

DIY Towel Hook Rack
This DIY Towel Hook Rack is the perfect addition to our master bathroom and a great way to store towels!
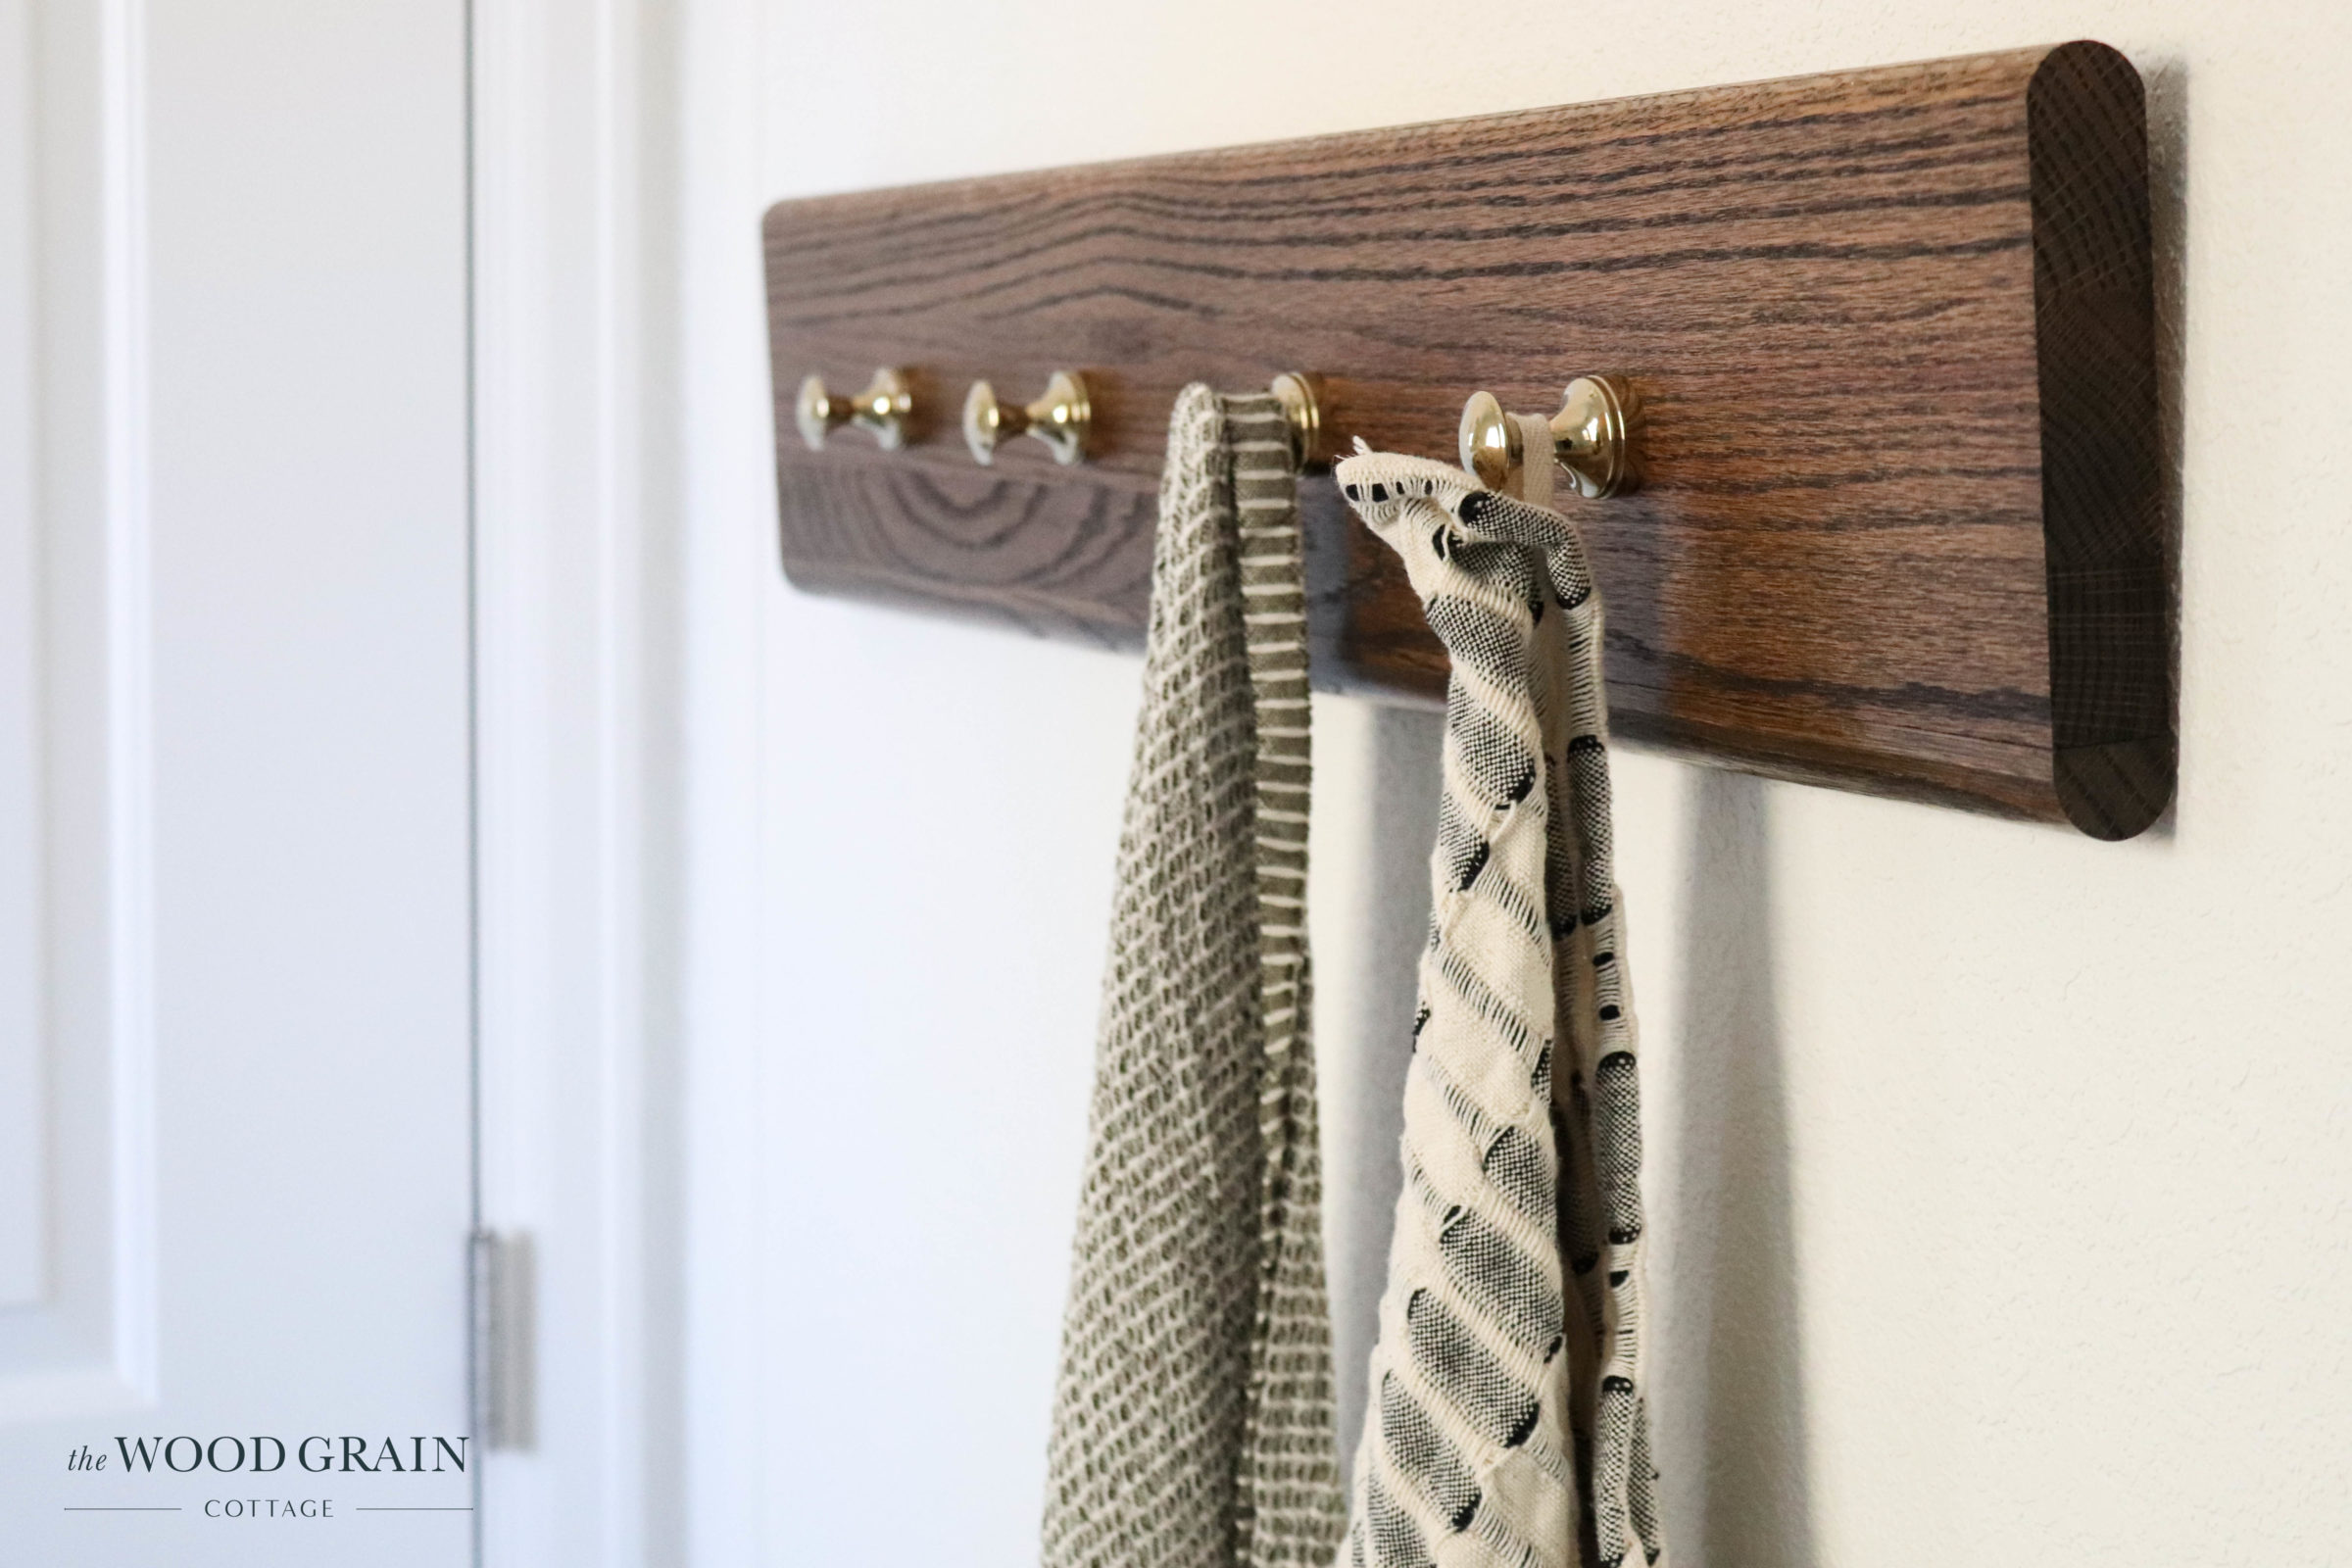
We’ve been busy working in our master bathroom and I was hoping to be able to share the full reveal with you at the end of the month, but since I haven’t had the easiest time shopping for all those pretty finishing touches, things have been pushed back for a while. One thing we were able to create, was our DIY Towel Hook Rack. This was such a fun project to put together and I love the finished product.
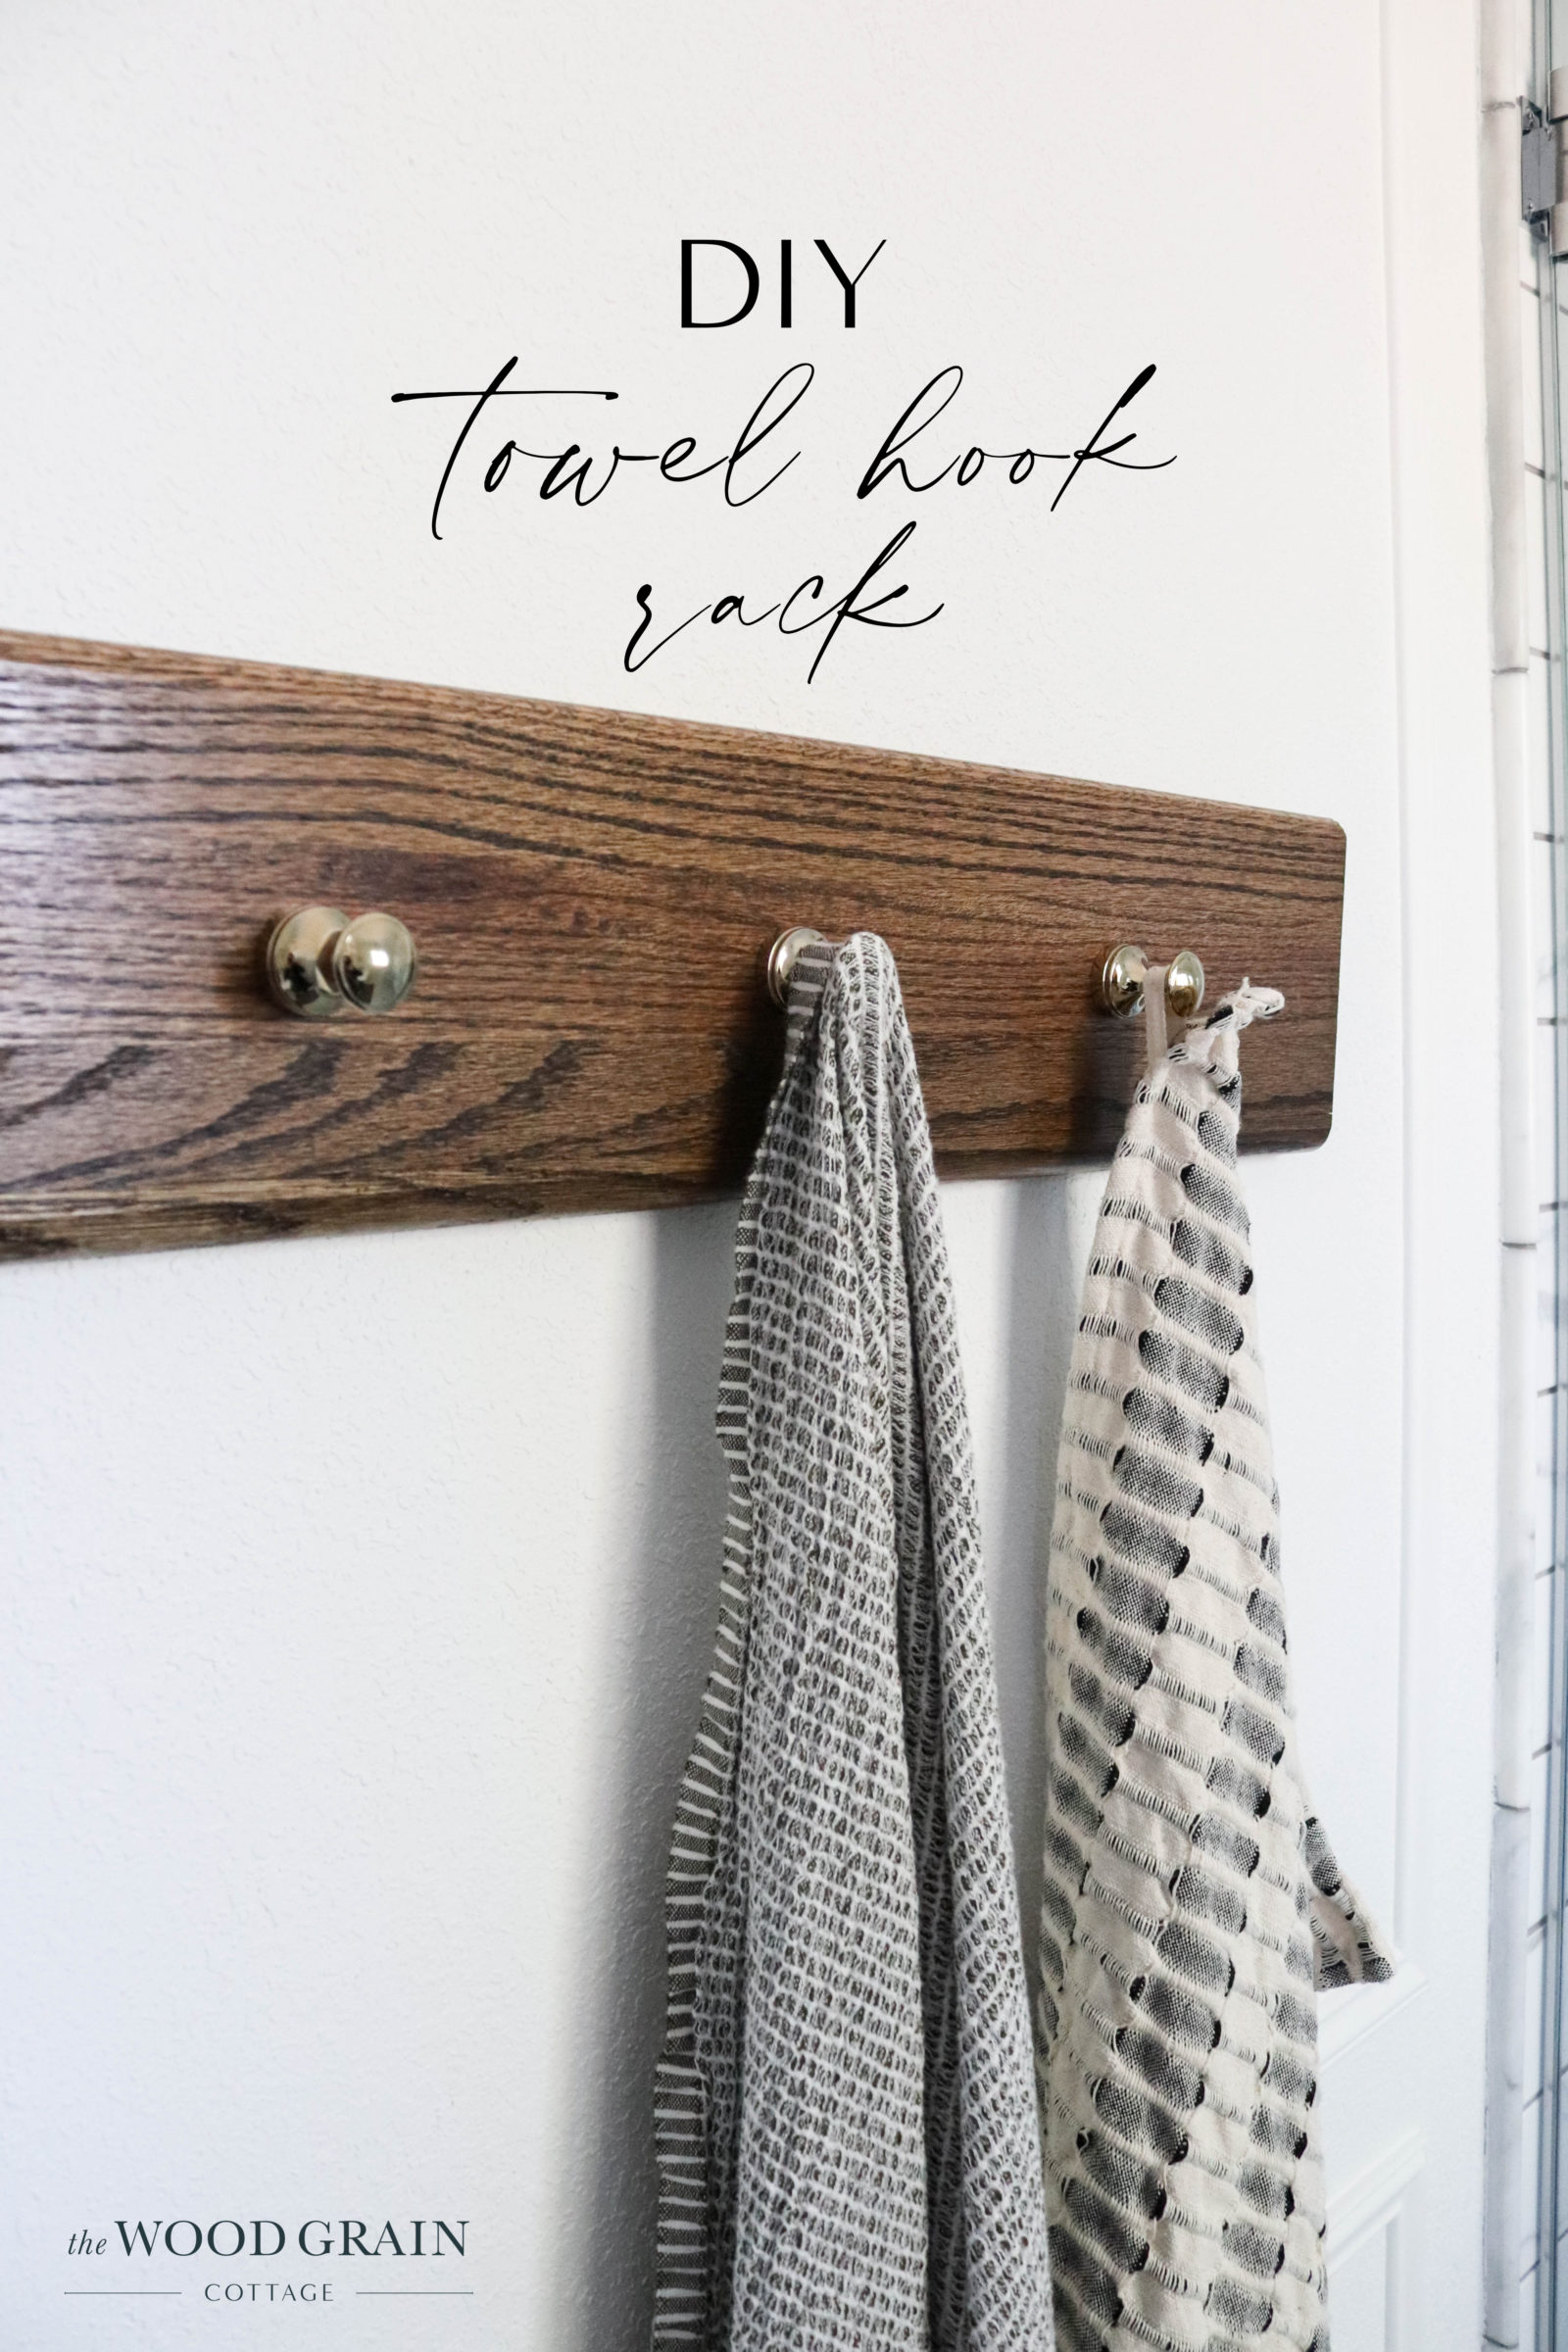
Believe it or not, but the wood is actually a left over stair tread from when we did our DIY staircase makeover. I loved the stair treads so much, that I wasn’t willing to let any of that beautiful wood go to waste and we ended up having the perfect piece left over to create our towel hook rack.
Here’s How We Built It:

Supplies:
- Wood, we used a leftover stair tread (We used these)
- Stain, we used Minwax Jacobean
- Finish, we used Minwax Polyurethane, Fast Drying in Clear Satin
- Table Saw
- Chop Saw
- Brad Nailer
- 1 3/4″ Brad Nails
- Measuring Tape
- Wood Glue
- Drill & Impact Driver
- 3/32 drill bit
- Towel Hooks, we used these
- Mounting Hardware, we used these
Step One: Cut Wood To Length
Since we already had a partially cut stair tread, which was a great width and length, we were starting with a nice foundation….

We could have easily squared off the bullnose edge, but that’s what I loved about it…

So, with another partial leftover stair tread, we used our table saw to rip down the material, using the bullnose from that tread to add to our towel rack…

That stair tread was a little bit shorter in length, so we ended up trimming our towel rack to size…


Step Two: Attach Bullnose Edge
With the towel rack cut to size, we added the bullnose edge. First, we applied a bead of wood glue…

Then Todd set the bullnose edge onto the towel rack…

We made sure it was flush on all sides, and then he nailed it in place…

Step Three: Touch Up Stain
There were a few little areas that needed touched up with stain, so I quickly added more stain and wiped it off…

Step Four: Attach Hooks
For the actual towel hooks, I used a set of these beautiful hooks. I love them. They come with their own unique mounting hardware, which is pretty cool!


Since we wanted four hooks, Todd started measuring and evenly spacing them along the board…

He worked his way down the board, marking each location as he went…

With each location marked, we started pre-drilling the holes…

Then, he started attaching the actual towel hooks. We installed the back piece first…
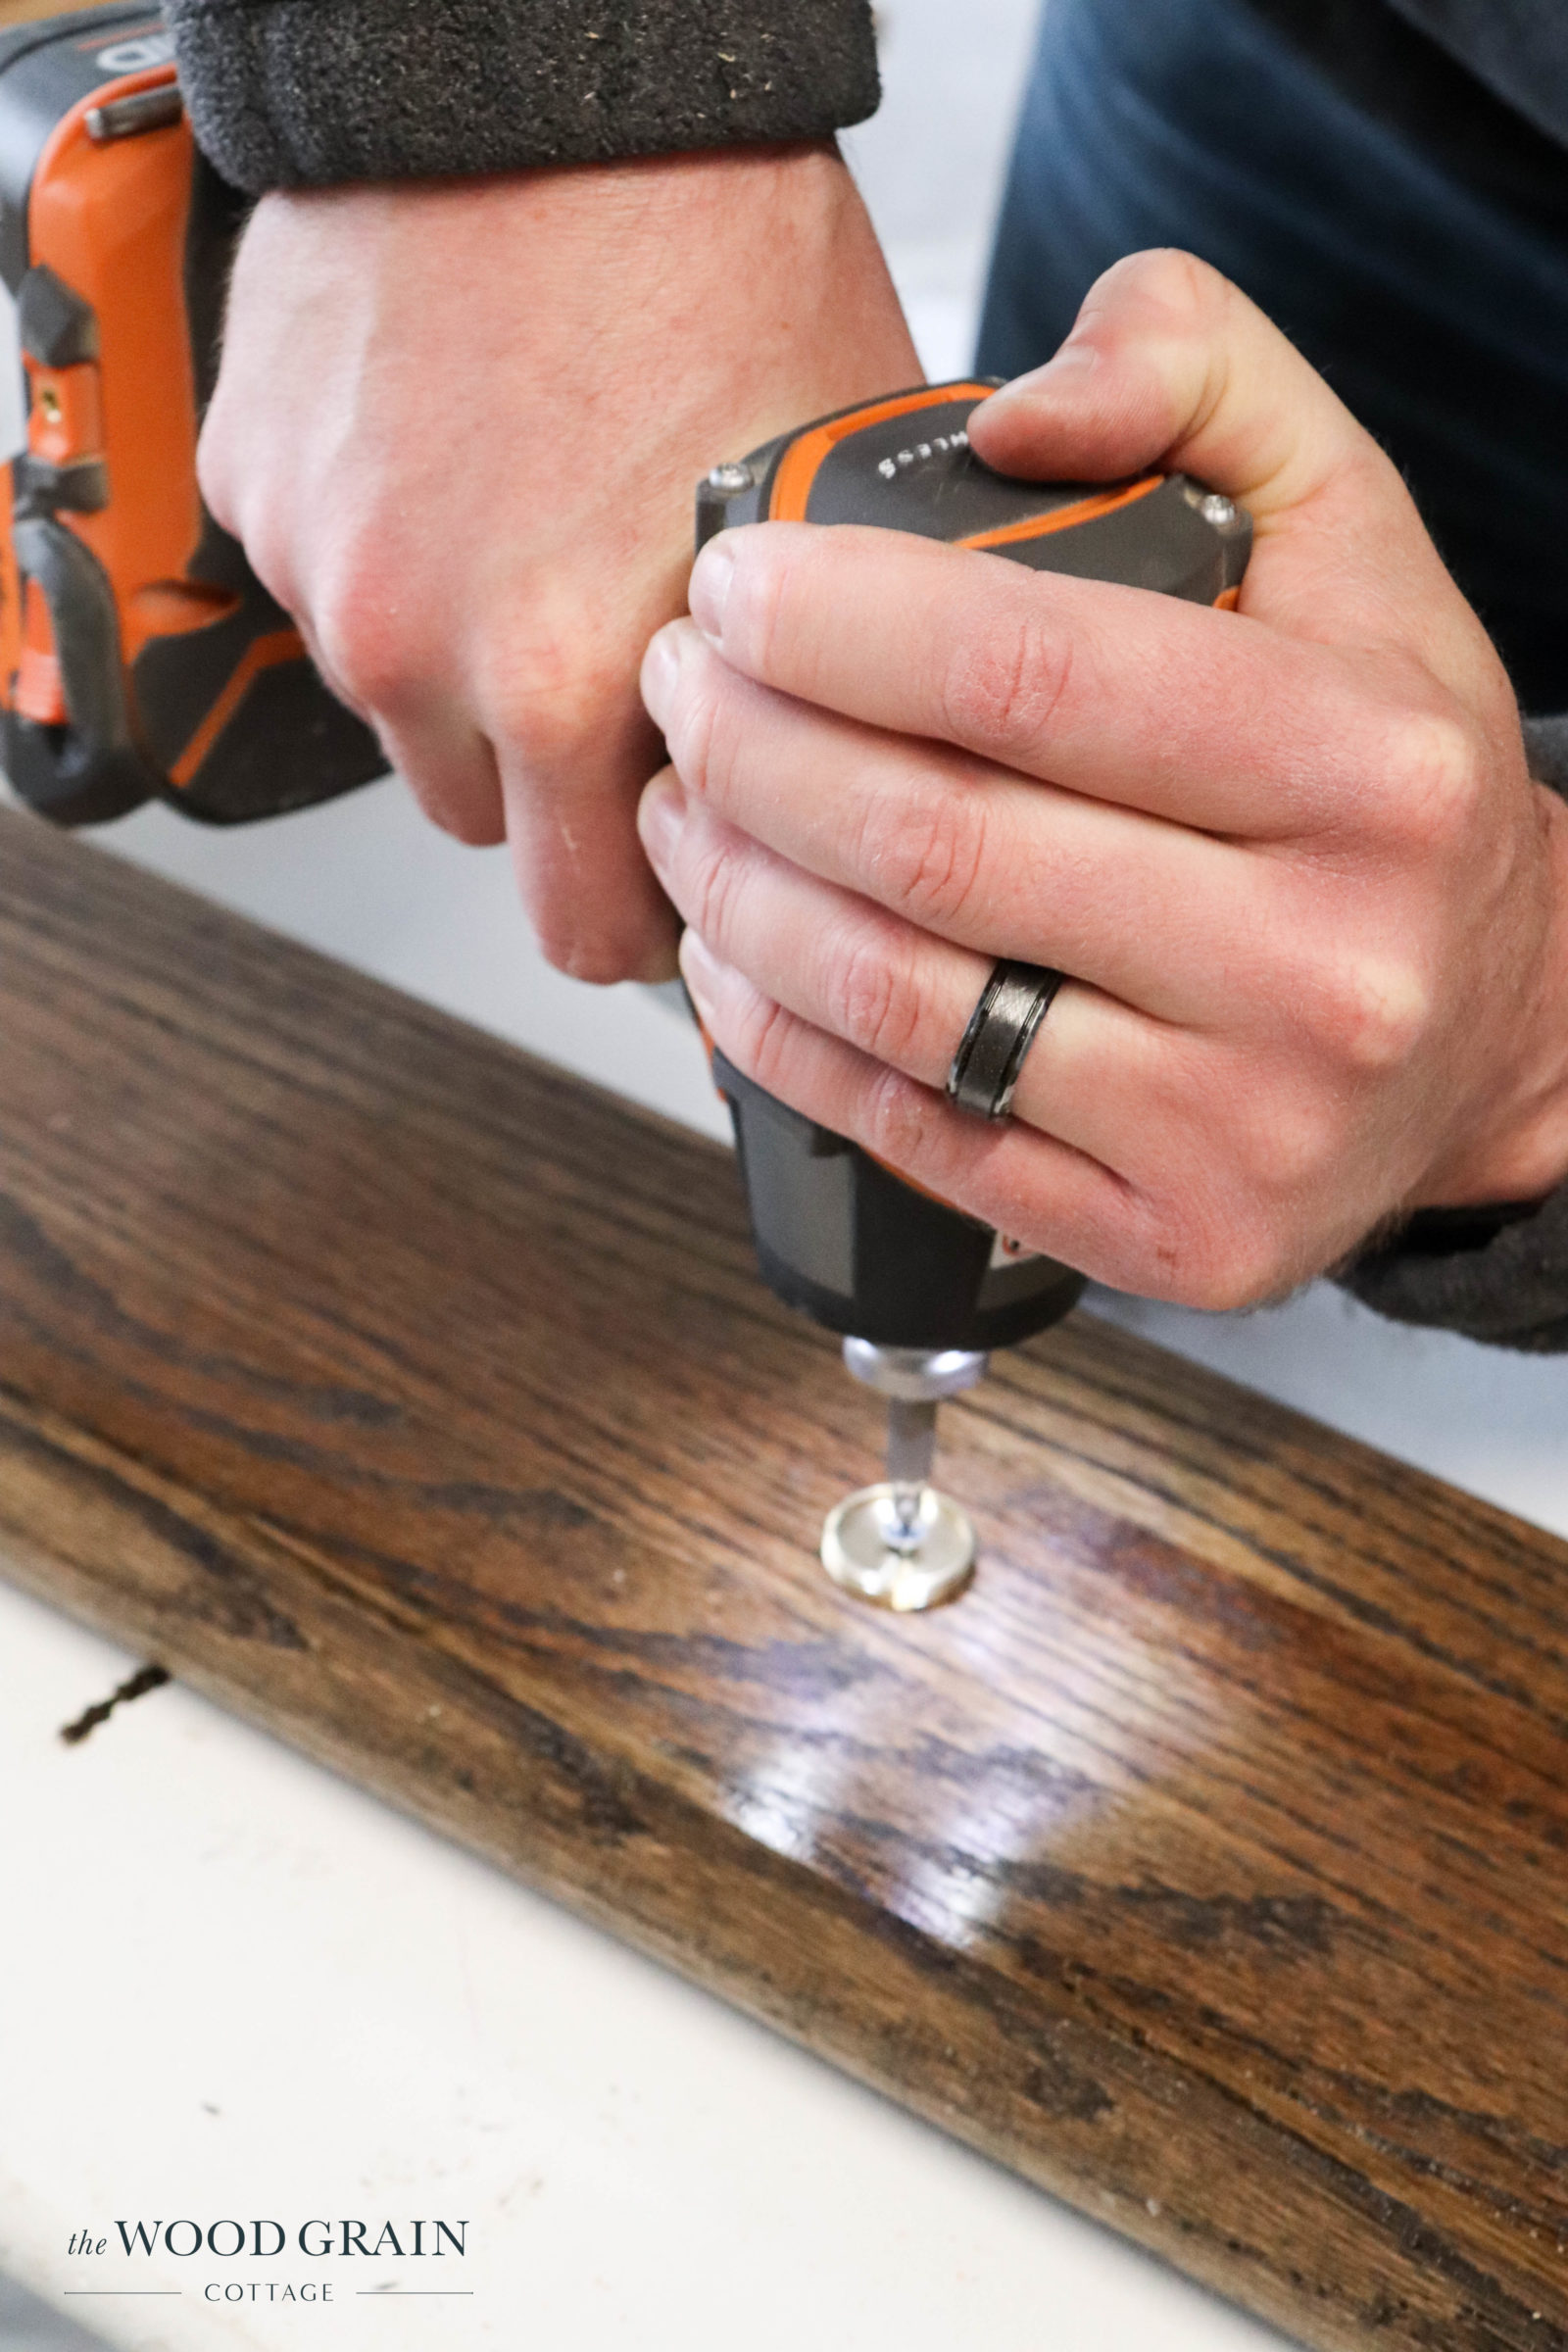

And then threaded on the actual hook…

Step Five: Attach Mounting Hardware
With all of the hooks in place, it was time to install the mounting hardware.

For the hardware, we used little D-Hooks…

Todd installed them on the back of the towel rack. After measuring, he pre-drilled the holes…

Then screwed the rings in place…

Step Six: Hang The Towel Rack
All that was left, was to hang the towel rack…


We love the way this DIY towel hook rack turned out! It’s such a great addition to our bathroom and the perfect accent to everything we have planned…
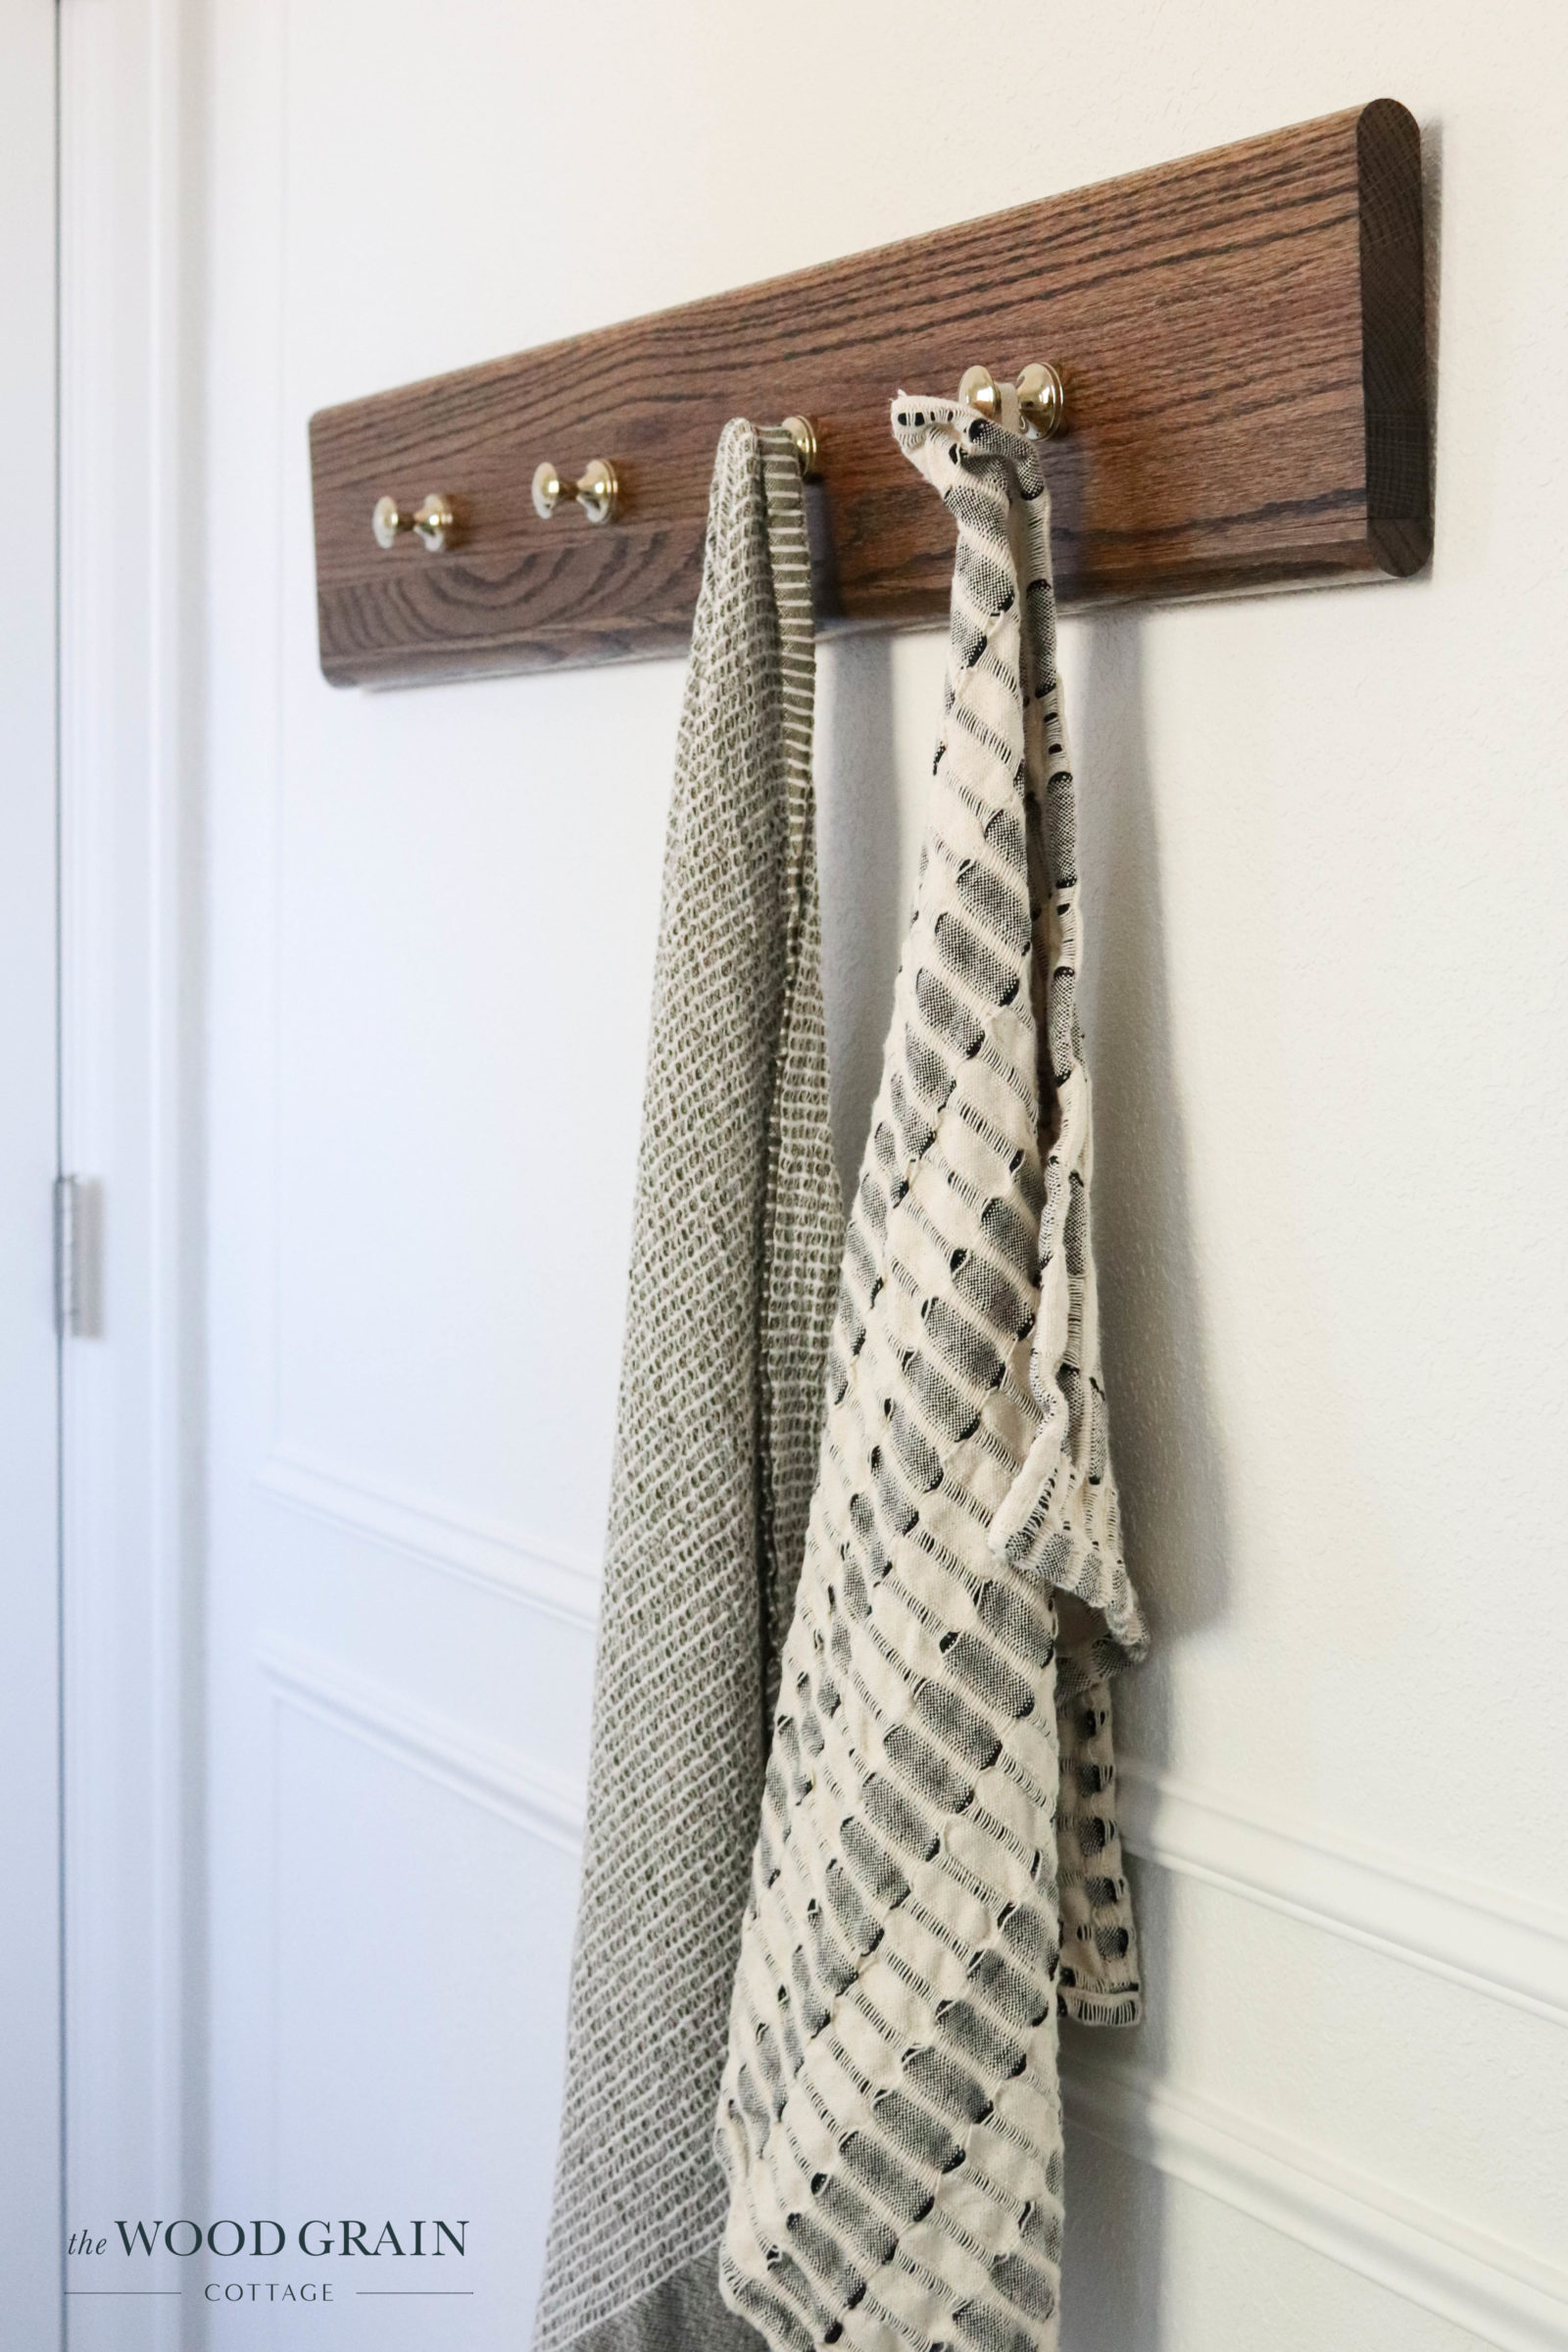

The warm wood stain is the perfect compliment to our vanity and the hooks are my favorite!
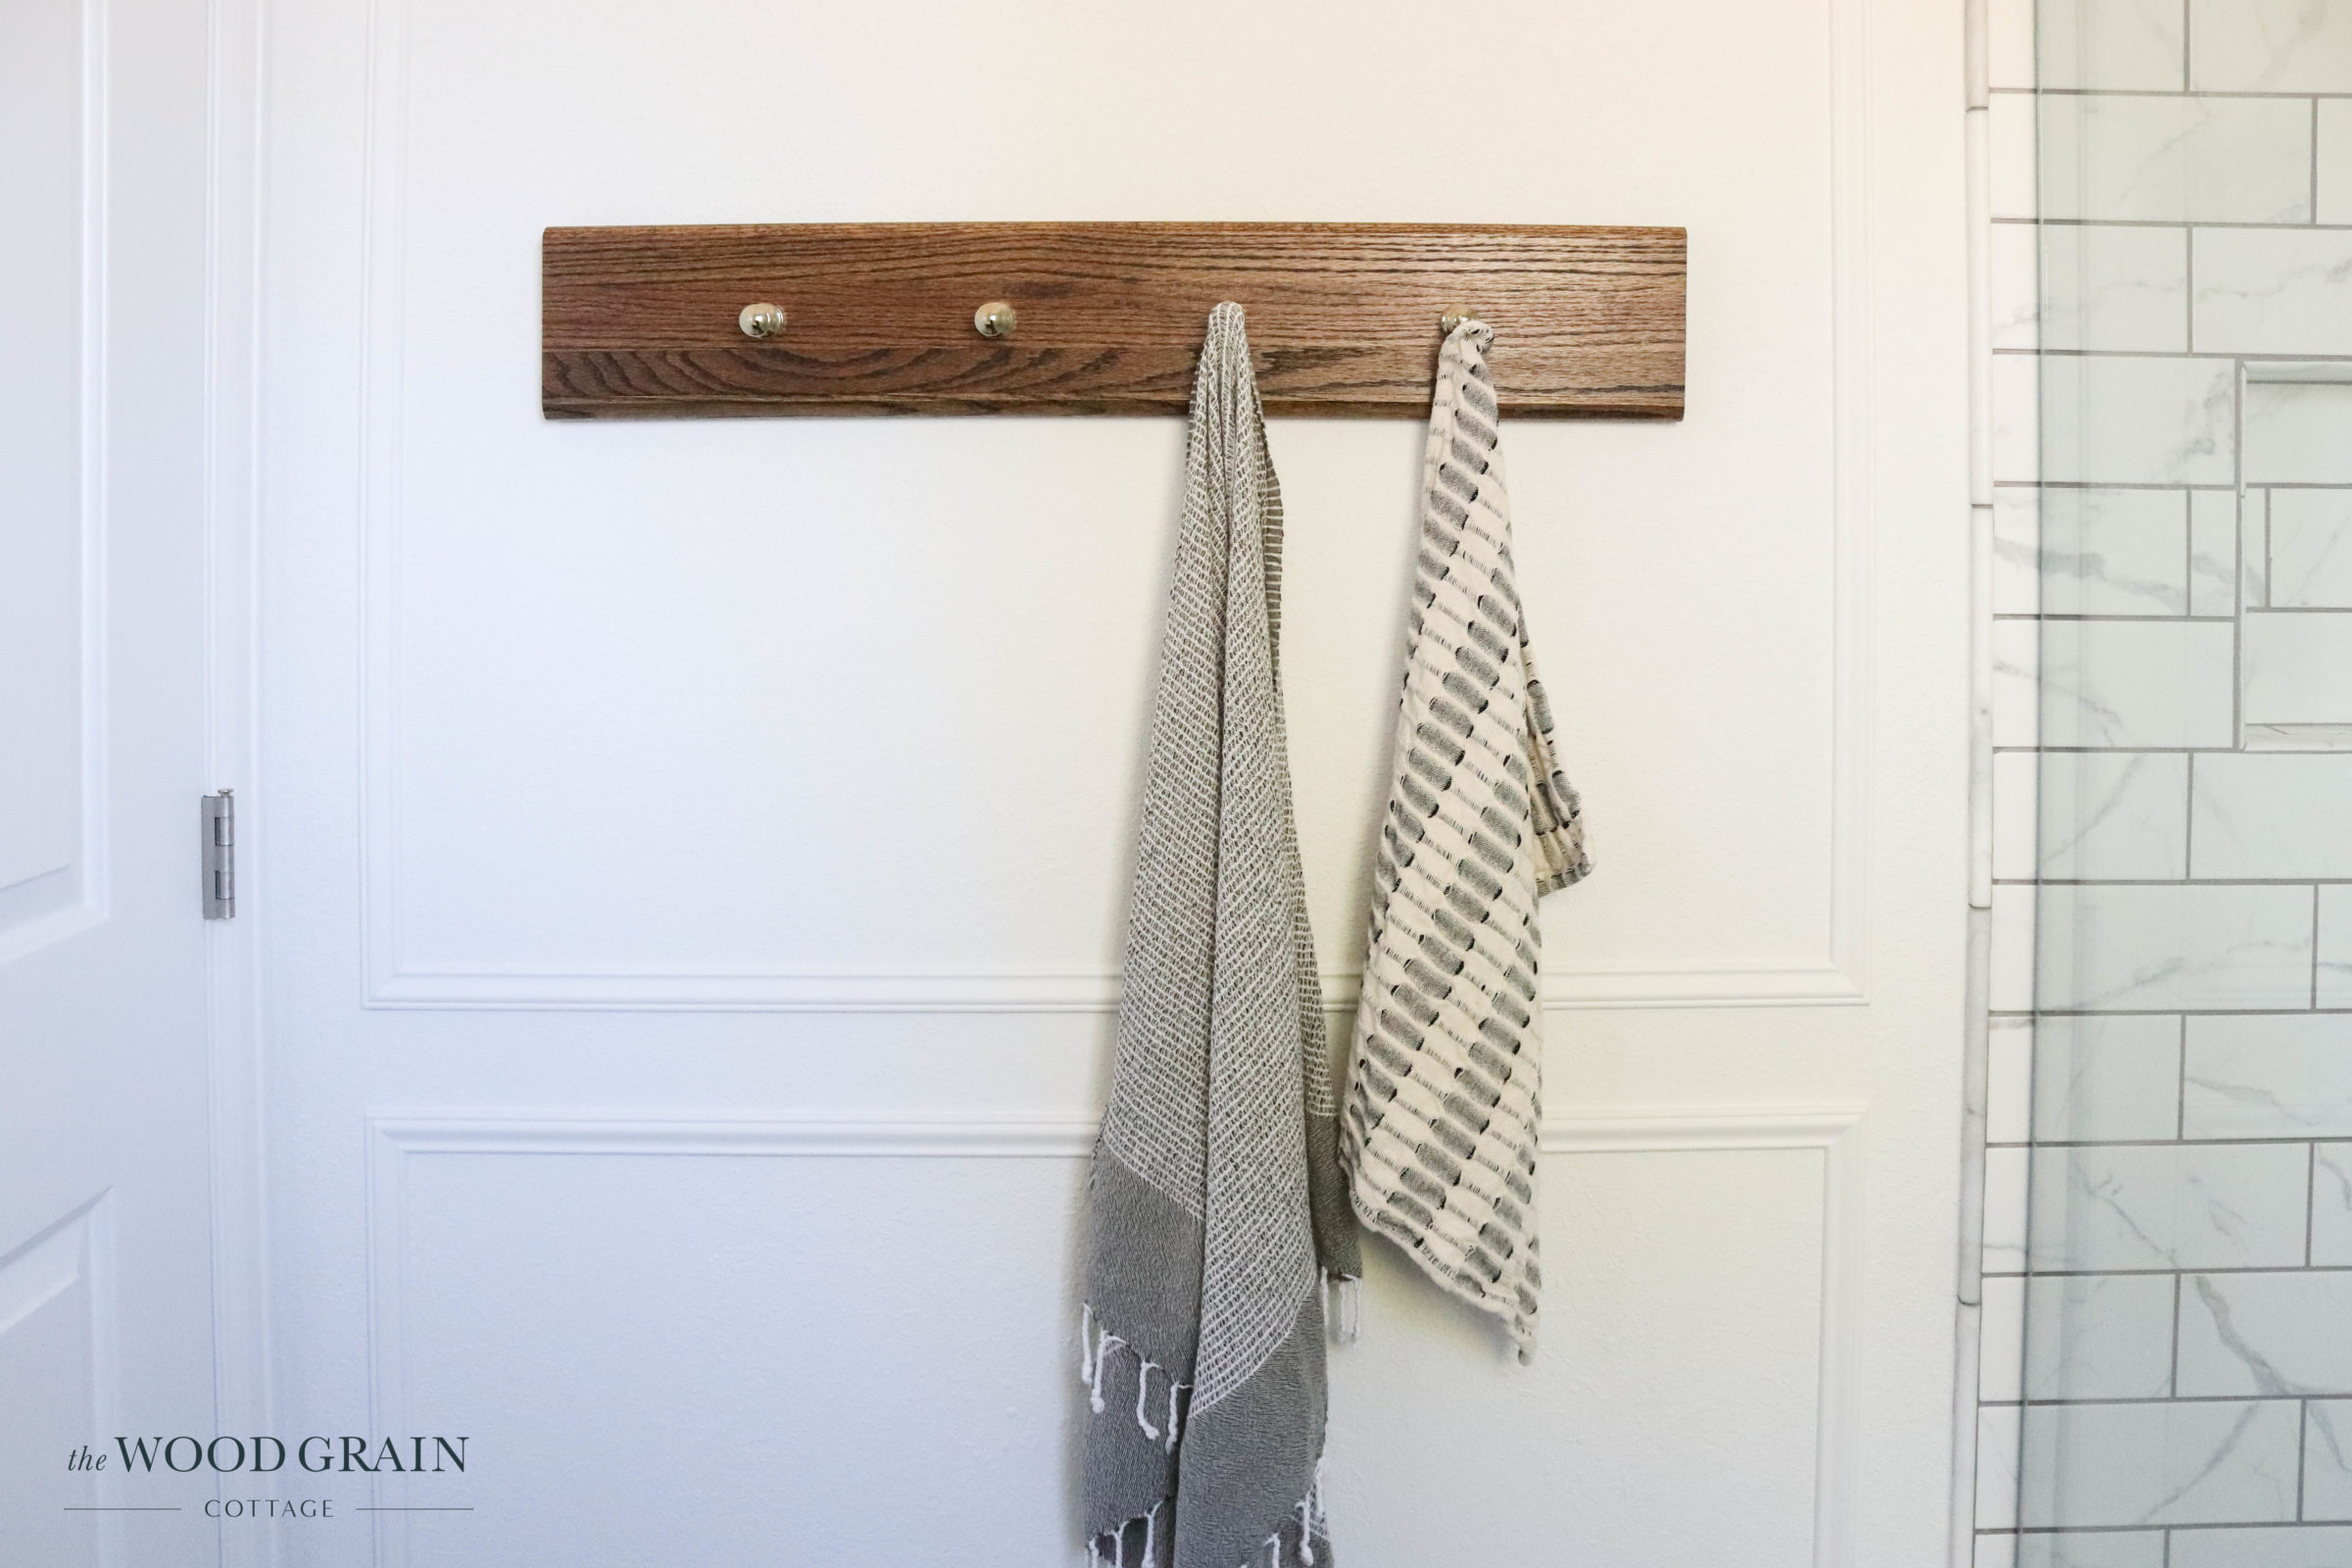


Project by project, this bathroom is coming together! We can’t wait to see it all finished!

[show_shopthepost_widget id=”4842276″]
In case you’ve missed it, here are some of our other master bathroom updates:
This looks simple enough that I could manage it, if only I had the tools (namely, the saws)… 🙁
I need to find a man who just has all these tools already lol 🙂