
Vertical Planking & Open Shelves In The Kitchen
See how we installed vertical planking & open shelves in the kitchen to make it feel bigger and brighter!
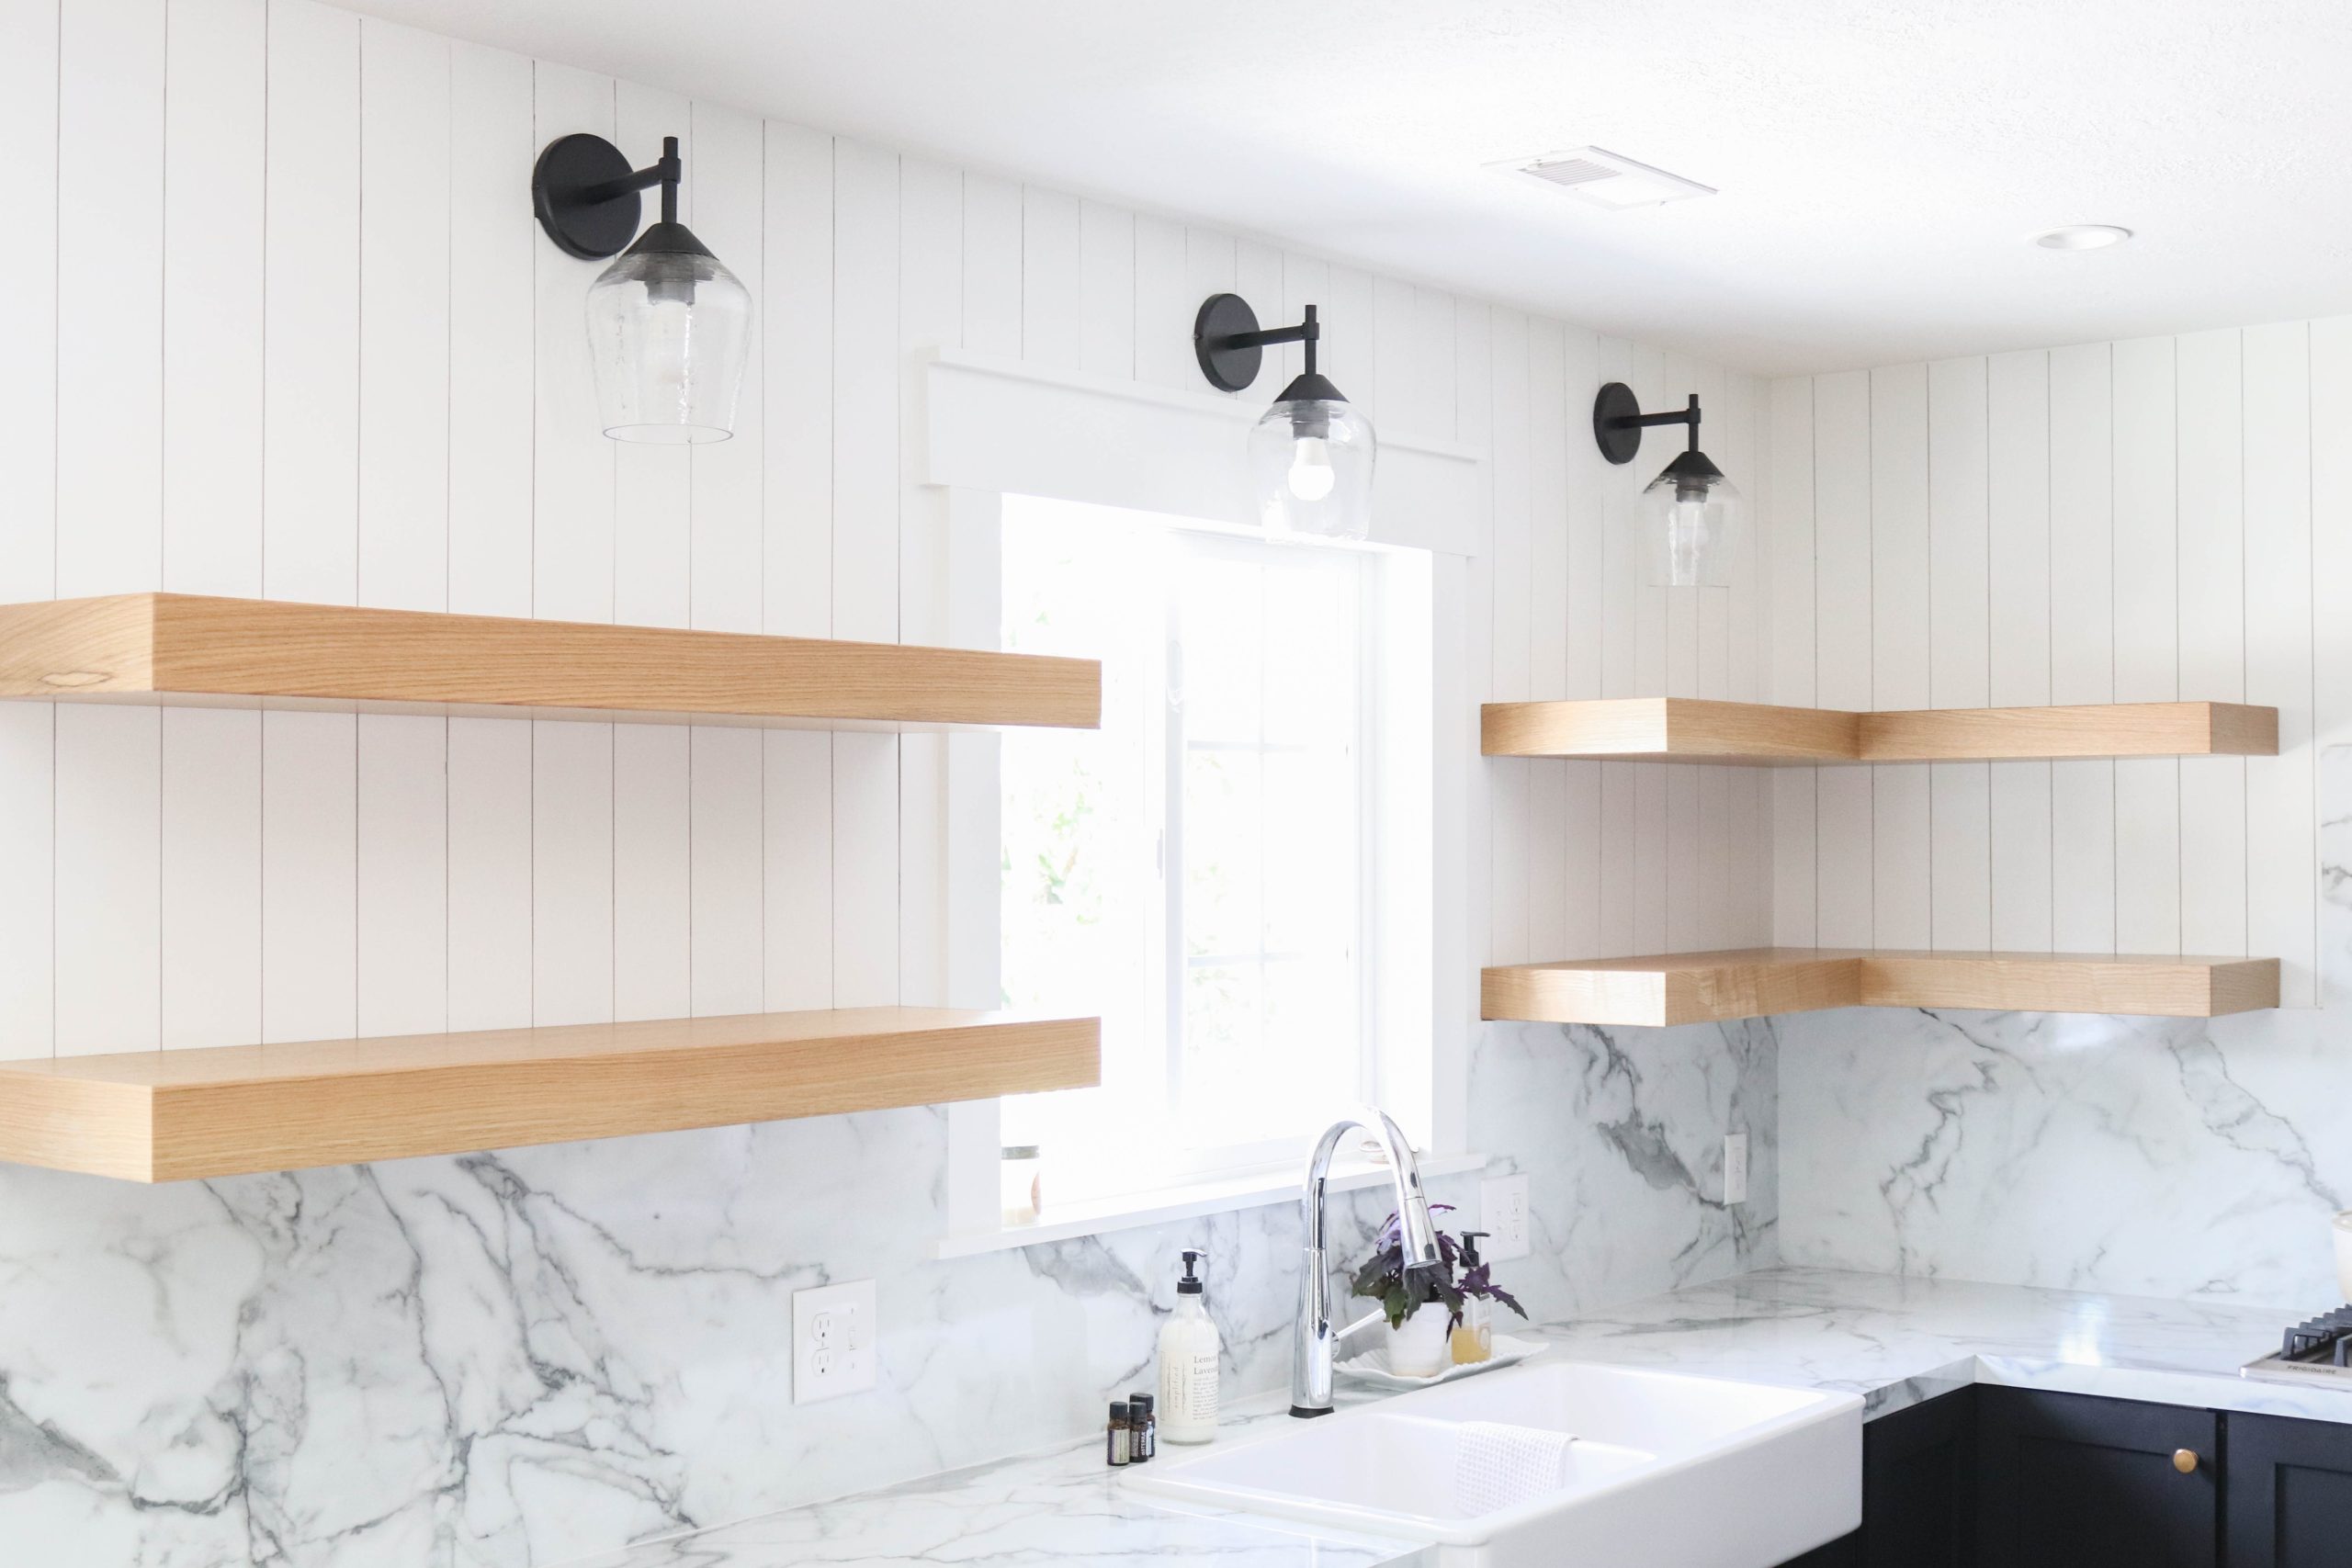
Our kitchen has come a long, long way. After we had our backsplash installed, it was time to add vertical planking and open shelves in the kitchen. From the very beginning when we were designing the kitchen, I knew I wanted open shelves to make the kitchen feel larger. We don’t have a big kitchen, but the new addition of the open shelves makes the kitchen appear bigger and less crowded.
Before we could have the shelves installed, the first step was adding the vertical planking. Todd and I decided to tackle the project a few weeks before I was due to have our baby girl. I was so big and pregnant, that my mom came and helped us paint everything in time for the shelves to be installed.
Installing the vertical planking

Affiliate links are provided below. Full disclosure here.
SUPPLIES:
- 1/4″ Flooring Underlayment, 4’x8′ sheets
- Table Saw
- Chop Saw
- Measuring Tape
- Todd’s Favorite Measuring Laser (Optional, but very handy and accurate!)
- Level
- Brad Nailer
- 18 Gauge 1″ Brad Nails
- Fine Grit Sandpaper
- Nickel, for spacing
- Caulking Gun
- Caulking
- Spackling
- Paint (I used Super White by Benjamin Moore in eggshell)
- Paint Brush
- Skinny Foam Roller
Step One: Cut Material To Desired Width
We started with 4 sheets of 4’x8′ underlayment. It’s the same material I’ve used on all the other plank walls I’ve done and it works perfectly. For the vertical planking in the kitchen, we cut the sheet into 4″ wide strips, sanding each edge of the strip before installing.
Step Two: Cut Planking Strips To Length
In order to fit the strips around our backsplash, we’d measure the length, then cut the strips individually to ensure a tight fit on both ends.
Step Three: Nail Strips In Place
We used our brad nailer to nail them into the wall…

For the gap in between each strip, we used a nickel. It creates the perfect gap between the planking…


Step Four: Continue Nailing The Planks To The Wall
Todd continued working his way across the kitchen, trimming the planks to size and nailing them up as he went…

He loves using his measuring laser to measure each plank. It’s incredibly accurate.

Once we had the back wall of the kitchen done, Todd started on the main wall of the kitchen. Instead of starting at the edge of the wall and working our way down the wall, we began the plank at the edge of the backsplash, making sure everything was lined up perfectly…

Step Six: Notch Around Any Outlets Or Lights
It was all smooth sailing until he had to notch around the lights and window. It wasn’t difficult, but it just requires a few more cuts…

Then he began working his way around the window…


With the main kitchen walls done, he started working on the dining room portion of the wall…

Step Seven: Fill Nail Holes & Caulk
With all the planks installed, it was time to fill all the nail holes…


I also used caulking to fill any gaps at the top of the ceiling and on top of the backsplash. Once the spackling was dry, I sanding down the walls, wiped them clean and then it was time to paint!
Step Eight: Paint The Planking
I knew I wanted the kitchen to feel really fresh and bright, with the main focus being on the backsplash and shelving, so I went with white paint. We used Super White by Benjamin Moore in an eggshell finish. It’s such a great, bright white.


The bright white paint and the vertical planking created the perfect backdrop for our open shelves. It also added so much character to the kitchen and dining area…

Once everything was painted, we were officially ready for the shelves to be installed!
Installing Our Open Shelves
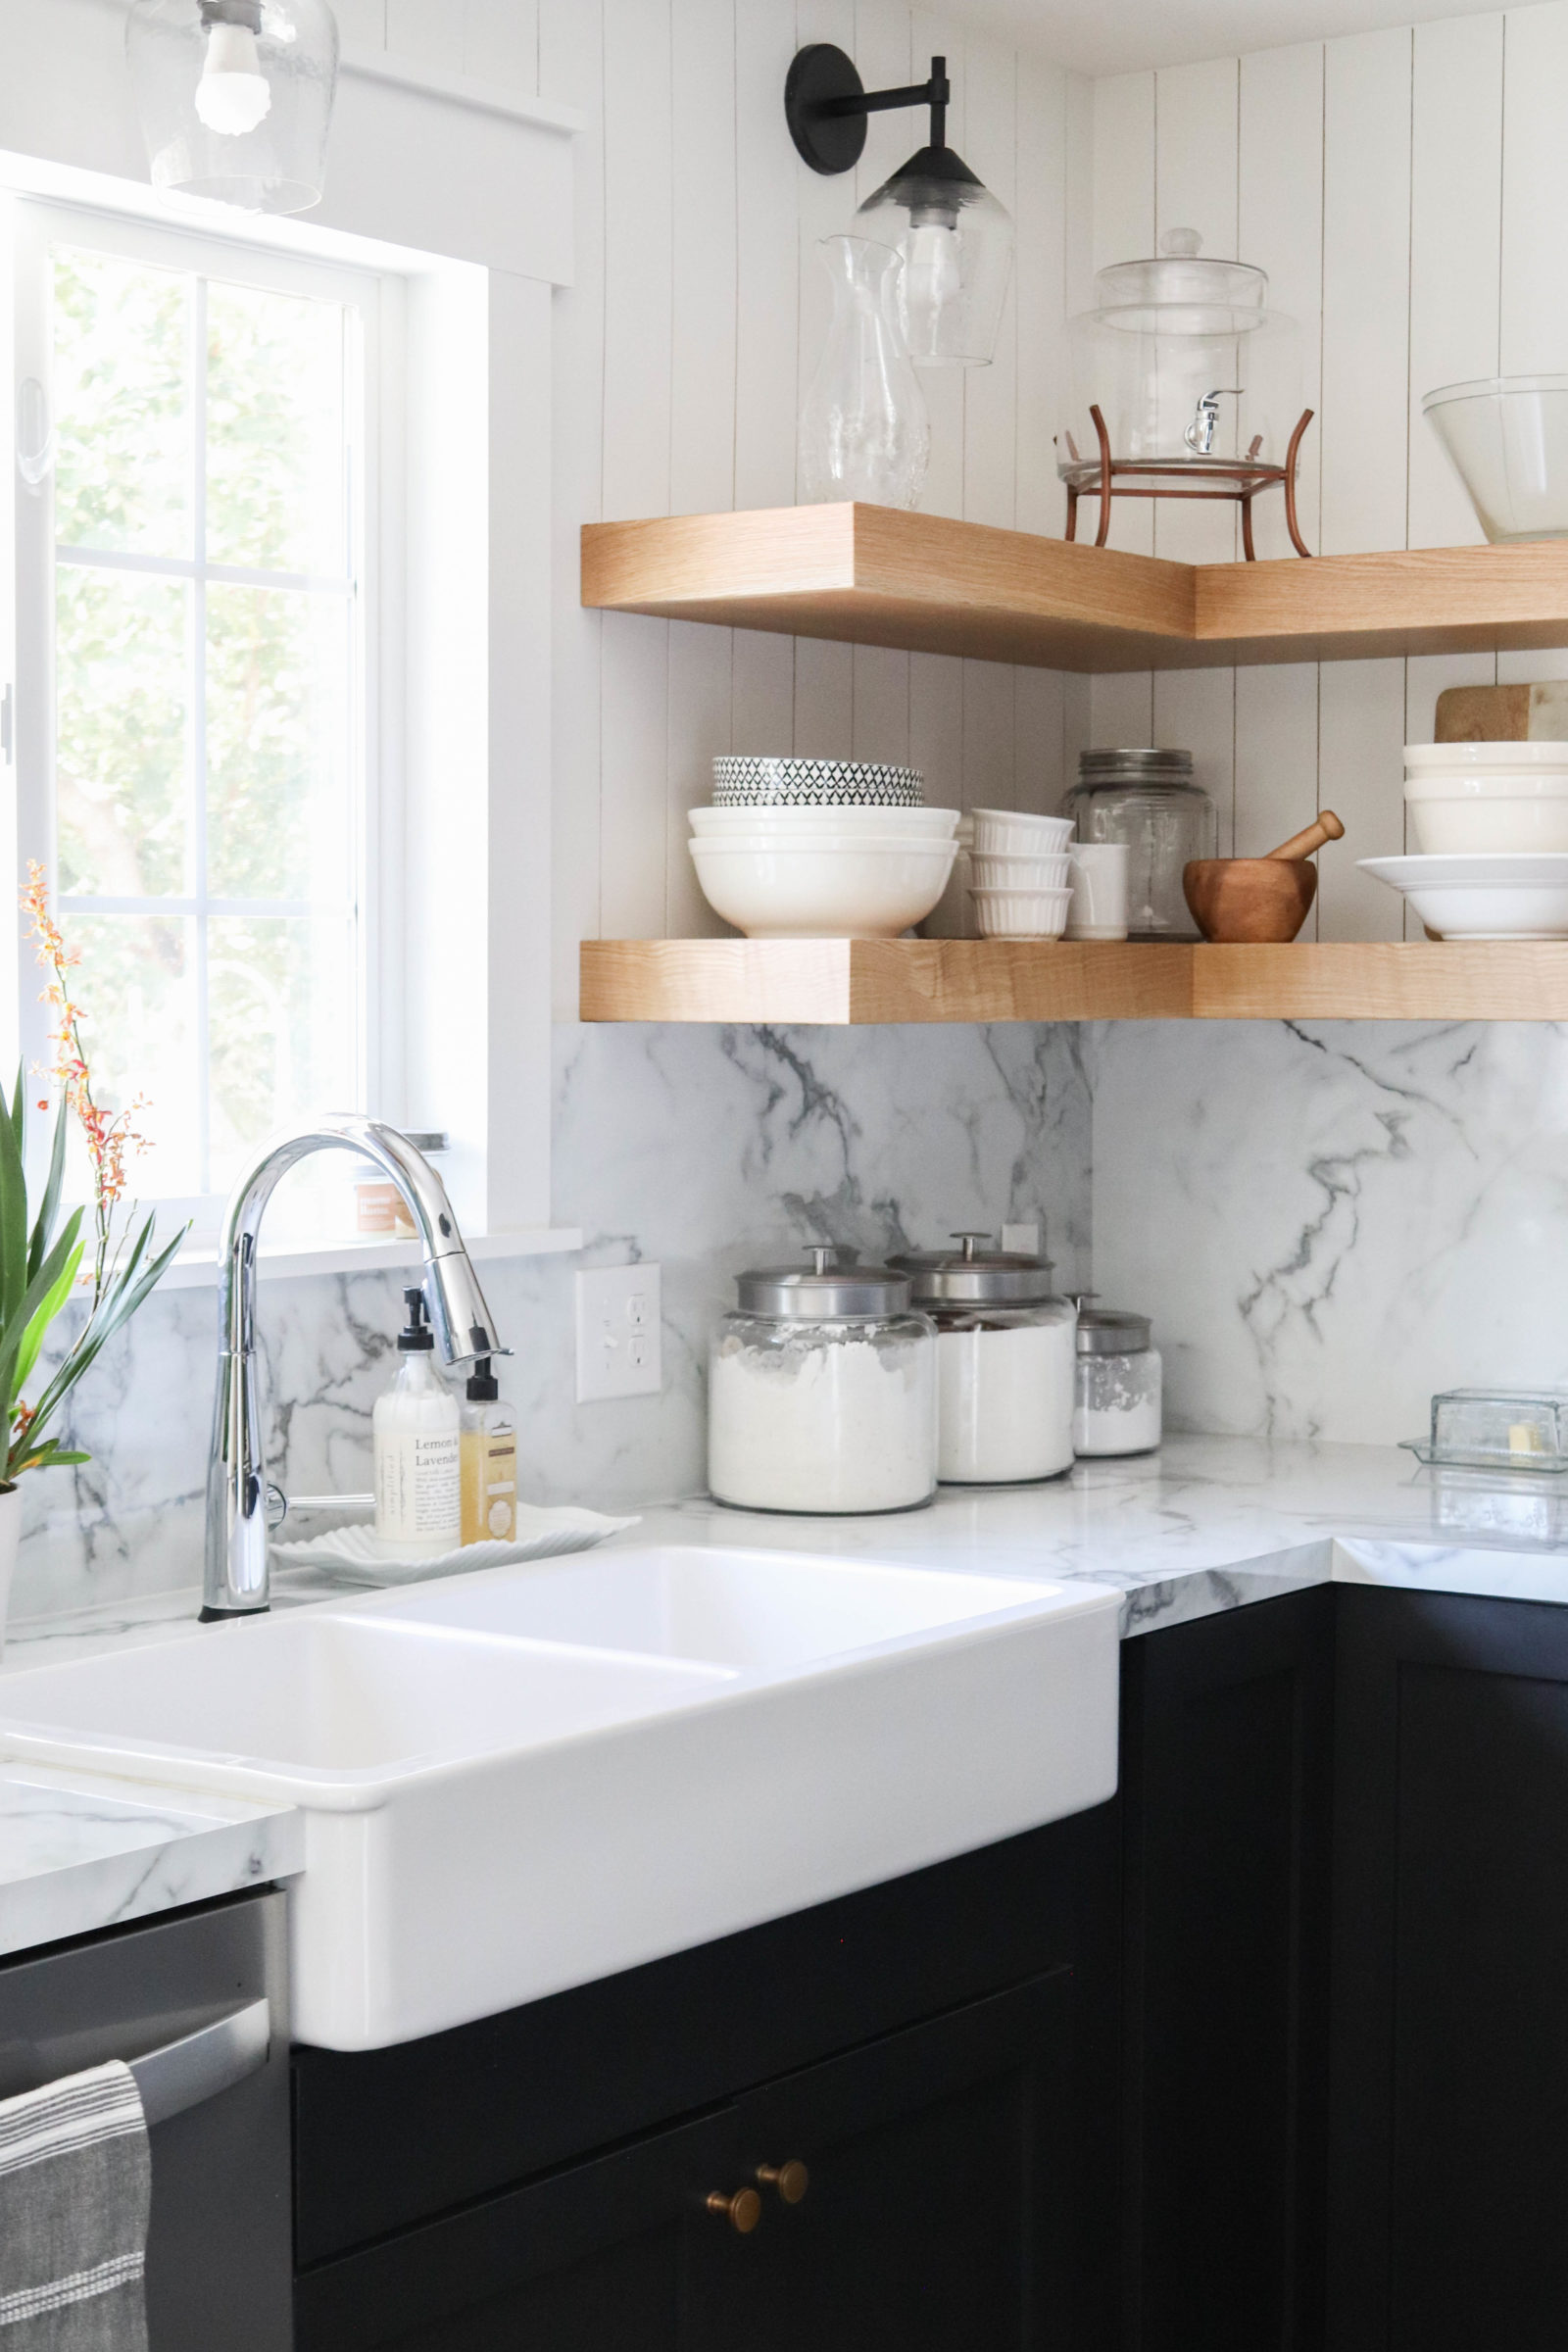
The next morning, literally, we had our shelves installed! We decided early on in the kitchen progress, that we’d have custom shelves built for the space and it was absolutely the right decision. These shelves are beautifully done and really bring the kitchen to the next level. We used the same company that built and installed our countertop and backsplash, Christopher’s Kitchen and Bath for anyone local.
Since we didn’t build the shelves, I don’t have too much detail about them, but I did get a few pictures of the process. First, they installed these wood strips onto the wall, anchored into the studs…


The back of the shelves were left open, allowing them to slide over the brackets they’d install next…

They mounted large brackets onto the wood strips, and slid the shelves over everything…

They then drilled into the shelves and anchored them into the wood strips along the wall. These shelves aren’t going anywhere, which is good because we use them for our everyday dishes!


I can’t tell you how happy we are with how everything has come together. It honestly feels like it’s taken forever to get to this point, but it’s all worth it considering the end result. Now, we really only have a few things left to finish, and we can call the kitchen done!


[show_shopthepost_widget id=”4206789″]
Here’s what’s left on our list:
- Paint the cabinet kick plate and drawer front under the oven cabinet
- Finish some miscellaneous cabinet trim
- Install the pot filler
- Build and install the vent hood
We’re so close to having it all finished! And it feels goooood!
You’ve come so far!! It so beautiful. A great tutorial as always. Question: you didn’t put any trim around the planking at all? Just cut it really tight and caulked well?
Thank you so much! No, we didn’t put any trim around the top or bottom of the planking. We made sure to cut it really tight to the ceiling, and then I caulked any gaps. It looks fabulous!
I am interested in giving the underlayment a try. I’m curious if you paint in between each slat or if it isn’t really noticeable if the gaps don’t get covered. It looks fantastic!
Thank you! In this case, I didn’t need to paint the wall since it was already a creamy white color. If your wall is a vibrant color, I would paint it. When it’s white on white, or white on dark, the gap between the planks creates the dark shadow. In my last home, I did repaint one of my white plank walls a dark color and then I had to paint each individual gap the same color since the previous white wall was peeking through! It was a pain, but I made it through, haha! I hope that helps! 🙂
Hi Shayna
Your kitchen is beautiful.
What a transformation.
Hope all is well with you & your family.
Much love,
Rose
I love how the kitchen is coming along. The backsplash is gorgeous and the planks are such a great addition.
Love how the kitchen turned out! Beautiful!!
This kitchen cabinet refinishing is beautiful! I love the dark cabinets with the white countertops! So beautiful.
Hi! I am wondering if he just nailed the planks onto drywall. Did he have to look for studs first?
We just nail the planks directly into the drywall. In my experience, they always have a strong hold and stay put. I hope that helps! 🙂
I absolutely love what you have done with your kitchen. You have really made a jewel out of it. What kind of wood are your shelves made from and is there a stain or topcoat to protect the shelves?
Thank you so much! We’ve come such a long way from where we started! Our shelves are white oak, but our cabinet maker used a melamine material and they look fantastic! They hold up incredibly well to everyday use.
How thick are the shelves?
The shelves are 4″ thick. 🙂