
Office Plank Wall
Do you remember that office makeover that I keep talking about? You know, the one that hasn’t had an update since I shared the freshly paint walls?
Well, today I’m actually sharing an update, our office plank wall! Oh happy day! Just like plank walls do, it’s completely changed the entire room. And now I have about 100 projects to do because I can’t get them out of my head. The office is officially ready for projects…
At least this side of the room looks good… the other sides, ummm not so much, they’re definitely “in progress” at the moment.

Here’s how we did it:
Please note: Some of the links in this post are affiliate links, which allows us to make a small commission from your purchase, but your purchase price stays the same. Thank you for helping support our blog! We greatly appreciate it!
Supplies:
- 1/4″ 4′ x 8′ sheet of Underlayment, cut into 5.5″ strips
- Table Saw, this is similar to ours
- Miter Saw, this is similar to ours
- 18 Gauge Nail Gun
- 1 1/4″ 18 Gauge Brad Nails
- Air Compressor
- Jigsaw
- Nickels, for spacing
- Level
- Tape Measure
- Caulking Gun
- Caulking
- Wall Repair Kit
- Foam Roller
- Paint Brush
- Paint, I used Super White by Benjamin Moore in satin
Just like the other plank walls we’ve done in the house, see here, here and here, we used 4 x 8 sheets of 1/4″ flooring underlayment. We used our table saw and ripped them down into 5 1/2″ wide strips.
Then, Anthony started at the ceiling, made sure the plank was level and nailed it in place…

Because our ceilings aren’t level, most aren’t, Anthony used the level to make sure the plank was level and left a gap at the top, which I would later caulk.

We kept adding planks as we went down the wall…
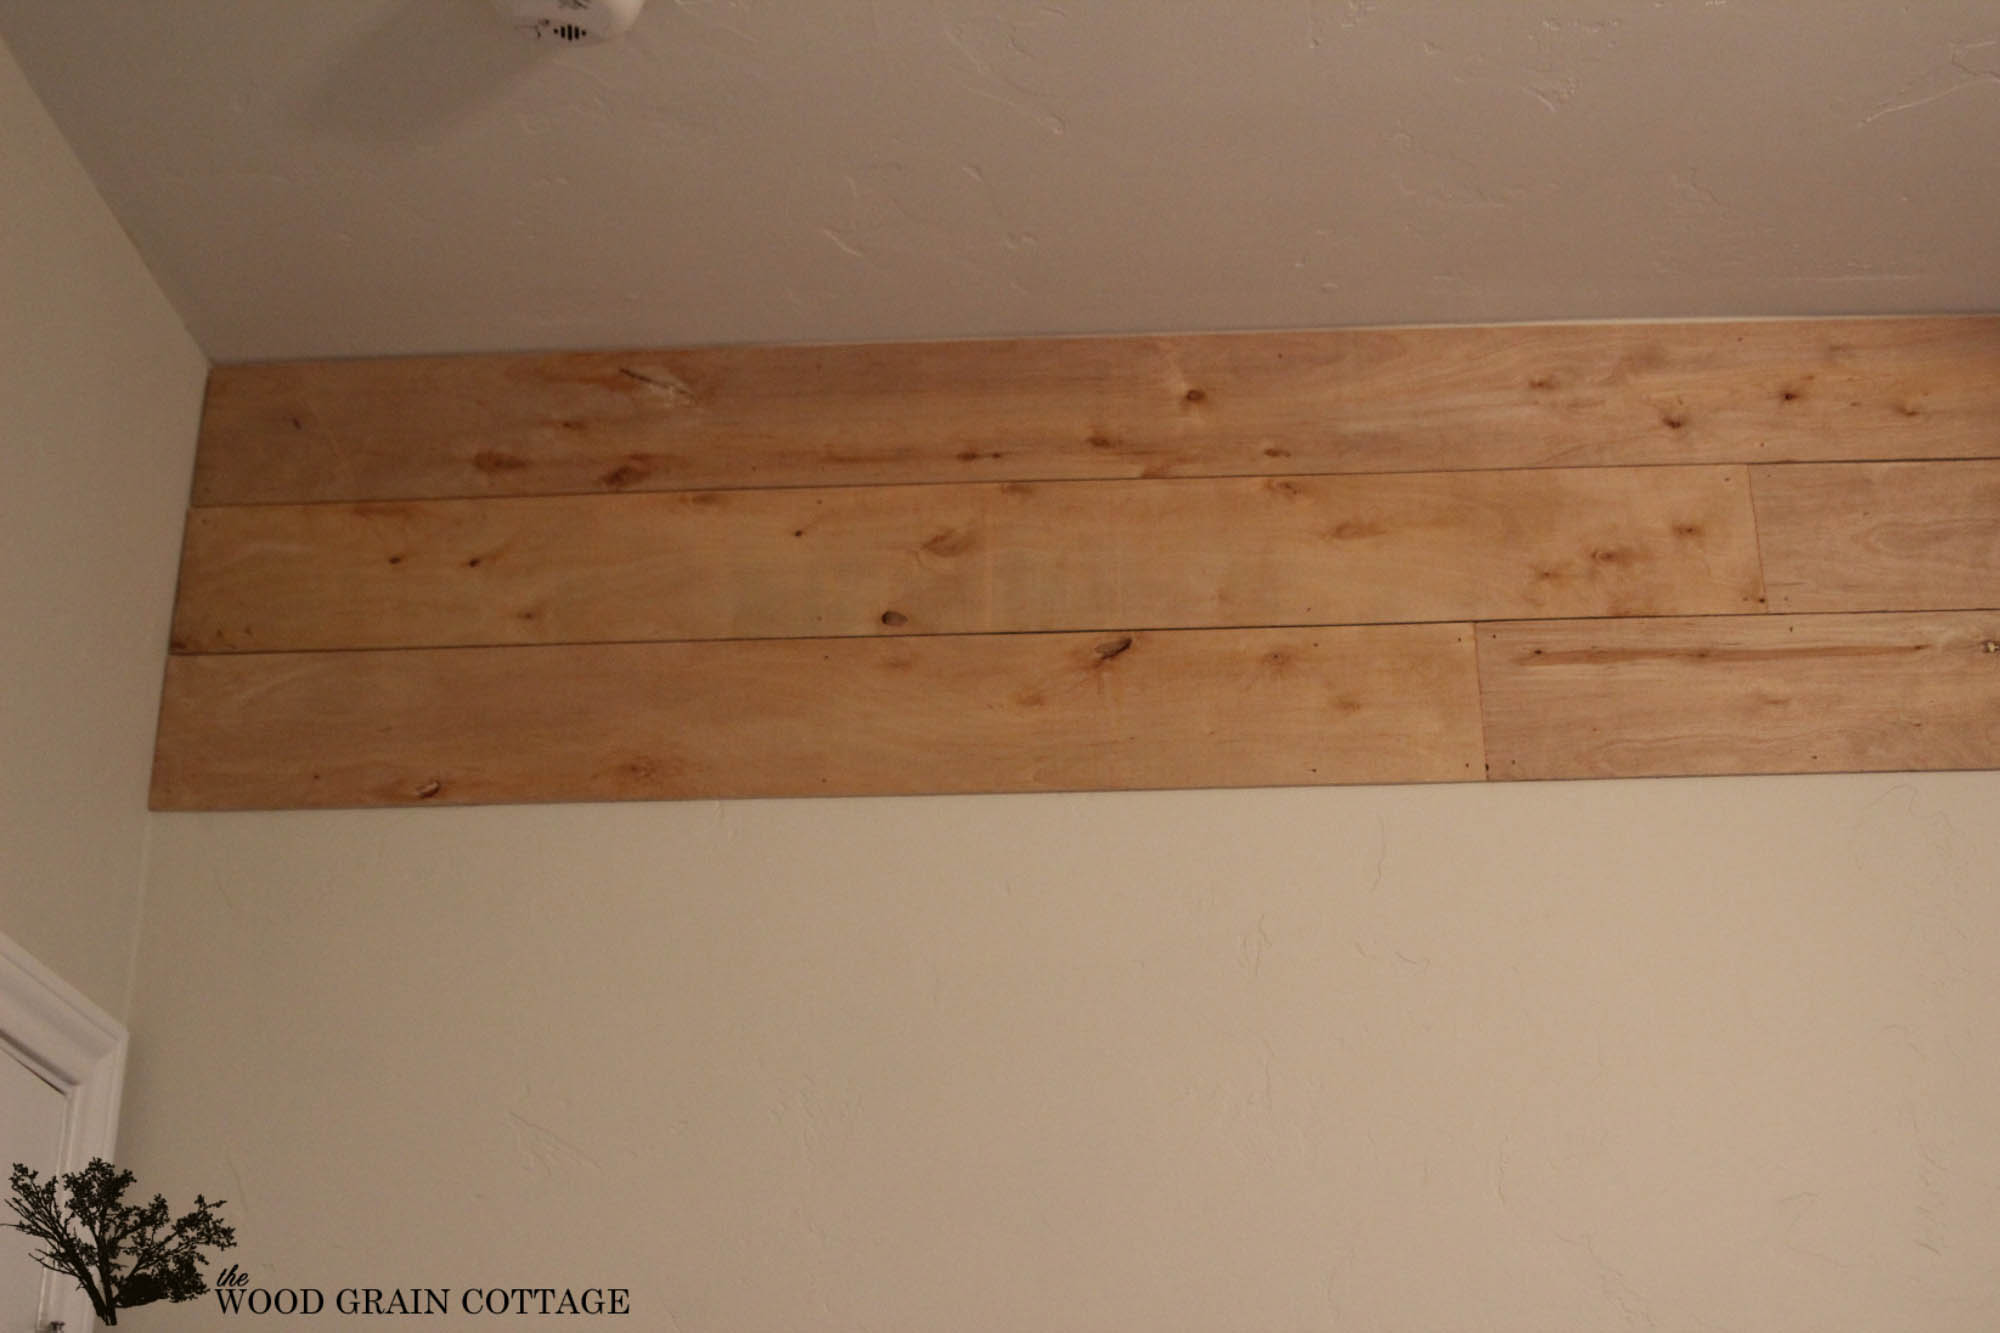
And because the boards weren’t as long as our wall, we randomly cut them to size to create a scattered look…


We used a nickel as our spacer…

And kept adding planks until we reached the electrical outlets near the floor…

Anthony traced around them, then used the jigsaw to make them fit…

Then, to fill all those nail holes, I used the 3M™ Patch plus primer spackling from the 3M Patch Plus Primer Wall Repair Kit…

From the kit, I grabbed the spackling and putty knife first…

I just scooped up a bit of the spackling…

Then, spread it over the nail hole and pressed it in firmly to fill…

Then I just wiped it smooth…

And once it dried, I used the sanding block from the repair kit to gently sand each spot smooth…

And just in case you’d like to see it in action, here’s a little video I shot… no laughing!
For any areas that got a bit of the spackling in the gaps…

I just used the putty knife to remove it…

Much better!

Once all 482 holes were filled and sanded, I wiped down the wall with a damp cloth to remove any dust…

Then, I started caulking. I caulked along the ceiling and along the baseboard… Caulking makes all the difference!

Once the caulking dried, I started painting. I used a smooth roller and chose my go to white paint, Super White by Benjamin Moore®.

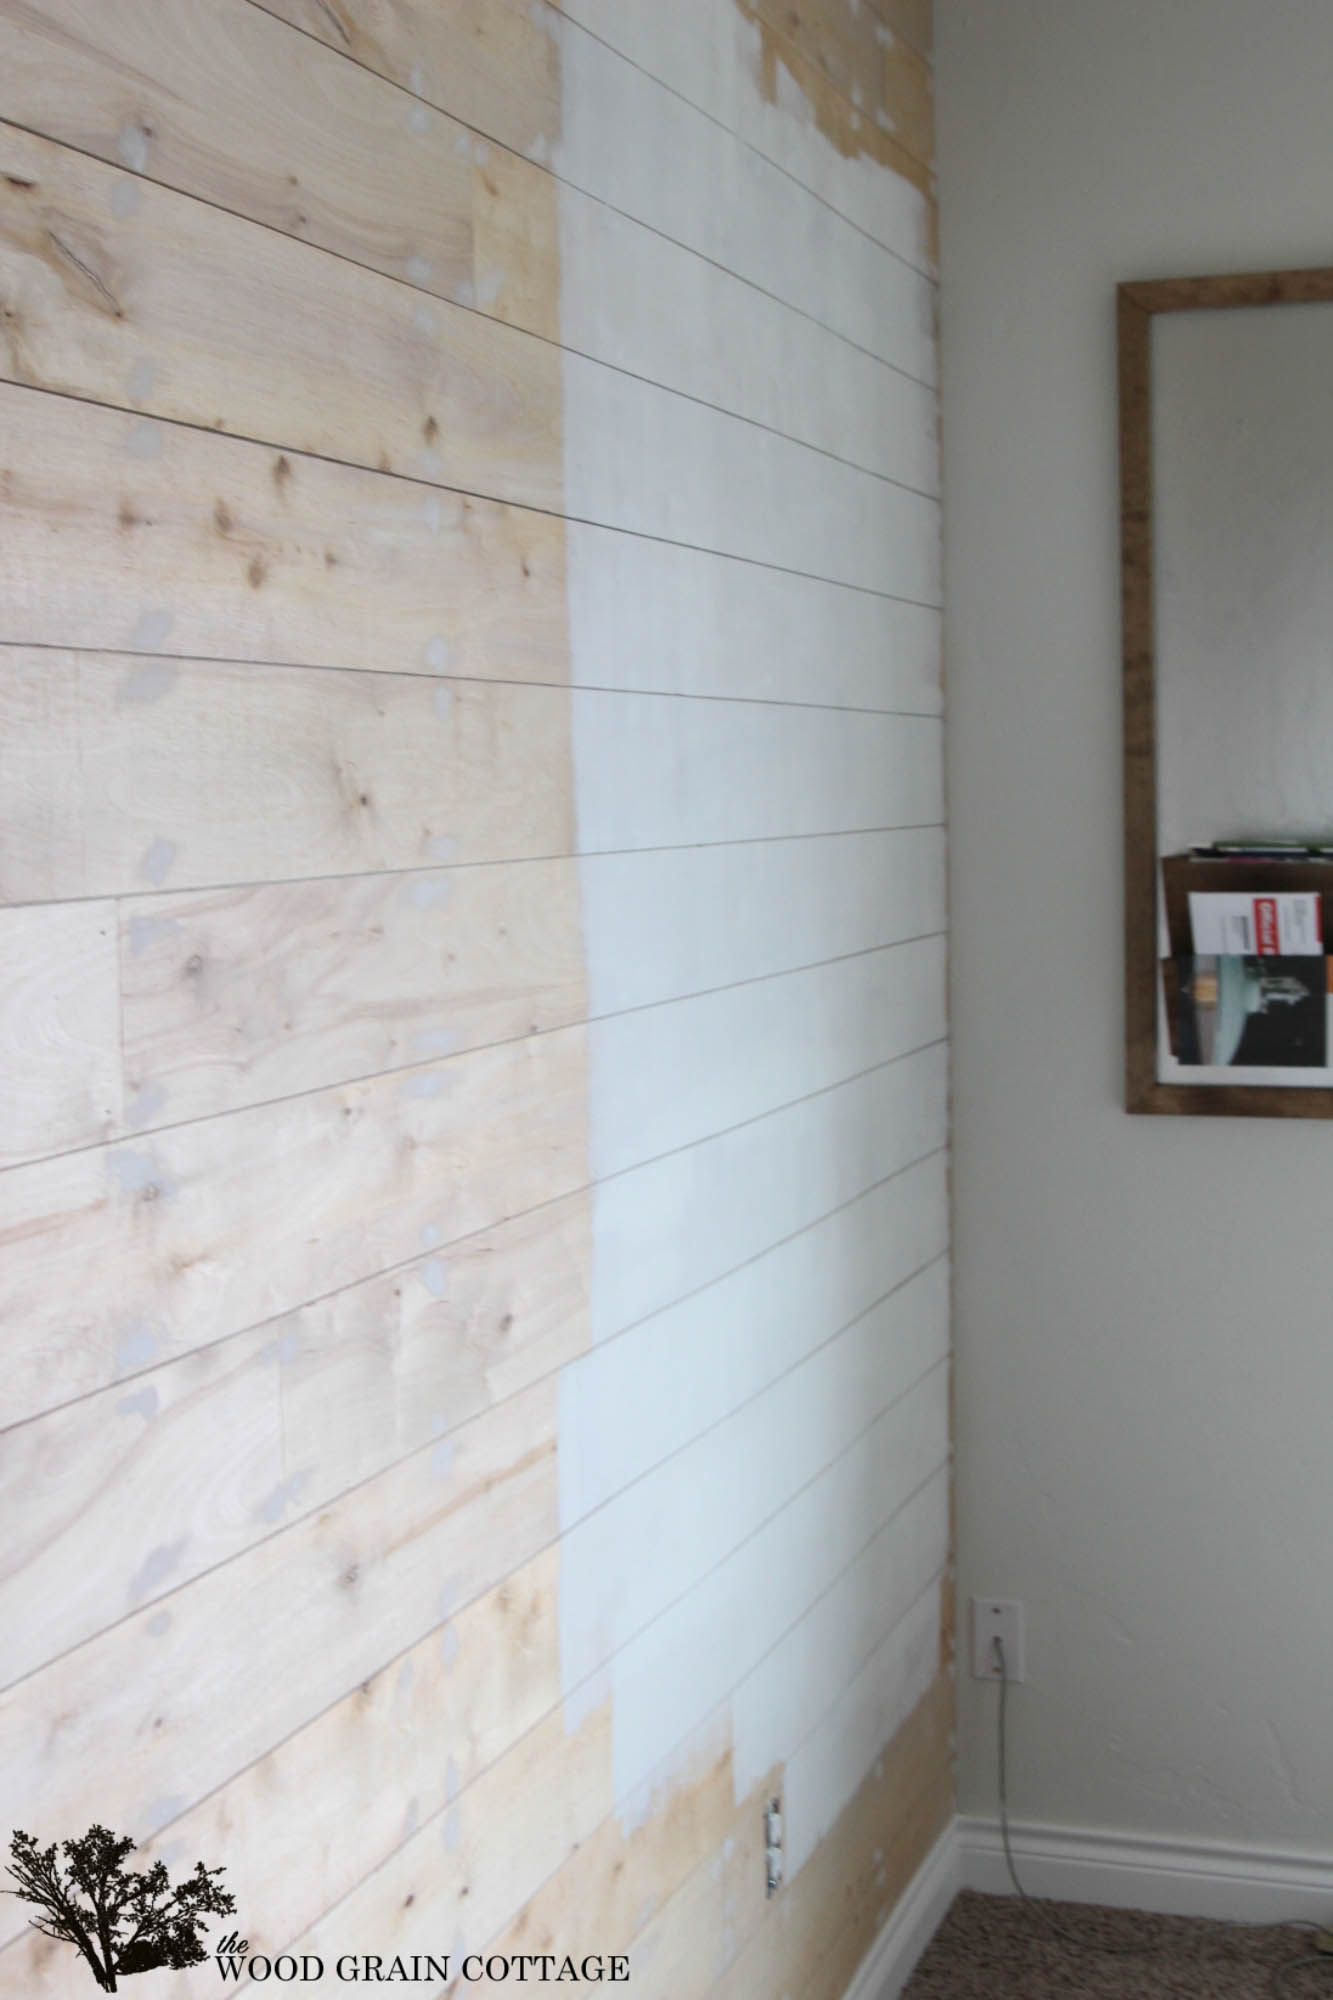
After two coats, I was left with this…

I couldn’t wait to move my stuff back in…

And for the time being, I’m totally forgetting that the other side of the room looks like a complete disaster…
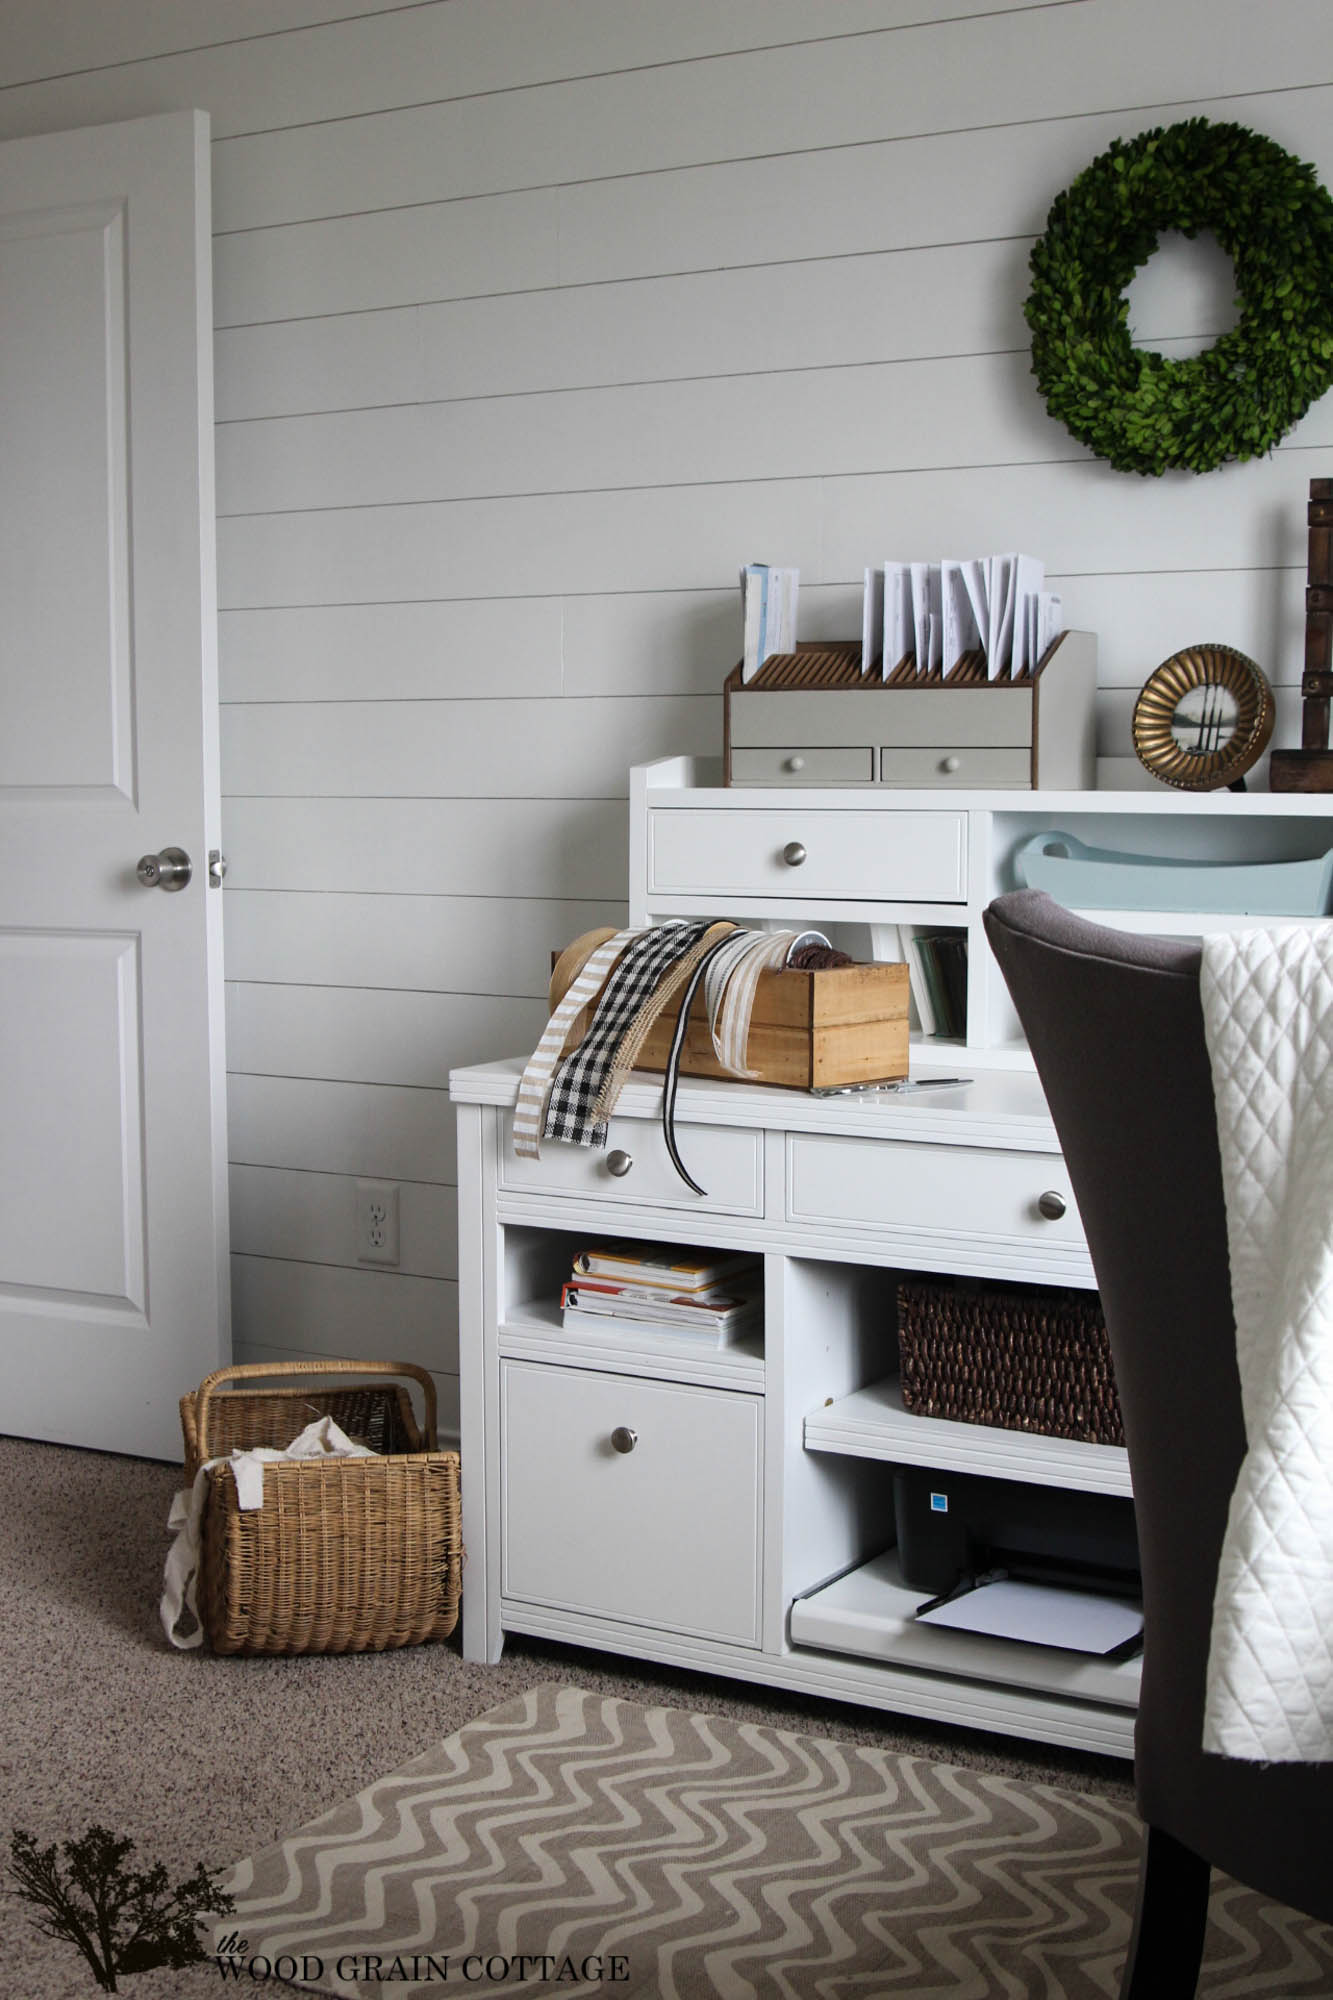
That’s such a minor detail when I have a plank wall to gaze at…

There’s still a bunch of stuff to do in here, and lots and lots of organizing, but it’s nice to have a part of this room feel semi-done…

Several new projects will be coming soon…

I can’t wait to show you more… exciting things are coming to the office!
I am proud to be a 3M- sponsored blogger, and, as part of my responsibilities, I get the opportunity to evaluate new products from 3M DIY. Opinions are my own and additional product used in the project were selected by me.


To learn more about 3M, you can visit them here:
3M DIY Website
3M DIY Twitter
3M DIY Facebook
3M DIY Pinterest
 P.S. You can see my full disclosure policy here.
I just can’t get enough of your home! It looks so nice. May I ask, where is your piece of furniture from?
THANK YOU so very much, Anna! I bought the white office furniture from American Furniture Warehouse. I hope that helps! 😀
Did the furniture piece already come in white or did you guys paint that as well?
Hi Blair! We bought the furniture white! 😀
Love all of your plank walls, they look amazing.
Love it!!!
Beautiful results as always, Shayna! We’re plank wall post twins today 😉
Your office wall looks beautiful! My husband and I used your plank wall tutorial this weekend in our mudroom. It worked out great! I’ll be posting about it tonight. Thanks for sharing!
looks wonderful! It is amazing what a plank wall does to a room.
This is gorgeous!! Such a beautiful accent wall that adds so much character!
I love your abacus/ruler style calendar! Did you make that? I’m new to your blog, so I don’t know if you’ve already posted about it or not.
Hi Cassie! Welcome to the WGC! So happy to have you! I bought the wood calendar from Decor Steals. I hope that helps! 😀
Love the wall turn out so beautiful.I like your reef and was wonder if you made it i have seen them on other peoples blog .
Now I want white planked walls in MY office! So beautiful, and I can’t wait to see more room progress!
Such a gorgeous space! I need you to come do a plank wall in my house – you kill it every time!!
Wowzer! This is gorgeous! I love this space 😉
Hugs,
Jamie
Shayna, this post could not have come at a better time! I want Bobby to plant a bathroom wall. Thanks so much for the great diy!!!! LOVE the outcome!
You may have mentioned this before, and I’m sorry in advance! But where did you get the desk from?
I so love your style! Every time I visit your blog, I love everything I see! Another beautiful project! 🙂
You are tooooo adorably cute! I love the video! The 3M Patch + Primer looks so easy to use, I’m definitely going to look for it at the store next time!
Love, love, love it!
Debbie
I love love love it Shayna – we did a plank wall in our boys’ shared room and it is my FAVE. Great tip on the fillers – goodness knows there will be a zillion holes to fill!!
Shayna says, 482 holes to fill, but who’s counting??!! Oh my goodness, how long did that process actually take? It is well worth it, your plank walls are fantastic looking.
Corrinne
oh stop. who cares if the other side is a disaster zone when this side looks like a magazine?!?!?! okay, well, if it was my house I’d care but seriously, Shayna… LOOOOOVE IT!!!!!
Looks gorgeous, Shayna! I think I need a plank wall in our house! Thanks for sharing your method!
~Abby =)
Hi there! I am so happy to have finally seen how this is done! We have a semi-open floor plan with our kitchen and family room-all one ceiling and I think this will be a great way to hide some imperfections. Have you even done or seen a ceiling done in planking? Wondering how to trim it out against the wall…
Hi Lisa! THANK YOU For the comment! I think that planking a ceiling would be fabulous! You could either do it just like we’ve done our plank walls, or you could use pine tongue and groove planking. Either way it would look amazing. To trim it out, you could use either quarter round, or an mdf product like we used on our board and batten walls in our living room: https://www.thewoodgraincottage.com/2013/12/06/how-to-install-board-batten/
I hope that helps! 😀
LOVE ♡♡♡ xox M
Beautiful wall and beautiful home! I read wall planking tuts whenever I find them. Want to do this so bad! Do you not caulk along the sides? If not, why? Thank you!
Hi Karen! THANK YOU so much for the lovely comment! We do not caulk along the edge unless we use quarter round. In this case, I don’t caulk them because we left it as is. I’ve found that if you do caulk the sides, a bunch of the caulking gets between the planks and it has to be dug out. It’s just my personal preference not too… it’s not very much fun to scrape out the caulking. 😀
I’ve been admiring all the planking in your home and considering doing this in our home as well. Problem is, we live on a ranch and that of course comes with a lot of dirt and dust. Since you are in the same boat, have you noticed dirt lingering in the space between the boards? Just like lovely open shelving in a kitchen, it doesn’t quite seem practical for our situation. What’s your experience? Beautiful home by the way!
Hi Sarah! I completely know what you mean about the dirt and dust! Luckily, I haven’t noticed any of it collecting in between the planks. I’ve kept my eye out for it, but haven’t had any problems thus far! I hope that helps! 😀
Thanks for the tutorial! I love love love planked walls and am thinking about adding them in our closet and nursery. But I have a question, did you removed your baseboard while planking your walls? I’d love to avoid that but I’m afraid that if we don’t it will look odd. We have the typical colonial baseboards.
Thank you so much! We love our plank walls! When installing them, we left our baseboards on, and planked down to them. Once we got to the bottom, we custom cut the plank for the remaining gap. It honestly doesn’t look funny! Hope that helps! 😀
What sheen of paint did you use?
Typically I use eggshell on all our walls. However, on the plank wall it’s a semi-gloss. I hope that helps! 🙂
the plank wall is gorgeous. I also like seeing the woodgrain in the plank wall. What would you do to this if you wanted to just clear coat it? How would you deal with the nailholes or would you just let them show through?
Thank you so much, JJ! Hmmm… if I were to leave them original, I would probably use a matte or satin poly and brush it on. I would leave the nail holes showing. I hope that helps! 🙂
Thanks for your blog, that’s the exact look we were looking for our dining room.
We used 1/4 inch ply wood cut in planks and now that every thing is nailed on the wall I’m looking at the 1/4 wide irregular space left between the first plank and the ceiling.
What kind of caulking did you use to fill that up ?
We also had a gap, but we filled it with white painting caulk by Dap. It’s called “Alex”, and it works great! I hope that helps! 🙂
Love your plank wall!!! We’re currently putting a nursery together for our first little one and I would love to do something like this. Did you find the paint beaded up in the gaps between the boards using a roller? And can you see in between the gaps? The wall I’m hoping to do ours on is currently painted with a square pattern using many different colors of paint. We’re unsure if we need to paint the wall first or if that would just be one extra unnecessary step.
Thank you so much, Brittany! For the walls, I always use a super smooth skinny, wienie roller. There’s not any texture, so it doesn’t hold as much paint. For the most part, the paint doesn’t get in the gaps, but it will occasionally. I keep a putty knife handy to scrape between the gap. Problem solved! Also, if you have a bunch of color underneath the planks, you will be able to see any bright colors through the plank gaps. To be safe, I would paint the wall. I hope this helps! 🙂
Was there a reason you didn’t prime the wood first? I’d love to skip that step.
Hi Graham! Yes, we don’t prime our plank walls. I’ve never noticed a reason for it. The first coat of paint soaks in a tiny bit, but by the second, it looks great. Depending on the color you choose, you may have a light third coat. Especially if you are using a white paint. I hope that helps.
Beautiful wall!! What size nails did you use, and did you match them up to the studs in the wall?
Thank you! I believe we used inch long nails in our nail gun. No need to match them up to the stud, they stay in place perfectly. 🙂
Why the nickel? Expansion? Is it mandatory?
Help!! I enlisted my son and his friend to put up the planks but they didn’t leave any space between each one and now it doesn’t look right even after painting. Is there anything I can do to make it look better other than take it all down??
Hi Annie! Unfortunately, if it doesn’t look right, I’m not sure what else to do besides take the planks off the wall and start over. That would certainly be the best thing. I’m sorry!