
Our Downstairs Bathroom Reveal
See our downstairs bathroom reveal and how we transformed this space into a functioning bathroom! I’ve included all of the room sources as well.
I’m so excited to be sharing the reveal of our downstairs bathroom with you today. This space has dramatically changed from when we first bought the house a few years ago. What was once a powder bathroom and a closet to our now laundry room, has turned into a beautiful bathroom we love.
I won’t beat around the bush. When we bought the house, this powder bathroom was in really rough shape. It also always felt really awkward with the entryway going into the bathroom. Plus, right on the other side of the bathroom was a tiny walk in closet with a big window.
None of it really made sense, so we decided to combine it all together, making it a full size bathroom with its own window. Changing the layout made such a big difference! Keep reading until the end of the post to see before and after comparisons… wow!
Our Downstairs Bathroom Reveal
Our Downstairs Bathroom Before
Just as a refresher, here’s where we started.
When you walked in, there was this entryway going into the powder bathroom. It never really made very much sense…

And then once you were in the bathroom, it was tiny and falling apart…

Right on the other side of the bathroom, was this small closet. It didn’t make very much sense either…

We quickly blocked off the door to this closet from our laundry room, and demo’ed the rest of the powder bathroom area…


From there, we had new electrical installed, new plumbing and new heating and air conditioning, which went along the wall under the window and into the the laundry room, as well as in the bathroom…

You can read all about our design plan and the remodeling process.
We hired out the majority of this remodel, but there were several things we did as well, like planking the walls and the vanity, installing the sink and faucet, and all of the painting and trim work.
And finally, here’s where we’re at today…
It’s hard to believe this is the same room as before, but it all came together so beautifully…

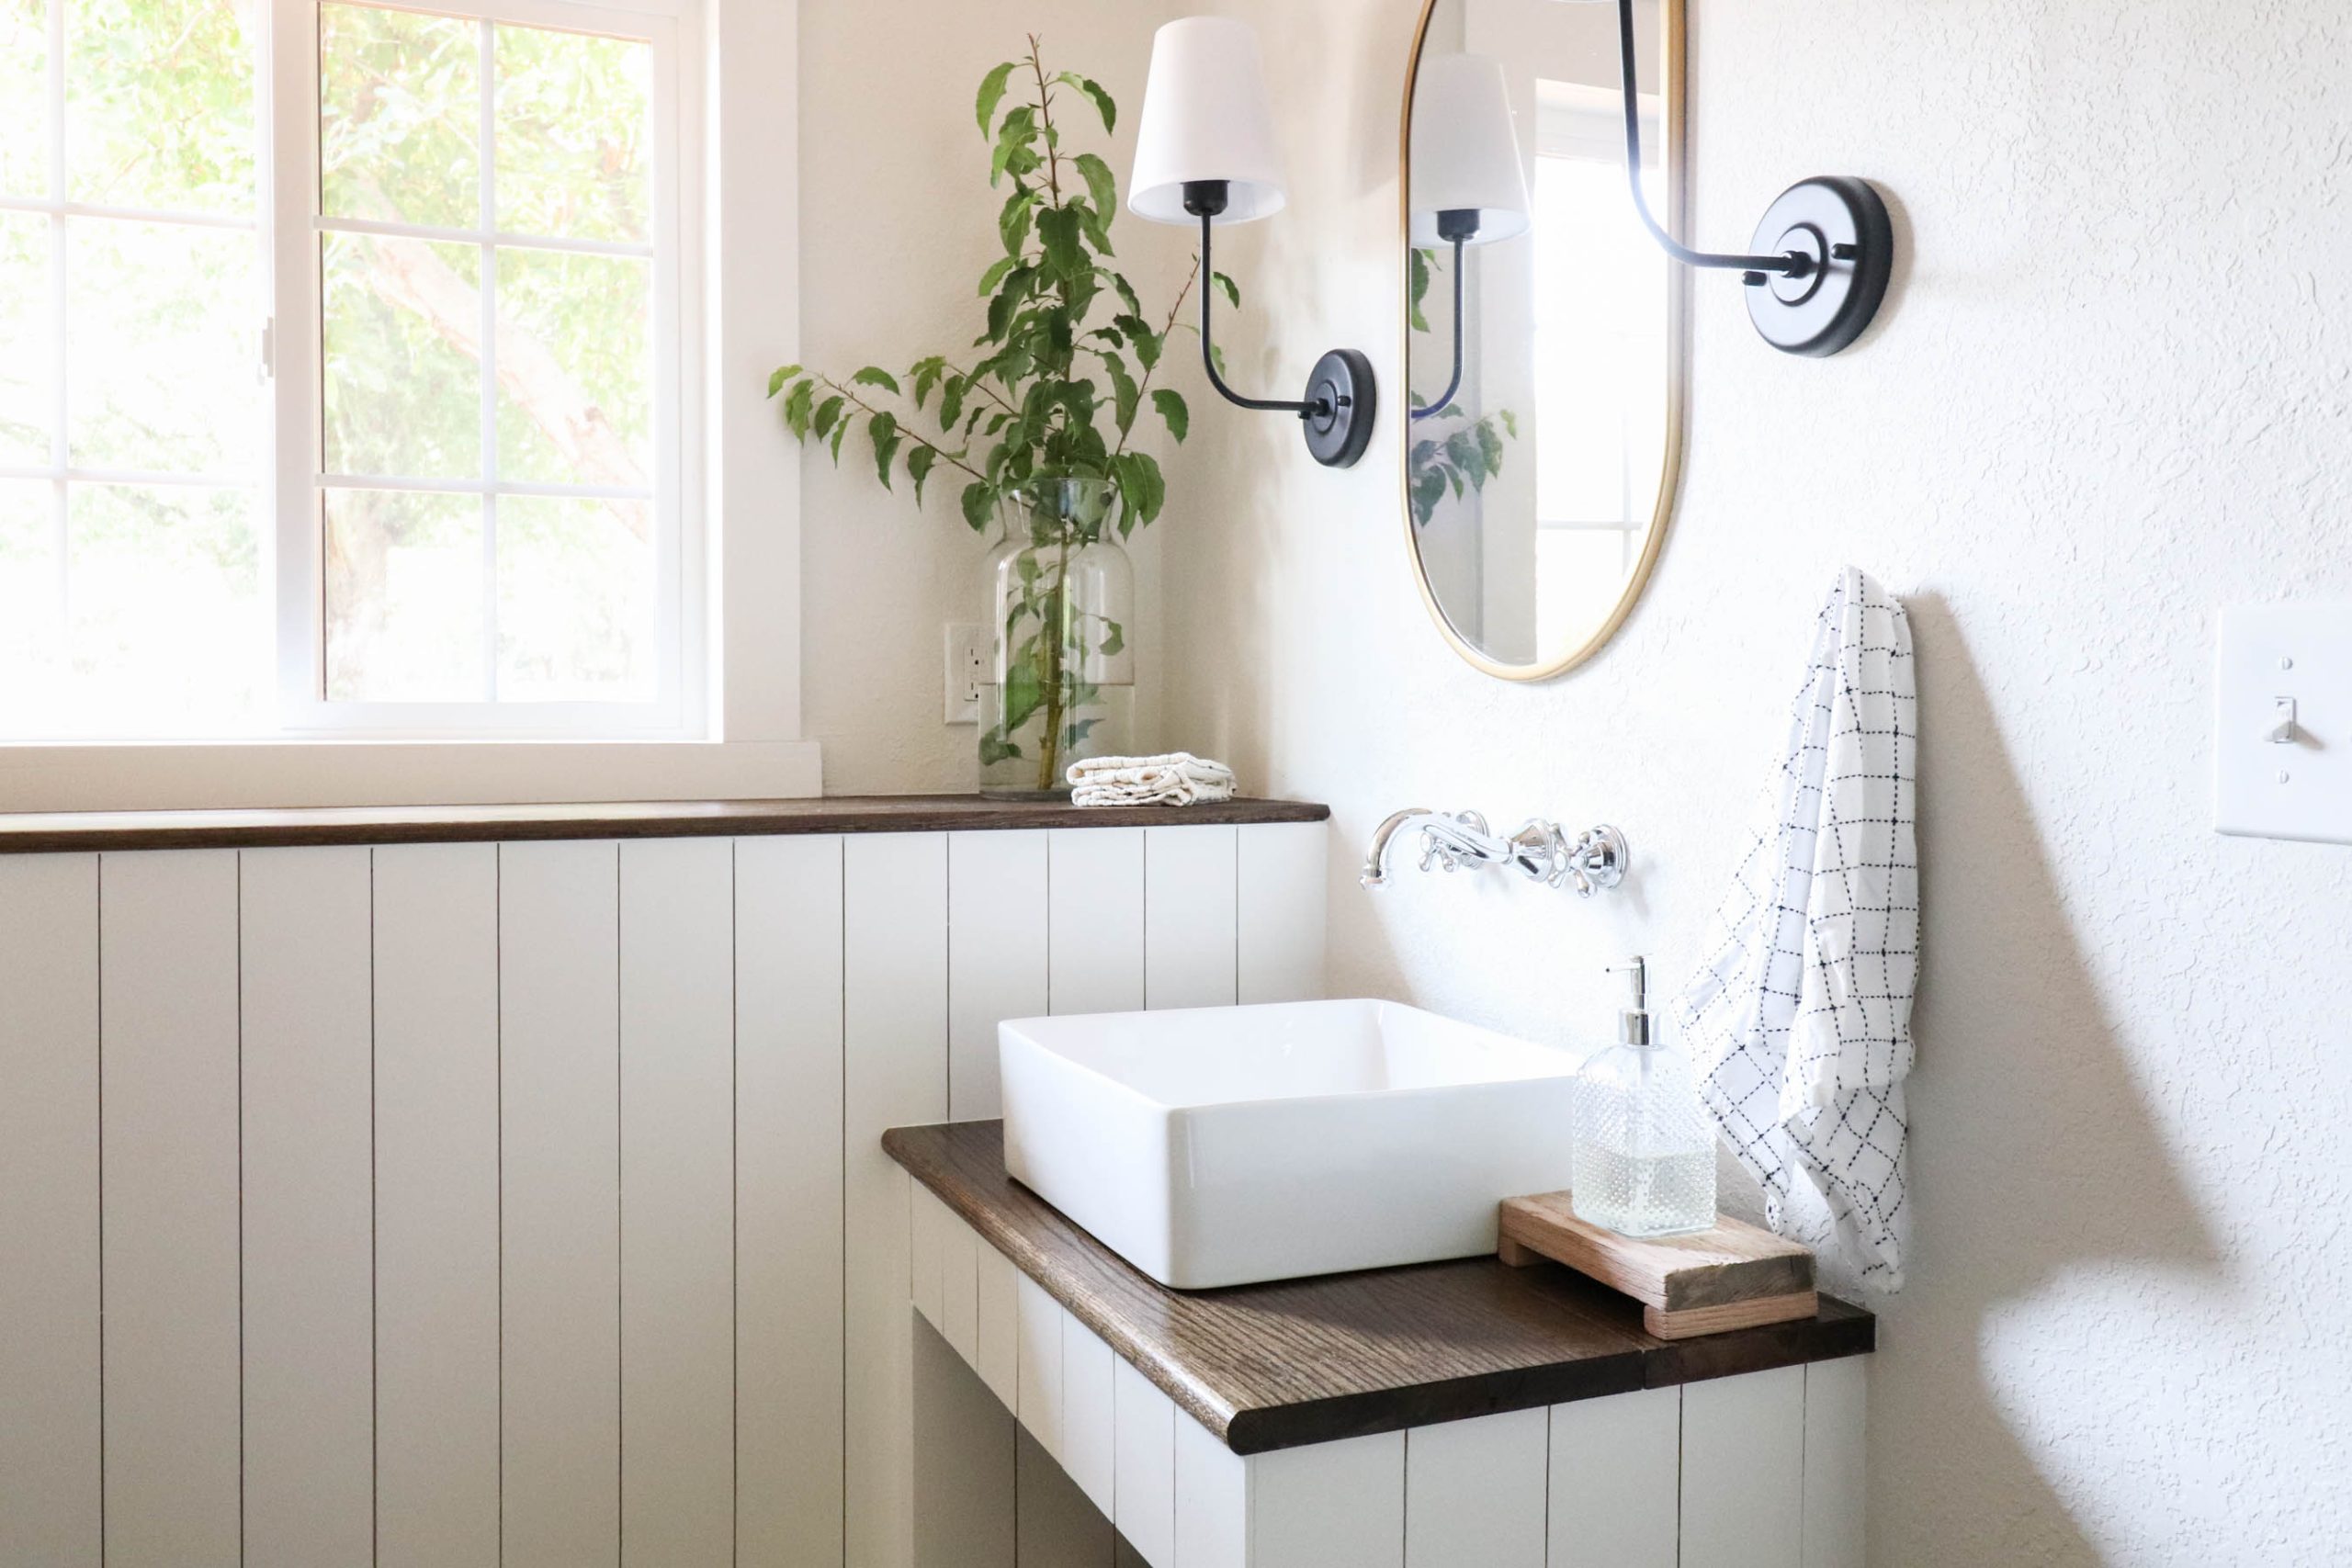
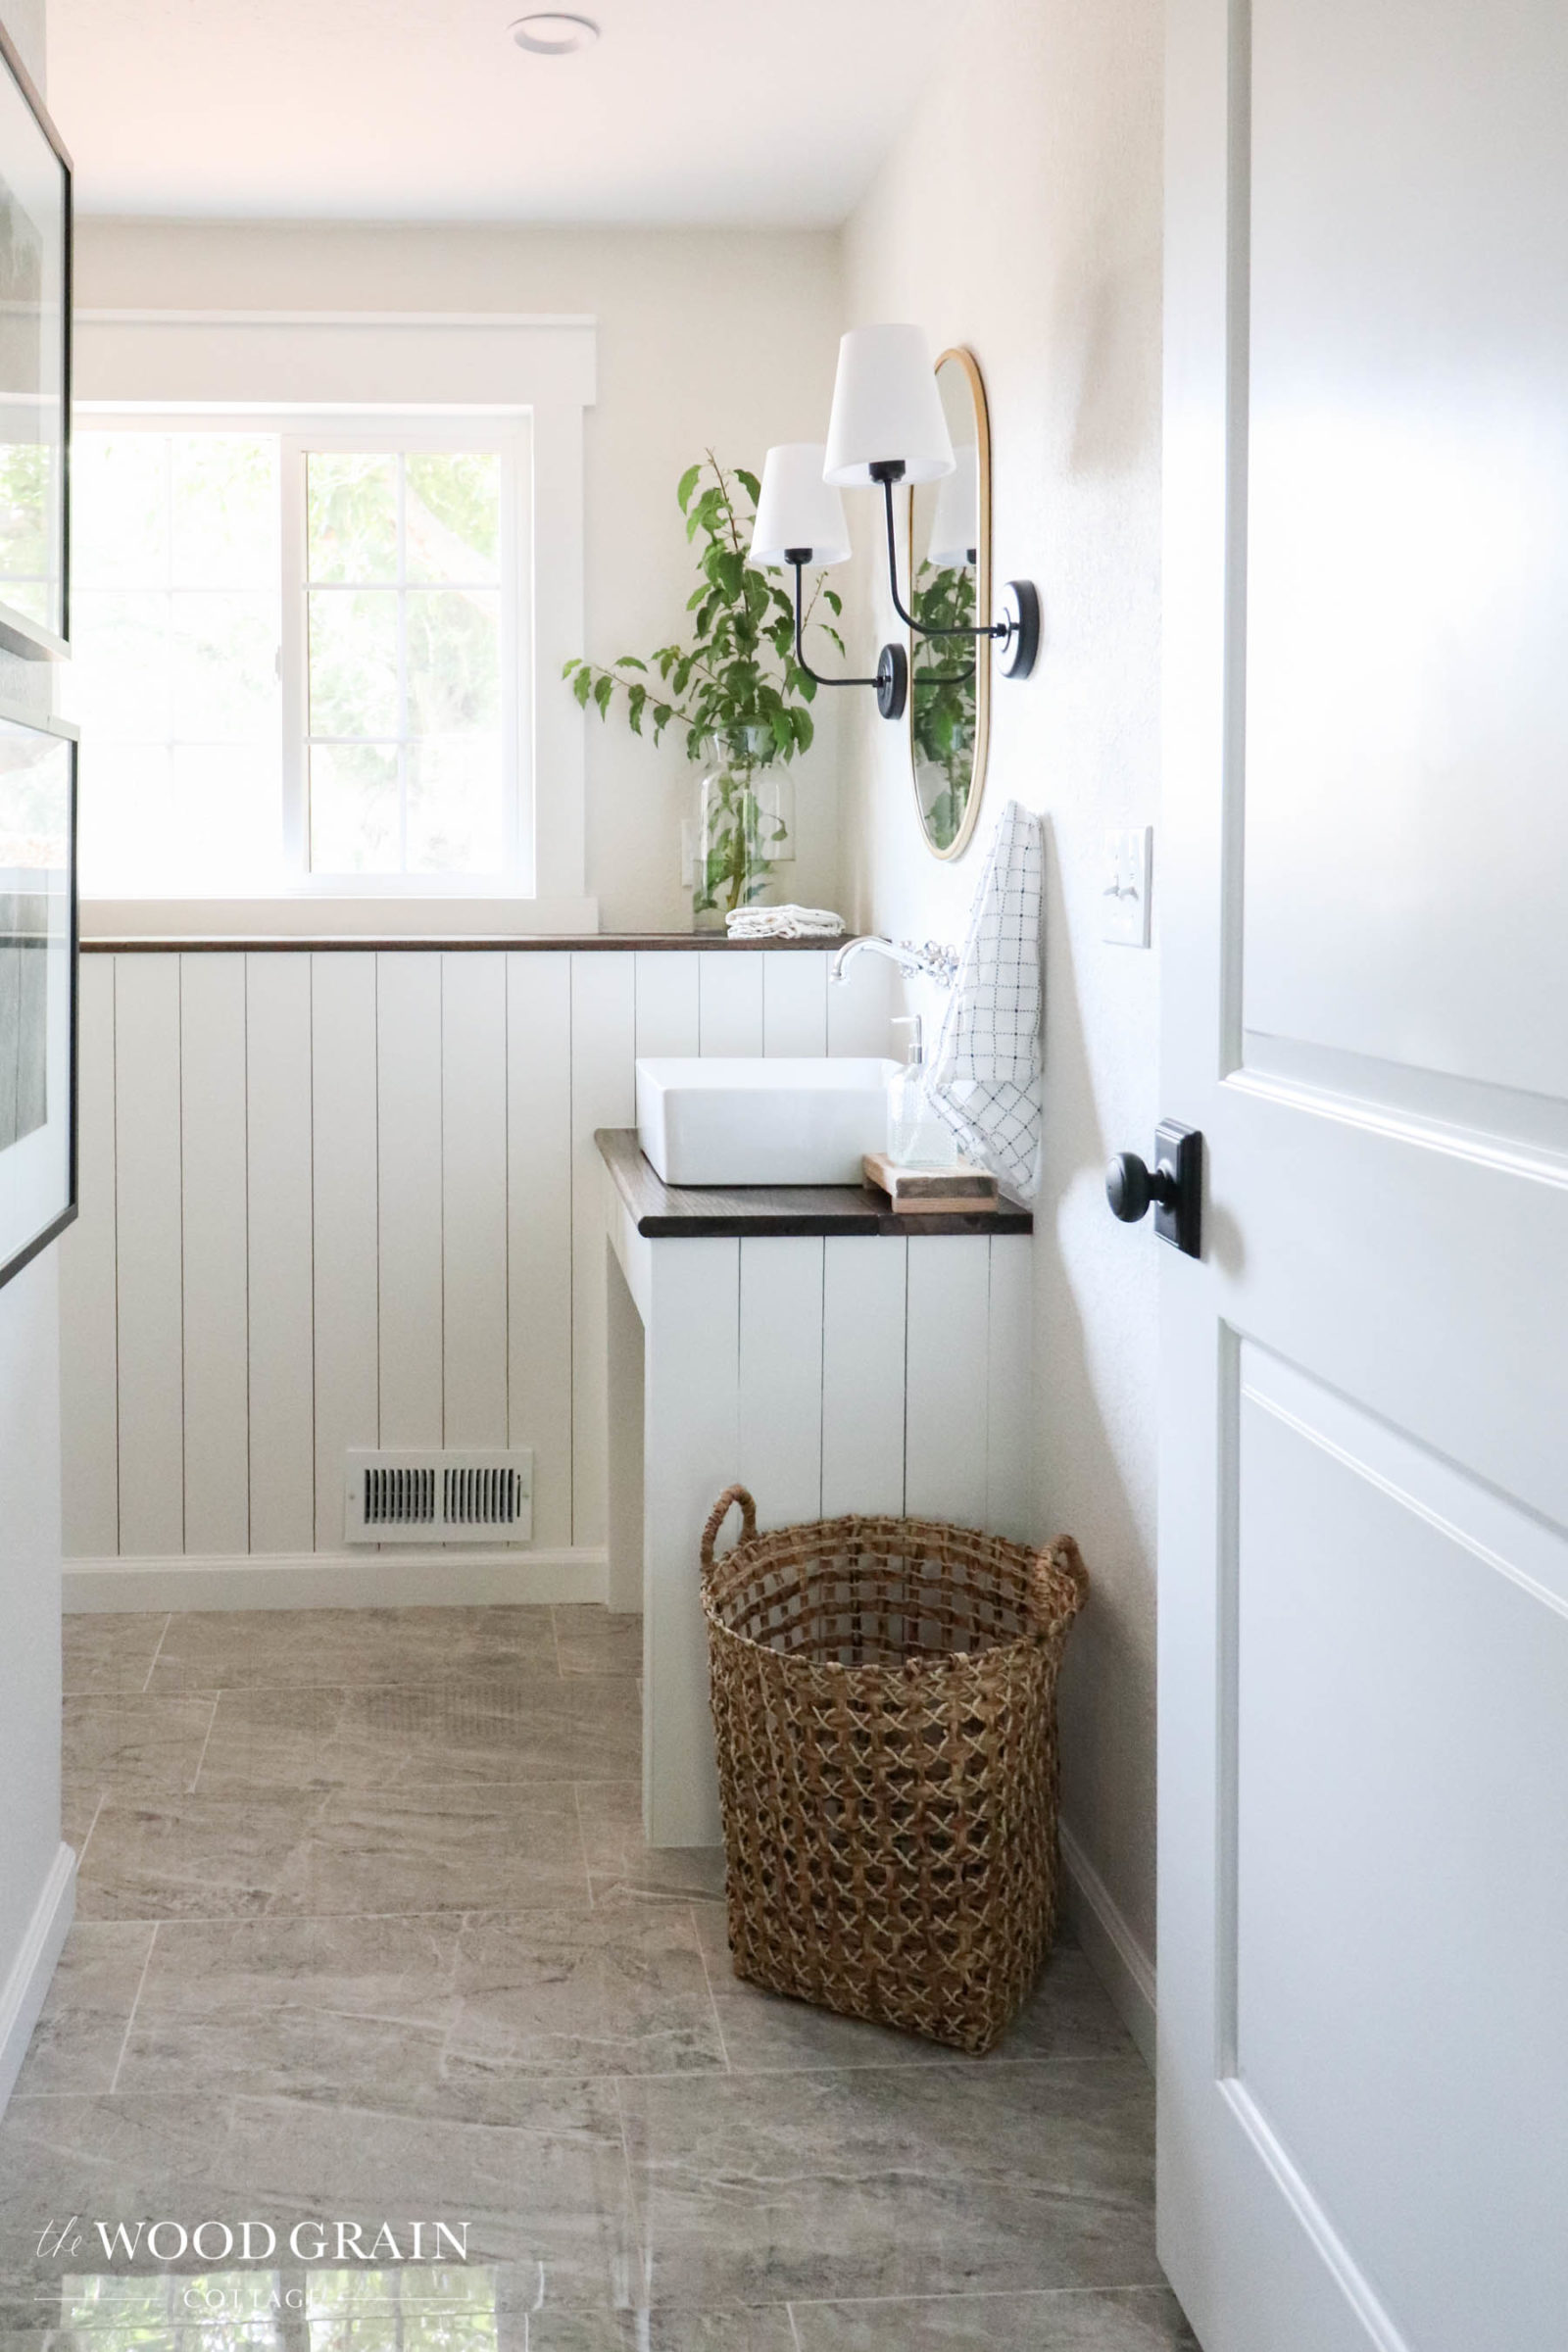
Because of the hvac and plumbing that needed to run along the wall with the window, we had to build several custom things for the bathroom. One of them being the ledge under the window and the vanity.
The Bathroom Vanity
The ledge under the window is the prettiest addition to this bathroom, but is also very functional by adding extra countertop space. I love how the wood ledge and countertop add an element of warmth to the bathroom, and once our window blind arrives (it’s on backorder), it will all tie together perfectly…
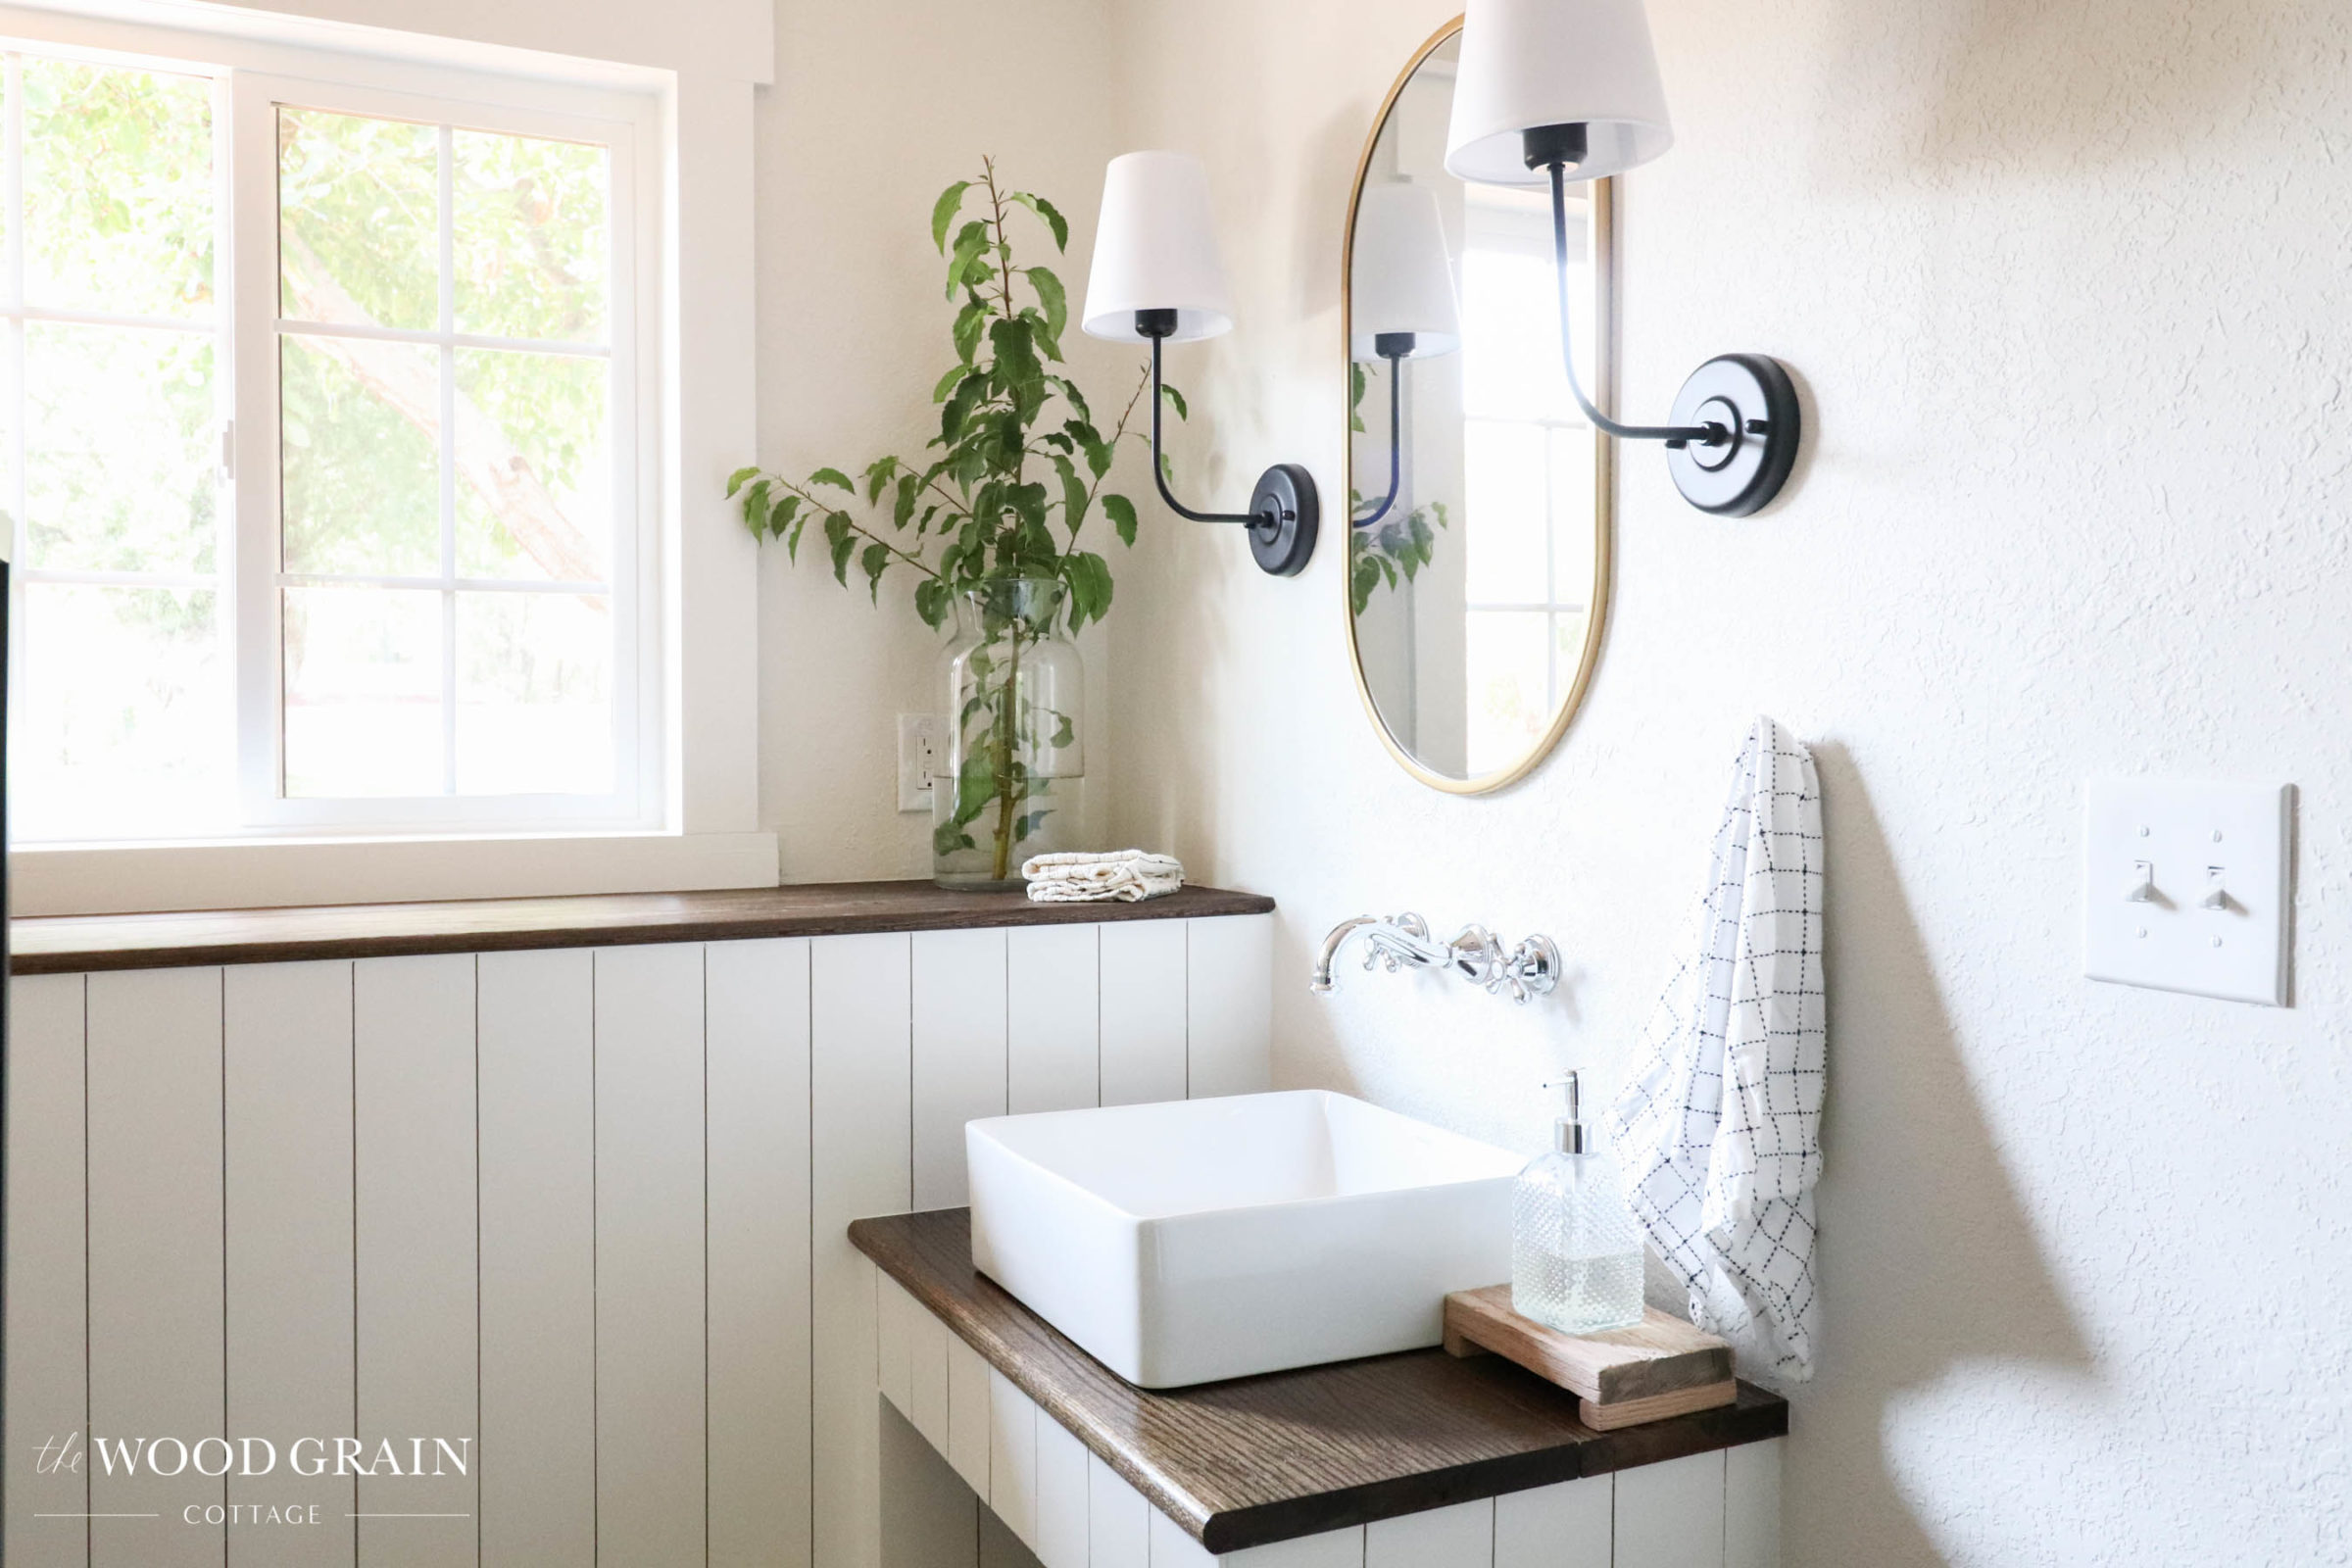
To give the wood countertop durability to water, we added several coats of polyurethane. It has a really nice finish and water wipes up beautifully. We also added a stunning square vessel sink which really makes the bathroom feel elevated in style…

The sink is so affordable, but I also love that it allowed us to do a wall faucet. I searched high and low for a budget friendly wall faucet and this one fit all my requirements!

I love the lettering on the hot and cold water handles. It feels very classic…

We also made the cutest little stand for our hand soap. I’ll share more about it later, but I’m obsessed with these little stands and we have several of them throughout the house…

The Bathroom Lighting
For the vanity lighting, I chose these affordable wall lights. They’re such a great find and I like them so much that I also used them in our master bathroom, just in a different finish…

They’re the perfect size for our custom vanity and I love how they look with the mirror…


The Bathroom Shower Area
We were also able to build in some storage to the bathroom over the ledge area under the window and behind the shower…

These baskets add so much storage space, which is a needed element to our bathroom…

With the floor plan change, we also had enough space to do a custom sized shower. To keep it as light and bright as possible, I had the contractor install white subway tile. It feels clean and classic, which is never a bad combination.
We also installed a rain shower head, which definitely adds to the luxurious feeling in the bathroom…

To keep the bathroom on budget, we also chose to do a shower curtain rather than a glass door. I honestly love the softness the shower curtain adds to the room. It fits perfectly.
I also love the floor tile we chose too. It’s very budget friendly, but it doesn’t look it…

The Bathroom Artwork
For the bathroom artwork, I used two of the Ikea Ribba frames from my collection (these are really similar) and had this digital artwork printed to size…


The Bathroom Water Closet
We also upgraded the area where the old powder bathroom was…

Admittedly, this is a hard space to get pictures of because there isn’t any natural lighting, but we installed floor to ceiling vertical planking (tutorial here) to help conceal the door leading into our crawl space.
I also hung the artwork I made in this room as well…

To give us more storage space, we added a large built in cabinet above the toilet. To make it, we stacked two Ikea cabinets on top of each other, added the glass doors, and then added a stair tread at the bottom. It fits perfectly and the pictures don’t do it justice…

The Bathroom Paint Colors & Room Sources
I wanted to keep this bathroom as light and bright as possible, while also having it feel like a continuation of the rest of the house.
For the walls, we chose China White by Benjamin Moore in eggshell. The vertical planking on the walls and sink vanity are all Super White by Benjamin Moore in eggshell. The trim and door is also Super White by Benjamin Moore, but we used a semi-gloss finish.
The stain color on the vanity and wall ledge is Jacobean by Minwax.

The Bathroom Tile
Room Sources
All of the room sources can be found below…

[show_boutique_widget id=”1090003″]
Side By Side Comparison


A big change, right? We’re so thrilled with how this bathroom came together and it’s so nice to have this room finished and off our project list!
Beautiful!! As always this reno turned out just perfect!
Thank you so much, Cynthia! 🙂
Fabulous design – so well done, Shayna.
Added thought for down the road? Have you ever seen those “bookshelves” that are really hidden doors to another room – or in this case your crawl space. It would need to be custom made and a piano hinge used to have it open into the inside of the secret space. NO one but you guys would ever know it was even there. I see it white and holding toilet paper and cute eye candy, etc.
Such a great idea! 🙂
Looks great! I especially like the digital art prints. What size are yours? Thanks!
Thank you! I had the digital art prints done at 12″x12″. A perfect fit for our frames! 🙂
Amazing renovation. This is so far one of the cute bathrooms I have seen. Also, the classic bath taps look so good with the theme. Just gorgeous. As a Bathroom interior expert, I must say you have done a great job.