

Easy DIY Raised Garden Beds
Looking to create your own garden? These easy DIY raised garden beds are the perfect solution and can be customized to fit your space!
One of our big goals this summer, is to get our backyard in shape. It’s a scary mess of dirt and weeds and we’re both so over it, we could cry. That’s what we signed up for though when we bought our fixer upper. This is the year though… we’re both determined to get this large yard in shape!
Our first big project this year for the backyard, was to build some easy DIY raised garden beds. Last year our garden was in a small area of the yard, but since the property had been severely neglected for several years, I spent so much time hoeing and pulling weeds to keep things tidy. Not only did I not want to do that again this year, but I knew I wouldn’t be able to keep up since baby girl is due the beginning of July. My weekly hoeing chore just wasn’t going to happen.
Raised garden beds really were the perfect solution, and we couldn’t be happier to have them done!
Here’s How We Built Our DIY Raised Garden Beds:
Affiliate links are provided below. Full disclosure here.
Supplies:
- Lumber, we used 2″ x 8″ x 16′ boards, cut to size for each garden bed
- Measuring Tape
- Chop Saw
- Drill
- 1/8″ Drill Bit
- Driver
- 2.5″ Wood Screws
- Clamps
- Level
- Wood Shims, cut from scrap lumber
- Pencil
Optional Supplies:
- Landscape Fabric
- Pea Gravel or Mulch
- Drip Irrigation Material
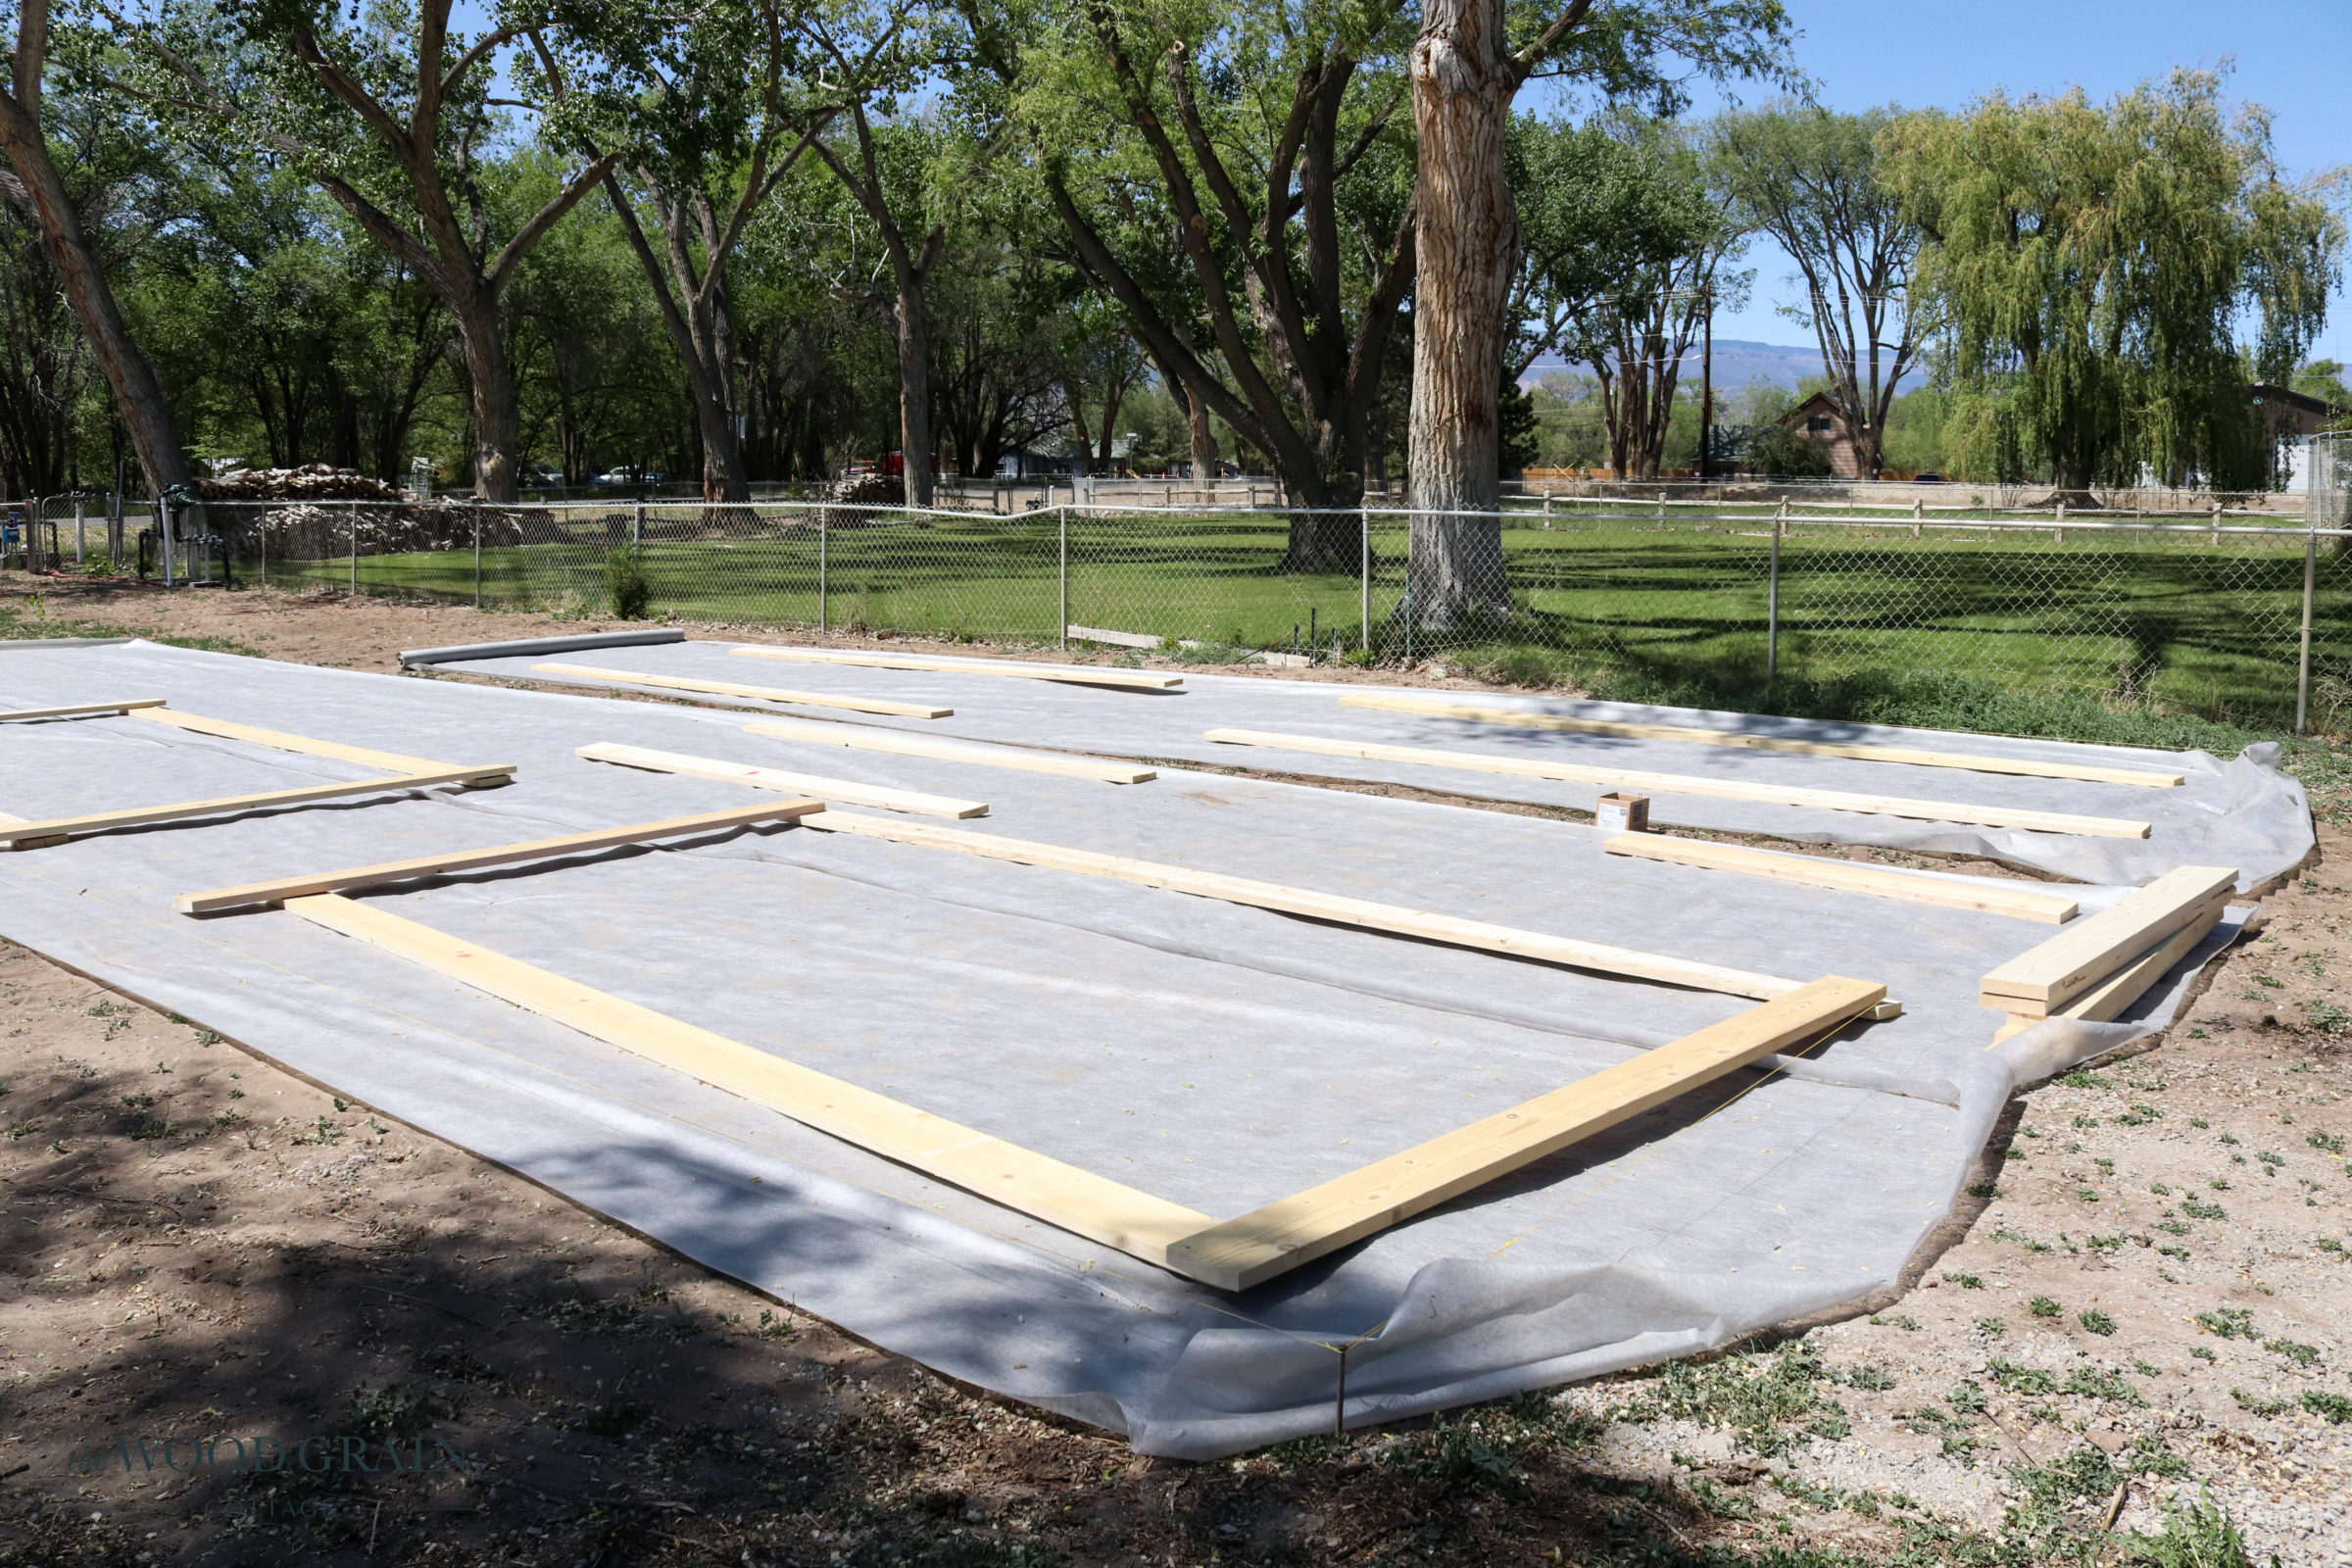
Step One: Determine The Size and Shape of Your Garden
Before we began building our boxes, we walked our yard space and started laying out how we wanted everything. Since we’re starting with a blank space, literally, we were able to decide how big of a space we wanted to dedicate to the garden area, and how many raised beds we wanted to include. Once we had our overall size, we bought our material and began building our beds!
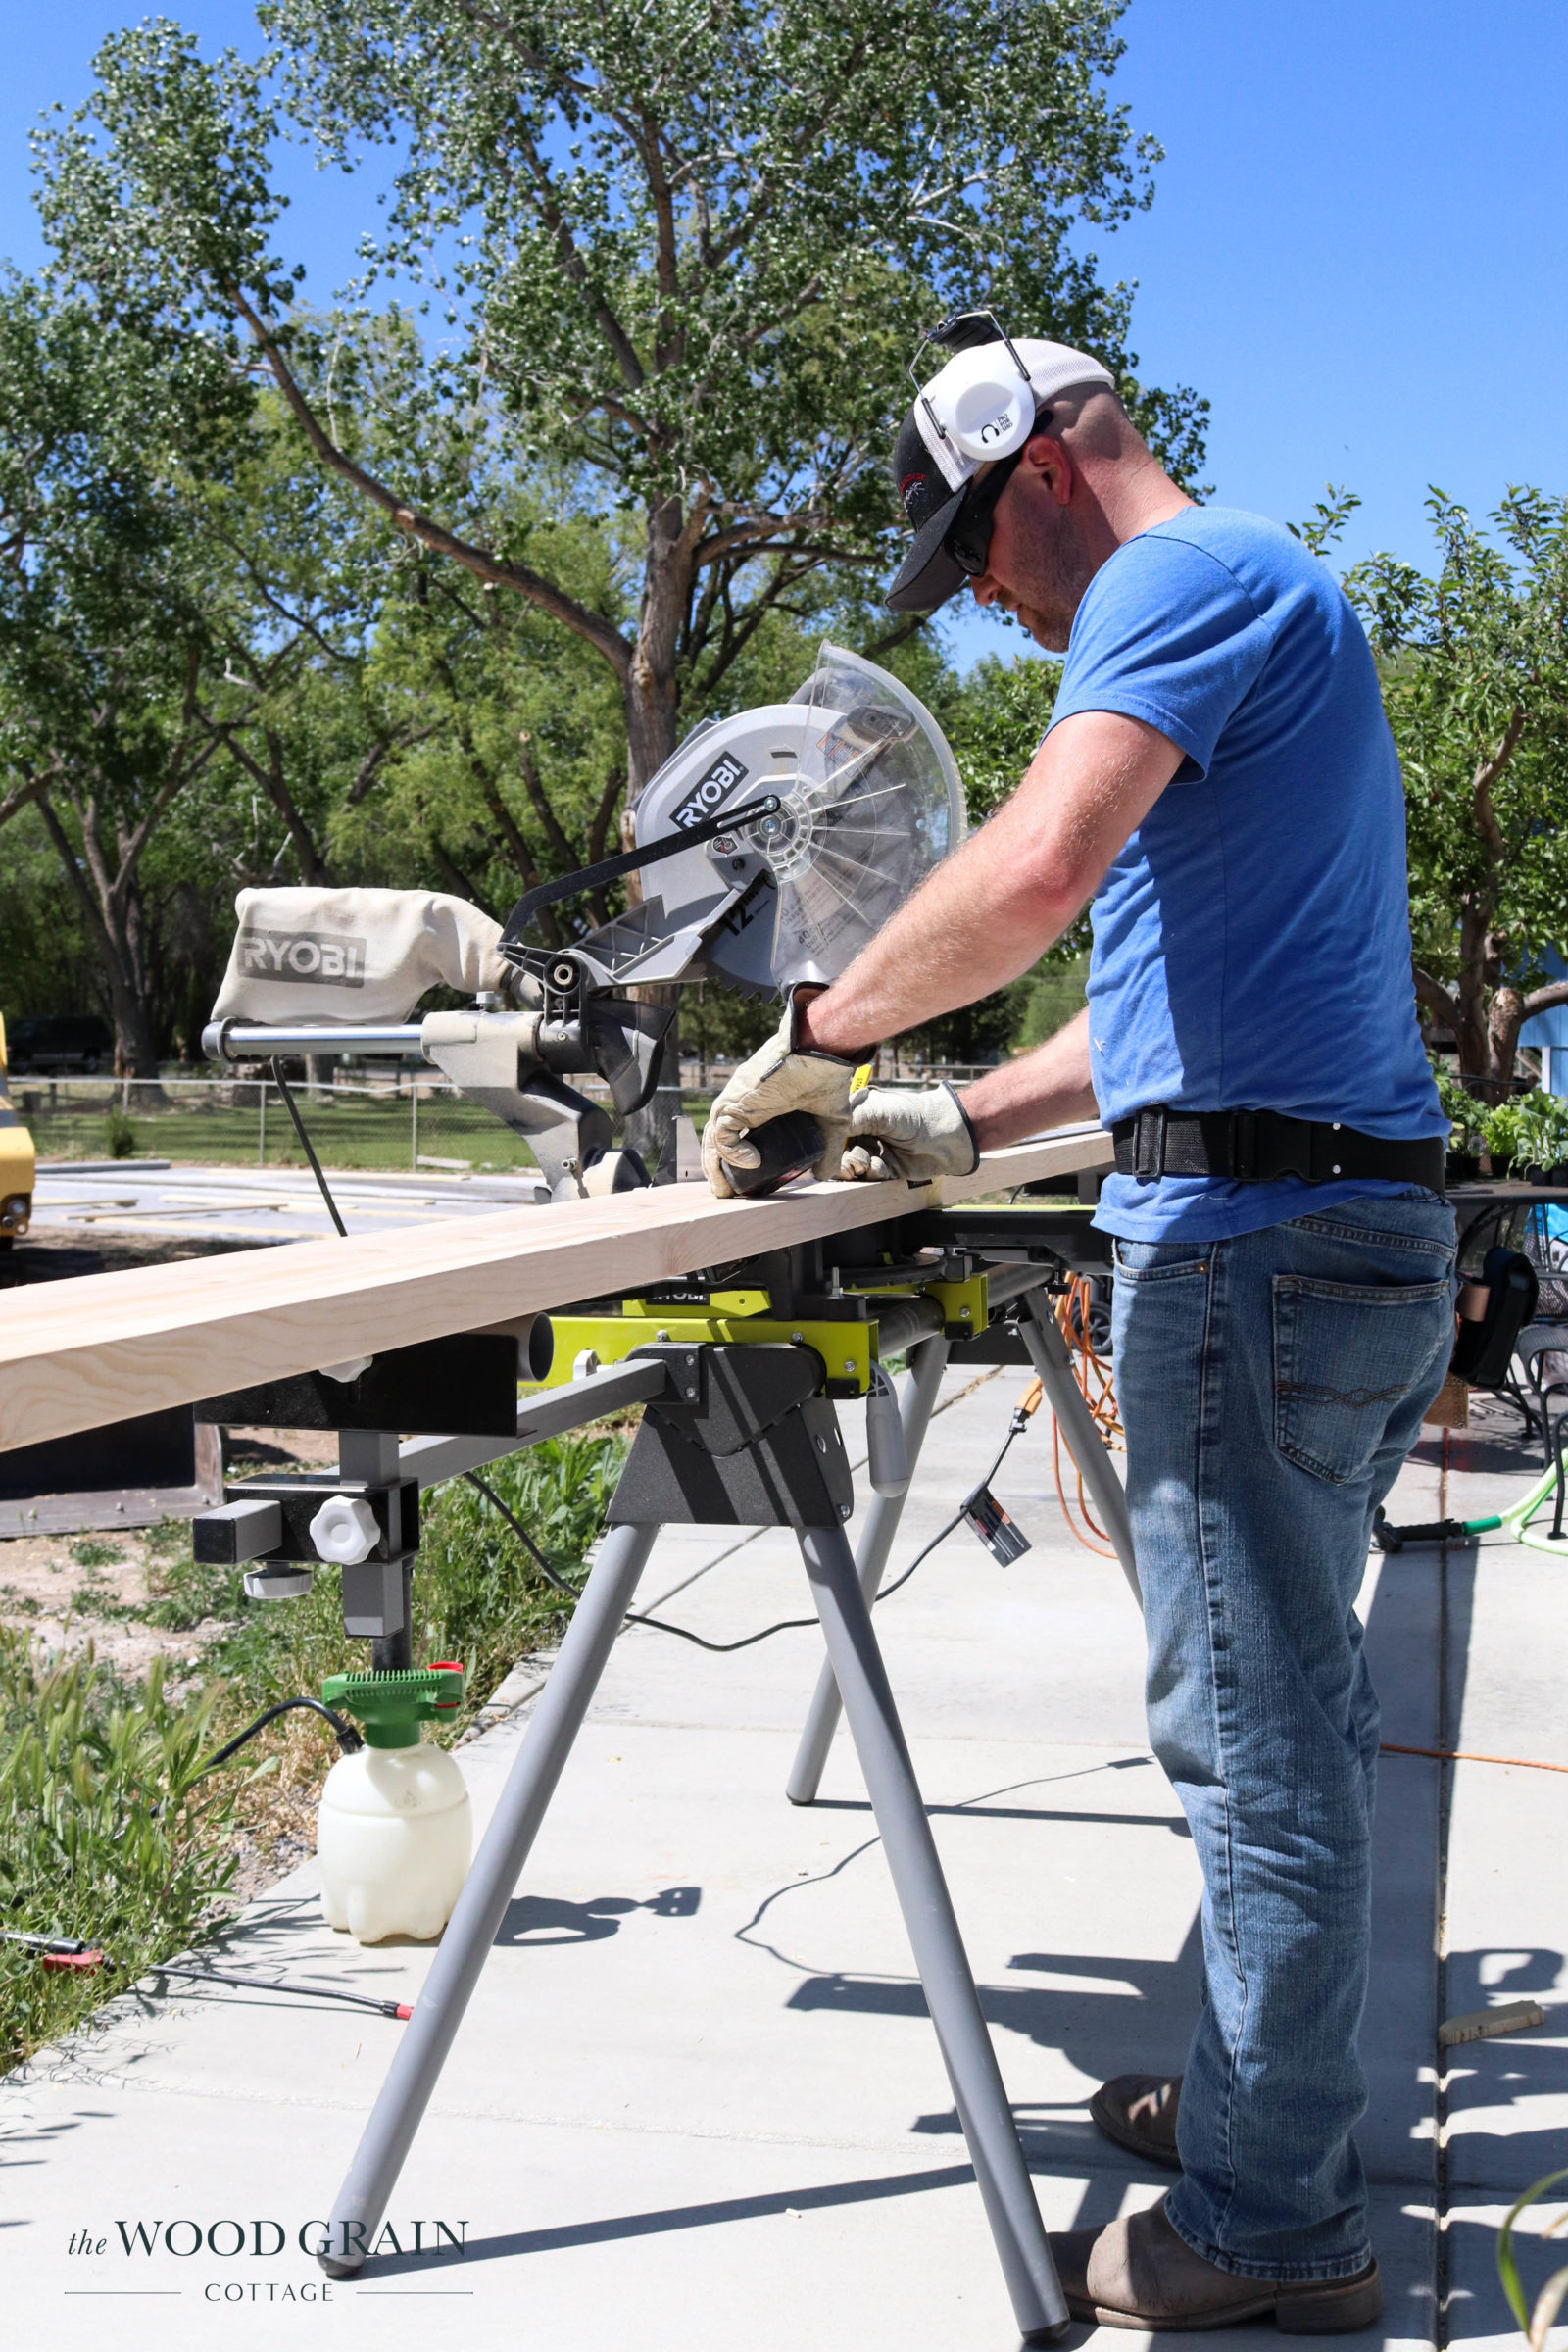
Step Two: Cut The Lumber
With the design in place, Todd started cutting the lumber to size. For these boxes, we used regular lumber. You can use cedar if you prefer.
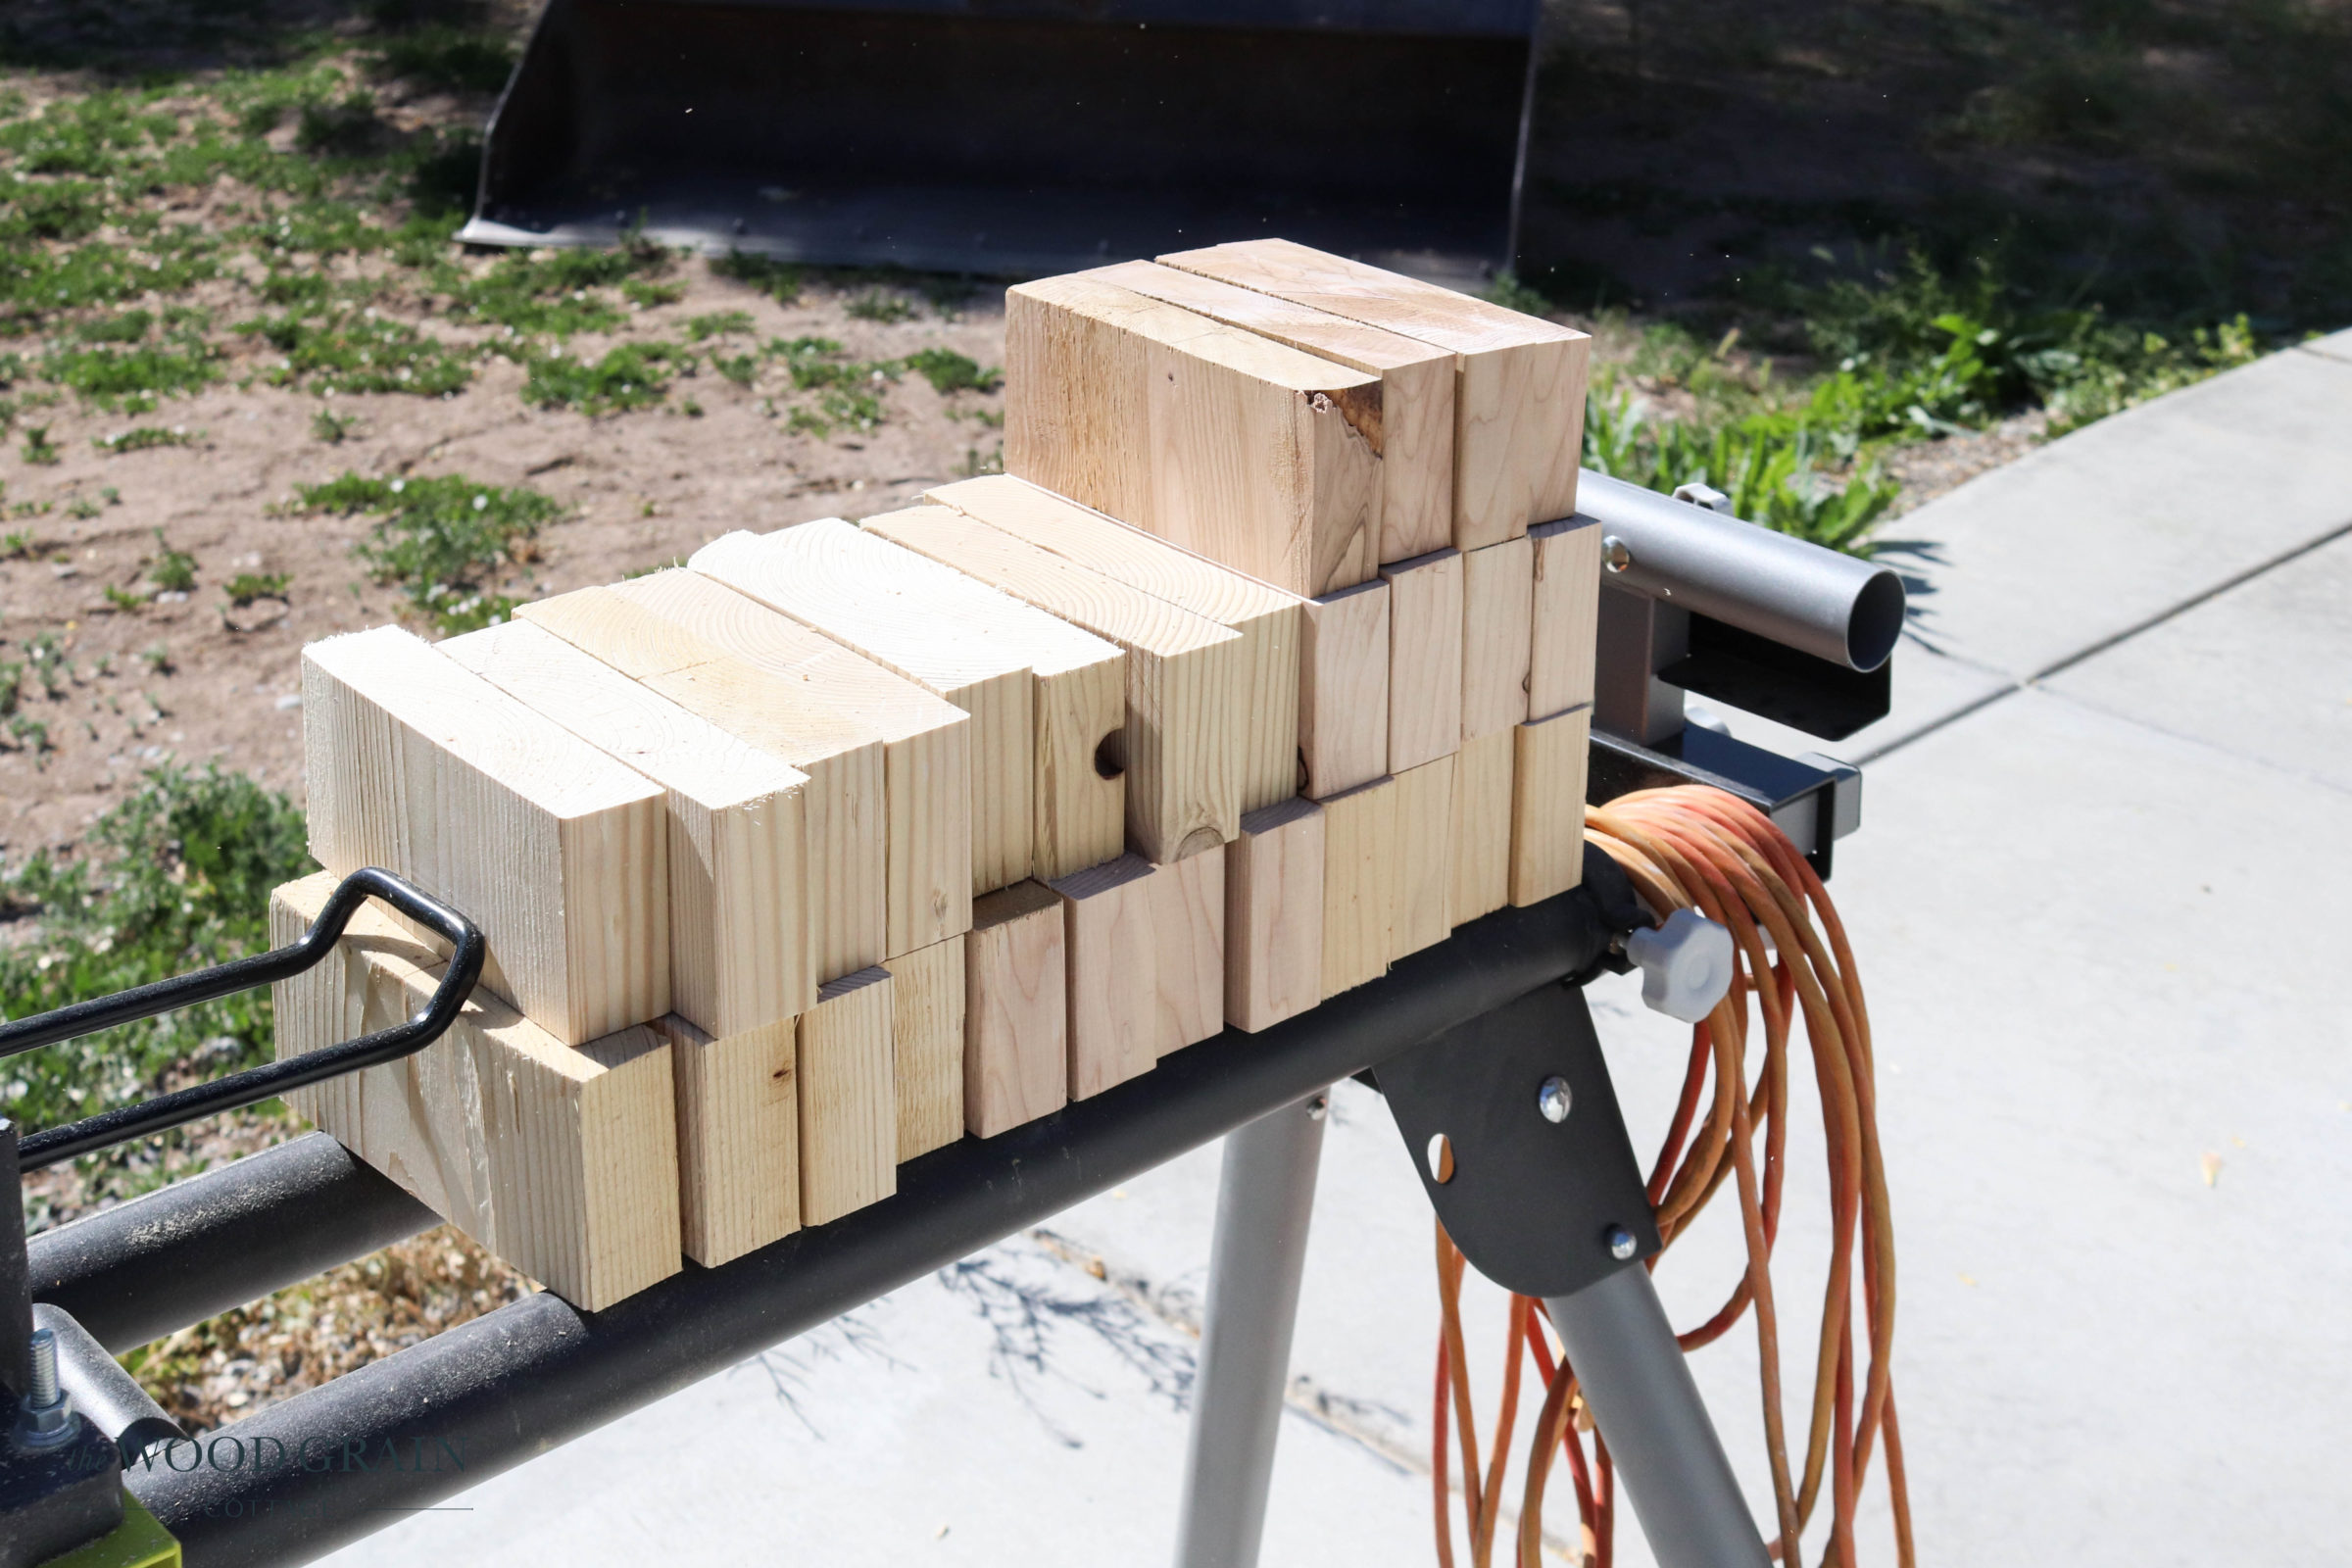
With all of the the boards cut to size for each garden box, we used the scrap end pieces and cut them to size to use as a corner brace that would hold everything together…

Todd cut them to size, making them 3″ wide overall…
Step Three: Level the dirt area and install Landscaping Fabric
The space we chose to place our garden was already pretty level, but we did smooth out any areas that appeared to be higher or lower than the majority of the ground. Even though we did our best, we knew we’d still need to shim some of the boxes in a few places as we installed them.
To help control the weeds, we also installed a nice thick layer of landscaping fabric…
Step Four: Start Assembling The Garden Boxes
With all of the wood cut to size, and the ground area prepped, it was time to start assembling the garden boxes. To do this, Todd took the shorter end pieces from each box and attached the mounting blocks.
He used clamps to hold the end pieces together, then pre-drilled each side in two different places before then screwing everything together with 2.5″ wood screws…

With the end pieces assembled, it was time to build each garden box. To do this, Todd lined up the end piece (with the mounting block) and clamped the side board flush together…

Then, he pre-drilled the wood to prevent splintering in four different locations. Two on the corner joint, and two on the mounting block…

Then, he used the wood screws to hold everything together…

He followed the same pattern on each corner of every box…

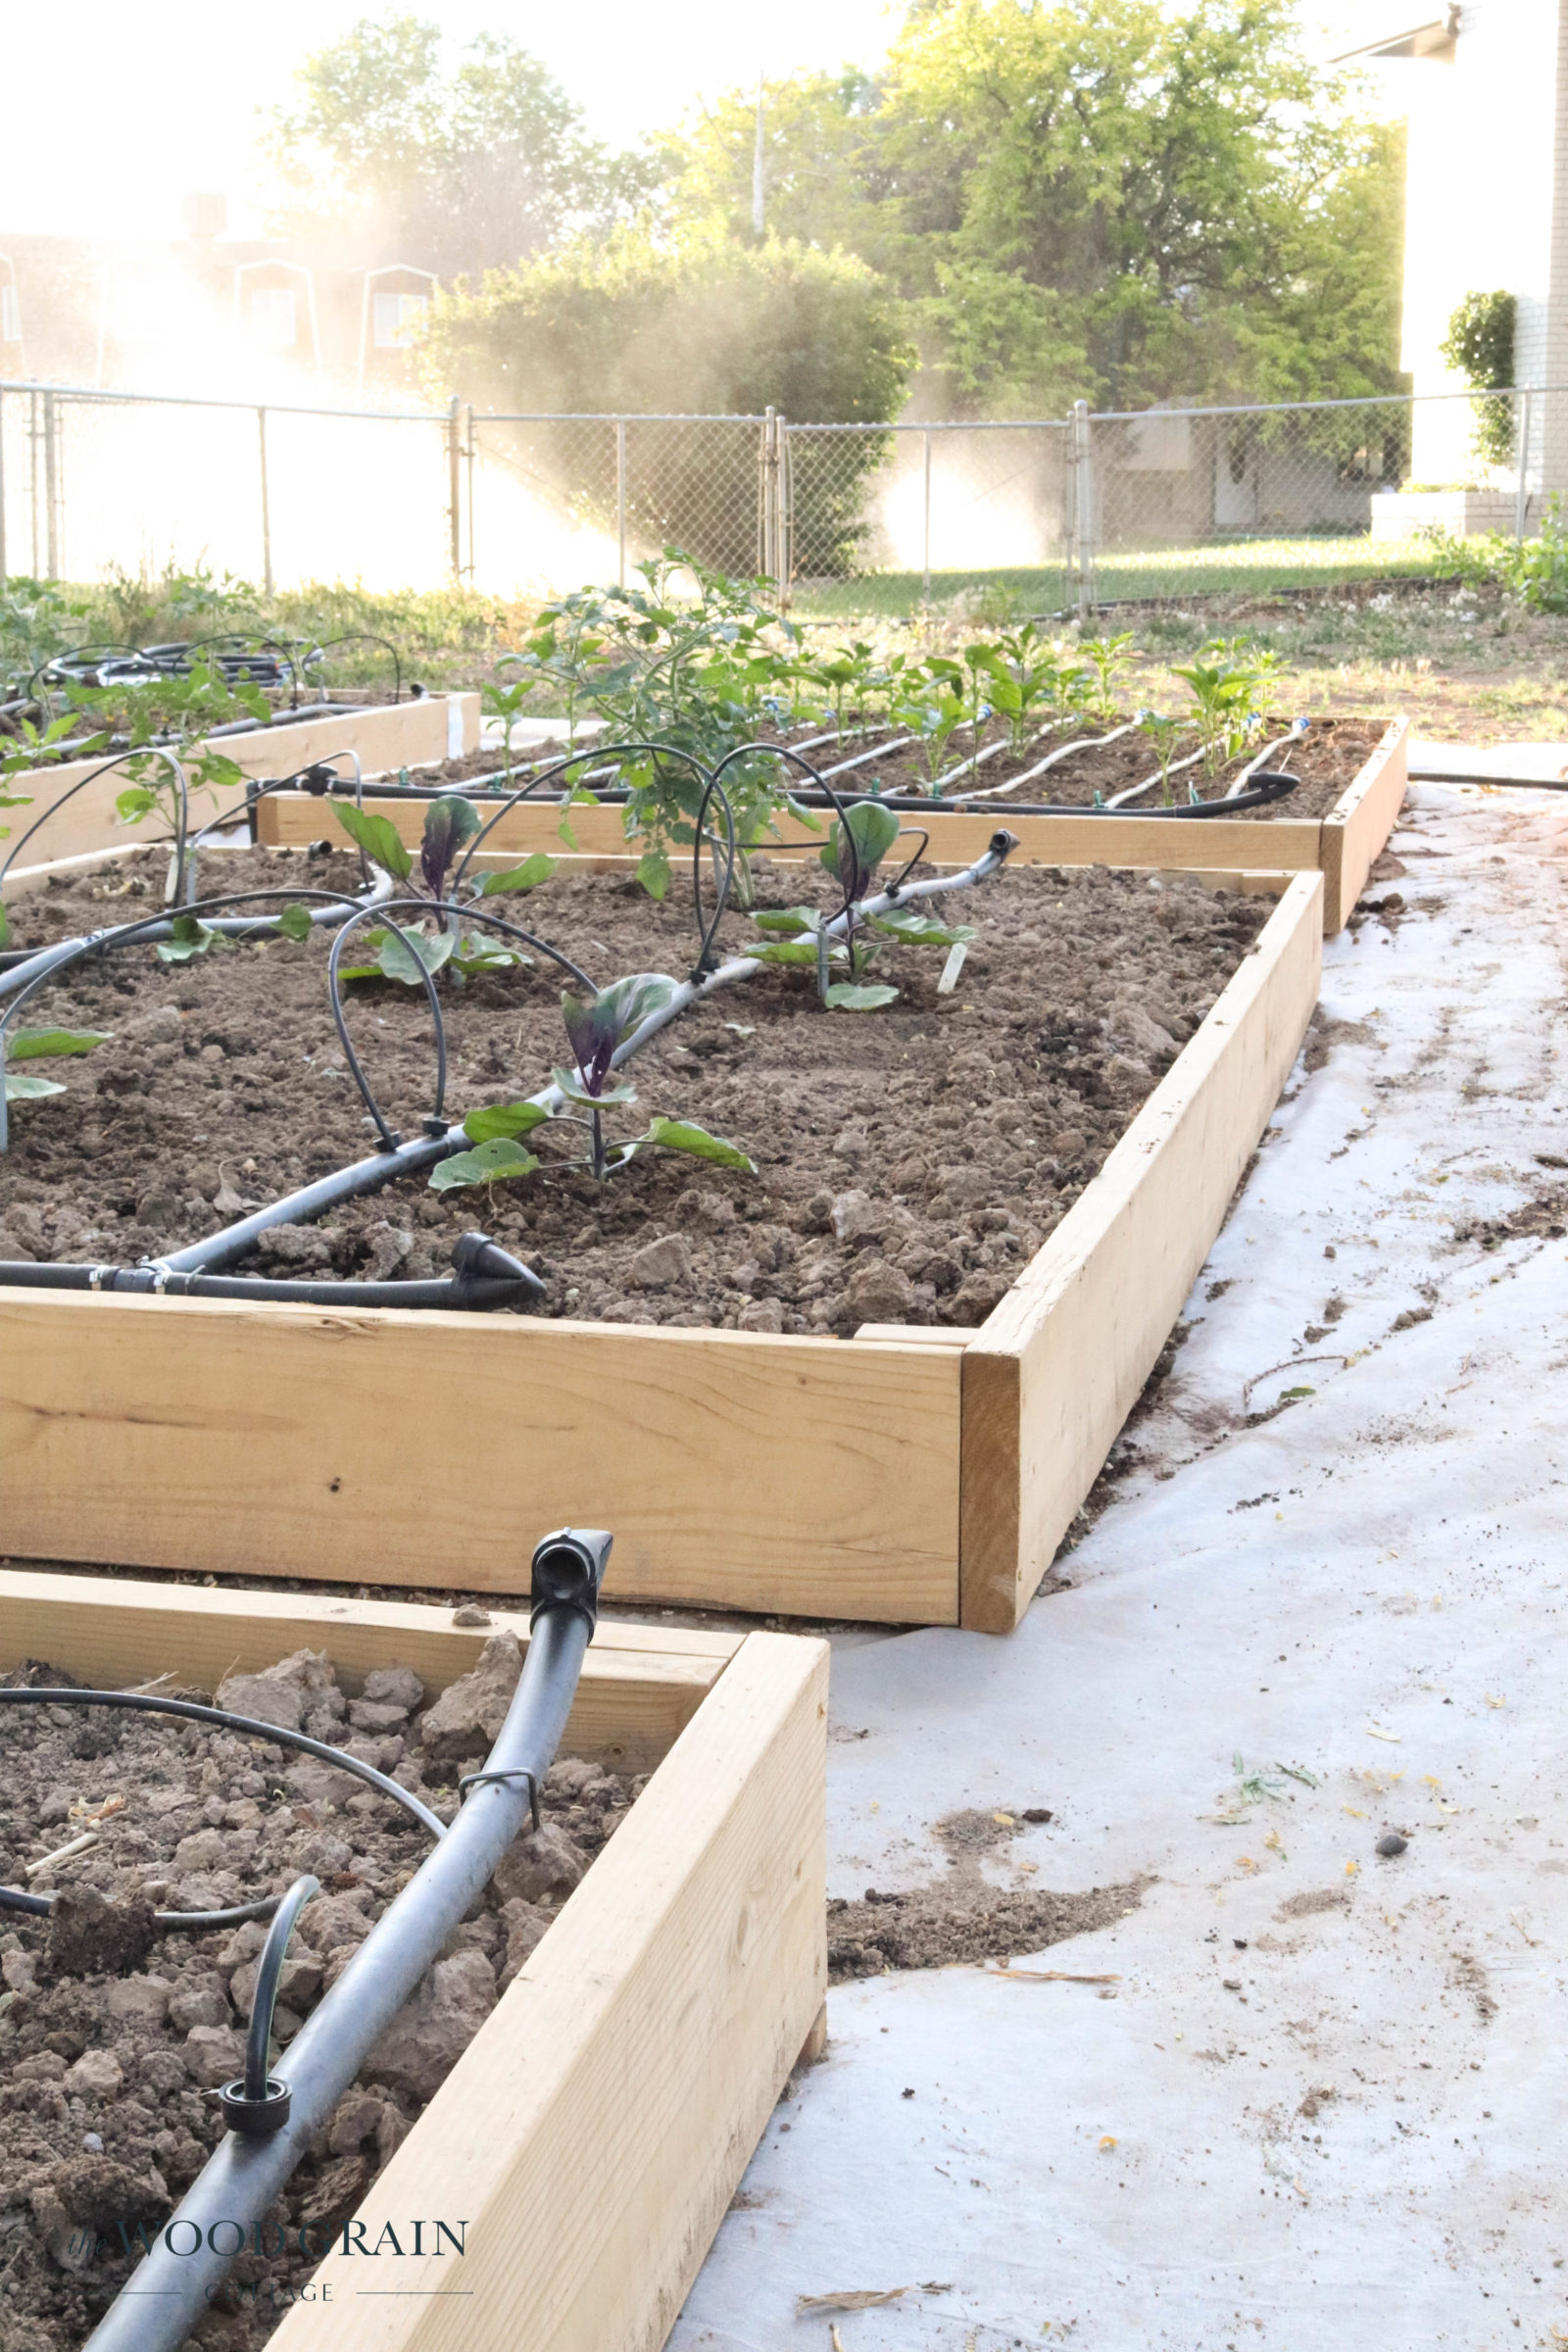
Step Five: Assemble & Fill The Boxes With Dirt
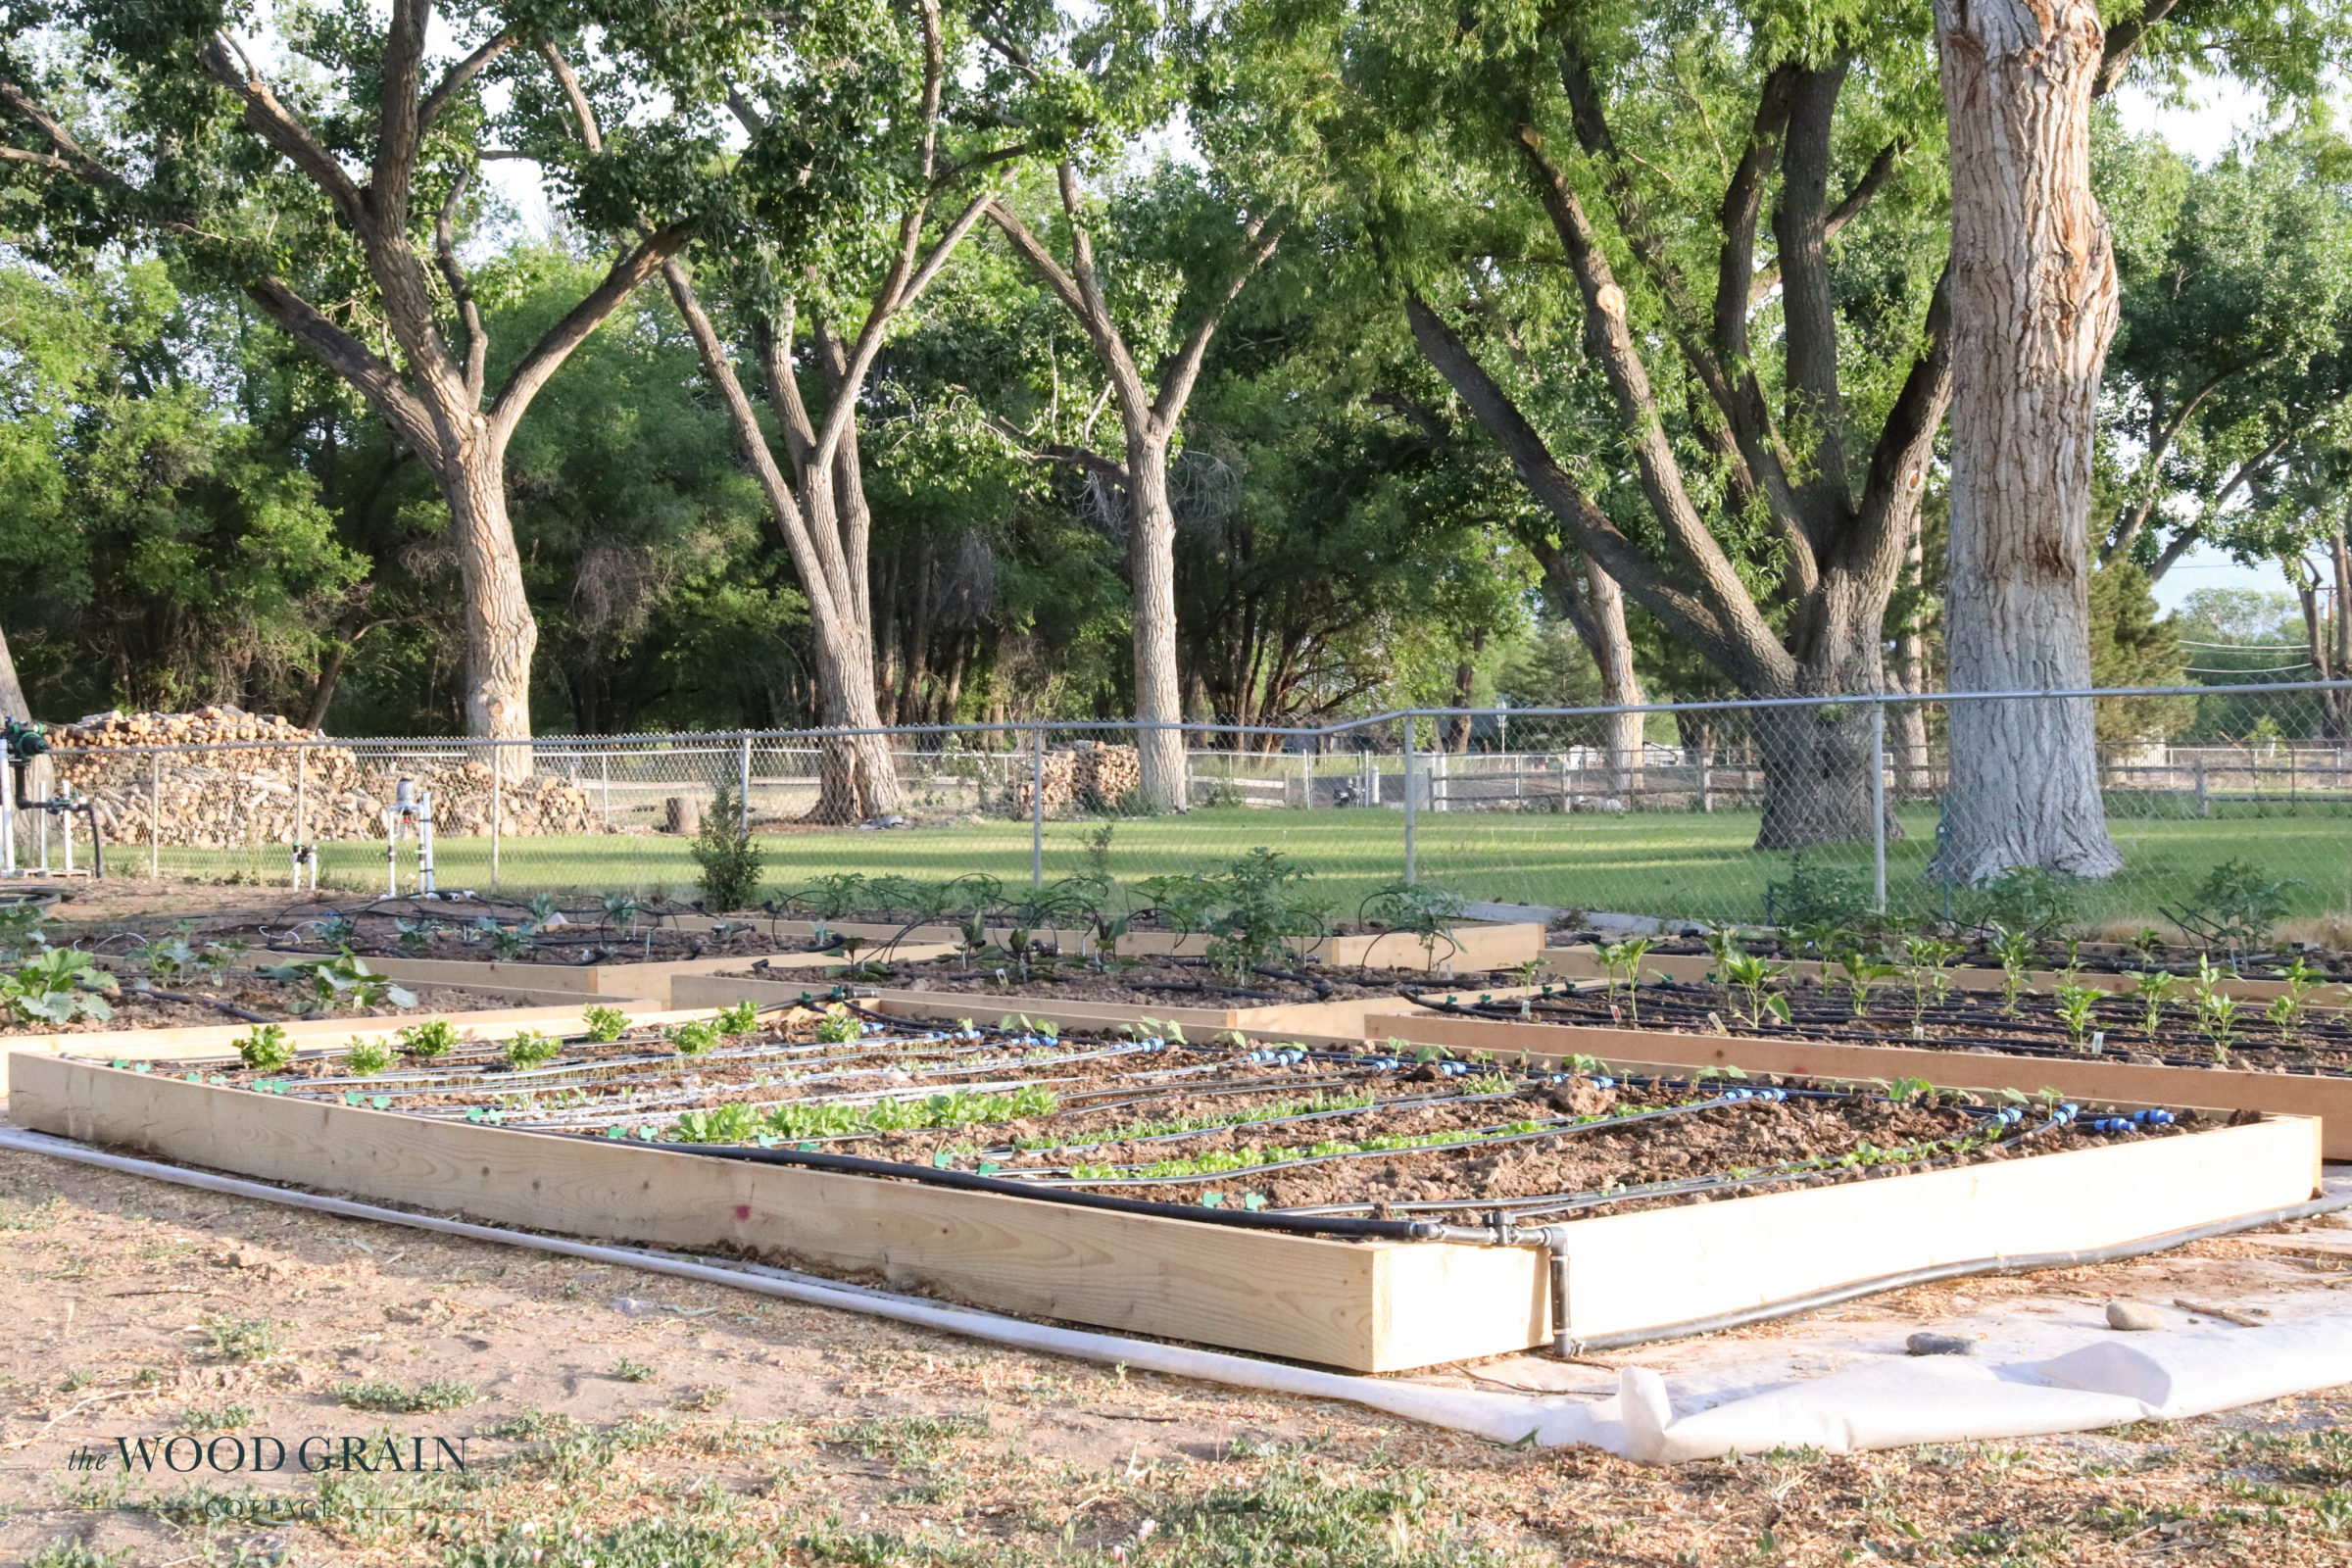
Because our garden area is large, 50′ long x 30′ wide overall, we knew the easiest way to fill the garden boxes with dirt, would be to assemble them and fill them with dirt as we went. Our boxes are large, and there was no way we wanted to use a wheelbarrow to fill each one. Instead, we used our skidsteer, which made the process so much easier and faster.
We placed each box where we wanted it, shimmed it with scrap pieces if needed, then added the dirt…

We followed this same pattern, working our way throughout the entire garden…

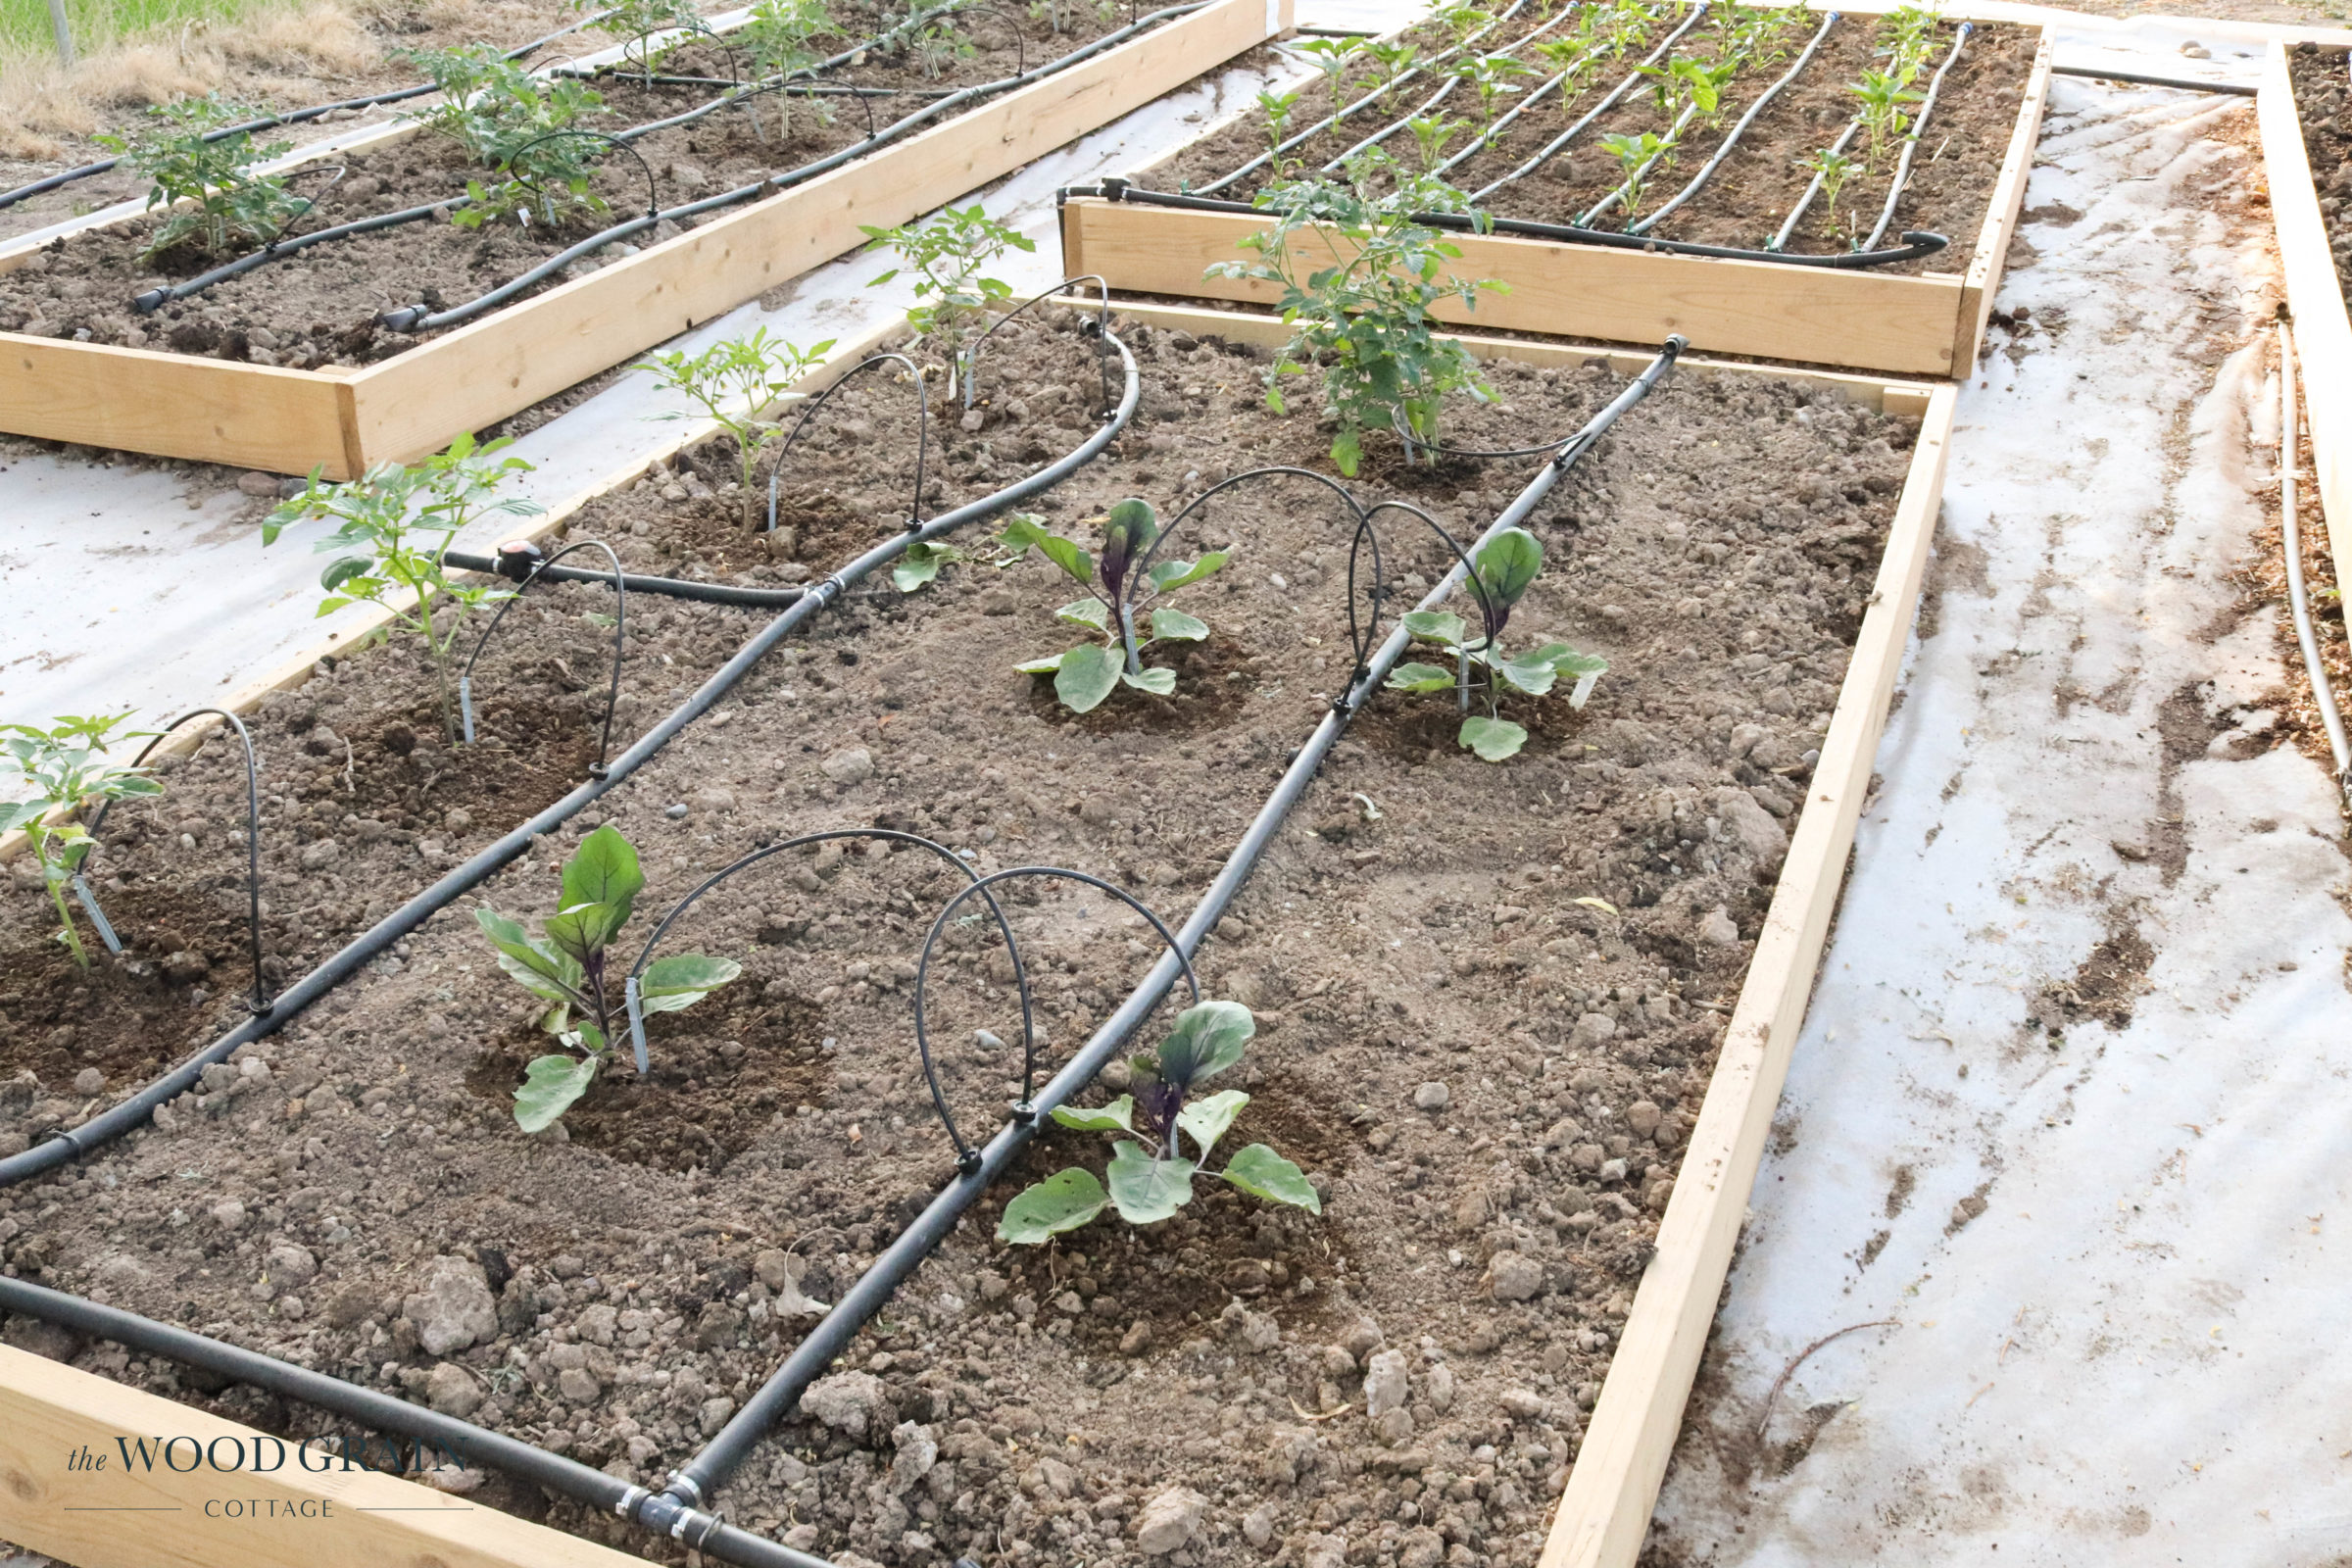
Step Six: Install Plants & Drip Irrigation
With the garden boxes built, and the dirt added, it was time to start planting our garden and installing the drip irrigation. Todd and his brother own and operate a company that sells irrigation supplies, so he installed our system. He did a fabulous job! These plants are happy, happy.
Step Seven: Install Pea Gravel or Mulch
We haven’t made it to this step yet, just because we’re waiting to have curbing installed around the garden area. Once we have the curbing installed this summer, we’ll be adding pea gravel around each garden box. That will drastically finish everything off and make for such a pretty area to our yard. I’ll be sure to update this post once we reach this stage!
Step Eight: Enjoy Your Garden
It’s been a month or so since we’ve installed these boxes and planted our garden and we are loving how everything turned out. I’ve had minimal weeding to do, our plants are thriving, the irrigation system works flawlessly and life is good! Well, other than a few bugs we’ve been fighting off…
It’s amazing to see how much our plants have grown since taking these pictures. I’ll definitely share an update once we get the pea gravel installed…


While these may not be the fanciest garden boxes you’ve ever seen, they were easy to build, cost effective to make and they’re working beautifully!

In case you’re wondering, here are the box sizes we built:
- 2- 4′ wide x 16′ long
- 3- 9′ wide x 10′ long
- 2- 9′ wide x 16′ long
And here’s a list of everything we’re growing in the garden this year:
- Tomato’s: Roma, Super Fantastic, Beefsteak, Cherry
- Peppers: Green Bell, Gypsy, Pimento Elite, Jalapeño, Anaheim
- Eggplant
- Tomatillo’s
- Broccoli, Cabbage & Cauliflower
- Cucumbers: Pickling, Lemon and Slicing
- Squash & Zucchini
- Celery
- Green Onions
- Beets
- Carrots
- Radishes
- Spinach
- Lettuce
- Green Beans
- We also have a separate dirt area where we’re growing several of the larger vining plants, like pumpkins, butternut and spaghetti squash and also okra.
Needless to say, we’ll be busy canning this summer! My mom also shares the garden with us since the raised beds make everything so much easier to manage and take care of. Plus, Todd really has this irrigation system down to a science, making that portion a total breeze as well.
Now, it’s time to tackle the rest of the yard this summer…

Psst… Looking for another style of raised garden box?
Take a look at these Raised DIY Garden Boxes:

Happy gardening! 🙂
Looking terrific! So like the irrigation you installed, what a time and plant saver!!!! You two are one heck of a great team!
Thank you! And yes, the irrigation system is a dream! Our plants are happy, happy! 🙂
That’s a great garden! Very big! I’m back to gardening this year and I love it. A great resource I have found is Old World Garden Farms. I get their emails and they have been most helpful.
Thank you for the tip! I’ll be sure to check out their website! 🙂
Looks wonderful! Here’s to many years of veggies! Might I make a suggestion? It’s going to take a ton of pea gravel to fill up that space and it’s very expensive. A friend of mine who runs a greenhouse uses grass clippings around his planters. He just dumps the clippings after he mows. It makes a nice weed free area and they are soft so when you crouch down to harvest or weed, you have a nice soft surface to sit on your knees. Pea gravel will hurt! It’s also free!! He has done this several years in a row and it works like a charm. Just a suggestion!
Thank you for the suggestion! We are in the process of planning the rest of the landscaping for the back yard so we’ll see what we come up with! 🙂
Very nice…