Designing And Buying Our Ikea Kitchen
I’m late in sharing this post, but better late than never, right? Designing and buying our Ikea kitchen was a new experience for us. We’d never went through the process of designing, creating and purchasing Ikea cabinets, and while it was definitely an experience, we’re still glad we did it.
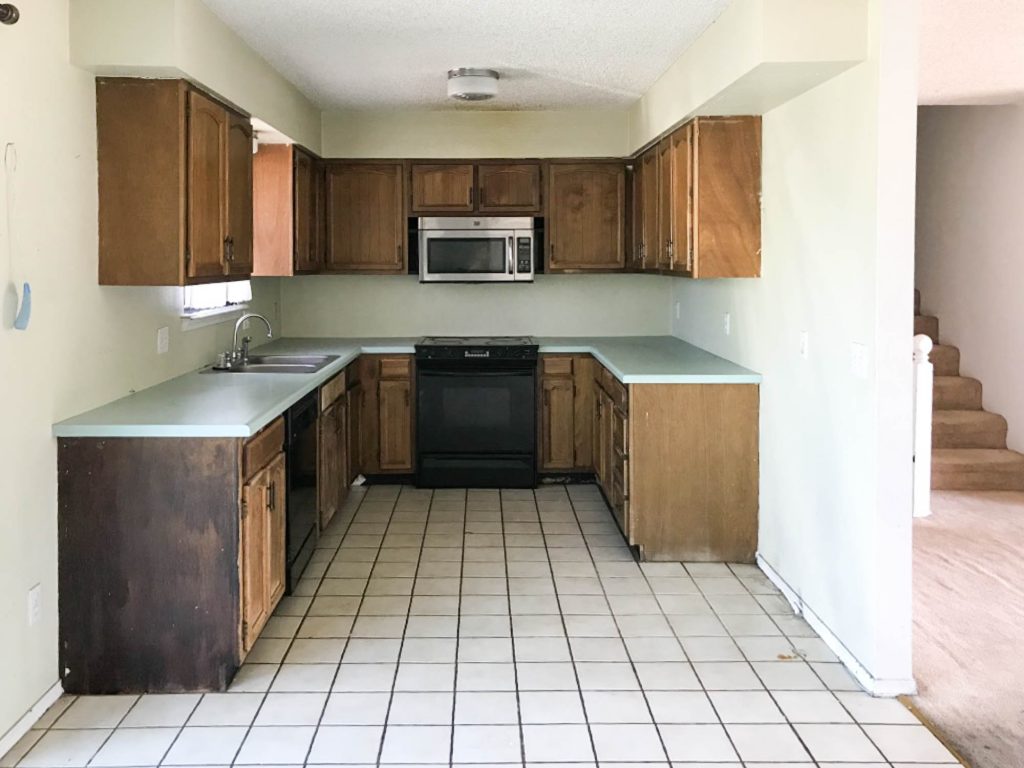
When we first bought our Willow House, basically everything needed gutted. There really wasn’t anything worth saving, and the kitchen cabinets were in really, really rough shape. We knew, just like with the rest of the house, the kitchen would be getting new everything. And because we needed to remodel the house on a budget, we’d be leaning on Ikea for the cabinets because of their solid construction and budget friendly price point.
Remember this gem?
The Design Process:
We started by going through the kitchen and taking measurements of pretty much everything. Where the sink would go, where the window was, where our fridge would be, any wall receptacles, counter outlets, etc., etc. The more detailed we were with it, the more accuracy we’d have.
Then, I spent a few months designing the kitchen with Ikea’s design software, and playing around with different kitchen cabinet options and layouts. Ikea offers a great free design software, you can find it here, and it’s helpful, but there’s definitely a few quirks with it too.
One great thing about Ikea, is you can basically design anything you want inside the actual cabinet. Want some hidden drawers? No problem. Need an organizer? Add it in. The amount you can customize is limited only by you! If this is something you want to do yourself, I’d recommend giving yourself some time to play with all of these options and really look at the functionality of your space.
Now, let’s get real. We have a small kitchen, and there really wasn’t any way to make it bigger unless we wanted to add on. That definitely wasn’t in the cards, so we worked with the existing space, making it function as best it could.
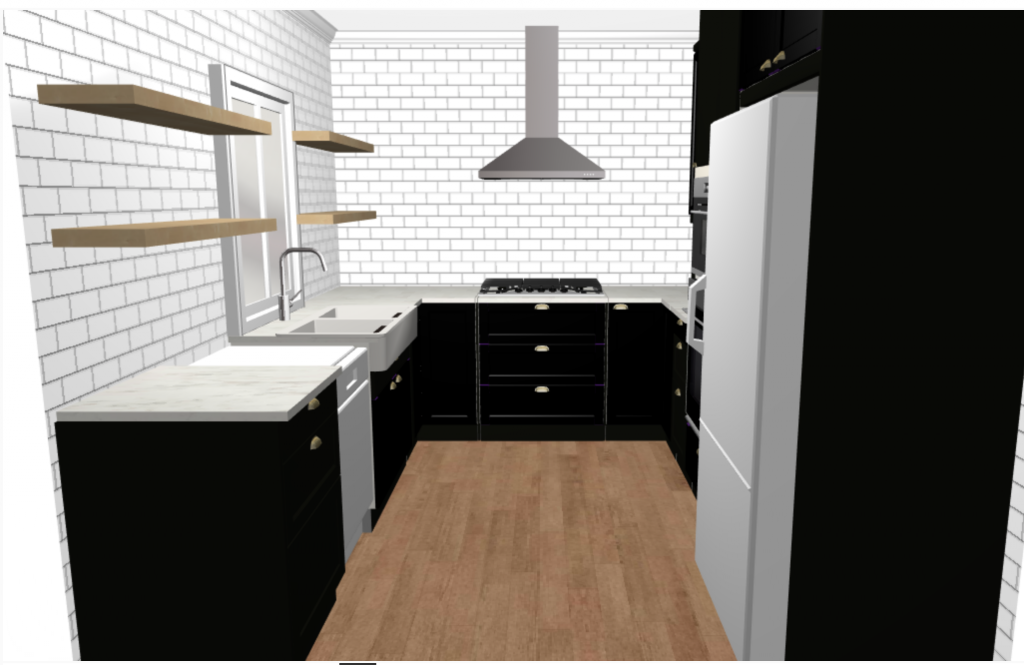
Because we wanted to do black cabinets, I knew the kitchen could feel small and overwhelming really fast if we did cabinets on every wall. With that thought in mind, we decided to add in some open shelving for everyday storage like plates, glasses, mugs and serving pieces. We use those things every day, and while the thought of our every day items getting dirty and dusty did cross my mind, I knew we’d use them regularly enough to keep them clean.
Here’s a computerized version of our kitchen, although it’s definitely different than what the finished product will look like.
There were also a few things I really enjoyed from my last kitchen that I wanted to transfer over into this kitchen. I loved my deep storage drawers underneath the cooktop, and I really loved having a built in wall oven. Because of that, we chose to do a gas cooktop rather than a traditional range/ oven. I also didn’t want a microwave above the cooktop, so we opted for a wall oven/ microwave combo. It elevates the kitchen making things feel a little more custom.
Buying Our Ikea Cabinets:
Once we had the drawings just right, and even though we weren’t quite ready to install our cabinets, we headed to our closest Ikea (4 hours away) and sat down in the design center. Ikea was having their kitchen sale, and we wanted to take advantage of the savings.
We made sure we were there right as they opened so we’d have time to look at their example kitchens, and we took one more look at door styles, colors, etc., before making our final decision to go with Semi-Handmade for the actual cabinet fronts. Meaning, we’d really only be buying the cabinet frame and shell from Ikea.
We had their kitchen specialists look over our design, and even with as thorough as we were with the design and cabinet specifications, they still found a few things we’d missed and needed to tweak. We spent a few hours going over everything again, and then it was time to finally buy our kitchen (and laundry room)! We knew there’d be a few hours until they had all the cabinets ready for us to load up and take home, so we placed the order, then went and browsed the rest of the store.
A few hours later, they had our order together and we went through the items they’d pulled, making sure we had all of the items on our kitchen list. Since we live 4 hours away, we didn’t want to get home and realize they’d missed an item on our list. It took us a little while, but we got through all the boxes, and luckily, they had every item accounted for.
Then, we made the trek down the elevators with several very full carts. This is always my least favorite part. The carts have a mind of their own sometimes and it’s hard to squeeze them into an elevator full of people.
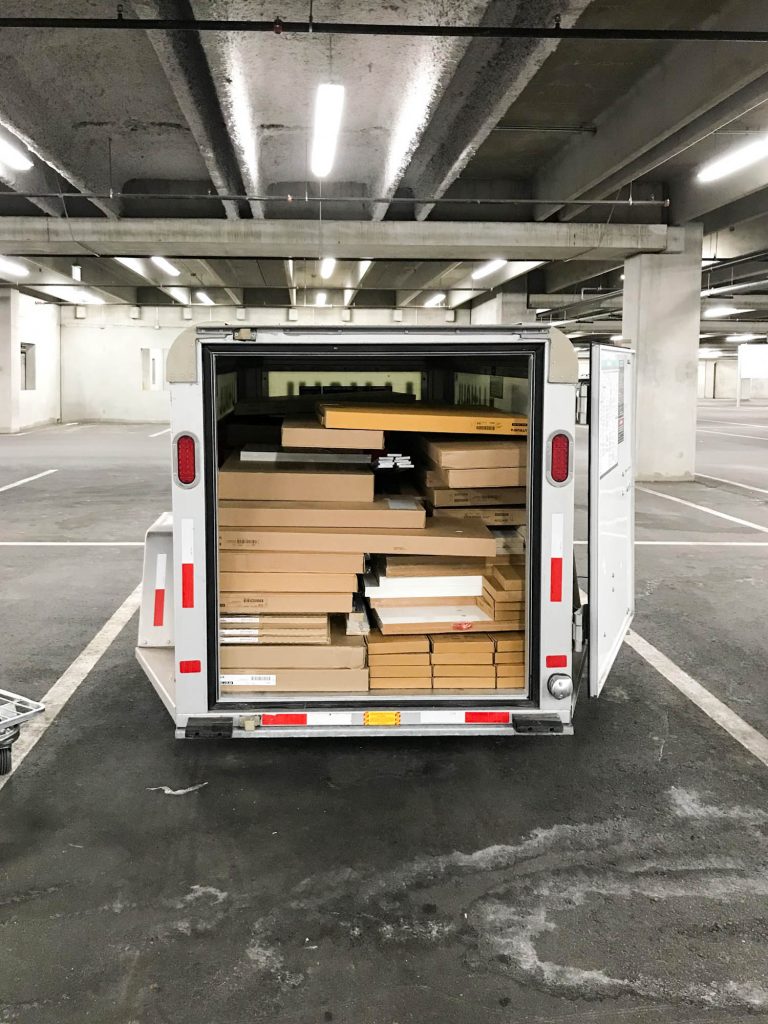
We knew we wouldn’t be able to get everything loaded in the back of the truck, so we rented a u-haul trailer and had it ready to go. Good thing too, because we packed this little trailer full of cabinet boxes!
If you live a good distance away from Ikea, I’d highly recommend getting an enclosed trailer for transport. That way, if you hit any rain or bad weather, you won’t be stressing about your cabinets or furniture getting ruined. We know from experience, unfortunately.
Once we got home, we unloaded the boxes into our garage, and waited to start installing until we finished up the necessary things we needed to have done to start installing the cabinet frames. I’ll be sharing our process on the cabinet install too (once we’re finished)… and how we painted our cabinet doors!


Can’t wait for the next installment!