Breakfast Nook Update: The Bench
Helloooo! As you may have noticed, I took a few days off for Thanksgiving. 🙂
Since this is the first year in our new house, we hosted Thanksgiving. It was lovely. Needless to say, I was busy, busy, busy! From cooking, to cleaning, to crafting, I was doing it all!
A big part of the “rush” would be because we just finished building our breakfast nook bench! Eeekkk!
It’s turning out wonderful and I can’t wait to show you the end and “final” result.
However, this post if all about building the bench.
Here’s how it went down, and what we used to build it:
Please note: Some of the links in this post are affiliate links, which allows us to make a small commission from your purchase, but your purchase price stays the same. Thank you for helping support our blog! We greatly appreciate it!
Supplies:
- 2″ x 4″ x 10′ boards, cut to size
- 3/4″ 4′ x 8′ sheet MDF, cut to size
- 3″ primed MDF strips
- 3″ torx screws
- Table Saw, this is similar to ours
- Miter Saw, this is similar to ours
- Screw Driver/ Drill
- Drill Bit
- 18 Gauge Nail Gun
- 1 1/4″ 18 Gauge Brad Nails
- Air Compressor
- Square
- Tape Measure
- Wall Putty
- Caulking
- Caulking Gun
- Painters Tape
- Foam Roller
- Paint Brush
- White Paint, I used Super White by Benjamin Moore in satin
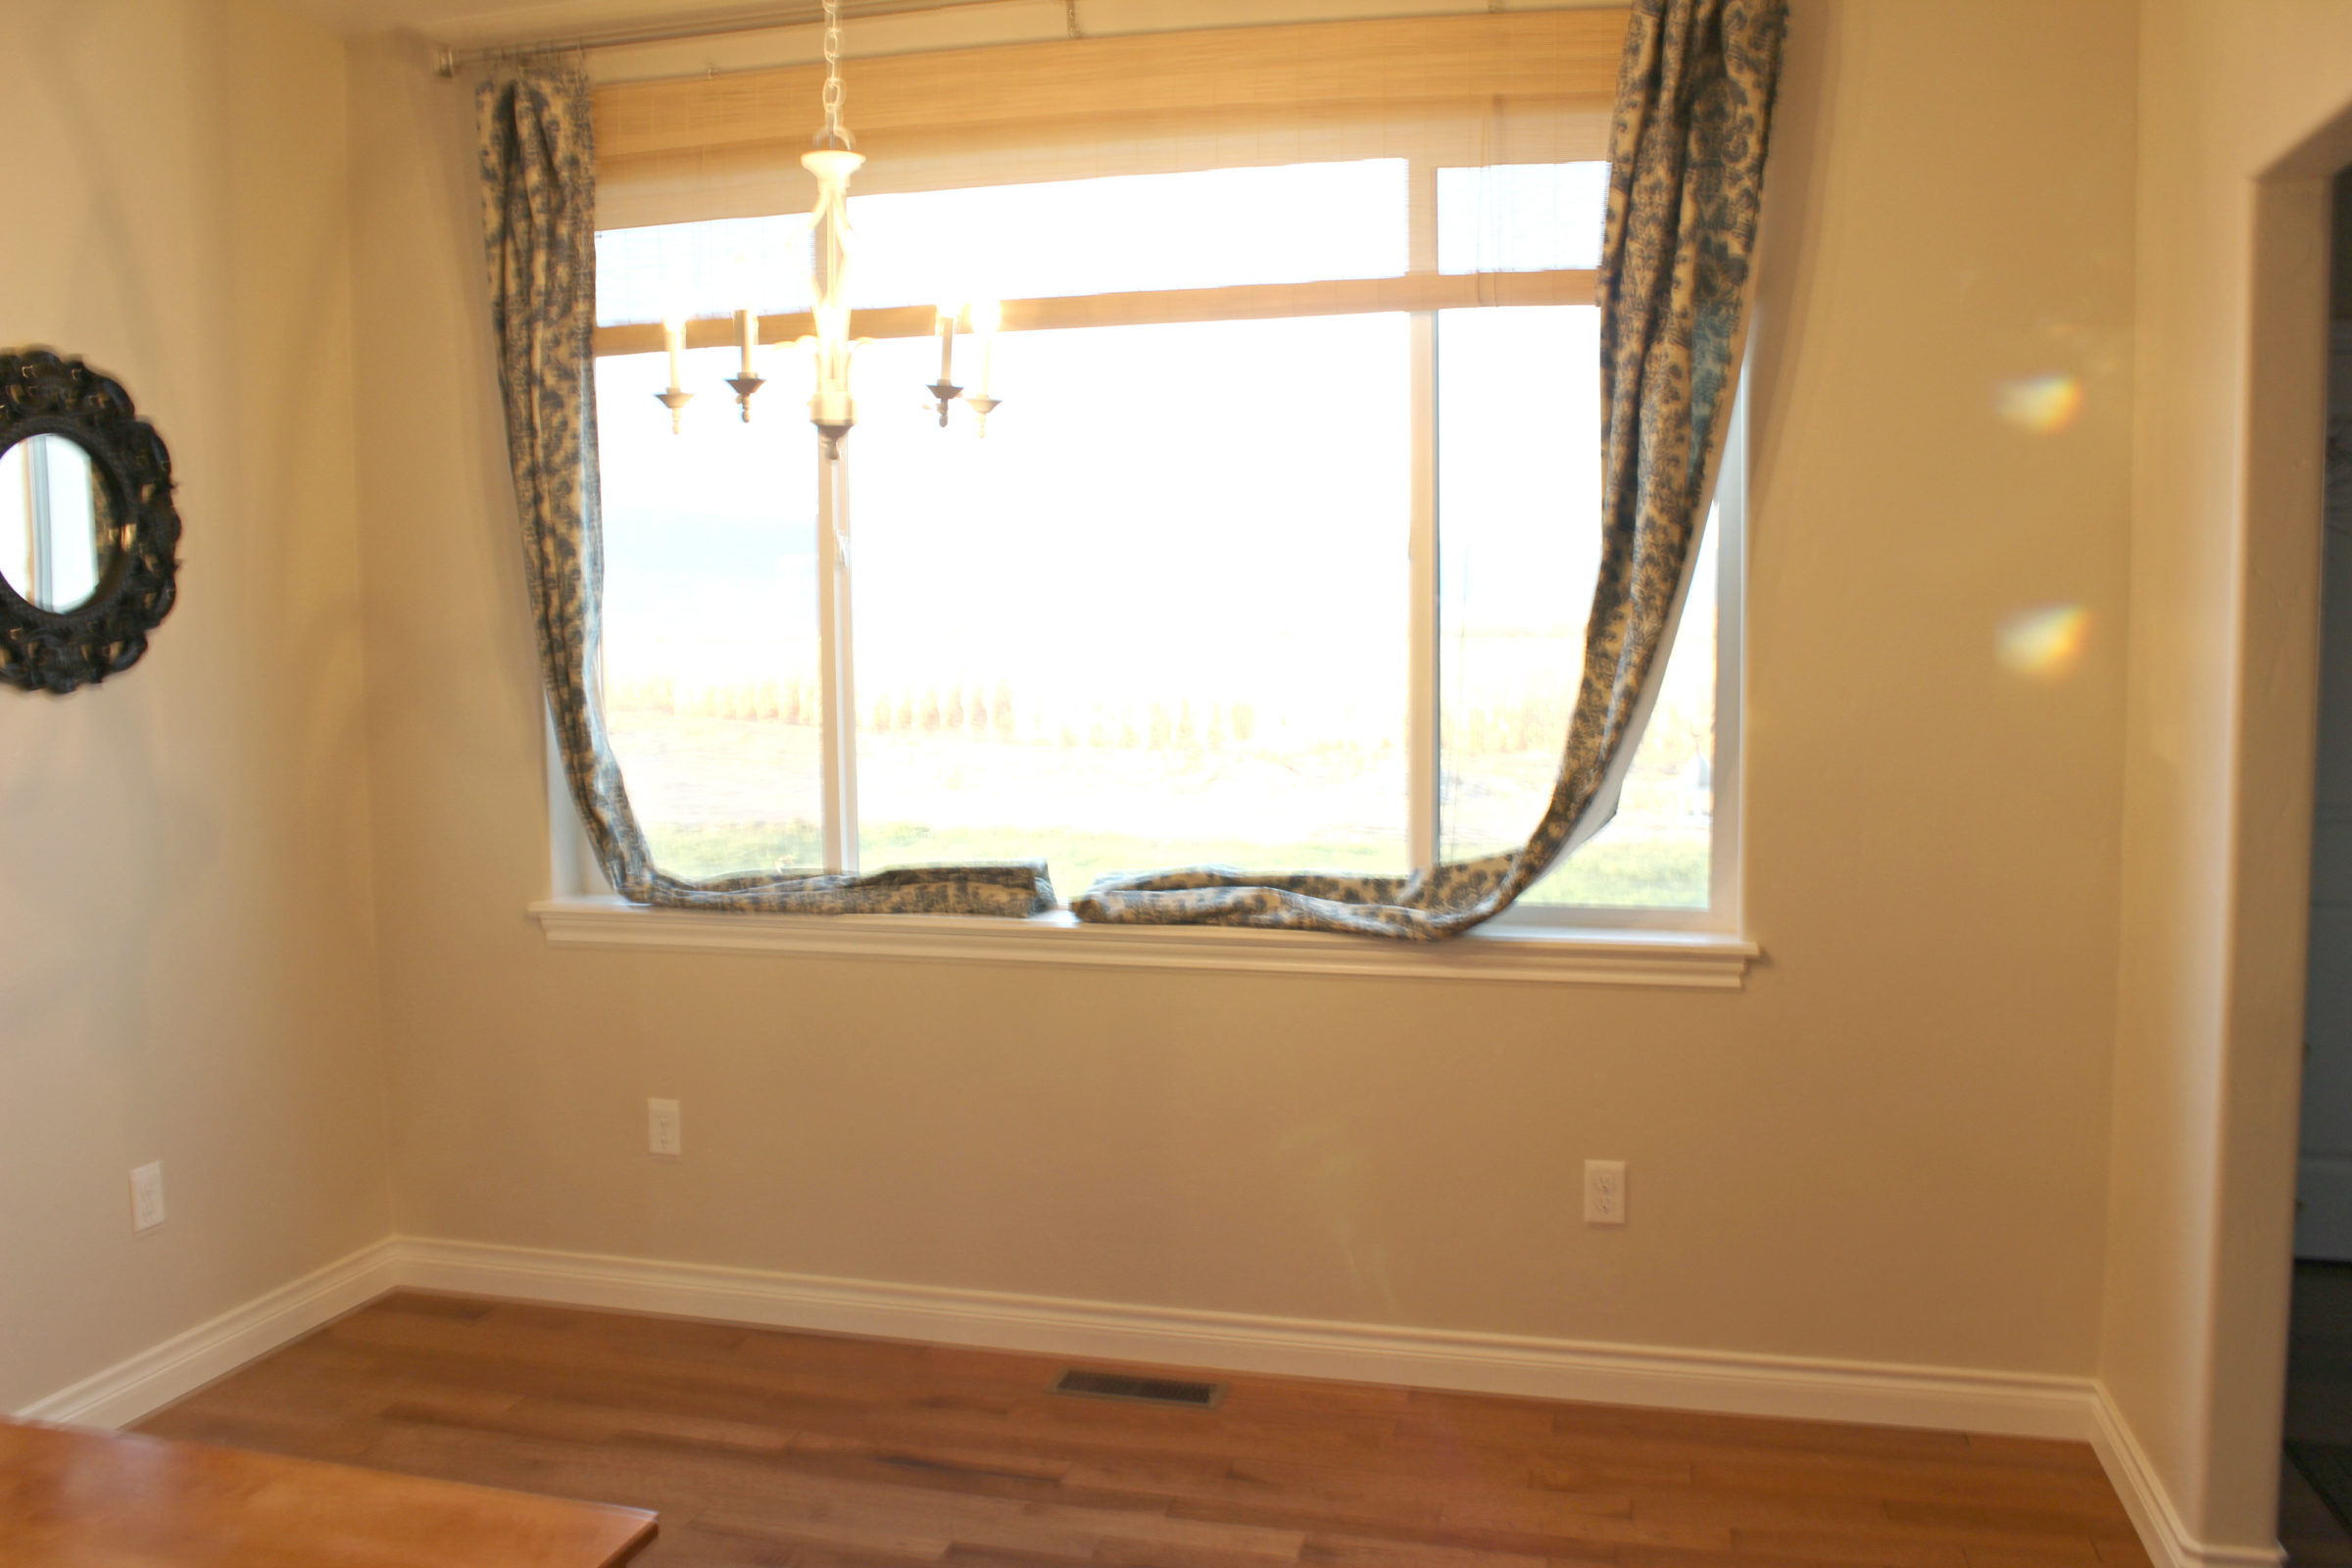
First off, we cleared out the room and pulled up the existing baseboard.
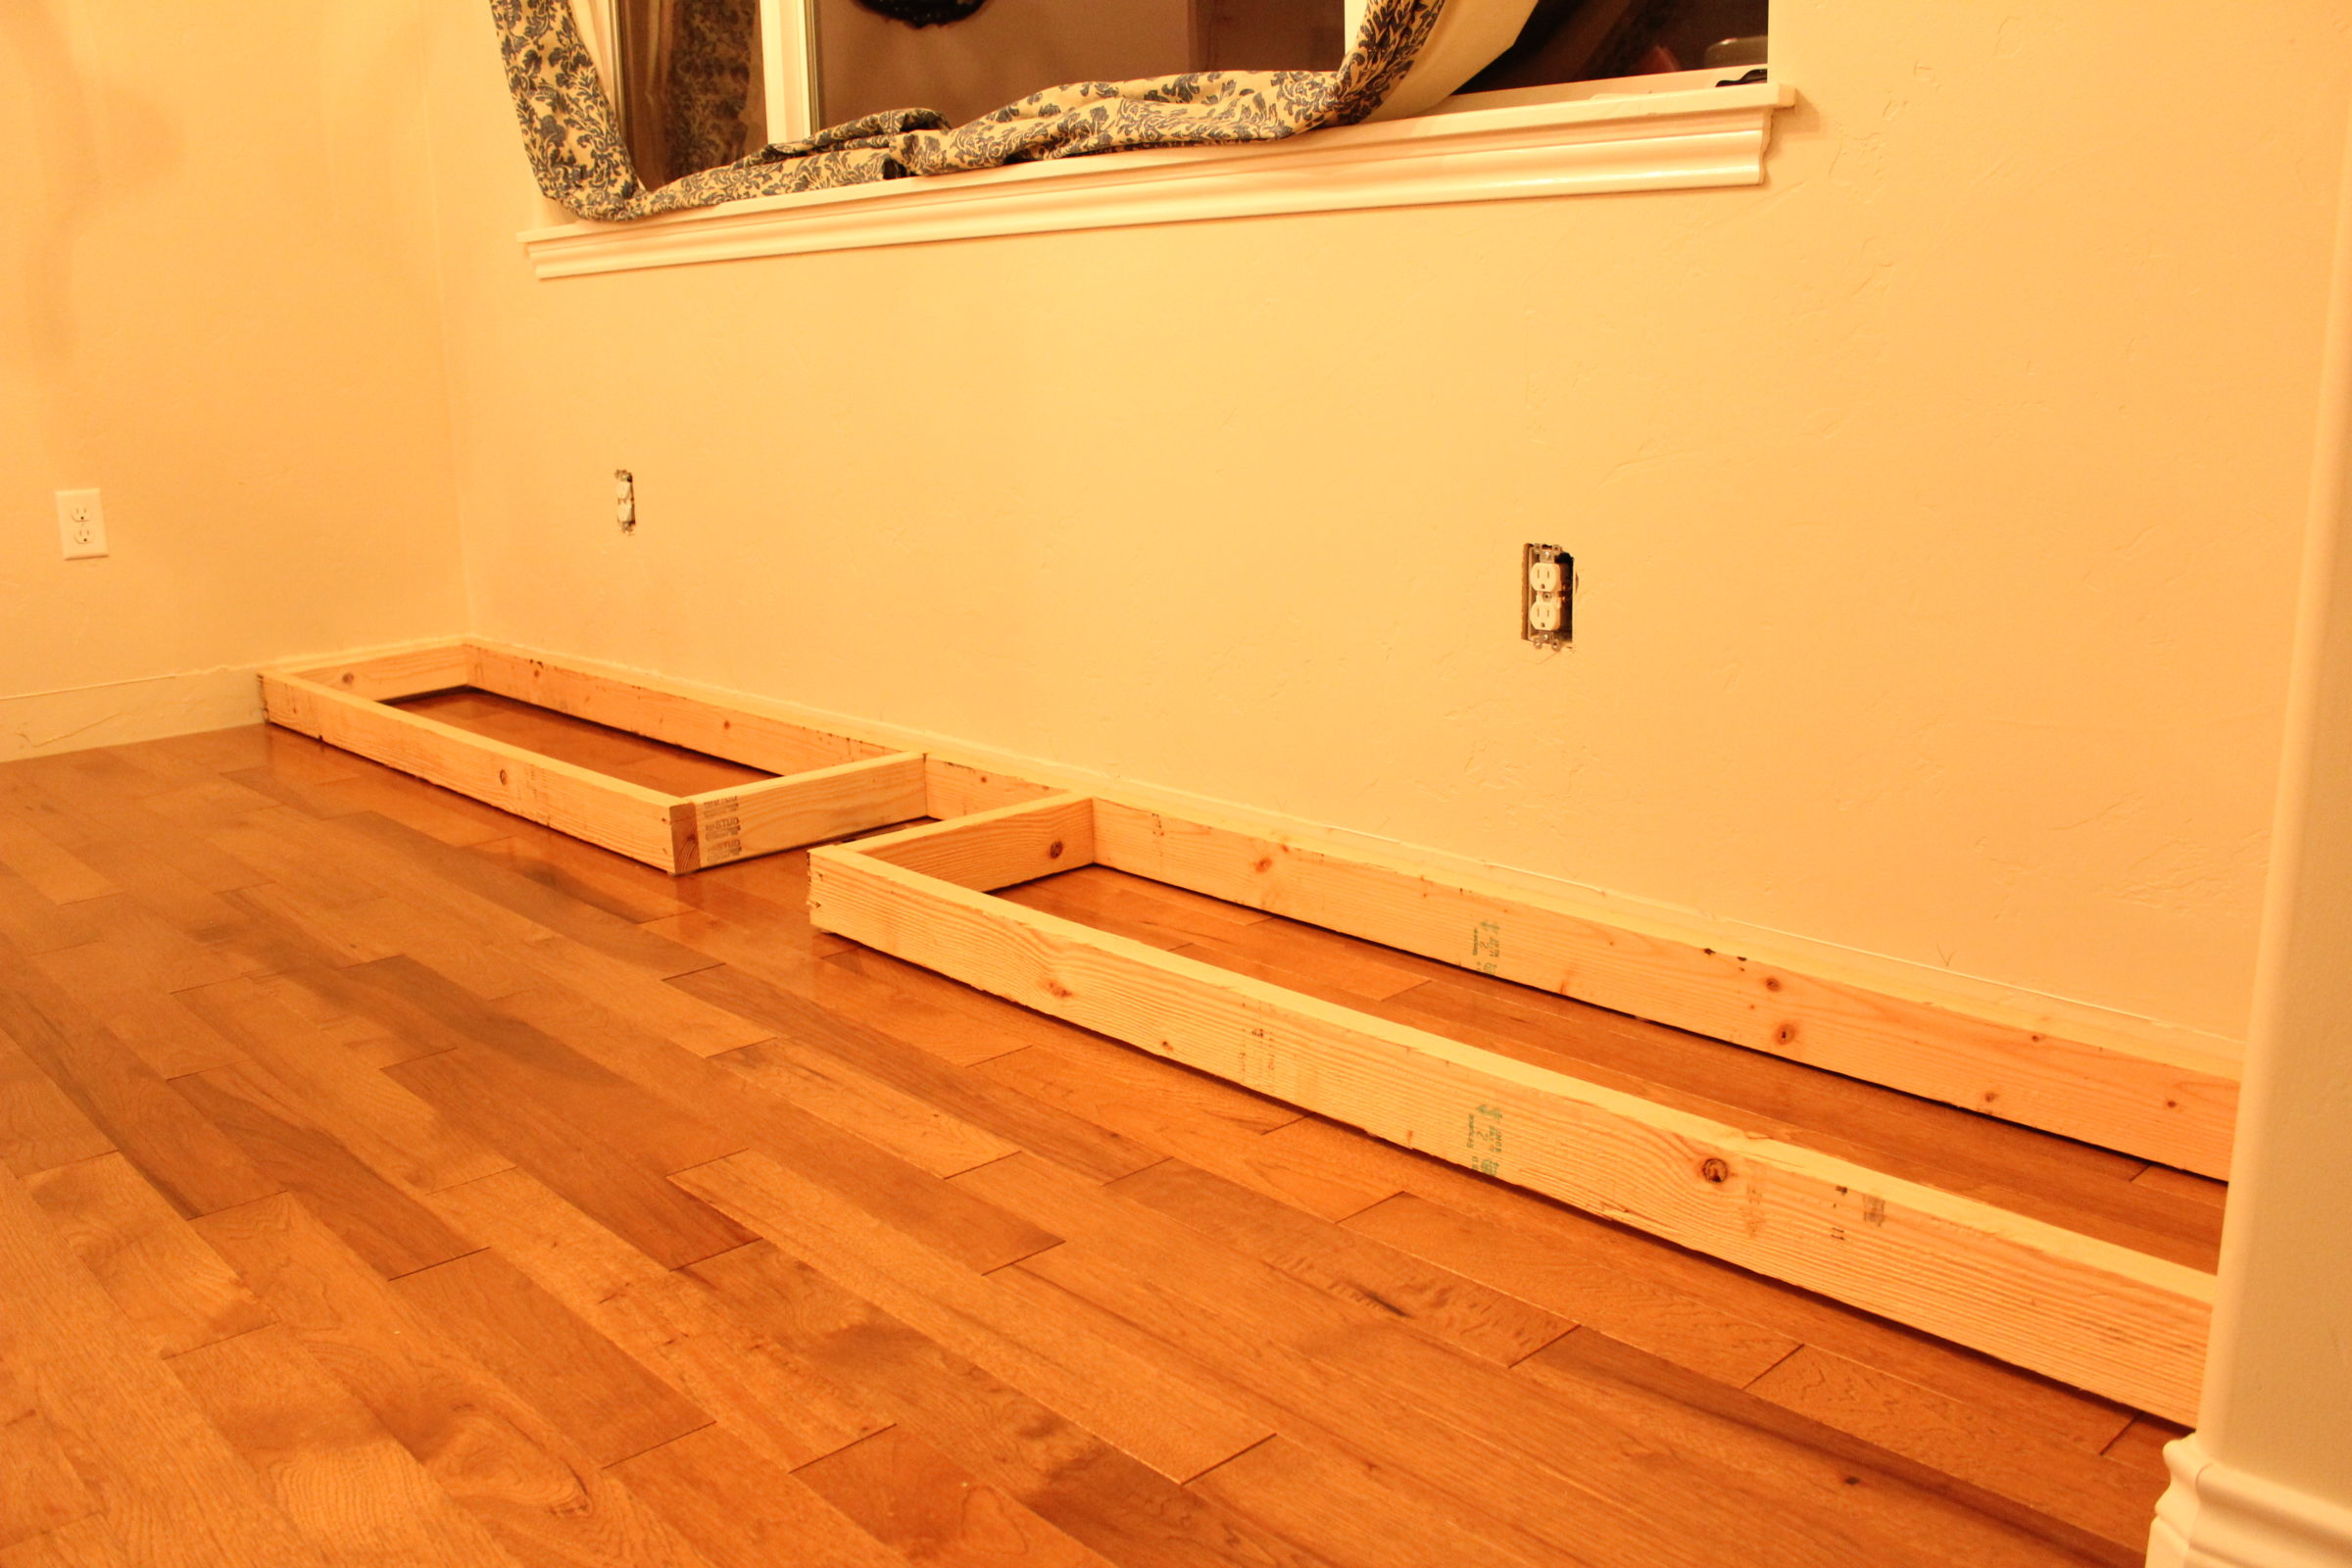
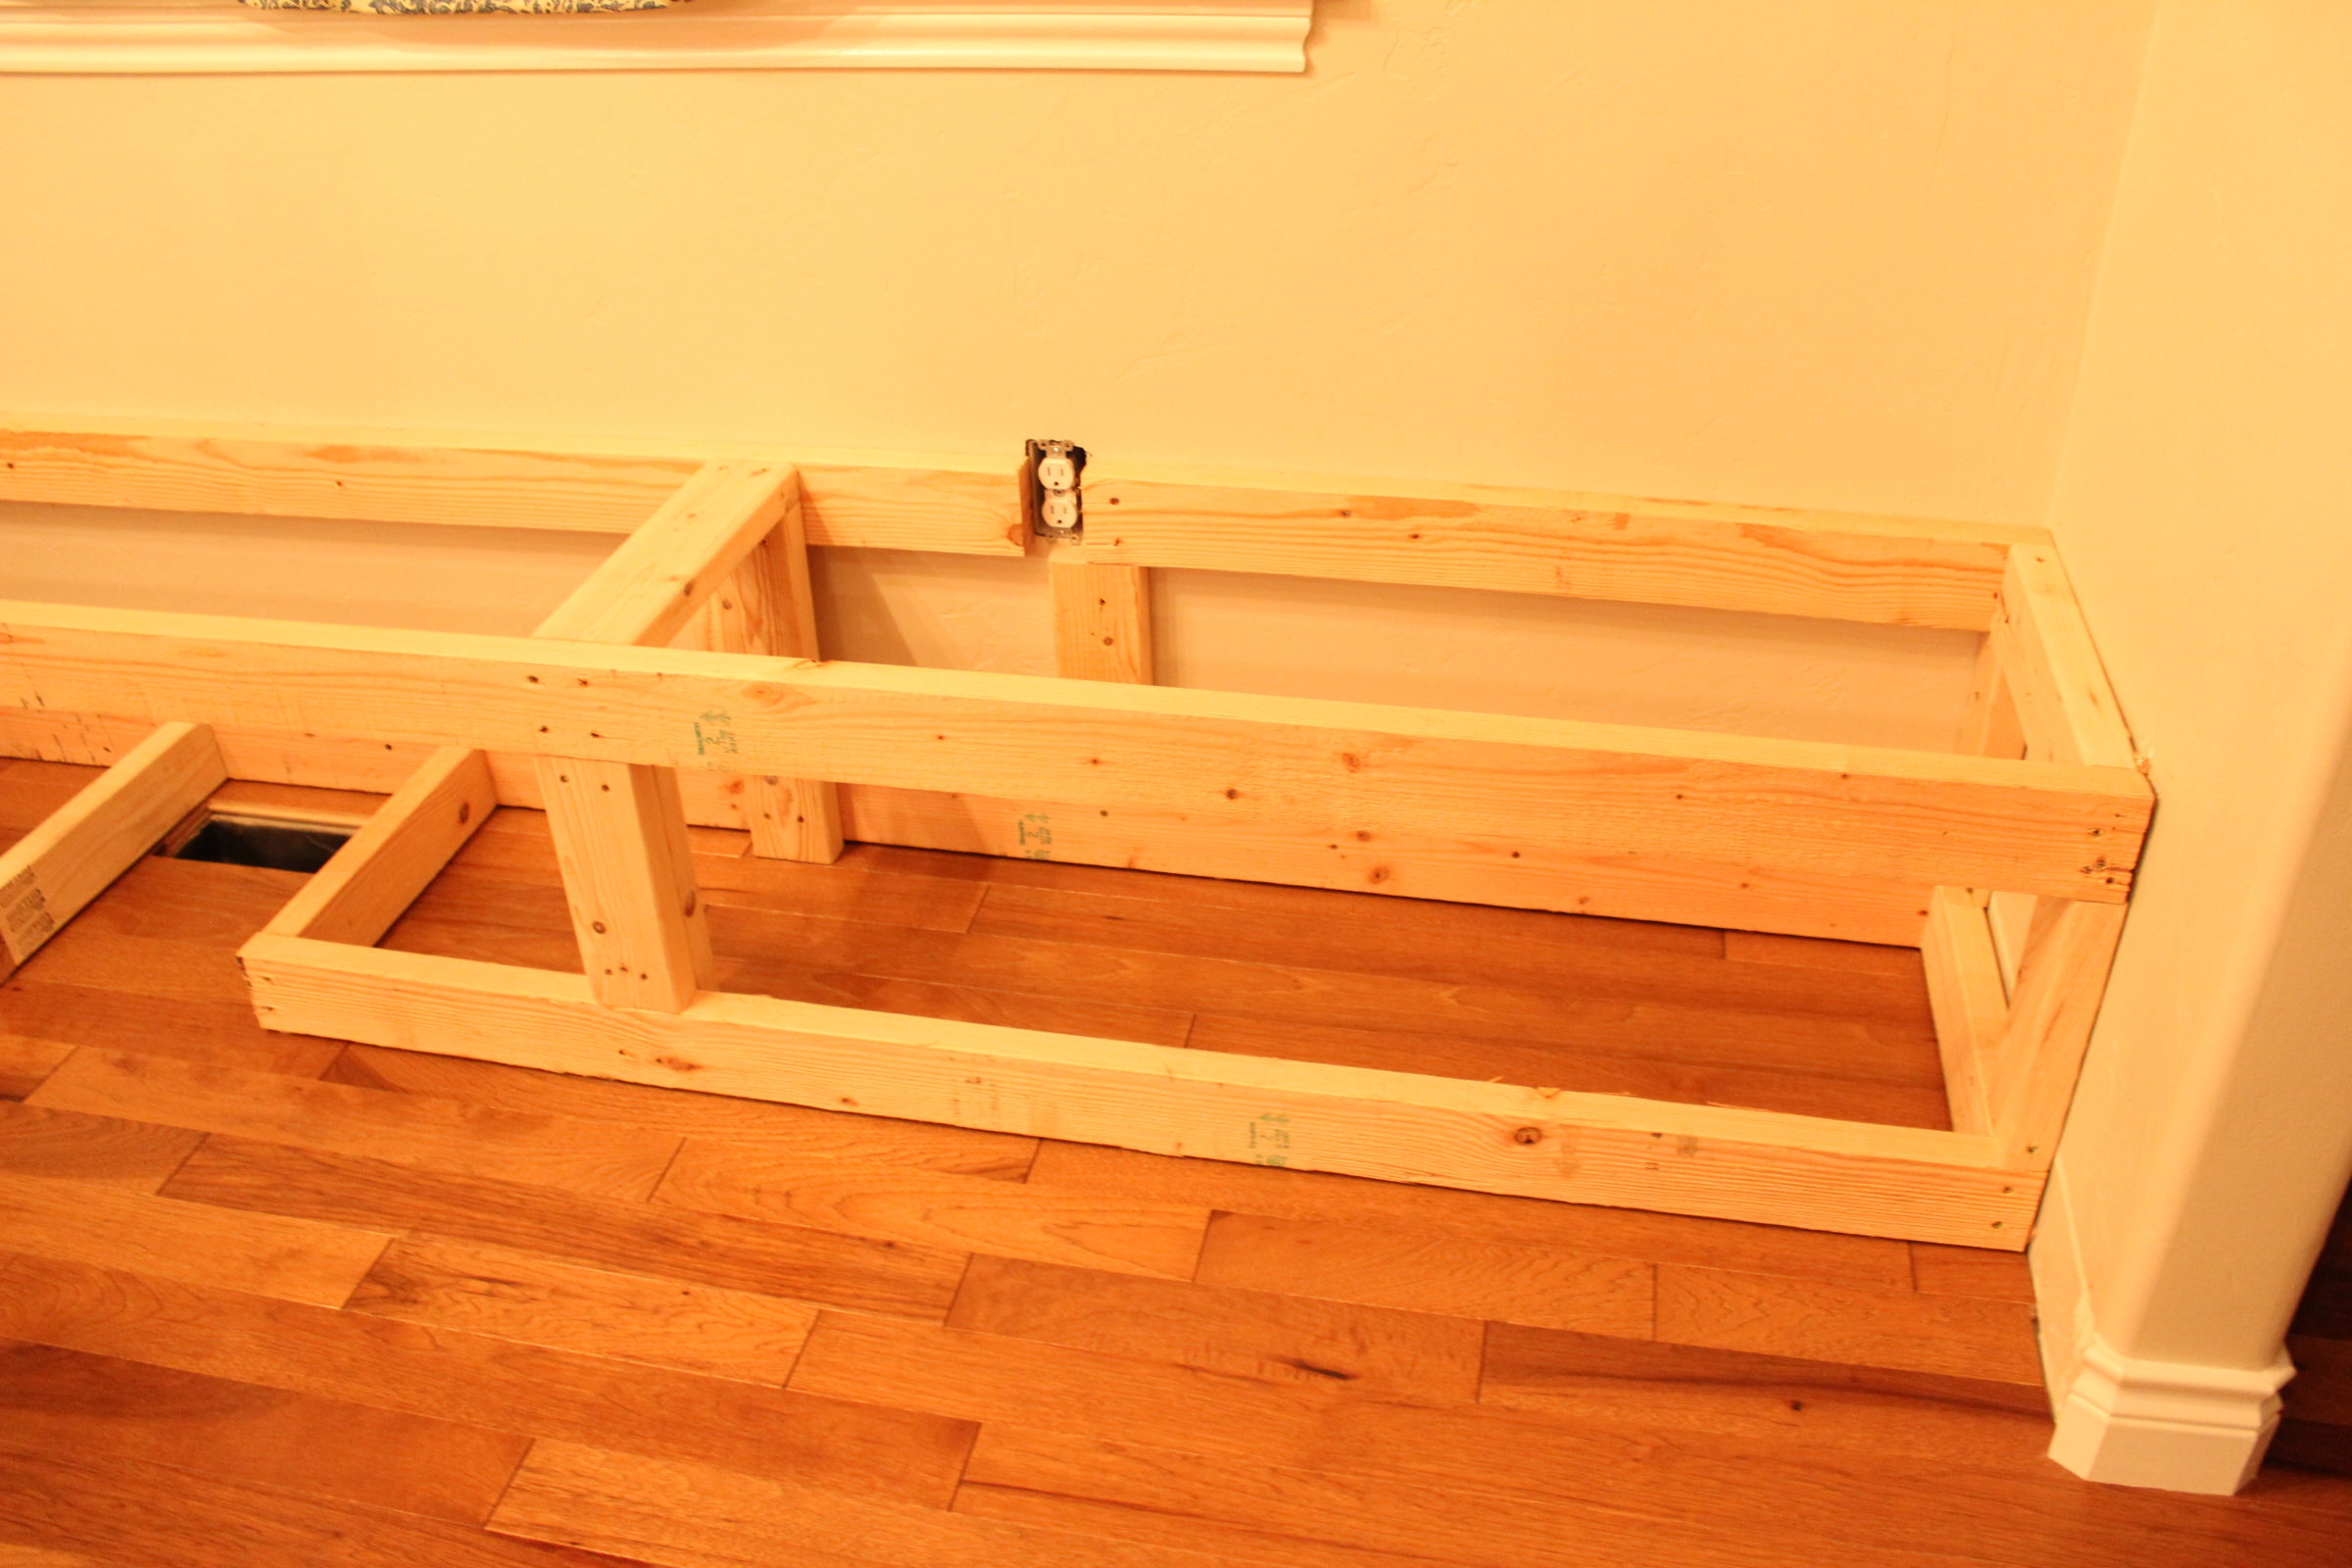
Next, we measured, and double measured, the length of the wall and my Mr. built the bottom frame of the bench.
(P.S.- I totally apologize for all my “orange” pictures… we were mostly doing this project at night and I’m still trying to figure out all the settings on my new camera. Of course, I figured out how to take better pictures at night AFTER this project was over… SORRY!)
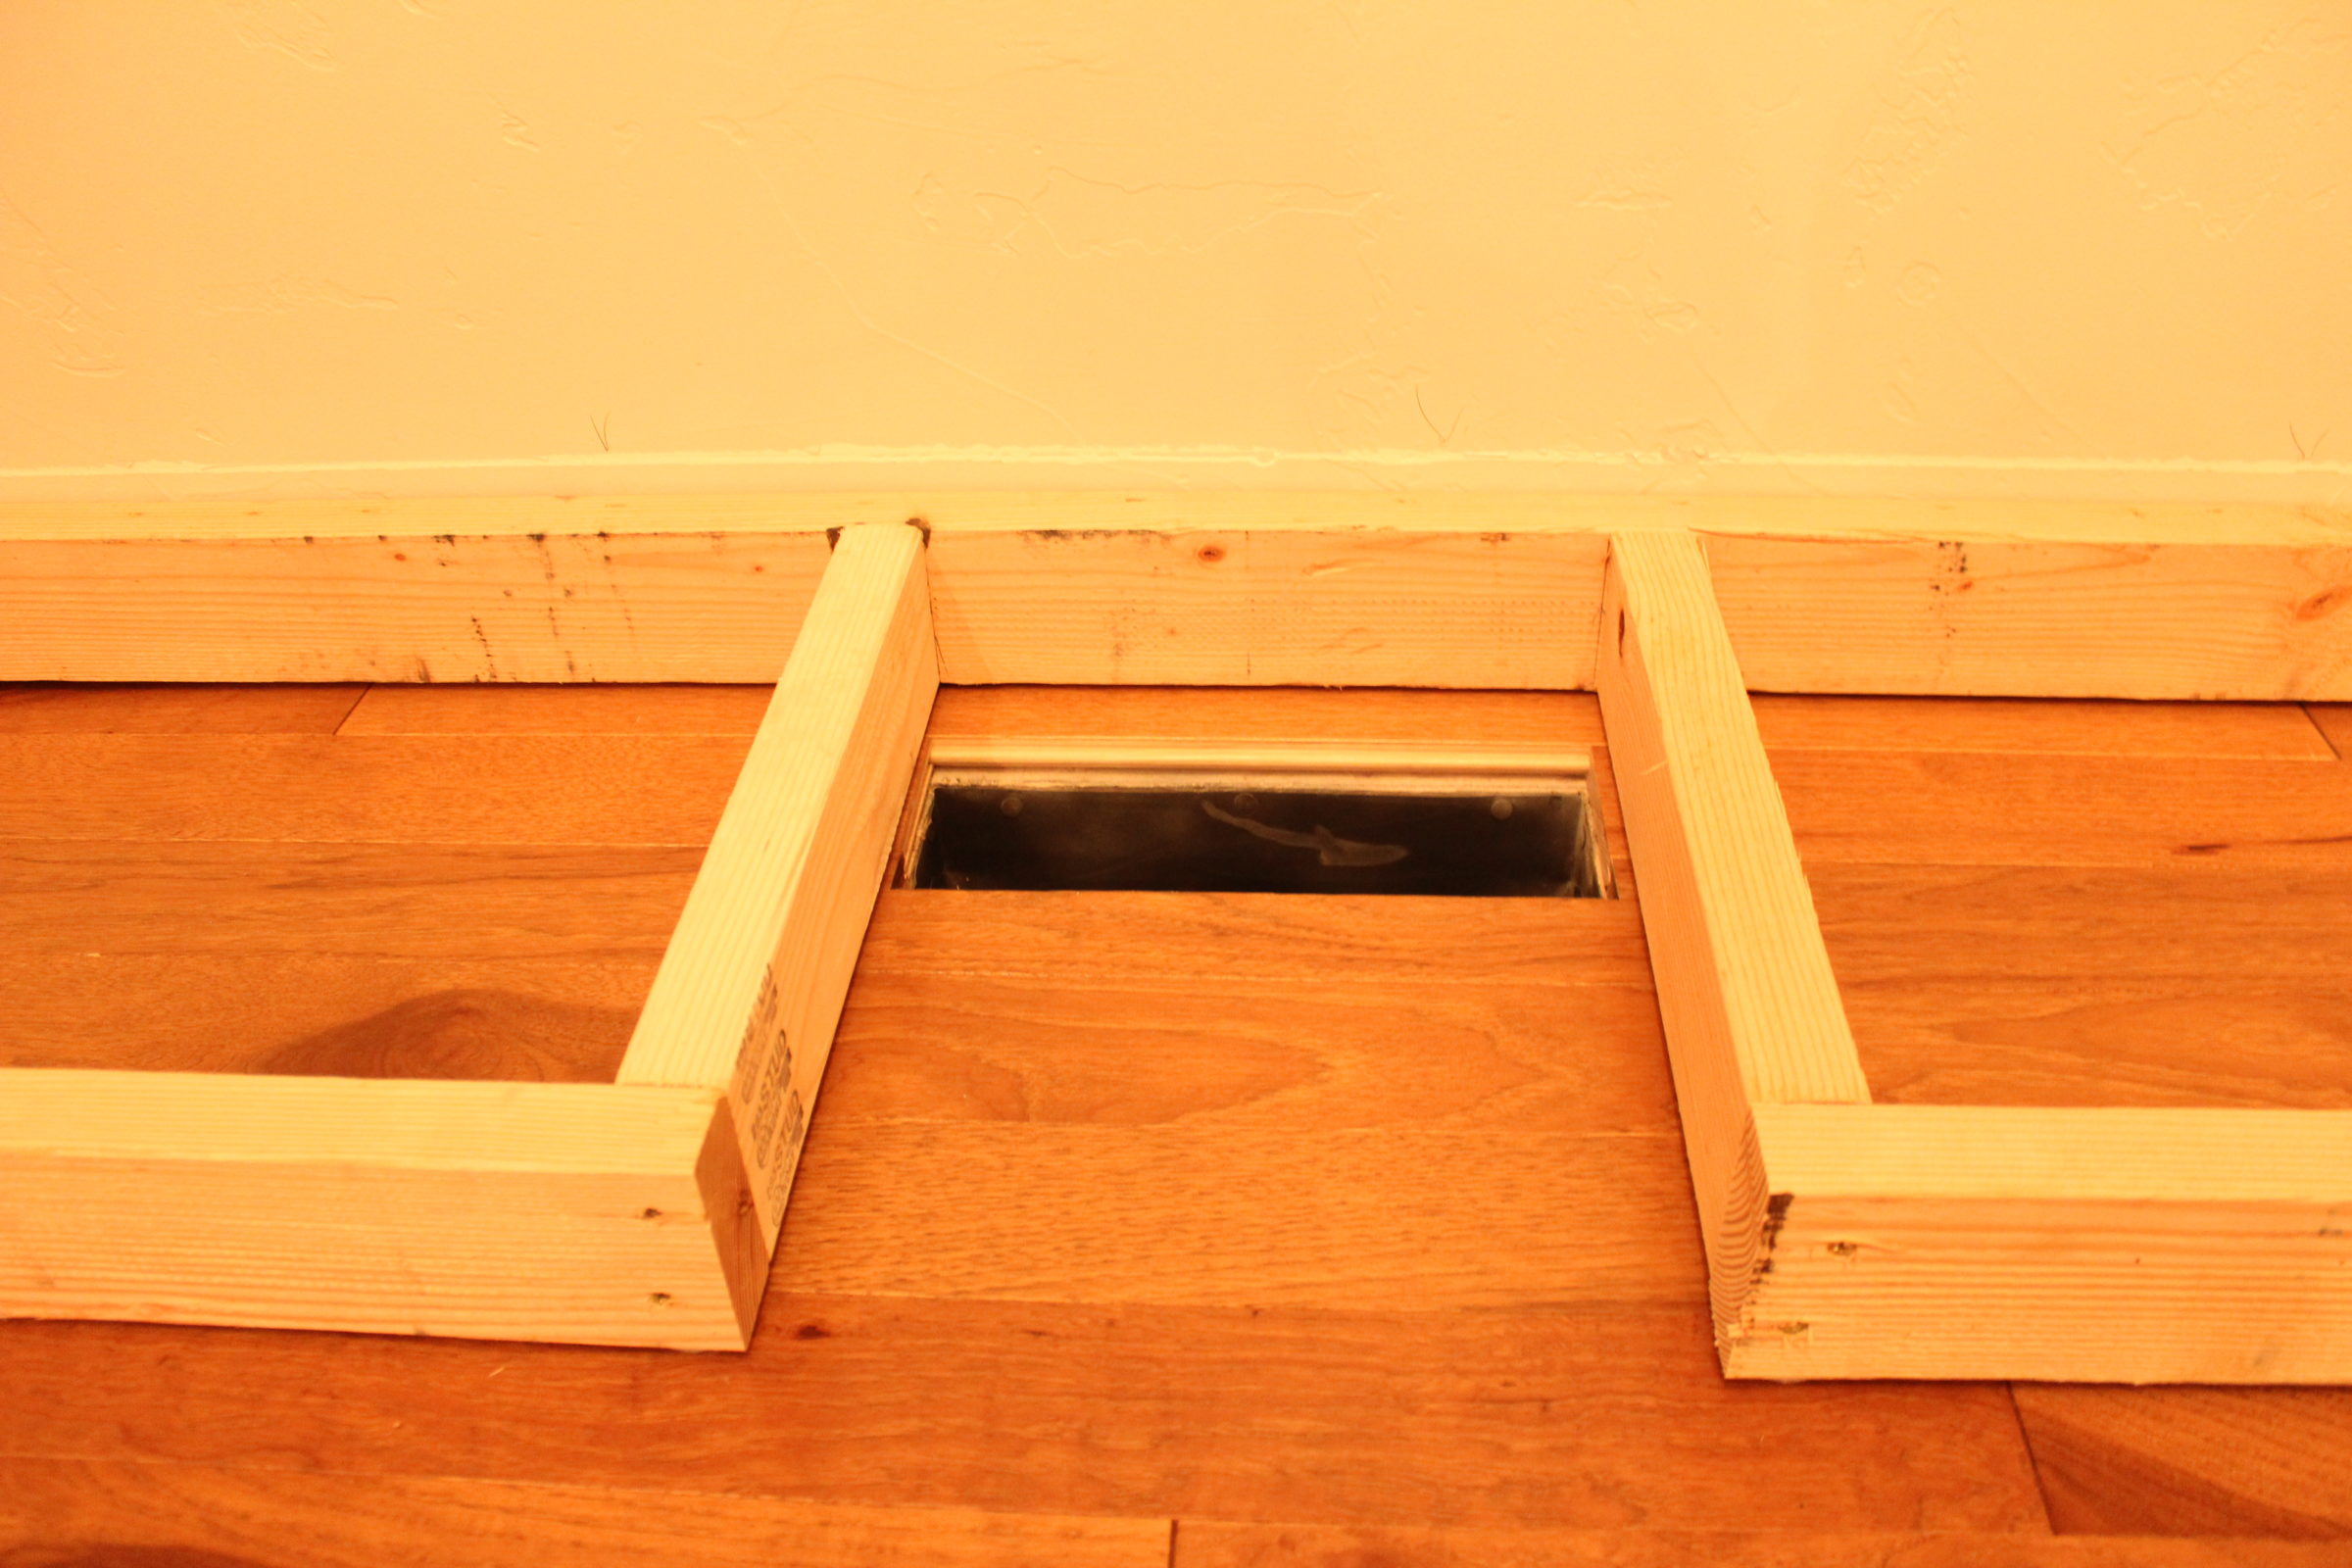
As you’ll notice in the above picture, we had to notch around our existing vent. The best way to do this was to build around it.
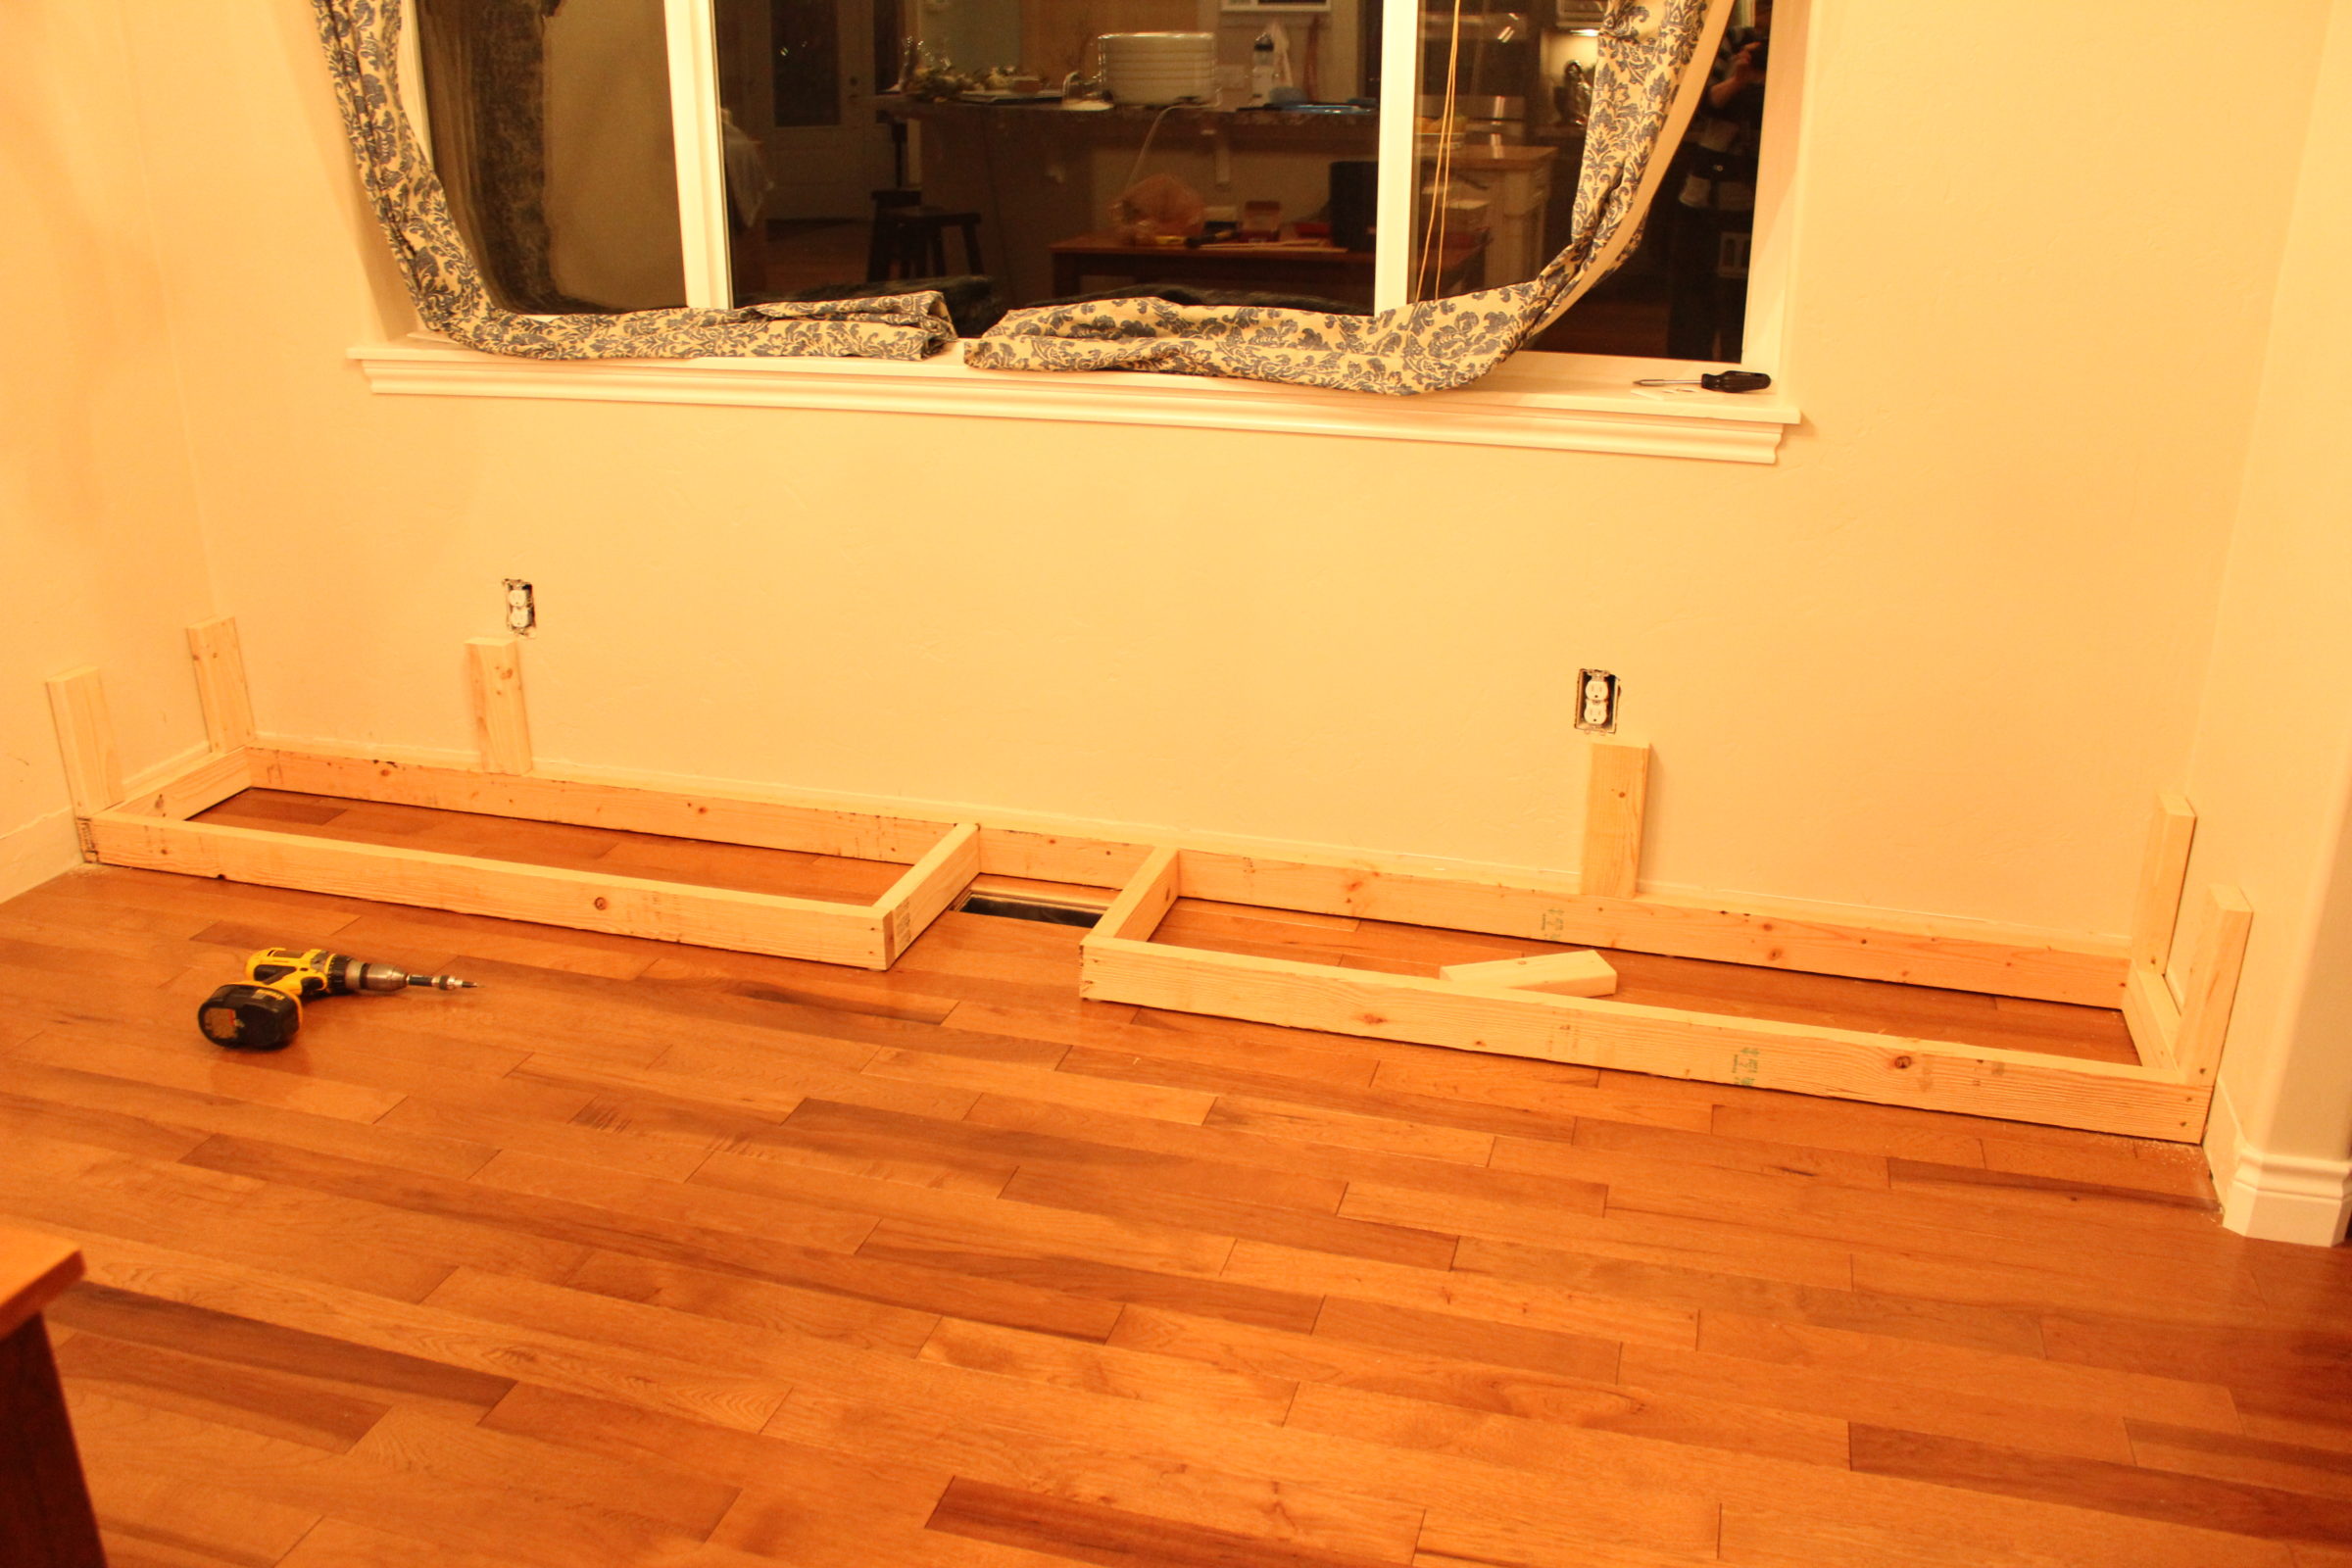
Once the base of the frame was down, he started adding the sides.
After the sides were up, we added the front and back supports.
Just like the vent, we had to notch around the two electrical outlets…
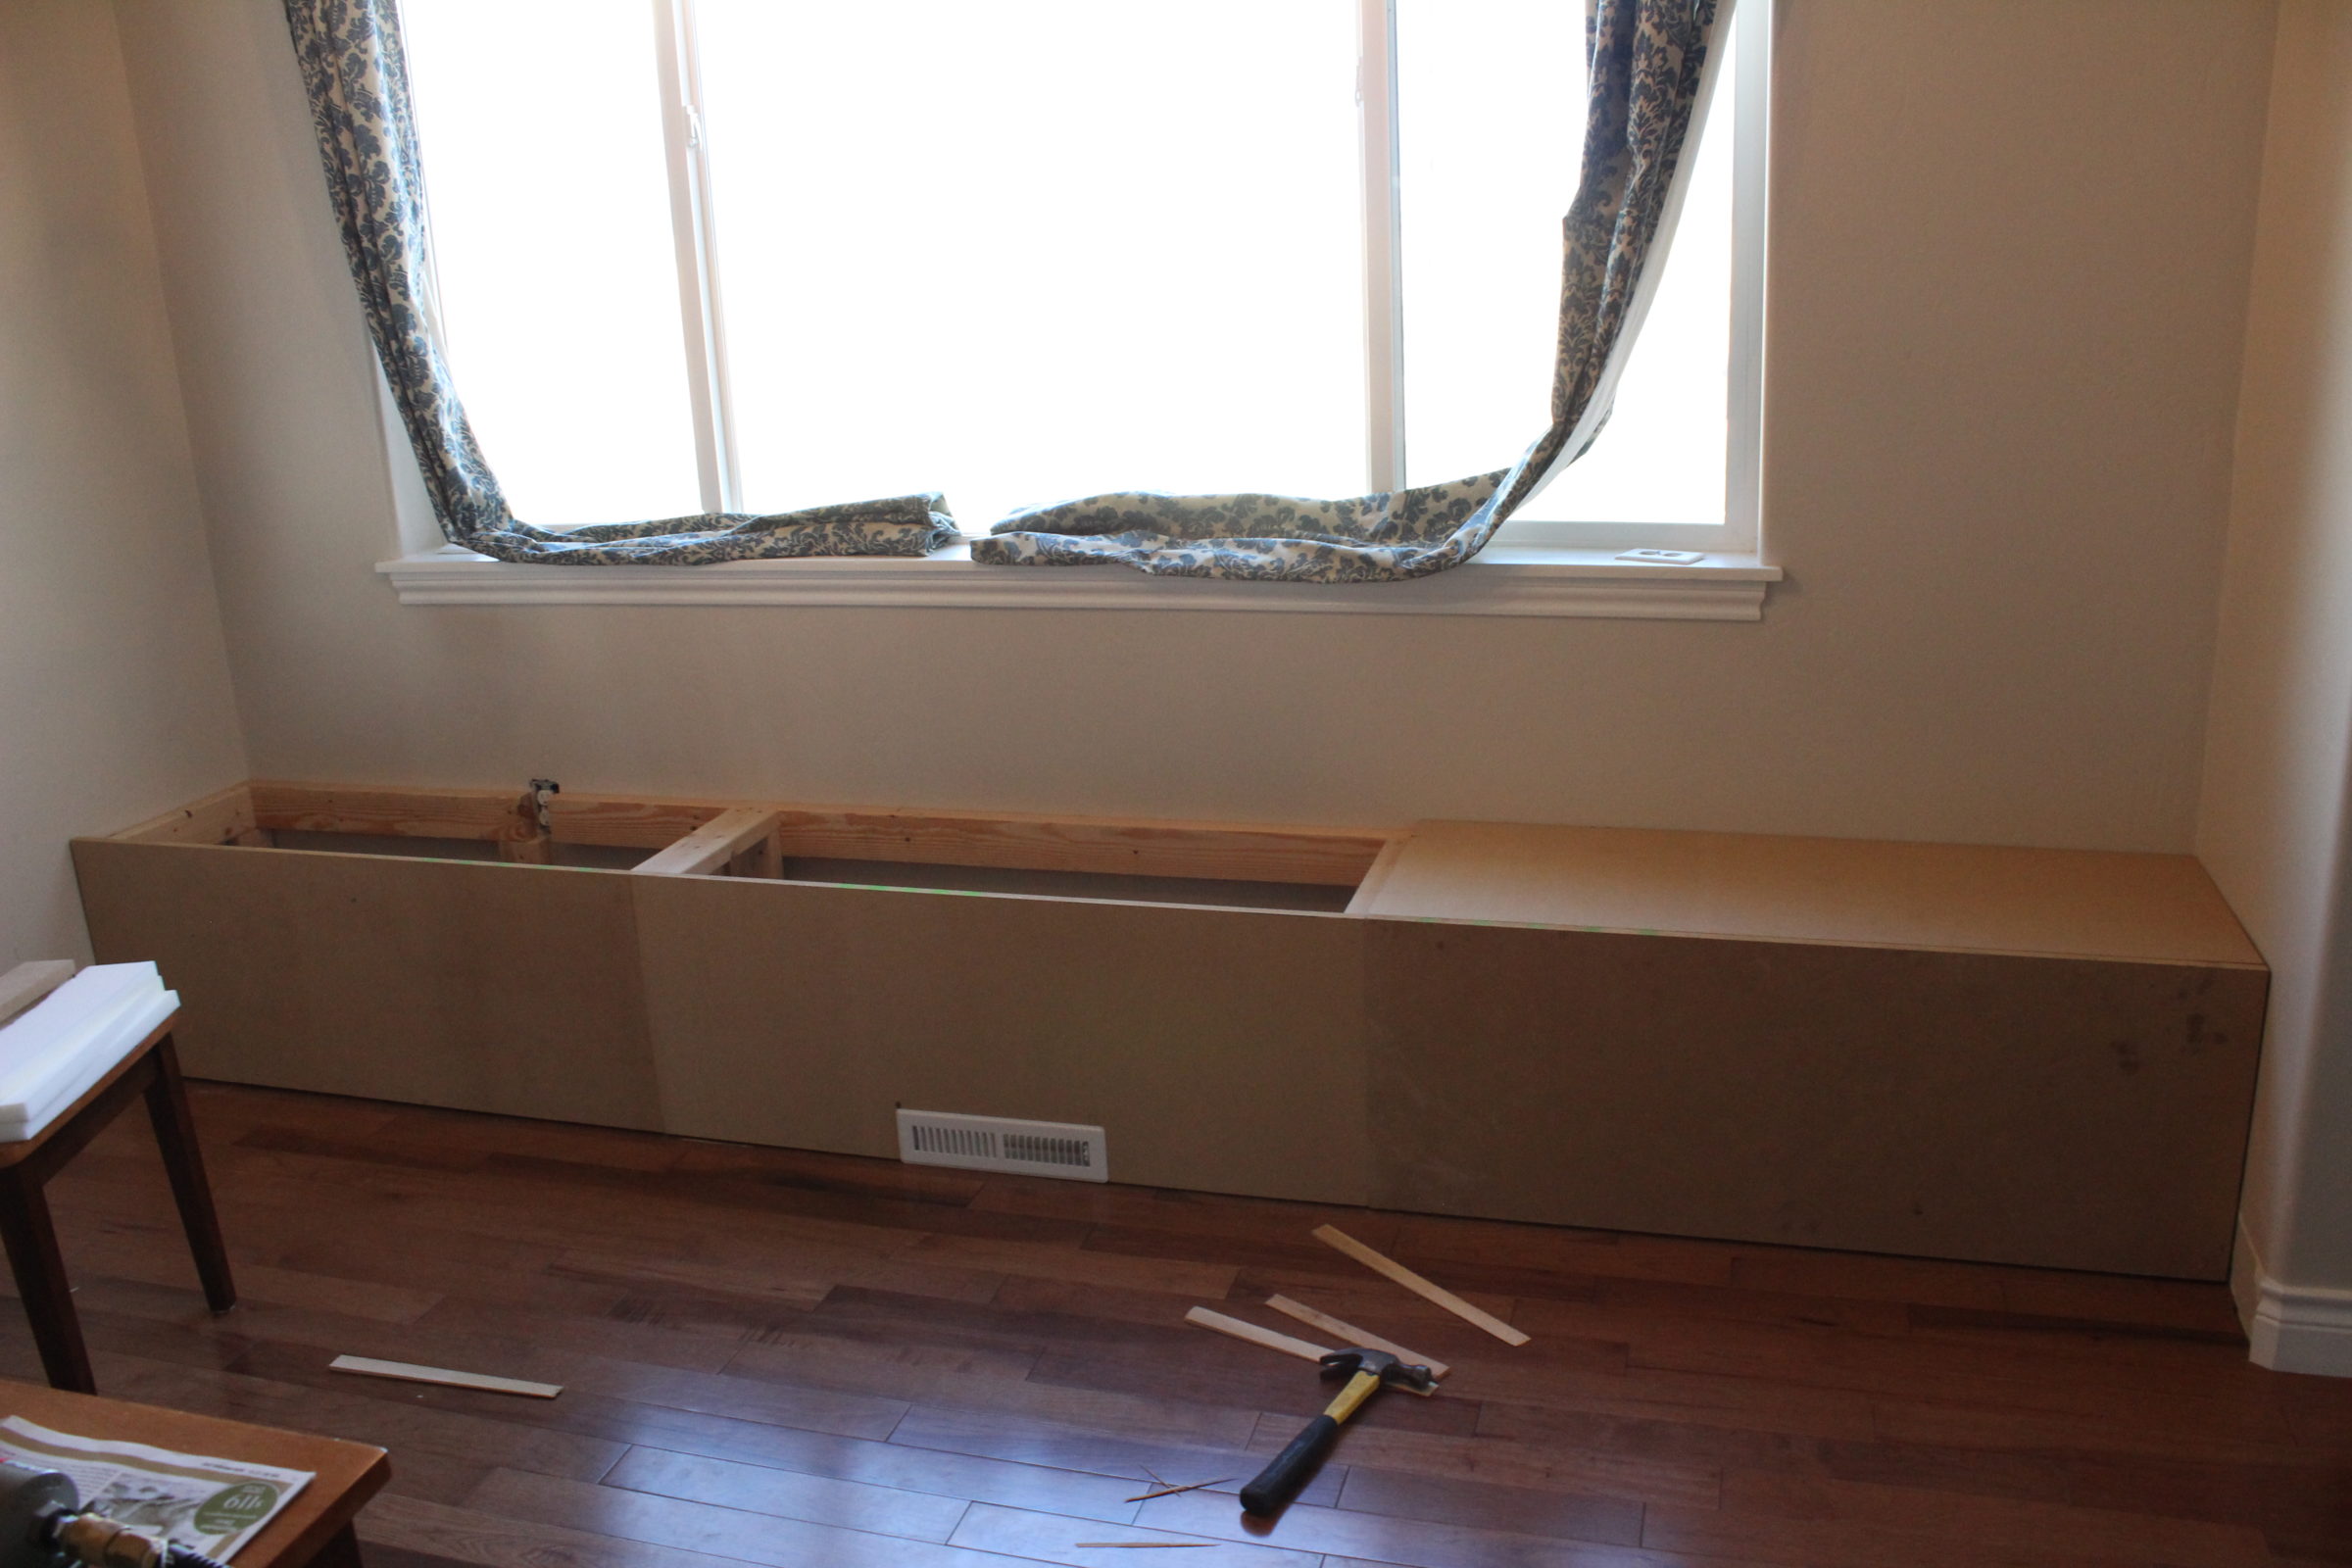
With the frame finished, my hubby started cutting the MDF for each “box”.
After the front was covered, he started cutting the MDF for the top of the bench. The top of the bench, or lid, sits on top of the frame.
This picture doesn’t show it, but we framed a box around the vent hole and used a narrow roll of insulating foam to go around the bottom of the frame. After that, it was completely air tight and we attached the new vent cover to the front of the bench. Easy peasy!
Once the entire thing was covered with MDF and the lids were cut, we started drilling the holes for the lids.
With the holes drilled, the hubby started trimming out the front.
After caulking, it was finally time to paint!
I know that in my original post I talked about making the bench out of pre-made cabinets. After doing a whole lot of research, I found that it really wasn’t that great of a deal. We needed three cabinets which would have made the cost around $230. And that was just for the cabinets. As well as the price, I really didn’t like the idea of using cabinets. The storage capacity didn’t seem that great and I wasn’t digging the idea of the doors opening into the furniture. I felt like I would have to move the furniture to get the cabinets open, which would make it hard to actually use the bench as storage.
With that in mind, we designed this bench to be a power house for storage. Since the lids open from the top, I can just lift them up and stick things inside. Perfect!
We spent around $90 on the bench, which is WAY better than the $230 that the cabinets would have cost. Plus, I LOVE ours! I can’t even remember the breakfast nook without it. That makes it pretty awesome!
Next up is the cushion. This room is coming together just like I imagined… maybe even better!
Big Smiles!
Linking up to:




Great job! That is going to be such a nice addition to your breakfast nook & great storage, too!
Thank you Carol! The storage is unbelievable! Major Love! 😉
Shayna
This is awesome! I was wondering if you could post the dimensions of the first two pictures. Mainly the height and width of the framing. Thank you!!
Thank you Nichole! The bench measurements are: 139″ long x 18 1/2″ deep x 18″ tall. It’s the perfect height for our table, and the width it great for sitting.
I hope that helps. 🙂
-Shayna
We have exactly the same corner that we would like to make it into a breakfast nook. Have thought about building cabinets, but after looking at what you did, we changed our minds. 🙂
We have the exact same vent and electrical outlets we have to take care of too.
THANK YOU so much, Lee! I’m so happy you found it inspirational. We LOVE our bench! It’s been one of my favorite projects to date… and the storage is fabulous! 🙂
-Shayna
I was wondering if you installed hinges on the lids or if they just lift completely off?
Hi Char! We didn’t install any hinges, the lids lift all the way off.
I hope that helps! 😀
-Shayna
Love your bench ———————– BUT tell me about the cabinets for $230. Please.
I am elderly without a MR. where would I begin with the cabinets? I want a day bed on top of cabinets!
Come on, give me some info and hints!
THANK YOU so much! We decided to build the cabinet instead of using the cabinets because the cabinets would have cost a bit more money. If we were going to use the cabinets, we were going to attach them to the back of the wall, then add a piece of MDF to the top so that I could add a bench cushion.
Maybe check this out: http://ana-white.com/2009/11/queen-sized-storage-bed
I hope that helps! 😀
-Shayna
My hubby and I are about to start building our breakfast nook benches and I was curious, you indicated that your bench is a finished height of 18″, that includes the 4″ foam cushion? Also was curious how high your table is from the floor to the apron of the table. We have a round pedestal table that measures 25″ from floor to the apron, so we are trying to determine what height the finished bench should be. Any thoughts?? Thanks in advance.
Hi there! Our bench is 18″ tall, but that does not include the foam cushion. Our table, to the bottom of the apron is 26 1/2″ tall, but the entire table does sit on a 1/2″ thick jute rug. I can tell you that sitting at the table is comfortable. When I’m sitting, from the top of my legs, to the bottom of the table apron, there is 4″ of space. We haven’t had any issues with banging our legs, or being “squeezed” under the table. I hope that helps! Your bench will be amazing! 😀
did you use 2/3’s for the frame? Also did you finish the bottom of the bench (on the inside) or just leave it open to the floor. Finally would it be hard to add some hinges for it to be easier to lift?
thanks.
I love the nook idea and I would like to do one myself but how did you determine the right height for comfort and seat depth?
I completely understand your question! Before we made ours, we measured several different dining chairs to get a general height, and then built it out to a depth that felt right. Our bench measures 19.5″ deep x 22.5″ tall, including the cushion. Hope that helps!
Very nice job! But why not relocate your outlets into the bench itself?
I like the storage. Nice job. When did he attach to the wall and did he use hinges for the top? Are there any written plans to follow?