
DIY Molding Frame
And speaking of our office makeover… 😀
I’ve been working on a gallery wall. A few years ago my grandpa moved into a smaller place and decided to down size some of his things. He had an awesome collection of frames with thick molding and I’ve been able to use the majority of them on the wall. Recently though, I decided I wanted a specific shape of frame, so I ran to Home Depot and purchased 8 feet of crown molding for our DIY molding frame…

It turned out beautifully! Here’s how we made it:
I bought 8 feet of stainable crown molding…

Then, Anthony measured and cut the corners. To get the right angle, he placed each side of the crown molding flush on the saw and cut down…

Don’t worry, his fingers were out of the way! 😀
This is what we were left with…

Once the pieces were cut…

We started putting the frame together. We squeezed on a bit of Gorilla Glue…
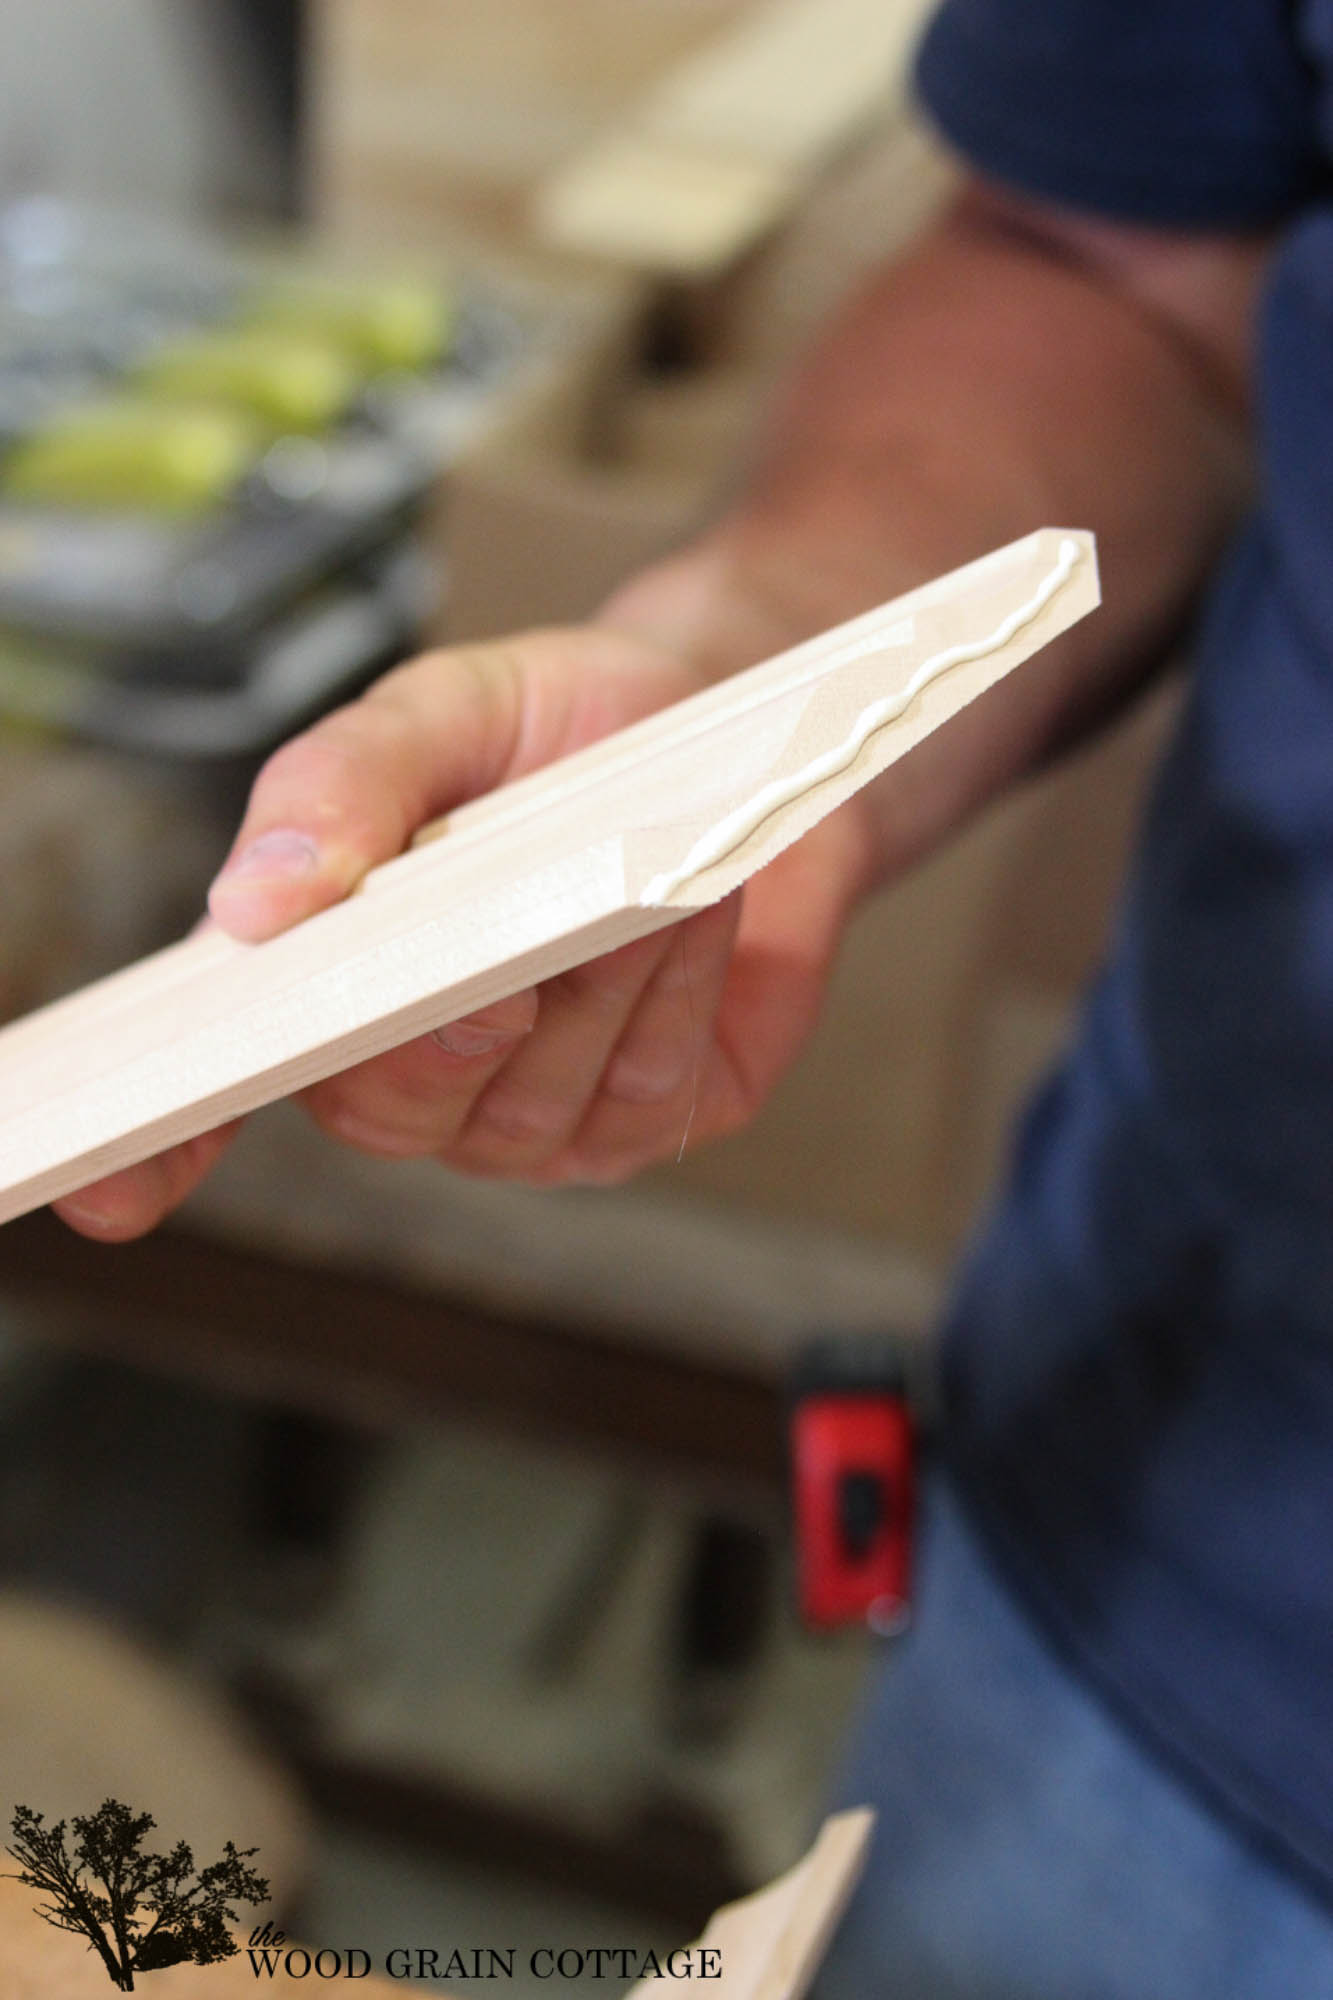
Then pressed the two corners together…

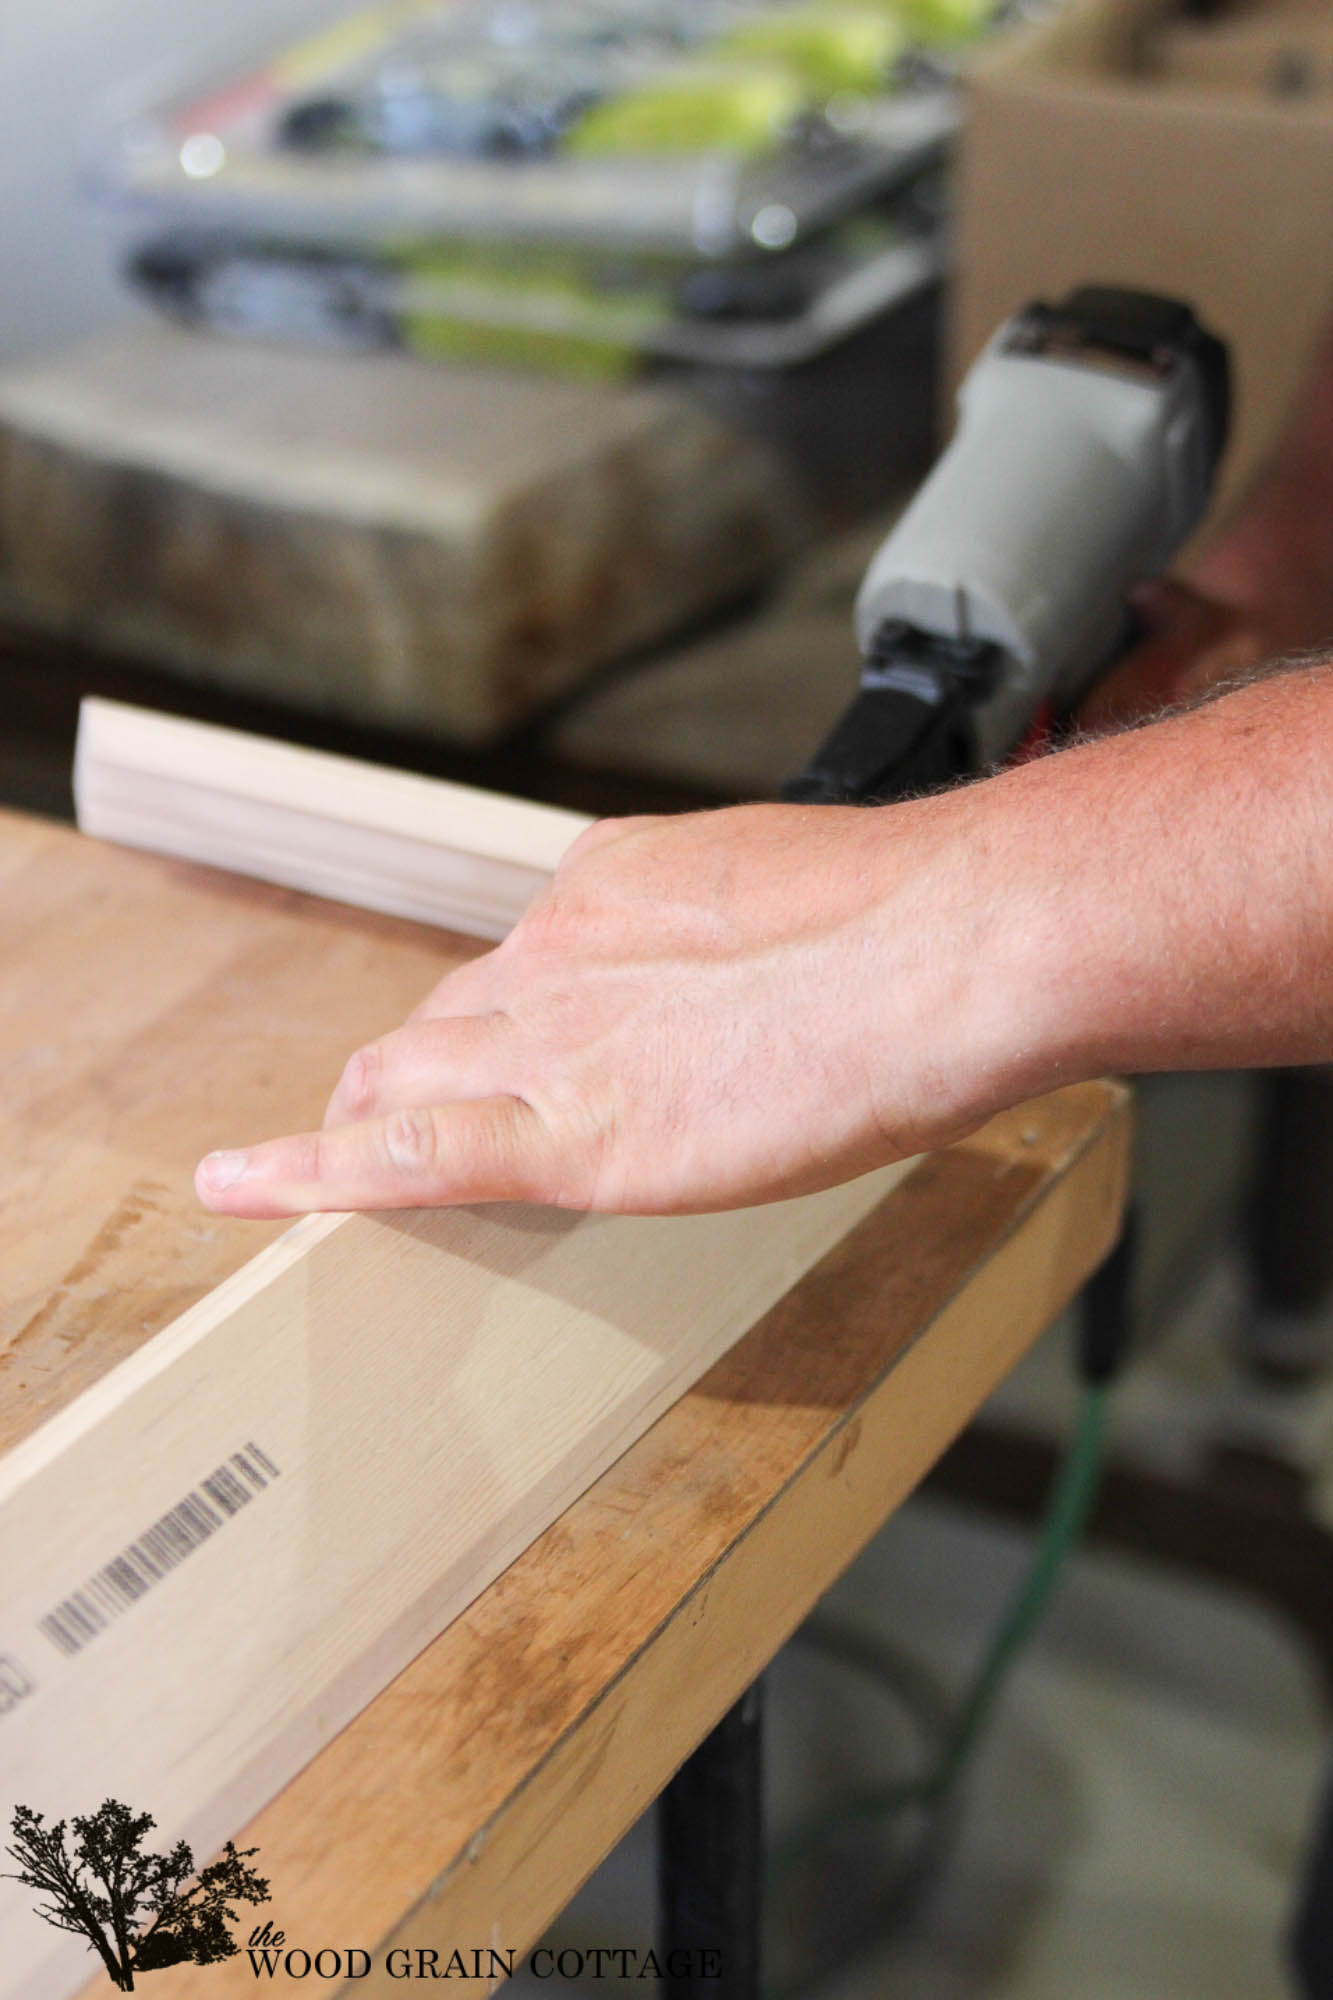
I held it while Anthony used our nail gun to secure them together. Then we flipped it over and added a few extra nails…
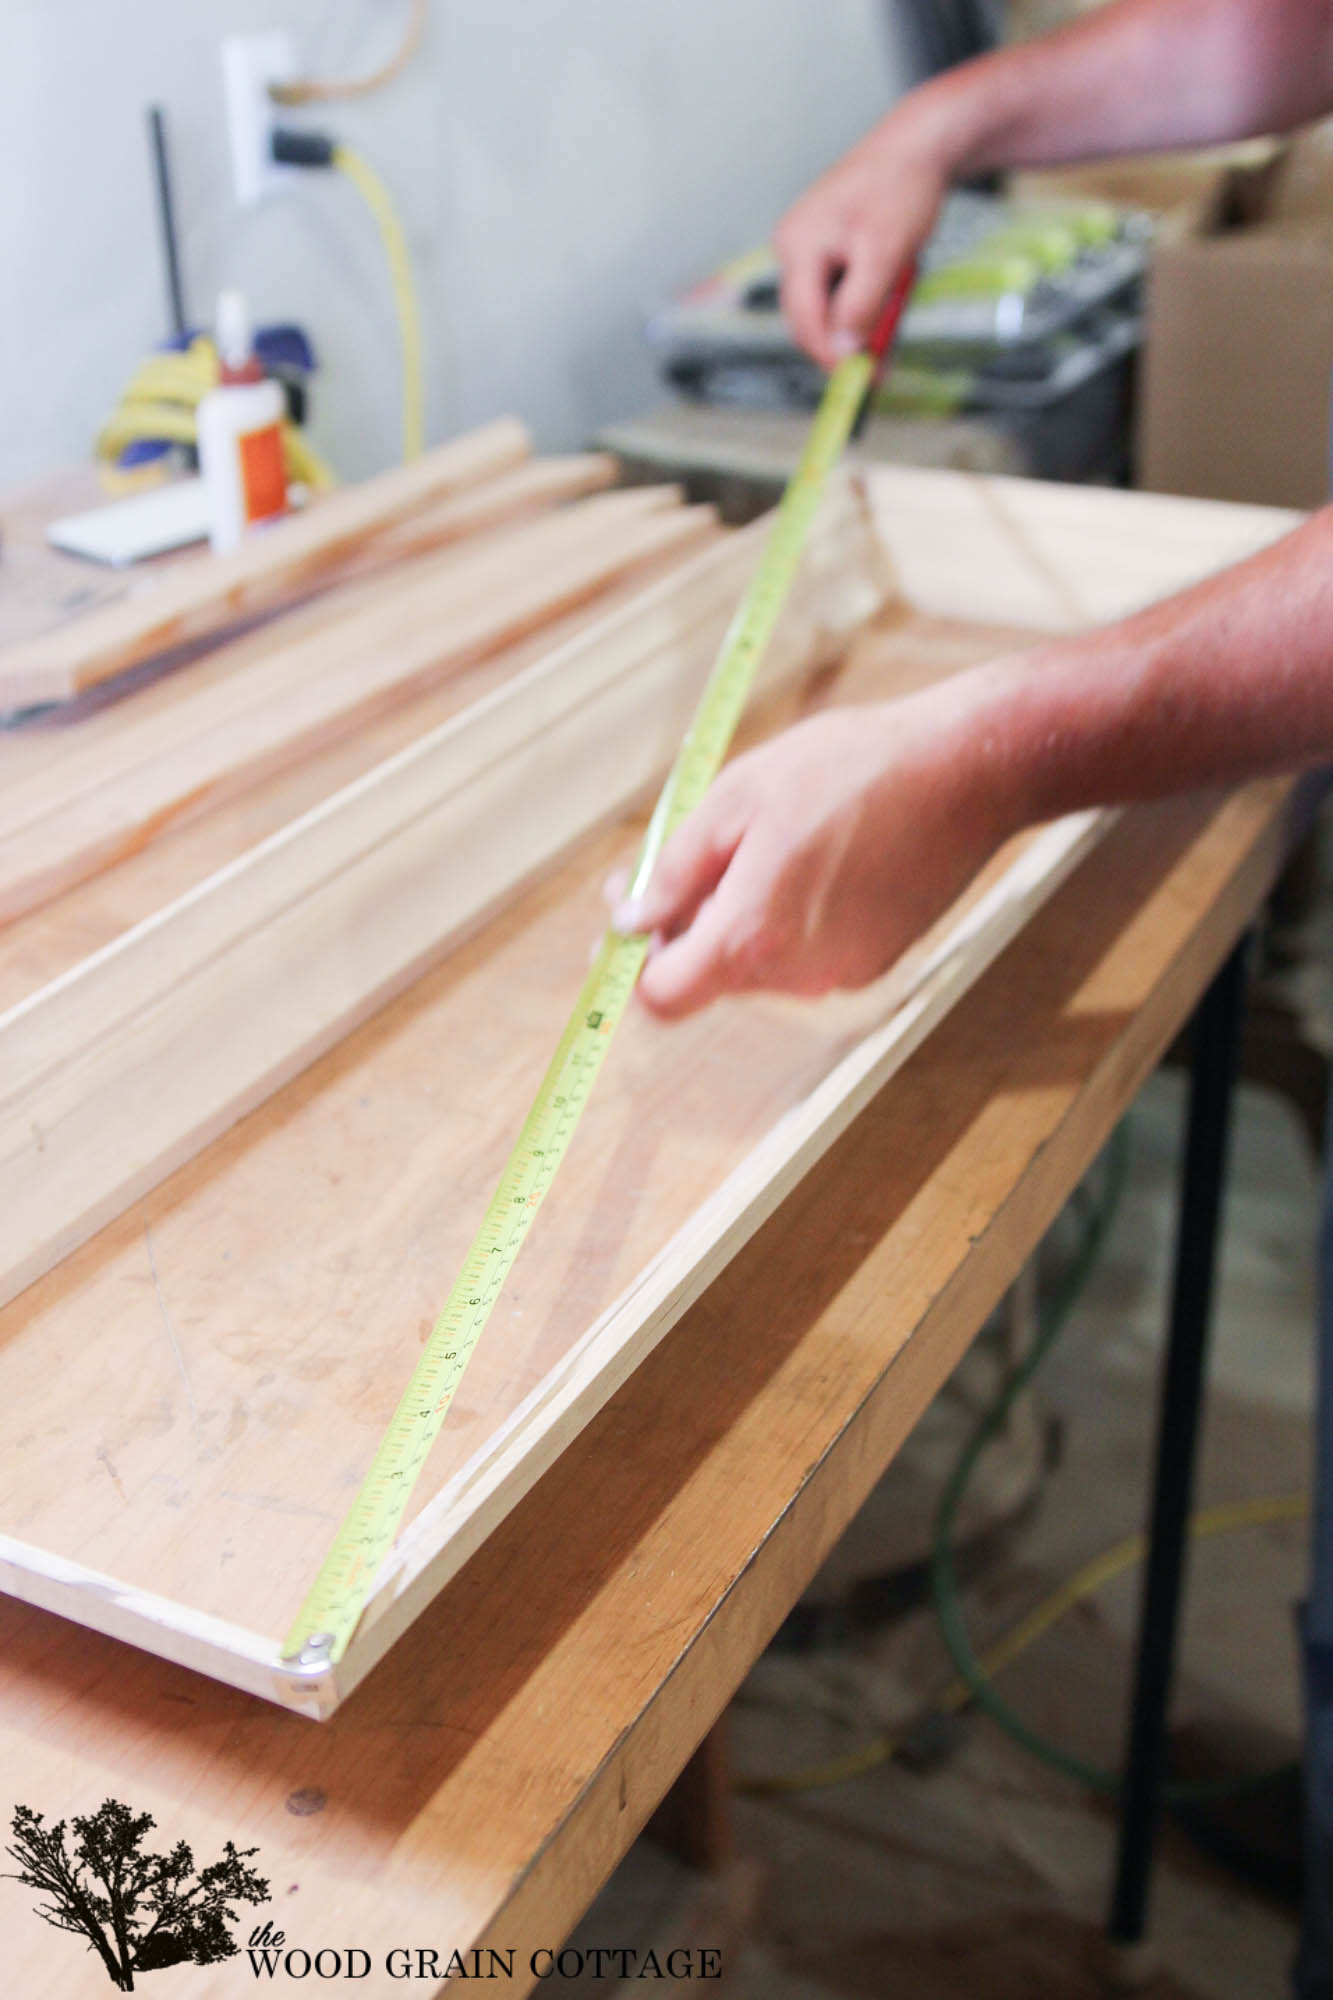
Once we had all the sides nailed together, Anthony ran a tape measure across each corner to make sure it was even in all directions…
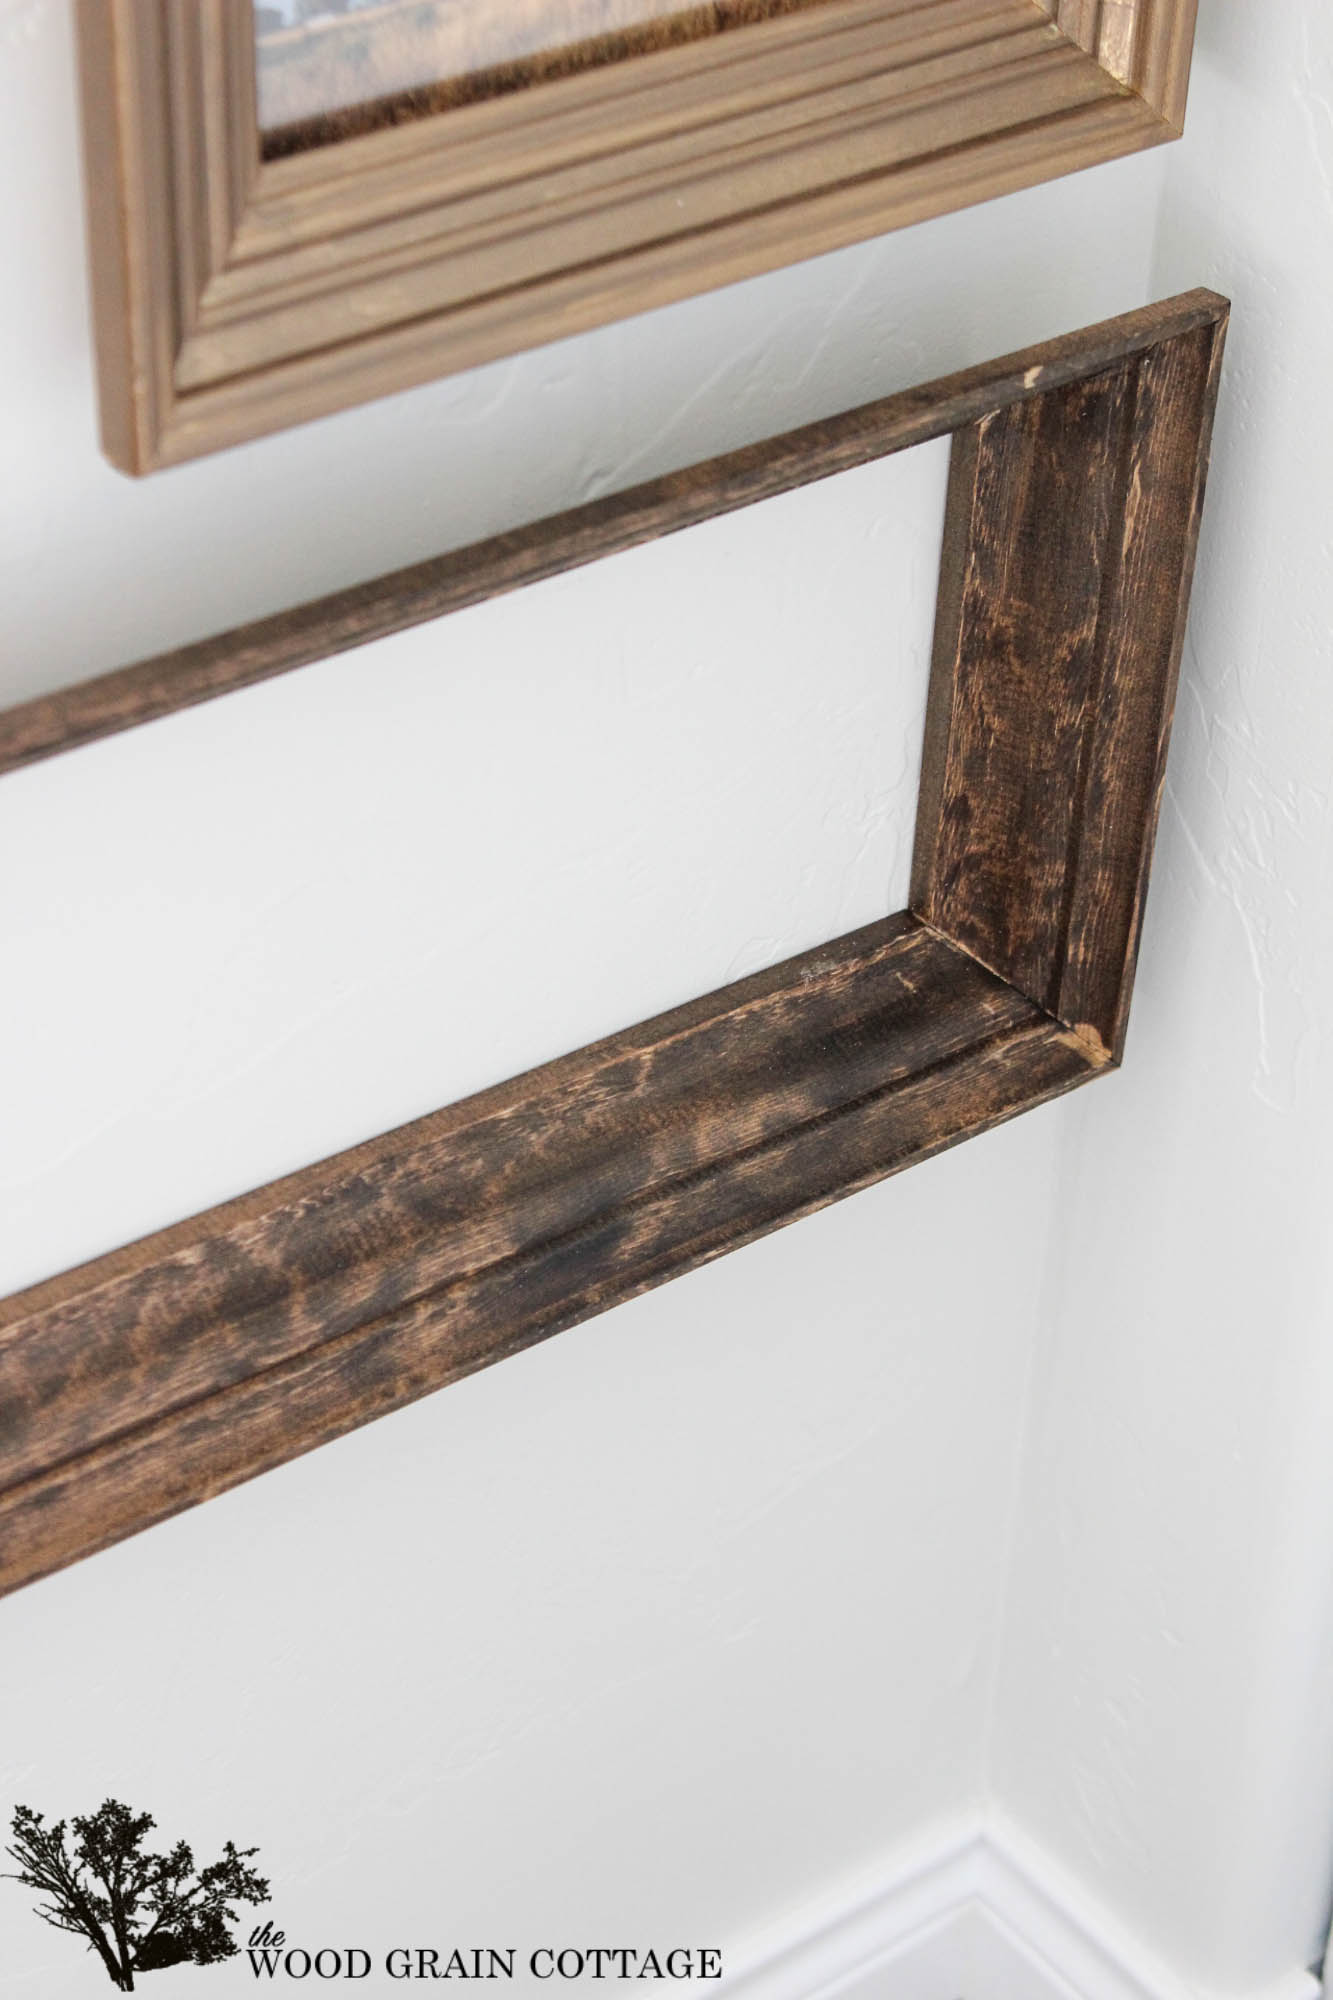
Once it was finished, I stained it with Dark Walnut by Minwax and rubbed on a coat of of dark finishing wax.
Then, I just hung it up with a few nails!

It looks perfect with the other frames, which I’ll be sharing a little bit later once the rest of the wall is finished…

And I completely love how thick the frame is…
Now, I just need to finish up what’s going inside of it!

I’m already looking forward to making a few more of these frames…. the ideas are spinning! 😀

I love how chunky and long this frame is. Beautiful job. I’m crazy about your wreath on the wall, too! I can’t wait to see what your fill the frame with!
Looks wonderful, Shayna! Can you re-explain the instructions: To get the right angle, he placed each side of the crown molding flush on the saw and cut down…. For some reason this is confusing to me… sorry!
Thanks,
Carol
Hi Carol! Sorry the directions were a bit confusing! 😀 I’ll see if I can do a bit better. Since crown molding is meant to be installed on the wall and ceiling, it has two flat surfaces where it sets flush against the ceiling and wall. To cut the molding for the frame, he sat both of the “flat” sides against the saw, then cut down on the molding. So instead of laying the molding flat and cutting down, we stood it up to cut it. Does that make better sense? Let me know if that’s clear as mud! 😀
Love the idea of using molding! Did you put a backing on it or just put it up to the wall?
THANK YOU so much, Shelly! For now, we’ve left the frame backless… that may change, but it’s working great right now! 😀