
Linen Lined Rope Basket
Baskets. I like baskets. But, I like them even better when they cost mere dollars rather than big dollar bills. You know what I’m sayin’?
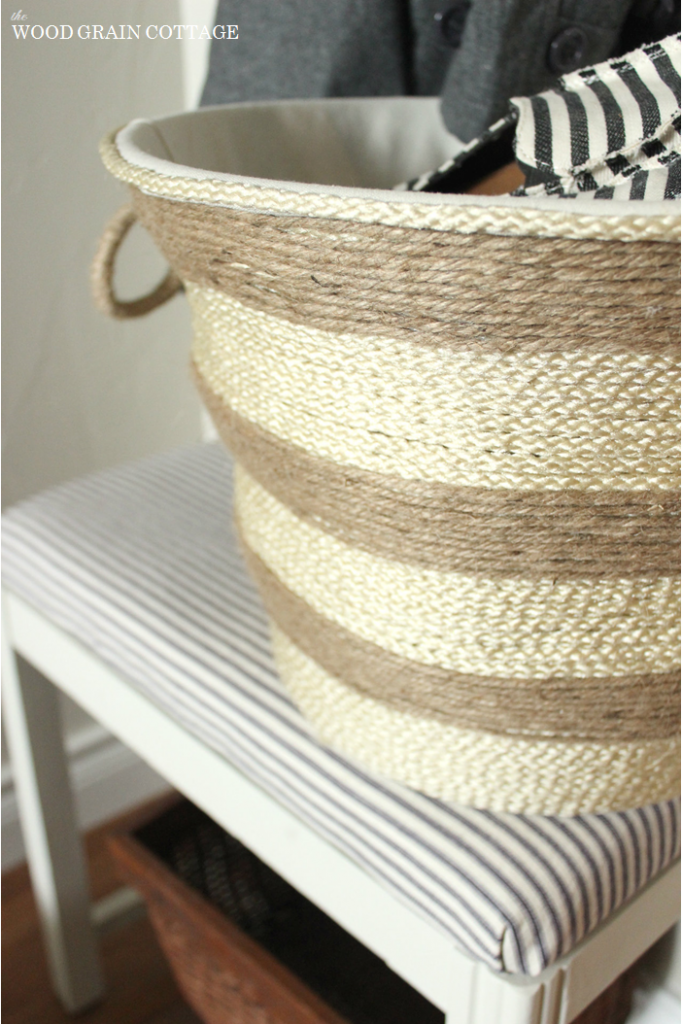
When I ran across these baskets in a Ballard Designs magazine, I instantly fell in love. They’re entirely versatile and I loved everything about them, especially the lining.

I made it my mission to figure out how to do a re-make.
And I must admit, I’m absolutely loving my version!

To give it a little different look, I gave mine stripes, which I love, love, love!
Here’s how I made it:
Please note: Some of the links in this post are affiliate links, which allows us to make a small commission from your purchase, but your purchase price stays the same. Thank you for helping support our blog! We greatly appreciate it!
Supplies:
- Dollar Store Plastic Laundry Basket
- Linen Fabric
- Jute Rope
- Nylon Rope, this is similar
- Hot Glue Gun
- Glue Sticks
- Razor Blade
- Wrapping Paper
- Pen
- Scissors
- Sewing Pins
- Fabric Scissors, these are similar to mine
- Sewing Machine
- White Thread
I apologize in advance for the pictures… I made this a while ago (notice the breakfast nook before the bench & plank wall!!) and my photography skills have gotten better… thank goodness!
First, these are the supplies I used:

I started by prepping the laundry basket. The top of the laundry basket has a curved plastic band that wraps around the entire top.
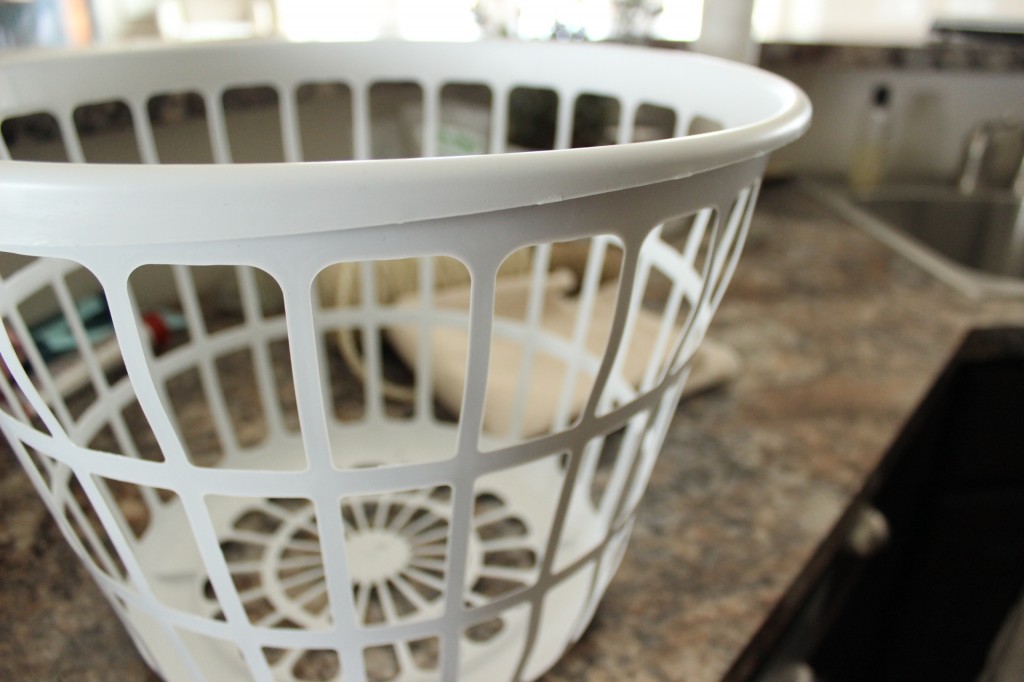
In some places it’s wider than others, so I used a razor blade to remove the excess plastic and to make it as smooth as possible.

It won’t be perfectly smooth when you’re done, but you want it to be pretty smooth the entire diameter around. We will hide this later.

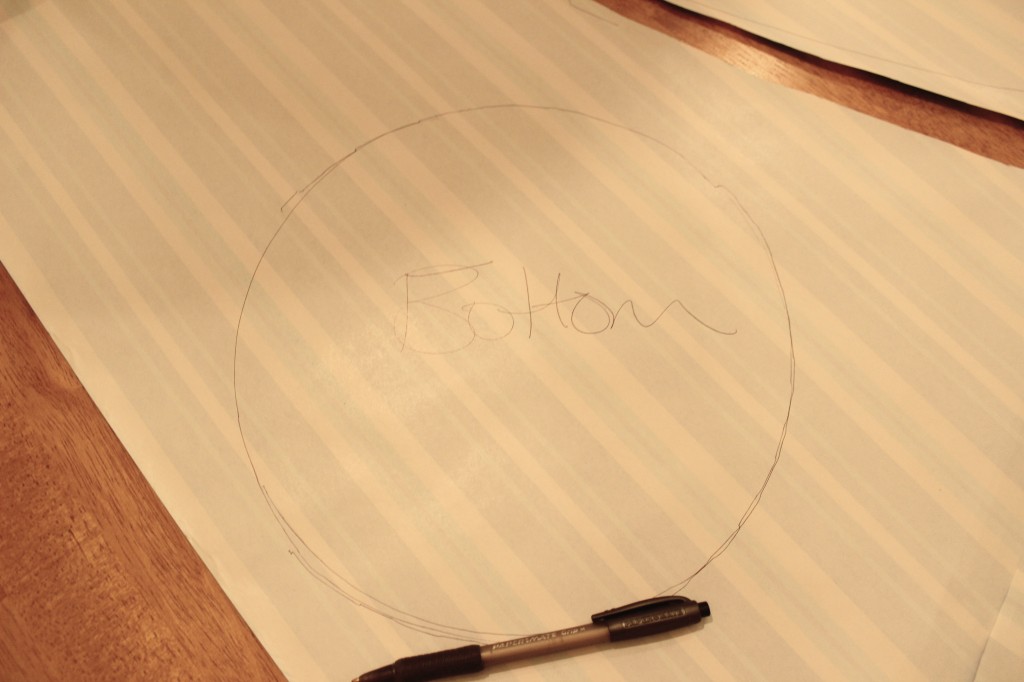
Next I moved onto the liner. On the table, I spread out a roll of wrapping paper with the face down.

I laid the laundry basket on its side and rolled it across the paper, making sure that it would roll the entire diameter on the paper. Then, I grabbed a pen and traced it as I rolled.
It took me a couple of times to get it right, which you’ll notice below.

I traced the bottom of the laundry basket too…
Then, I used scissors to cut my shapes and I placed them in the basket to make sure they fit.
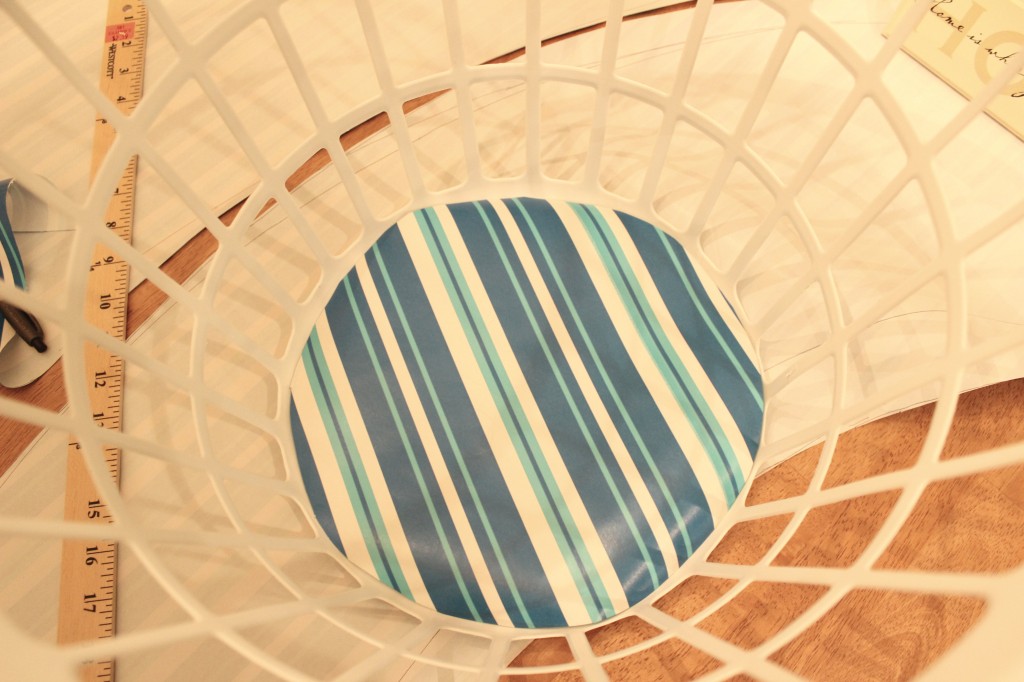
I placed the side piece inside the basket and marked where it connected.

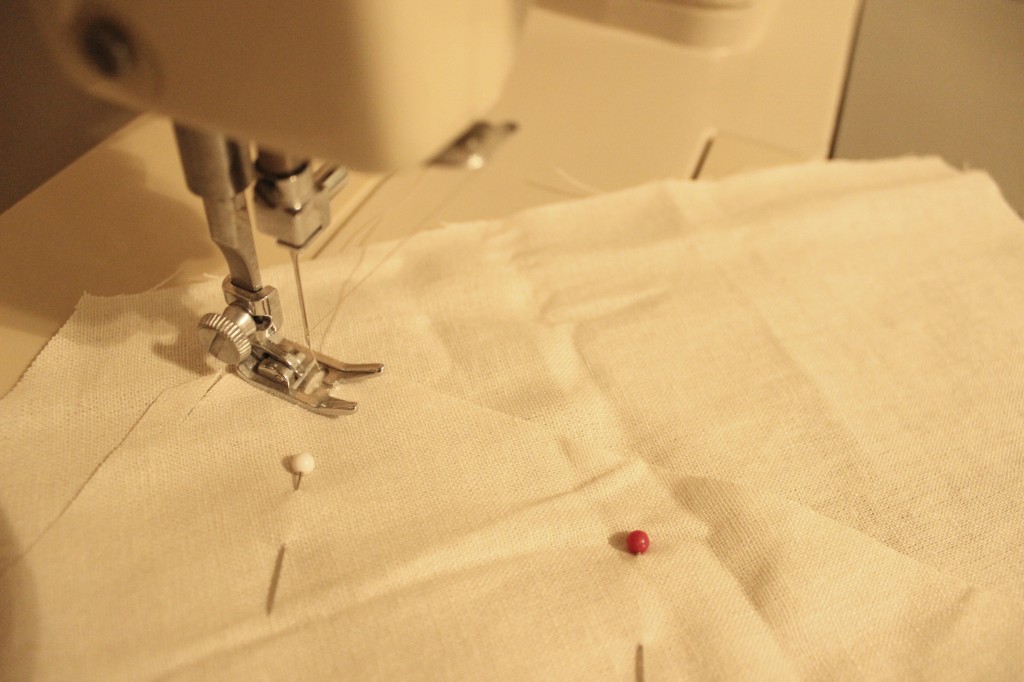
Next, I grabbed my piece of linen and laid the wrapping paper template on top.

I used pins to attach the paper and fabric, then I cut around the fabric leaving about half an inch on the sides.

Then, I removed the wrapping paper and folded the linen in half, like so:

I then sewed the two sides and the bottom together. I’m sorry I didn’t take better pictures…
I put the liner in the basket and used hot glue to attach it under the plastic lip that we trimmed earlier.


I used scissors to trim the extra fabric.


With the liner in place, I grabbed my nylon rope and started by first making the handles.
I wrapped the end of the rope around the bottom of the basket and hot glued it in place.
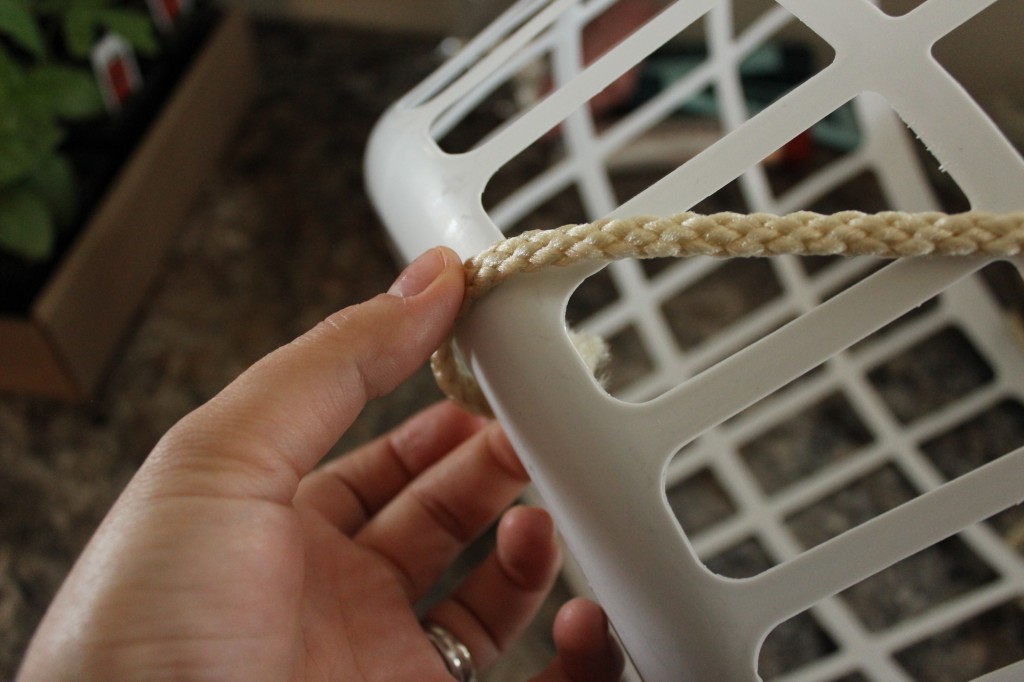
Then I decided the length of my handle…

With the proper length, I cut the end of the rope and attached it to the bottom of the basket with hot glue. I made sure to leave enough space for it to look like a handle.

Then I did the exact same thing, making it a double handle.
I did the exact same thing on the other side, making sure the handles were the same length…
Ok… I stopped taking pictures at this point… BAD! I’ll try to explain as best I can…
I started at the top of the basket and used hot glue to attach the rope to the basket. I hot glued the handle rope to the basket, then placed rope over that.
Once the entire basket was covered in rope, I hot glued a single string of rope around the top of the basket. That hid the area where I had wrapped the fabric over the plastic band.
I wrapped the handles with the jute roping… Then added jute stripes over the nylon rope.
Done!
I just love it!

Those stripes… they get me every time!
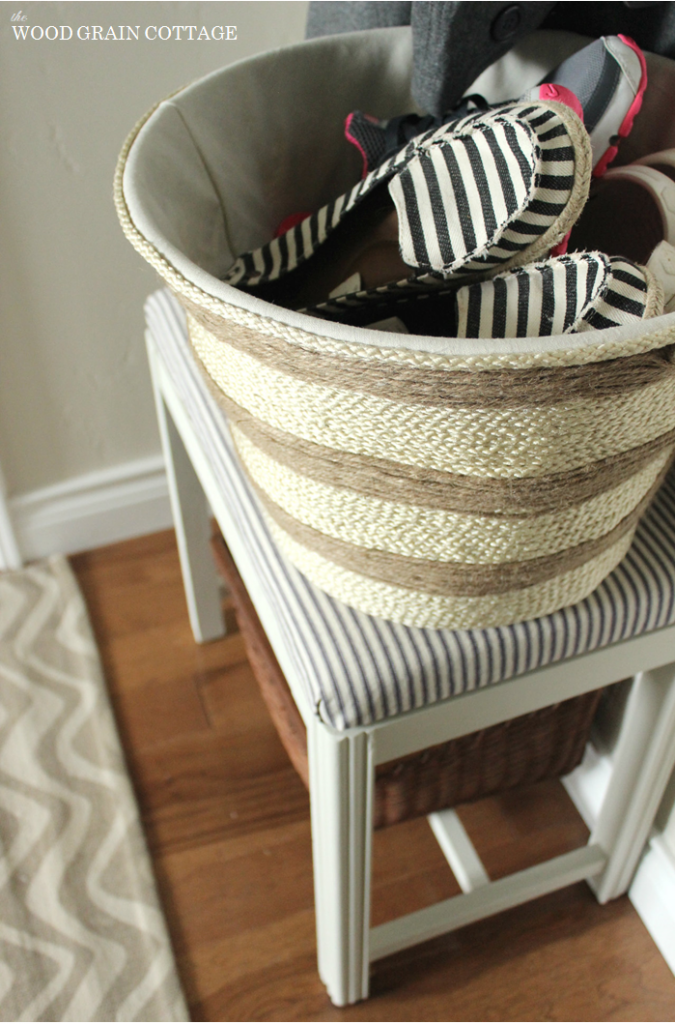
It’s perfect for holding shoes in the mudroom…
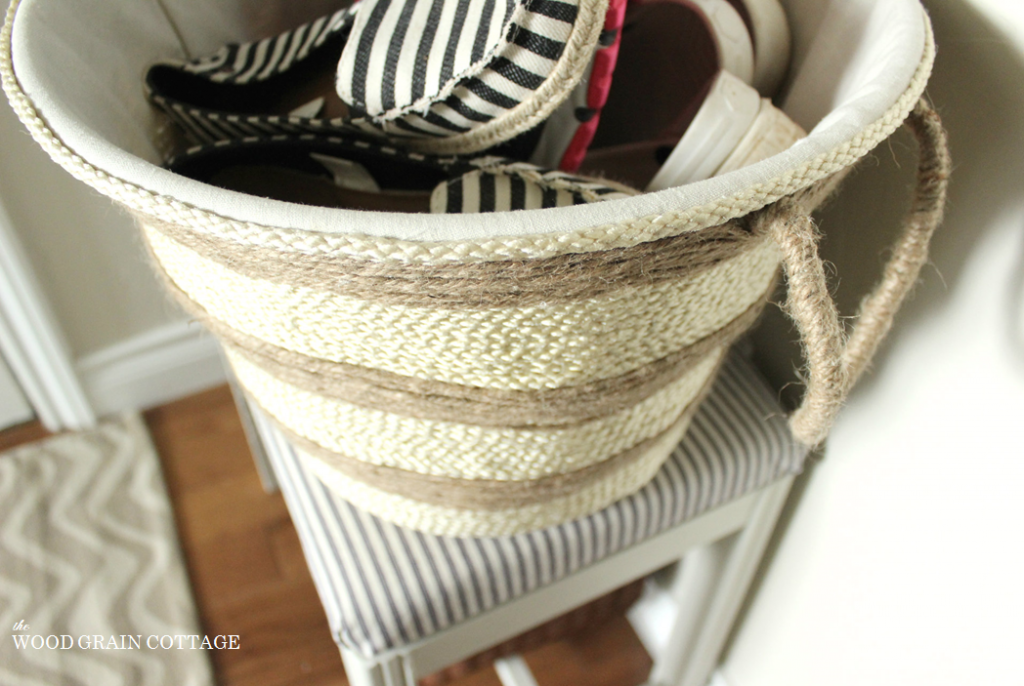
And I love that it’s lined with linen. It gives it such a classy look!
You would never know this was made from a dollar store laundry basket!
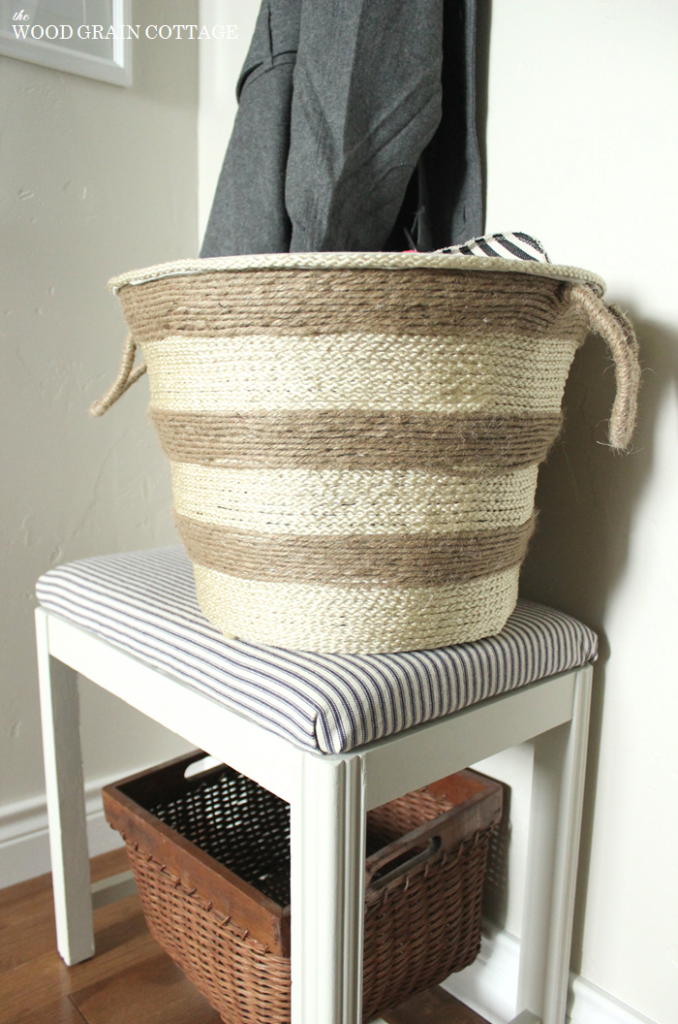
I think it’s just about perfect!
I especially love how it looks with the mudroom bench and rug.

I am so happy with the way that it turned out… I want to make one for every room! And I’m not kidding when I say that!

I can’t even tell you how happy I am to NOT trip on shoes every time I walk through the mudroom door. It’s life changing! And oh so stylish!
Def- Def- Definitely stylish!

P.S.- Is it noticeable that I like stripes? Ha!
Linking up to:
ingenous and my neighbor just gave me a bunch of Rope and I covered a small moving container and now I will a basket.. thank you
THANK YOU Shirley! And how lucky are you?! Free rope!! I hope you love it! 🙂
-Shayna
Wow! What a transformation! I would never have thought that was originally a plastic laundry basket! Great step-by-step instructions.
THANK YOU Amanda! I love the transformation too and it’s such an easy project! So happy you enjoyed it! 🙂
-Shayna
OK! I know, I’ve told you this many times but I will tell you again: you are so creative! 🙂 you did a great job Shayna! 🙂 I never would’ve guessed it was a plastic basket before! I believe you when you say you will be making one for each room! ha!ha!
Awe- THANK YOU Ingrid! Your comments always give me such big smiles!
Hugs to YOU!
-Shayna
Where did you get the rope cheap. Can’t find it cheap
Hi Julie! I bought the rope from our local craft store! I’ve also found it at Home Depot. I hope that helps. 😀
I am menufacturer of jute londey basket @ facebook ( bangla jute handicraft)
Brilliant, I adore this basket! Not only does it totally match the lamp shade I recently did, you also did a fabulous job making this! Off to pin!
JACQUE! Thank you so much! And you’re right- this totally matches your lamp shade! Great minds think alike?! Thanks for the pin! 🙂
Hugs!
-Shayna
What a GREAT idea! It looks awesome..
Stephanie @ thestyledsoul.com
THANK YOU soo much Stephanie! I’m happy you like it! 🙂
-Shayna
This is so awesome Shayna!! I have a laundry basket just like that that’s broken and annoying. Thanks for the inspiration. I’m totally trying this!! Pinned 🙂
THANK YOU Chelsea! It’s such a rewarding project… and just perfect for your broken and annoying laundry basket. You won’t even know it’s the same thing! 🙂
Thanks for the pin!
-Shayna
Found you through the YHL pinterest challenge. Great project! I love sisal rope anything and I might have to make myself a few baskets 🙂
Hi Mary! So happy you found me- and that you like my rope basket! I love it too! 🙂
-Shayna
Another awesome project girl! Love it. Pinned it. Yay you 🙂 So cute!!!!
Awe- THANK YOU Shannon! Such a sweet comment from a lovely lady! 🙂
Hugs!
-Shayna
How creative and cute!
THANK YOU Jae! 🙂
-Shayna
OMG! I love this idea, so crafty and probably wayyyy cheaper than Ballards.
THANK YOU Courtney! And yes, it was waaayyy cheaper than Ballards! 🙂
-Shayna
Wow, seriously?? That’s amazing. You did an amazing job!! I love it!
Jamie @ somuchbetterwithage.com
THANK YOU Jamie! I’m so happy you love it! It’s such a rewarding project! 🙂
-Shayna
Very cool! What a great knock-off. It looks so nice. Pinning!
Awe- THANK YOU Lora! So happy you like it! Thanks for the pin! 🙂
-Shayna
Oh my word, this is totally unreal. I love it and a great tutorial too. I host a weekly party called Inspire Me Tuesday that will be live tomorrow evening. I would love for you to link up. http://www.astrollthrulife.net. Hugs, Marty
THANK YOU so much Marty! I’m glad you like it! I’ll be sure sure to stop by your party! 🙂
-Shayna
How awesome! I may need to give this one a try. Love it.
THANK YOU Beca! I’m so happy you love it- me too! 🙂
-Shayna
This is so awesome!! Thank you for sharing at Give Me The Goods!
Dimples & Pig Tales
THANK YOU so much Amber! And thank YOU for hosting! 🙂
-Shayna
Out of a clothes basket?! So clever and so cute! Love it! Thanks so much for linking up at Give Me The Goods Monday! Can’t wait to see what you bring next week! Jenna @ Rain on a Tin Roof
I love it!! What an excellent idea. I like your basket better, too. I want to try this now. It is fabulous!!! What was the total cost with the jute and rope? I’m sure it was still much better than the Ballards price.
Ruth
THANK YOU so much Ruth! I’m so happy you love it! 🙂
The rope was relatively inexpensive. I think I spent about $8 for the nylon rope and $4 for the jute rope. I’ll pay $12 any day, especially when I have enough rope for 2 baskets!
-Shayna
That is brilliant! It’s so cute, Shayna! Love it!
THANK YOU so much Roeshel. I’m so happy you love it! Me too!
-Shayna
You know I love this! Thanks for linking up 🙂 Have a super week – Shannon
Awe- Miss Shannon! Thank you! So happy to link up!
I hope you have a SUPER week too! 🙂
Hugs!
-Shayna
This is brilliant and I would have never have known the basket came from the Dollar Tree. I love the stripe and the texture. 🙂 I am visiting from Debbie Doos!
Hi Melissa! So happy to have you visiting- and so happy you love this basket! I love the stripes too! 🙂
-Shayna
Love this! I was just thinking that I need to come up with something cute to cover my plastic laundry basket and this is perfect!!!
thanks for the inspiration, found you through Thistlewood Farms FB page.
Have a happy week 🙂
THANK YOU Anne! It’s such a simple way to spruce up your laundry basket! 🙂
Thanks for popping over from FB!
I hope you have a great week too! 🙂
-Shayna
You are one clever lady. I cant tell you how much I love this.
Awe- THANK YOU Karen! I’m so happy you love it! 🙂
-Shayna
That is amazing, beautiful and thrifty!
Awe- THANK YOU so much! 🙂
-Shayna
Love the basket!! And the black/cream shoes inside the basket!!! You are so creative!!
THANK YOU so much Vickie! So happy you like it… and the shoes! 🙂
-Shayna
Shayna: Love this basket, I would love to try this but I am not crafty. Would you be interested in making a couple for me. Please consider it or maybe you can refer me to someone who would.
Thanks
If you need any jute basket plz contac me or visit facebook ( bangla jute handicraft)