

Replacing The Kitchen Sub Flooring
If you ask either one of us what our least favorite project has been to date, we’d both probably answer with replacing the kitchen sub flooring. Don’t get me wrong, we were thrilled to get the nasty, rotted sub flooring up and out, but the process of actually doing it left a lot to be desired…
Remember when I shared all about demo’ing the kitchen?

And when we found mold around the sink?

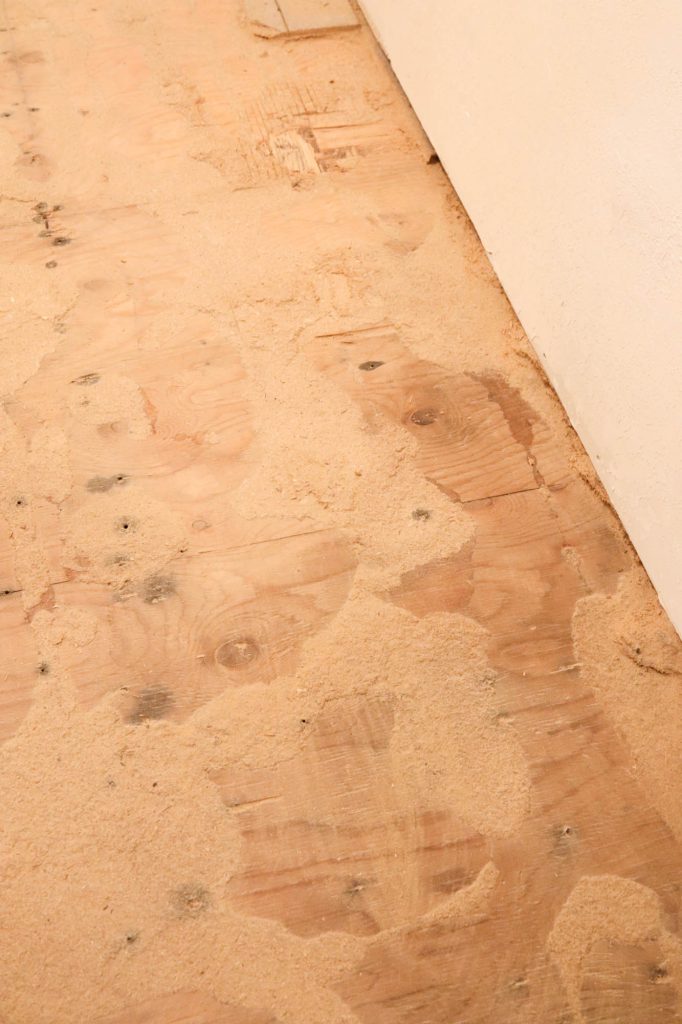
The previous people obviously didn’t care about the leak, because not only did they let it start growing mold, but it also rotted the main layer of sub flooring. (Palm to the forehead…)
When we broke up the kitchen tile, and pulled up the thin layer of wood underneath, we could see the kitchen sub flooring had absorbed all that water. When this house was built, they used particle board as the sub flooring, which is essentially sawdust and glue formed into sheets. It doesn’t hold up to water and has absolutely no sort of resistance. It rots, swells and falls apart. And that’s exactly what we found.

Not every part of the kitchen flooring was bad, but the majority was since the fridge had also been leaking water. (Palm to the forehead… again.)
Here’s how we went about removing the rotted sub flooring and installing new plywood!
Please know, I greatly appreciate you shopping through the links I’ve shared in this post. It allows me to make a small commission from your purchase, while your purchase price stays the same. By shopping through these affiliate links, you’re helping the blog to “keep the lights on” and create new content! Thank you, thank you!
Tools:
- Drill
- Spade Bit
- Circular Saw
- Pry Bar
- Hammer
- Angle Grinder
- Dremel Saw
- Zinsser Mold Primer
- Tape Measure
- Plywood, 5/8 thick
- Screws, 2 1/2″
- Liquid Nails
- Chalk Line
In order to tell just how thick the sub flooring was, we drilled a hole and quickly realized there was another layer underneath…

Pulling it up was a messy, dirty job. And to think, the kitchen walls were painted (sigh), but thankfully we hadn’t painted the rest of the interior just yet…

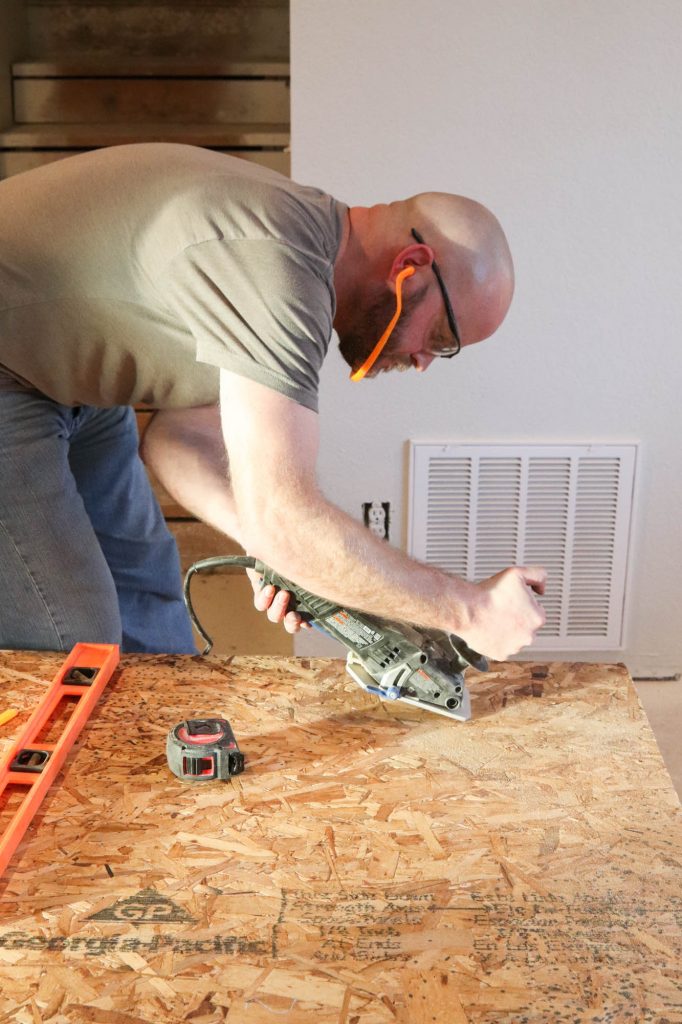
We used a circular saw, set to the depth of the top sub flooring layer, and cut strips into the particle board, then used our pry bar to start lifting it up. It came up in chunks… and most of them weren’t very big.

It was tedious, nasty and the whole main level of the house was coated in particle board dust. Not only had the sub flooring been screwed down, but it was also glued down. There were sections that just. wouldn’t. budge. We tried everything to get it to come up, but in the end the only thing that would touch it, was the grinder.

Todd is a champ, I’m telling you. I gave up, threw in the towel and started painting the hall bathroom. After hours of prying up quarter size chunks I had had enough.

The edges were the hardest. We bought a little dremel to cut the sub flooring right at the drywall since the sub flooring runs underneath the wall. But even with it cut, we had to pry it up by hand. We also ran into one area that was in perfect shape and it wasn’t coming up. We tried… or should I say Todd tried. Since it was in the corner of the kitchen, we decided to leave it be.
Given the rough condition of the first layer, we were honestly surprised at how good of shape the second layer was in. Other than it having a few stains, that could be sanded off, it was in much better shape, and very strong! The particle board had taken the majority of the damage. But just to be sure, we asked several different contractor friends and they all came back with the same answer… leave it in place and add new material over it. So that’s what we did.
To be safe, even though it was probably overkill, I added a layer of mold primer to any area that had previously had water, or looked funny…

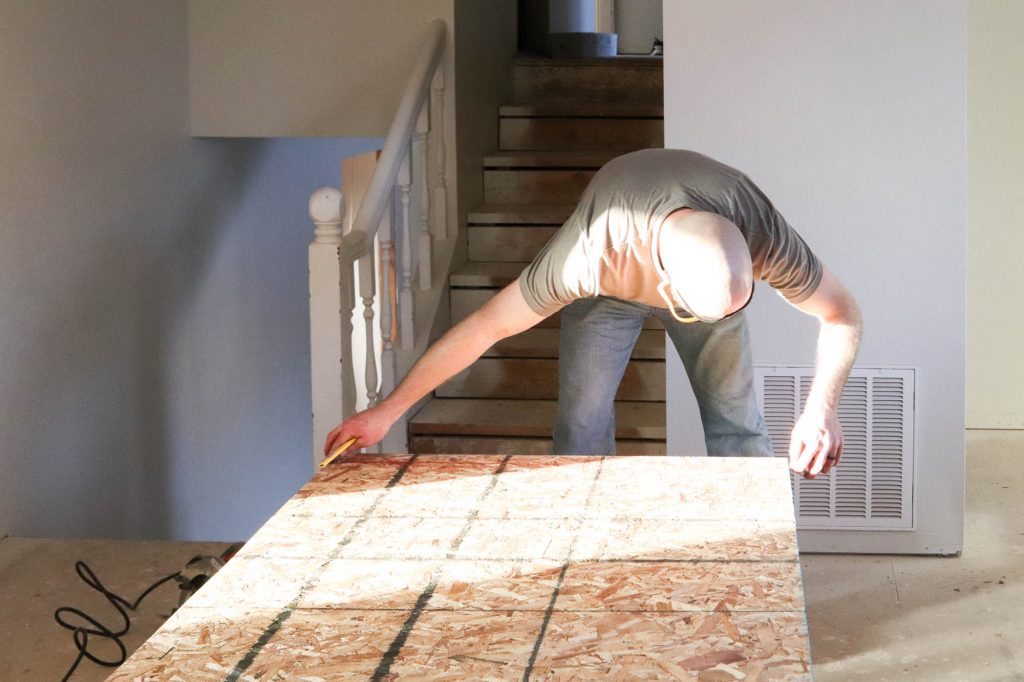
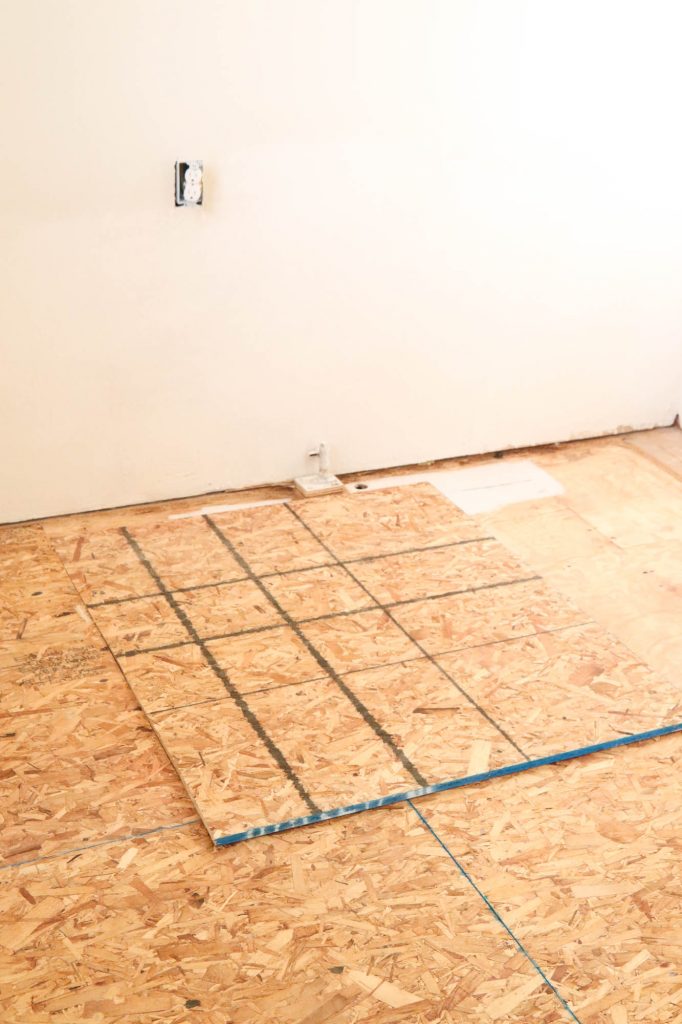
Then, we started adding the new layer!

We used both screws and liquid nails to secure it…

We cut down the 4’x8′ sheets to fit the room, and kept working our way across the kitchen…

We used a chalk line to mark the sheet…
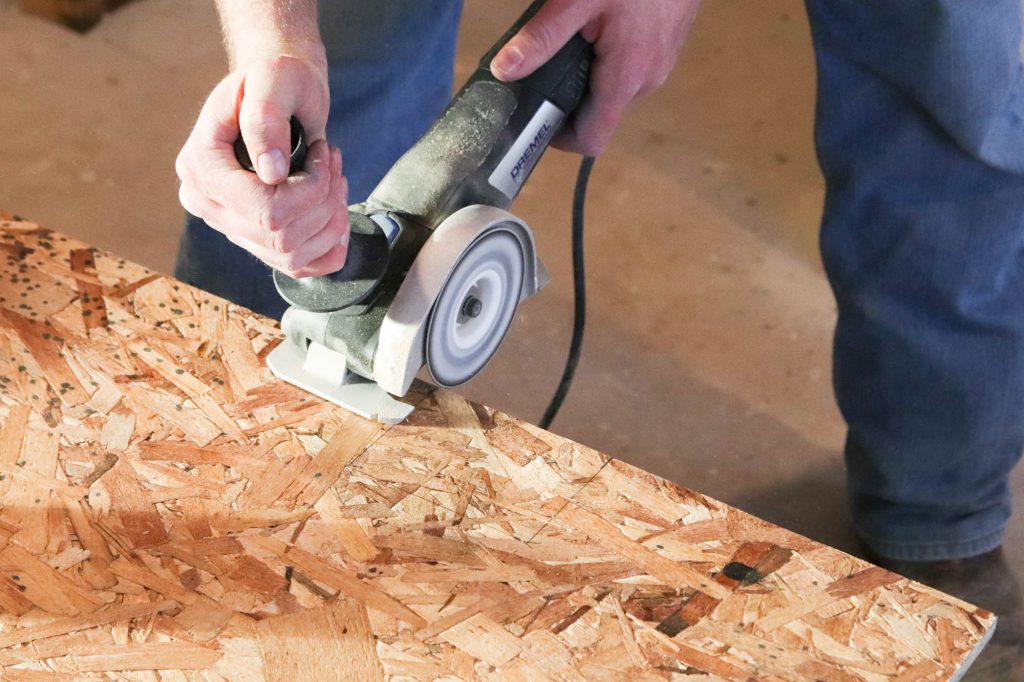
And then used our dremel to rip it down. This little tool is powerful! We had a few areas where we had to notch around the existing gas line, water line and then the small area with the previous sub flooring…
We measured each of those spaces…
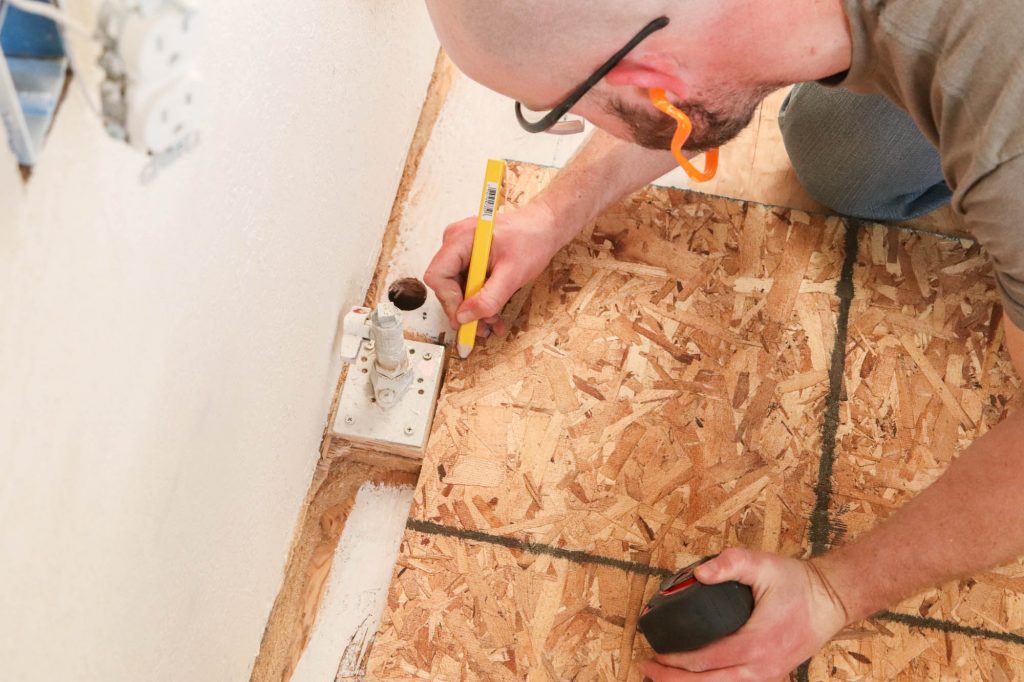
Then cut them out…
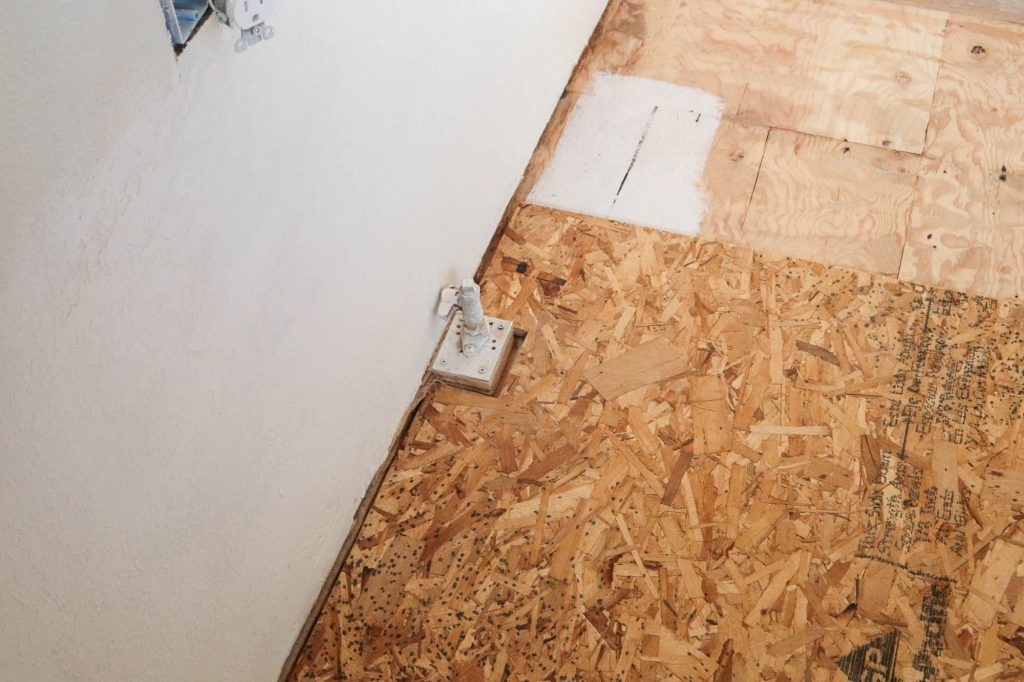
After all the cuts were done, we were left with a nice, new sturdy sub flooring!

It’s so much stronger and the floor feels healthy now. Was it a fun project? No. But was it absolutely necessary? Yes. A thousand times over! Needless to say, we were both really happy when this project was over and we could start laying the new flooring!
You two are amazing. You make a good team.I admire that you are not afraid of really hard work. You can be so proud.
I’d have cried and cried!!! I’d have given up!! I’ve neverknown anyone with this much heartache infixing up a house that is not ancient. I’m so glad your reno partner did not want to skimp on doing this the right way. Ick!!! Now you know there’s no mold. No icky stuff.
What a lot of work and I’d never have known. Thanks for showing the sweat equity that’s harder than starting new.
This house will look amazing from it’s insides to its surfaces !!!
Way to go. You’ve gotten so much done!!!!
Turning a house into Your Home. How sweet it is. Also, I spy a wedding band on your honey ~ so Happy you two tied the knot.
: )
He’s definitely my favorite! 🙂
Sooooooo much hard work……………… but as a follower/ reader … I am cheering you guys on!!! So exciting and I can’t wait to see the reveal!!!!! Home Sweet Home!!!