• Home
  • Blog
  • About Me
    • Contact Me
      • Advertise
      • Privacy Policy
  • Shop

The Wood Grain Cottage

  • Seasonal
    • Spring
    • Summer
    • Fall
    • Winter
  • Project Gallery
    • Remodeling
    • DIY Projects
    • Decorating Ideas
    • Furniture Makeovers
    • Sewing
    • Gardening
    • Recipes
    • Organizing
  • Home Tour
    • Our Current House
    • The Original Wood Grain Cottage
DIY Projects· Seasonal Projects· Winter

DIY Wood Stocking

October 30, 2015

Disclosure

This unique DIY wood stocking is a great way to add some serious charm to your Christmas decorating this year. It’s easy to make, needs minimal materials, and can be customized to fit your style!

DIY Wood Stocking By The Wood Grain Cottage

Christmas is right around the corner. Before we know it, we’ll all be decorating for the holiday, shopping for gifts, and preparing our home for guests. I love this time of year! This wood stocking is the perfect holiday project that can have so many different uses: hang it on your front door, on your mantel, kids’ bedroom doors, mailbox, etc. It’s so versatile, and the size can be customized to fit your needs. 

Here’s how I made it:

First, I started with a small section of plywood. I didn’t use the real stuff, but rather the composite. I wanted the texture of the rough wood; you’ll see why below.

DIY Wood Stocking By The Wood Grain Cottage

I started to draw the shape of my stocking. This sounds like it would be a little bit difficult, but it wasn’t. Make your stocking as big or small as you want, and feel free to play with the shape of the stocking!

DIY Wood Stocking By The Wood Grain Cottage

With the shape drawn, I used our jigsaw to start cutting out the stocking.

DIY Wood Stocking By The Wood Grain Cottage

DIY Wood Stocking By The Wood Grain Cottage

I used a piece of sandpaper to knock off the rough edges.

DIY Wood Stocking By The Wood Grain Cottage

And then I painted it with some leftover white paint.

DIY Wood Stocking By The Wood Grain Cottage

While the stocking was drying, I started building the box for the front. I used a piece of 4- inch pine for the box, and cut it into four pieces: two at 3 1/2 inches long, one at 4 1/2 inches long, and one at 6 inches long. 

DIY Wood Stocking By The Wood Grain Cottage

I started by taking the 6 inch board (the bottom), and running a bead of wood glue on the edges.

DIY Wood Stocking By The Wood Grain Cottage

I took the two small side boards (3 1/2 inch long) and added them to each side, nailing them in place.

DIY Wood Stocking By The Wood Grain Cottage

Then, to create the front of the box, I added the 4 1/2 inch board, and nailed it in place.

DIY Wood Stocking By The Wood Grain Cottage

And, just like that, the box was done. I stained it with Provincial by Minwax.

DIY Wood Stocking By The Wood Grain Cottage

To attach the box to the stocking, I placed it in the center of the stocking, then used our nail gun to secure it in place from the back of the stocking.

DIY Wood Stocking By The Wood Grain Cottage

Then, to give it some character and dimension, I decided to wrap the top of the stocking with batting.

DIY Wood Stocking By The Wood Grain Cottage

I covered the batting with some plaid fabric.

DIY Wood Stocking By The Wood Grain Cottage

And stapled it in place.

DIY Wood Stocking By The Wood Grain Cottage

DIY Wood Stocking By The Wood Grain Cottage

With the top of the stocking done, I cut the fabric for the toe and heel.

DIY Wood Stocking By The Wood Grain Cottage

DIY Wood Stocking By The Wood Grain Cottage

I simply used hot glue to secure them to the stocking. Once they were on, I attached basic sawtooth picture hangers to the back. Just like that, the stocking was done!

DIY Wood Stocking By The Wood Grain Cottage

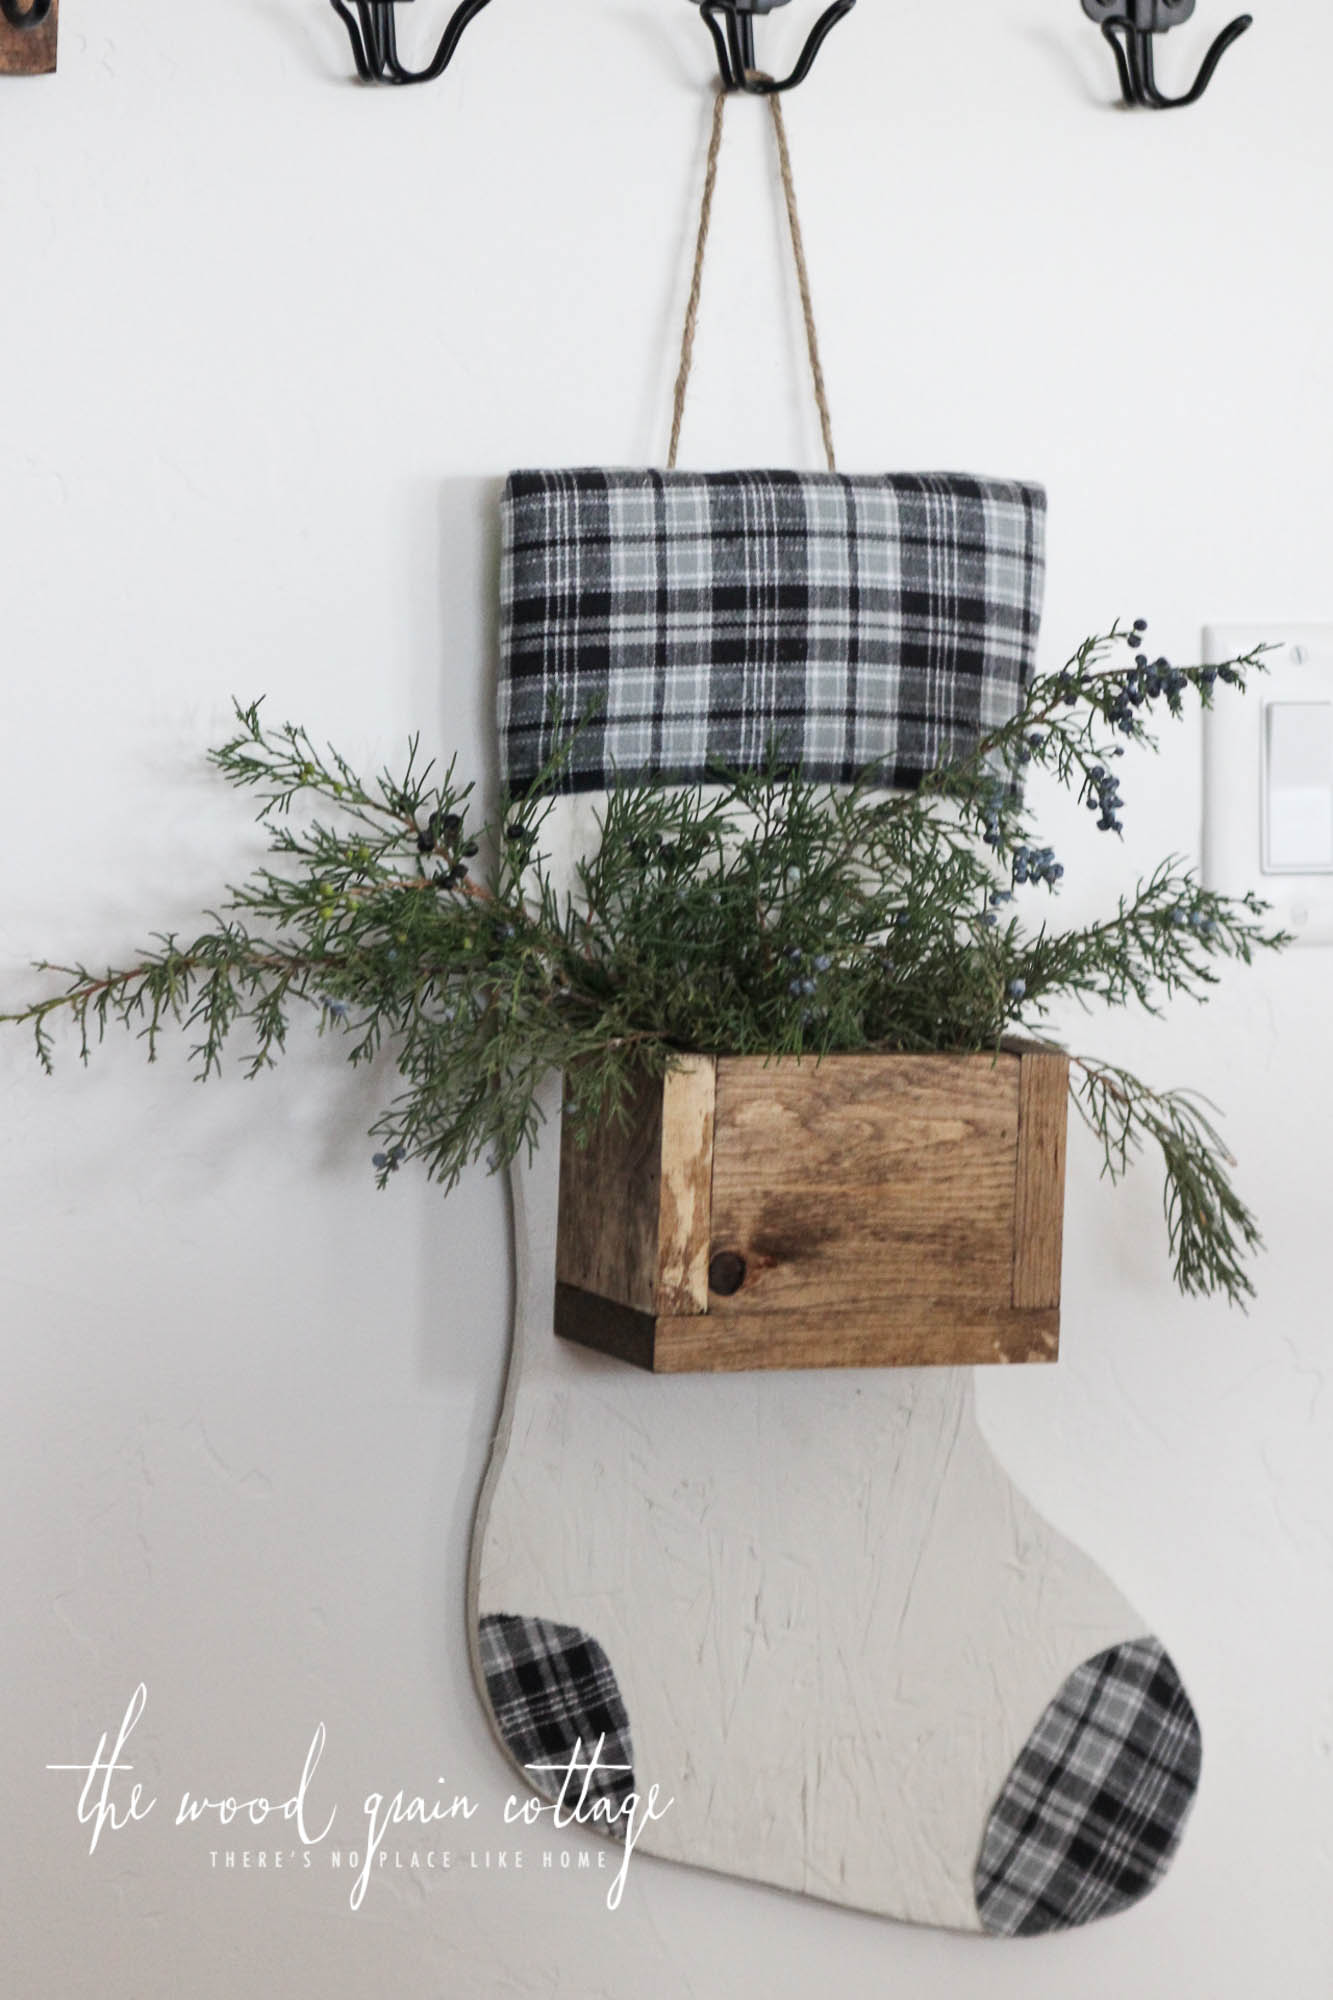
I decided to hang it from jute roping rather than the hooks, but I did use the hooks to wrap the rope around.

DIY Wood Stocking By The Wood Grain Cottage

I love the combination of the stained box with the cream paint, and the plaid fabric.

DIY Wood Stocking By The Wood Grain Cottage

I also love that the stocking looks as if it is made of a subtle fabric. Because I used the textured plywood, it gave the stocking a simple pattern.

DIY Wood Stocking By The Wood Grain Cottage

And when you add fresh greenery into the mix, magic always happens.

DIY Wood Stocking By The Wood Grain Cottage

DIY Wood Stocking By The Wood Grain Cottage

Those simple projects, I tell ya…

And I’m so excited to share about The Home Depot’s Do-It-Herself in-store workshops. They are held on the third Thursday of each month at all Home Depot store locations. Grab your girlfriends and have a fun-filled ladies night learning new skills, knowledge, and confidence from the pros! You can be a great DIY-er, I promise!

The Home Depot wants everyone to have the skills and confidence to be a first-class do-it-yourselfer. In-store workshops are a great way to get step-by-step instructions and hands-on experience learning to do simple décor and easy home improvements.

Want to learn more? Register online today to attend this month’s workshop!

hd_logo_blogger

Blog Signature

I’m Shayna… The small town Colorado girl who’s obsessed with home and everything that entails! I’m a creative, a decorator, a day dreamer, a huge fan of scones and I’m passionate about loving where I live and making a home.

Tagged with: DIY, seasonal project, winter5 Comments

Comments

  1. Dawna says

    October 30, 2015 at 4:54 PM

    The plywood is great for the main stocking! I love the texture of it too. Great idea! How is the online store going for you so far? 🙂

    Reply
  2. Audrey Zumwalt says

    October 30, 2015 at 6:36 PM

    Really cute and an excellent tutorial. just what I need for my front door. Thanks for the inspiration.
    Audrey Z. @ Timeless Treasures

    Reply
  3. Shannon says

    October 30, 2015 at 6:47 PM

    Adorable!
    Cute, simple & beautiful.
    I love it 🙂

    Reply
  4. Gwen says

    October 30, 2015 at 9:27 PM

    I have NO room for one. I’ll make room!! I’m disabled mentally so a big no to stuff like saws but oh I can dream!! At first I saw the plywood and I thought Huh???but as always , you have it right. Before I read on I just was hooked on the texture it gave to the stocking!!! This box makes it unlike anything I’ve seen. I’m sure I could hint for a gift??? I have a handy son in law!!!

    Reply
  5. Rose says

    October 31, 2015 at 7:19 AM

    I agree with Audrey – perfect for the front door.
    Thanks Shayna –
    Will this be in your store??

    Have a wonderful day
    Rose

    Reply

Leave a Reply Cancel reply

Your email address will not be published. Required fields are marked *

This site uses Akismet to reduce spam. Learn how your comment data is processed.

I’m Shayna… The small town Colorado girl who’s obsessed with home and everything that entails! I’m a creative, a decorator, a day dreamer, a huge fan of scones and I’m passionate about loving where I live and making a home.

Join our newsletter

Search the blog

Join our newsletter

Instagram post 17877687346486071 We are loving the evening glow from our Christmas tree! Today on the blog, I’m sharing all the details on our tree and the different steps and layers I used to create it. It’s such a beautiful addition to our living room. 🎄

#thewoodgraincottage #thewgc #christmastreedecorating #christmas #christmastree #flockedchristmastree
Instagram post 17855703316617271 Happy Saturday! We’re installing more interior doors and trim today! What a big difference it makes! This fixer upper of ours has been making some big progress lately. 😍 
Throwback to my last house... but our new doors will look similar to these! 
#thewoodgraincottage #thewgc #interiordoors #christmasdecor #christmasentryway
Instagram post 17856780565609483 Our new flocked Christmas tree arrived and I spent the afternoon setting it up and fluffing the branches. It’s such a tedious job, especially on a new tree, but it’s worth it! 
I’ve been trying to decide how I wanted to decorate this year, and while I was “fluffing”, I think I finally decided. And now I’m excited. 😬🎄 This lovely picture is from my last house, all decorated for Christmas. 😍

#thewoodgraincottage #thewgc #christmasdecor #christmasinterior #christmasshelfie
Instagram post 17842824415781814 On the blog, I’m talking all about designing and purchasing our IKEA cabinets. We still have a little ways to go before we “officially” have the cabinets completely installed and finished... and then we have all the other things we need to add, like a custom vent hood, backsplash and open shelves, just to name a few, but if you’re wanting to use IKEA cabinets, today’s post will give you a good idea of what to expect! 
#thewoodgraincottage #thewgc #ikeakitchen #ikeacabinets #kitchenremodel #ontheblog
📷: @patriceandeverett
Instagram post 17881252693452397 I’ve been updating the home tour of my old house on the blog, and I ran into this gem of a picture. This breakfast nook was such a beautiful space. 
#thewoodgraincottage #thewgc #breakfastnook #homedesignideas #kitchendesign
Instagram post 17859897157563074 I’ve been on the hunt for a new flocked Christmas tree since this beautiful tree is waay too tall for our 8’ ceilings... and I don’t want to look like Clark Griswold with my tree stuffed in the corner about to burst through the window. 💁🏼‍♀️ Sooo... I searched high and low to find the best flocked Christmas trees. There are some seriously beautiful trees... and after getting our tape measure out, we finally picked our new tree and it should be here this week! 🎄

If you’re looking for a new tree, be sure to head to the blog... I’ve organized them by size to make it easy! 👍🏻 #thewoodgraincottage #thewgc #christmasdecor #christmastree #flockedchristmastree #ontheblog
  • Facebook
  • Instagram
  • Pinterest
  • Twitter
  • Shop
  • Email

Copyright © 2019 The Wood Grain Cottage · Site by Moonsteam Design · Privacy Policy