
Wood Welcome Sign
I mentioned before that I’m all about sprucing up the exterior of our home, and I can’t wait until I can start planting flowers and herbs! For this edition of $30 Thursday, I decided to spend the attention on our front porch, and add something to go with the new wreath I just shared.
In case you’re new here, $30 Thursday takes place on the first Thursday of the new month. April from House by Hoff and Jen from Migonis Home join me in bringing you new ideas you can make for $30 or less!
And my new wood welcome sign fits that bill perfectly!

Here’s how I made it…
I started with a round piece of wood from the lumber section at your hardware store. This one is from Home Depot.

Then I stained it Early American by Minwax…

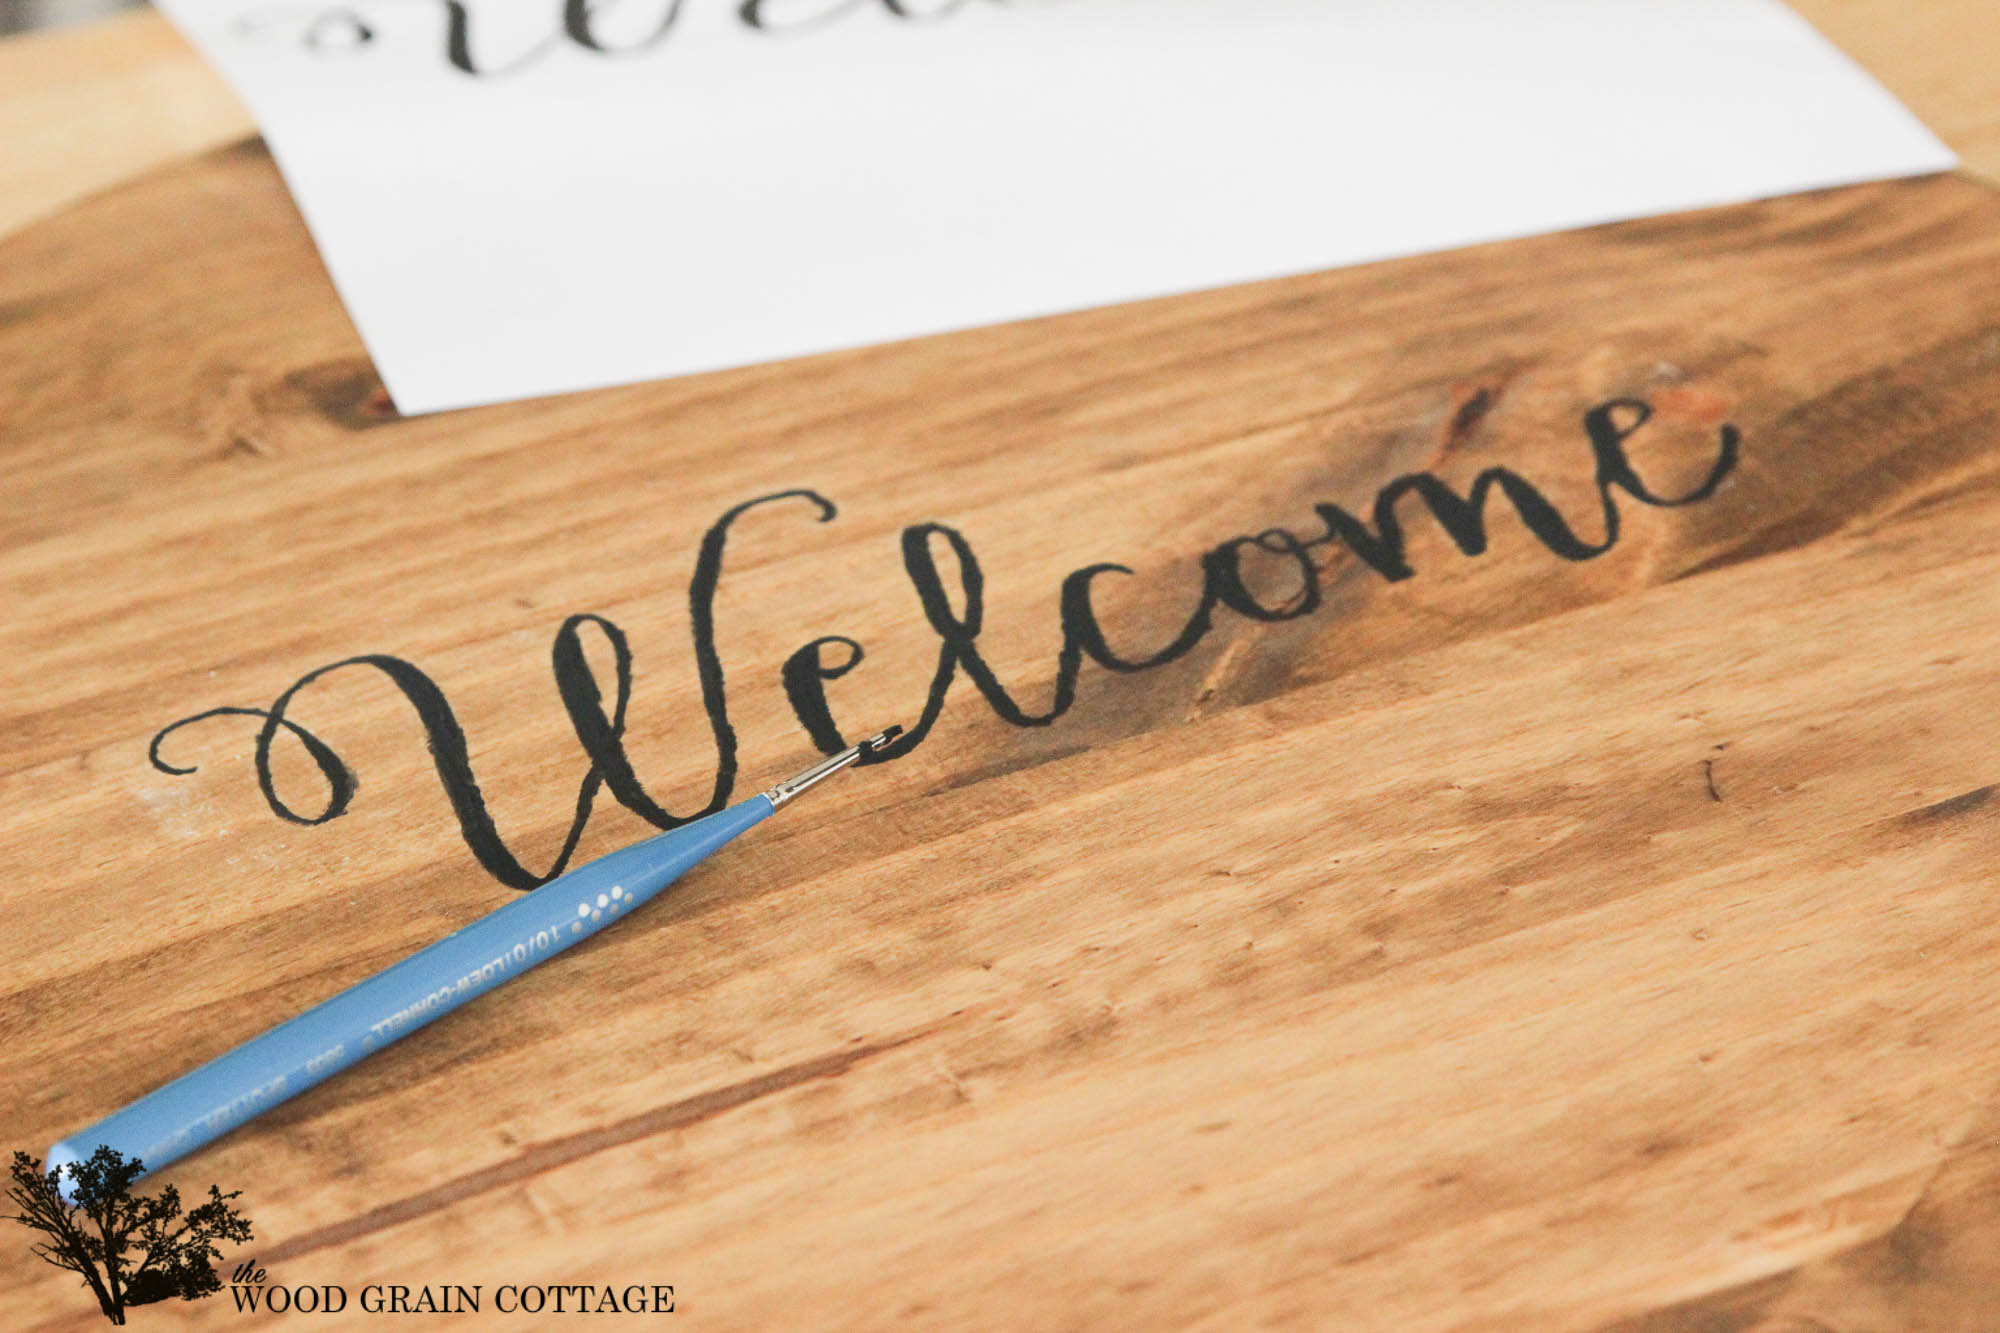
Once it was stained, I created my design by printing out the wording and graphic…

The font is a paid font, Isabella Script, and the graphic is something I purchased from Etsy.
Then, I center positioned the wording, and began tracing the lettering with a pen…

I made sure to press hard enough so there was an outline in the wood once I removed the paper. It worked perfectly!
Next, I used plain black paint, and a fine point brush, and began filling in the letters…

A steady hand is best, which I was lacking that day, so once I had the entire wording filled in…
I just went back over all the letters and cleaned it up. Then, I followed the exact same steps to add the graphic piece.
With the graphic added and filled in with paint, I let it dry, then waxed it with a dark wax…

And with that, it was done!
I did decide to hang it, so I drilled a hole in the back, big enough for my nail, then pressed a nail in between my bricks. Worked like a charm!

I’m loving the extra pop of character it adds to our front porch…

And when I don’t want to hang it, it will look just as lovely propped up against our potted flowers…


There’s just something I love about the small touch of wood to our front porch…

And as soon as the wind stops blowing, it’s going right back up on the wall…

Yesterday as I was taking pictures, the wind was in full force, knocking me and my patio furniture around. And in the middle of the shoot, it fell off the wall, nicking the corner. Such a sad moment, but nothing a bit of stain couldn’t fix. Anything that makes it’s appearance on this front porch needs to be brave and familiar with the wind, and this lovely little sign got a hard dose right from the get go. We’re both still bracing ourselves. 😀
Now, Jen and April have a few projects to share as well…
April made this old picture frame into a darling message board…

And Jen is sharing this easy idea to turn sea fan into art…

They both always have such great projects! To see all of them, join us on our group Pinterest board. It’s loaded with easy, affordable projects you can make, or recreate, for $30 or less!
Here’s one more picture for the road!

Enjoy! And happy April! 😀

I love this Shayna!!
Don’t worry about the nick it adds more rustic charm! Very cute idea – thanks for sharing.
Super cute! Every time I see those round pieces of wood at HD I always think about you. 🙂
Love it!!! Before you were born we had Americana. It was expensive for the quality stuff. My friend had a steady hand and skills with saws, routers and could make anything we found in a catalog. She did a half circle white with slate blue edging to match my house. She stenciled WELCOME FRIENDS with a small house and est. date. I hung it under my porch light by my front doors.
My Dear Dad saw the sign and said, I think hurt and so loving and gentle he was,” So Family isn’t welcome??” So after that I prefer Welcome:). Thus I love your sign. Not a copy of the old fashioned stuff of mid to late 80’s but refreshed and not excluding your friends NOR family!!!
Wow, what an easy and inexpensive way to give an added addition to your entrance. The graphic is fitting and I think works well hanging or even in the olive bucket. The nick just adds character to the piece.
Love it! Pinned! 🙂 A sign like this would be the perfect rustic touch for our front porch. 🙂
You are my idol.