

")

")


")
I’ve wanted to make numbered clay tags for a good while now. It seems like everywhere I look, they keep popping up. They’re just that cute.
So, this weekend I set out to make my own.
First, I tried to use the ever popular salt clay recipe, but I didn’t like the outcome and ended up buying my own polymer clay at the craft store.
Because I tried both methods, I thought you might like to see the outcome of both… and to see the better choice if you want to make your own!
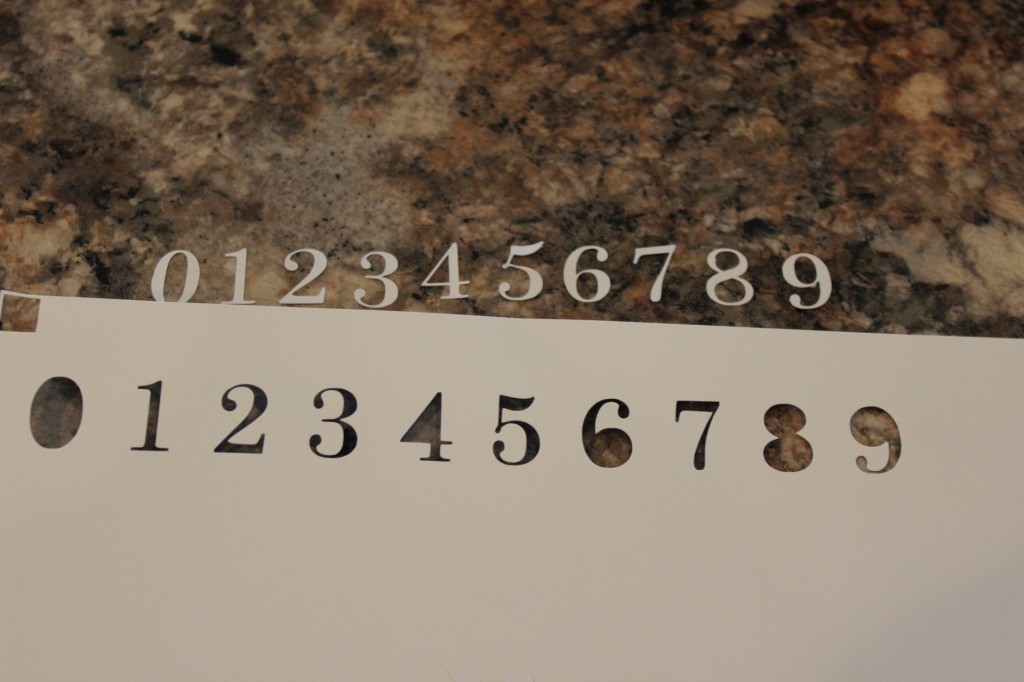
To start, I used my Silhouette to cut out the numbers on card stock.
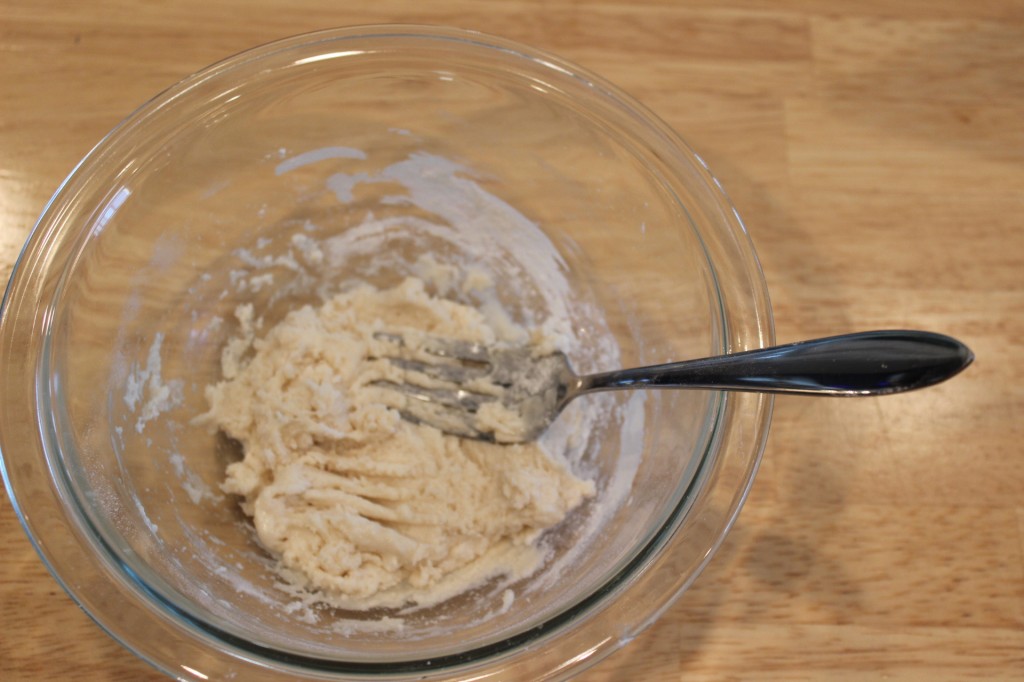
Then I made the salt dough recipe. The directions said to mix 1/4 cup of flour, 1/8 cup of salt and about 1/4 cup of water, or until it was consistent and play- dohy in texture.
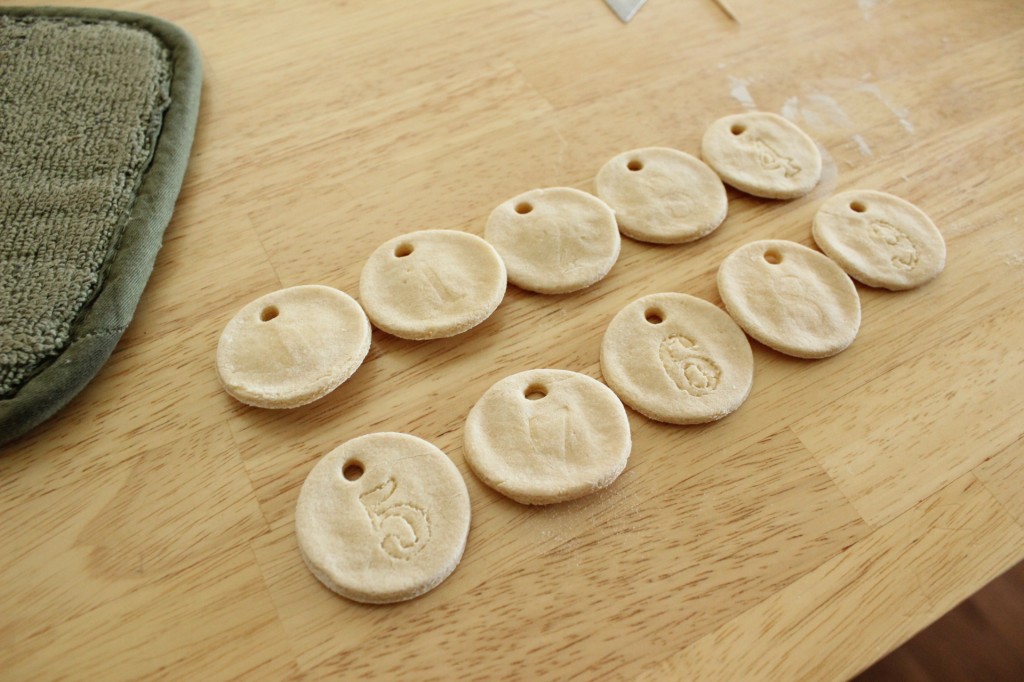
Then, I rolled it out onto a lightly floured surface and used a round cookie cutter to cut the dough. Everything about this reminded me of sugar cookies. The dough felt & looked just like it. Made me want to eat the dough really bad…
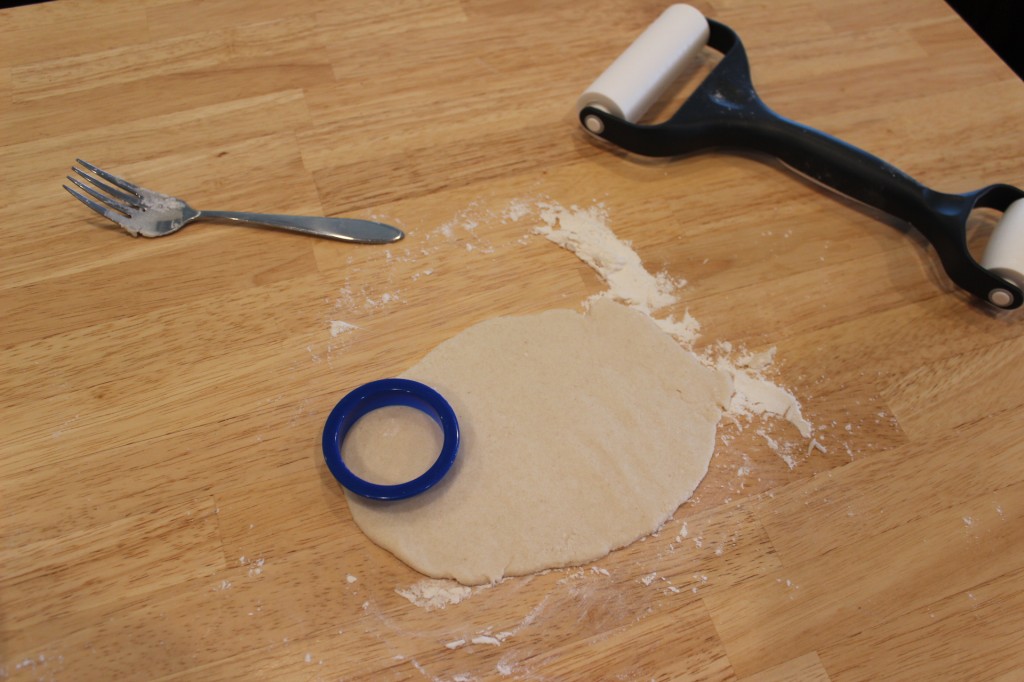
With enough cut out, I used a straw to punch a hole in the top of each one, and used a toothpick to trace around my numbers. This was quite frustrating because the dough wanted to keep pulling and sticking up… I didn’t even finish tracing all of them. I figured it would be easier to trace the shape on once they were baked.
Then, just like the instructions said, I baked them at 250 degrees for 2 hours.
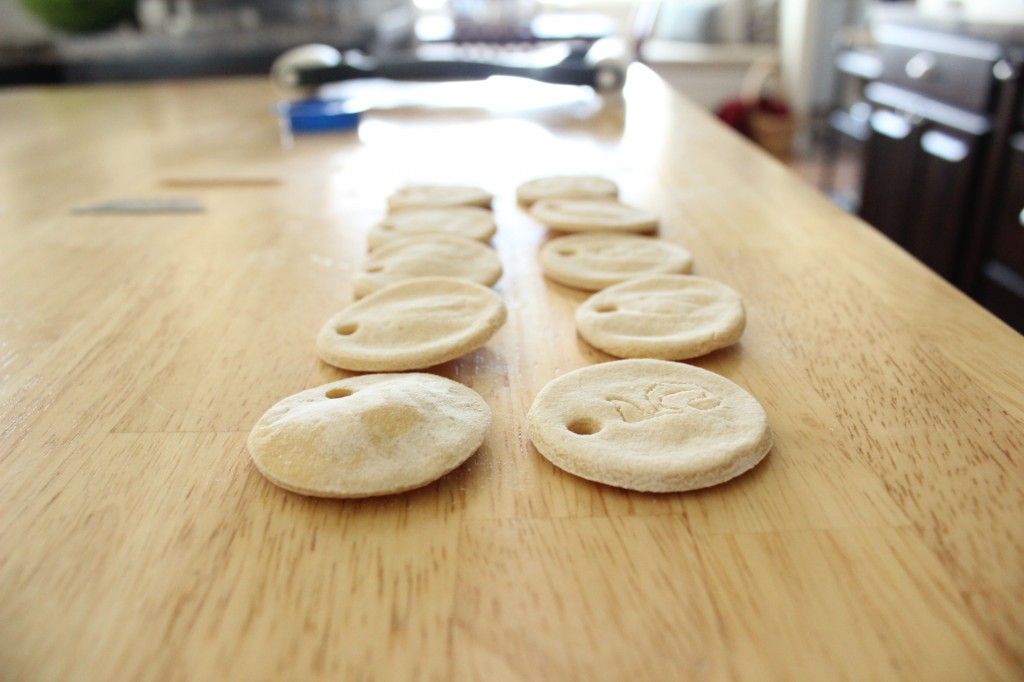
When they came out, a few of them looked okay, but the rest of them had puffed up in the middle. They just looked plain bad. Even Anthony said they were a flop….
Frustrated with the outcome, I decided to visit our local craft store to pick up the proper clay. I was determined to have those cute clay tags.
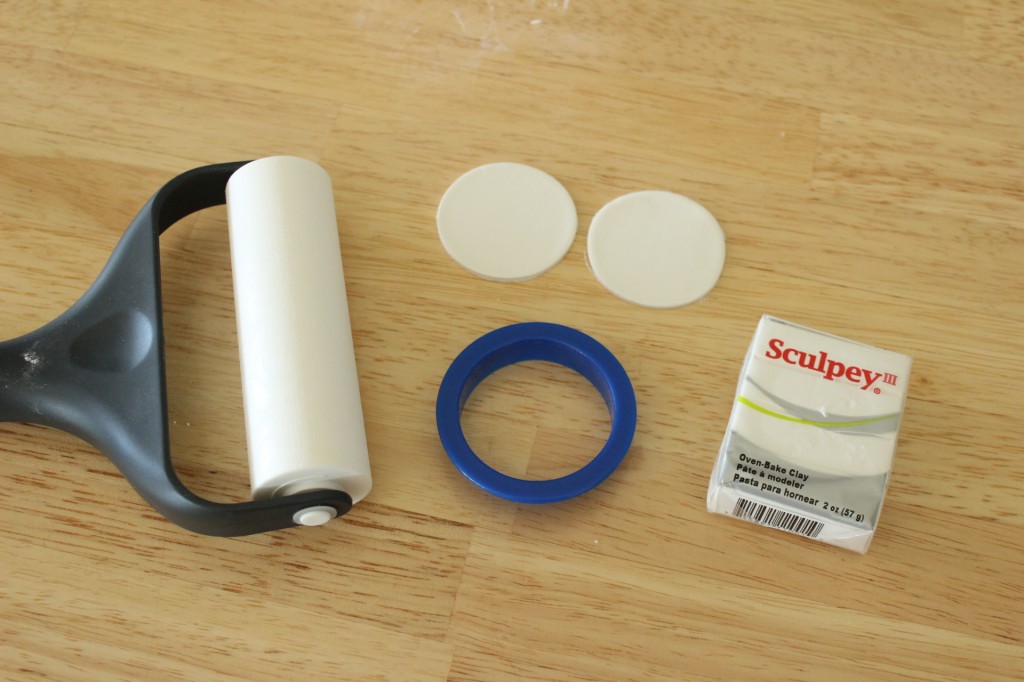
Let me just tell ya, this was the way to go!
After rolling the clay around in my hands for a few seconds, I grabbed my rolling pin and started rolling it flat to about 1/4″.
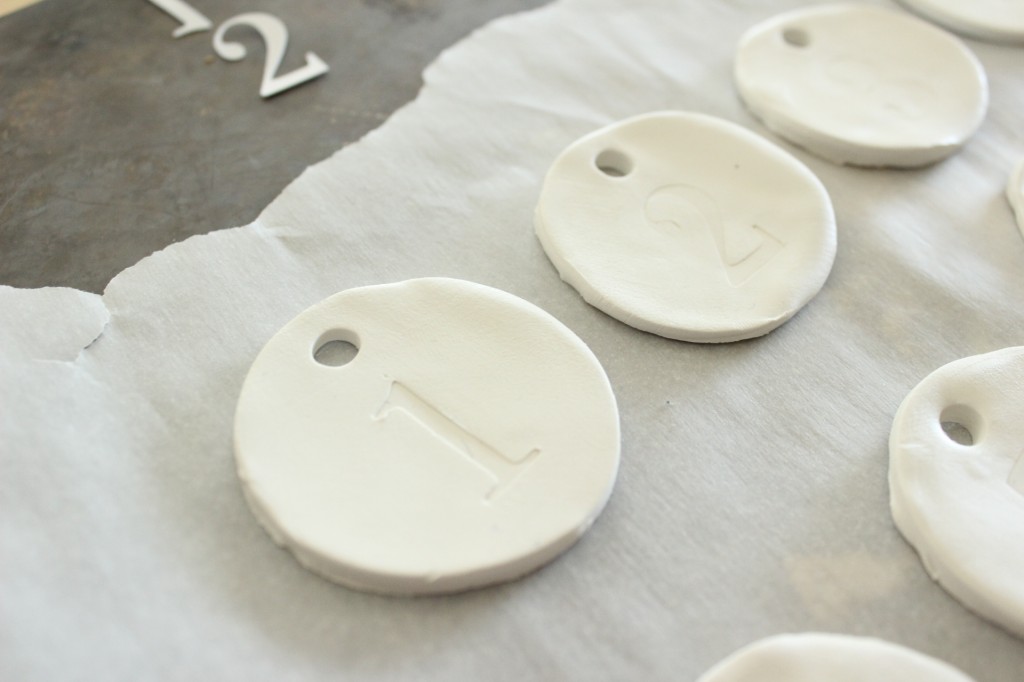
I used my cookie cutter to cut the shapes…
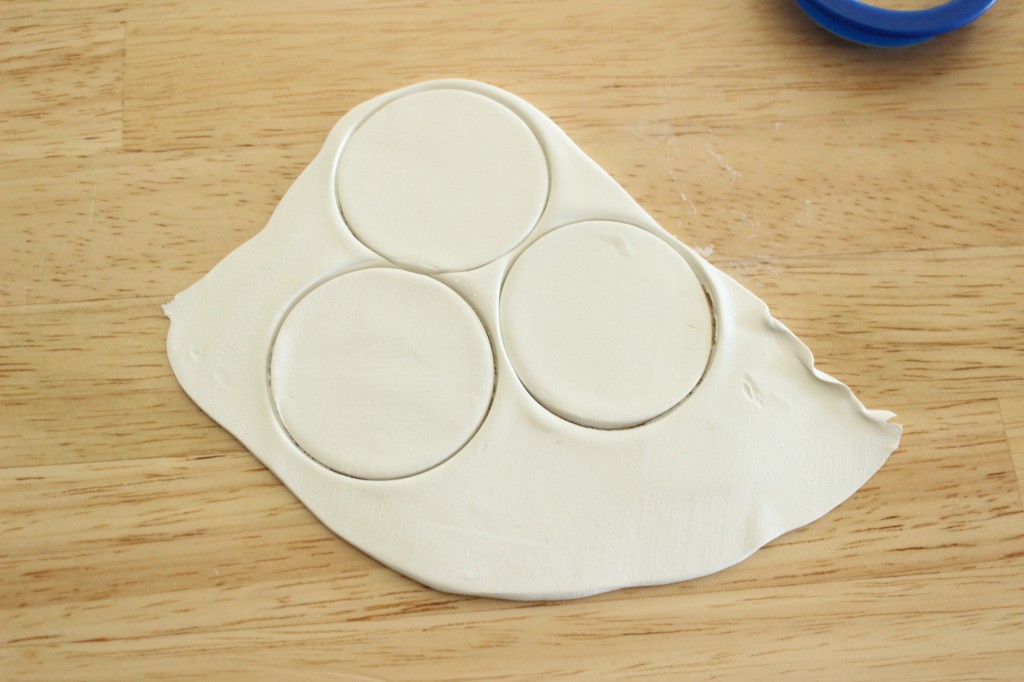
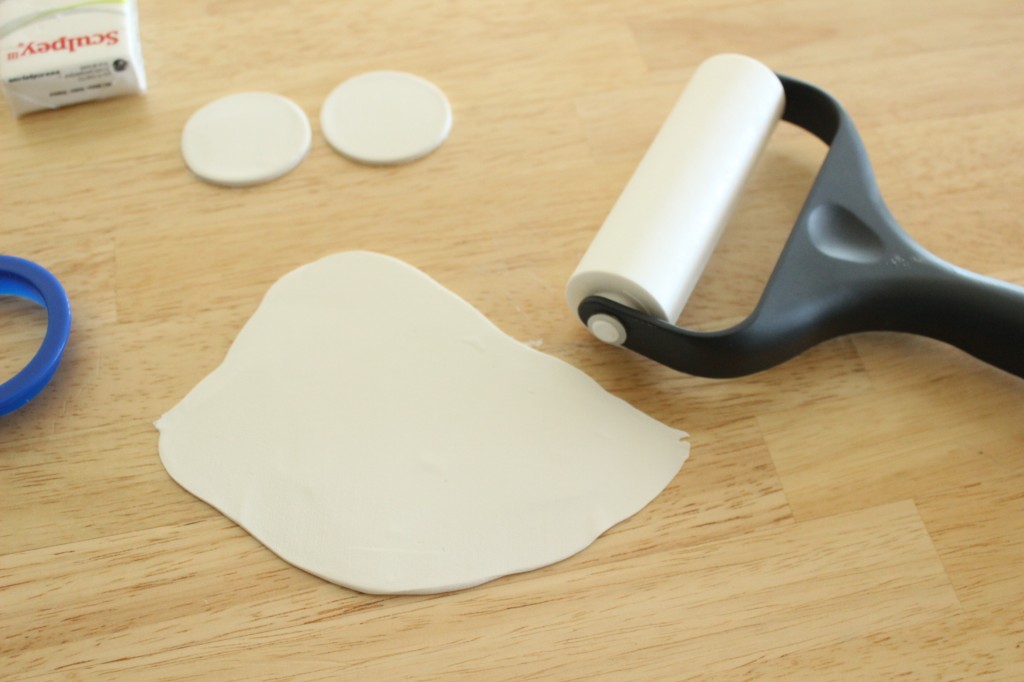
Then, I used a razor blade to lift them up and place them on a cookie tray with a parchment paper lining.
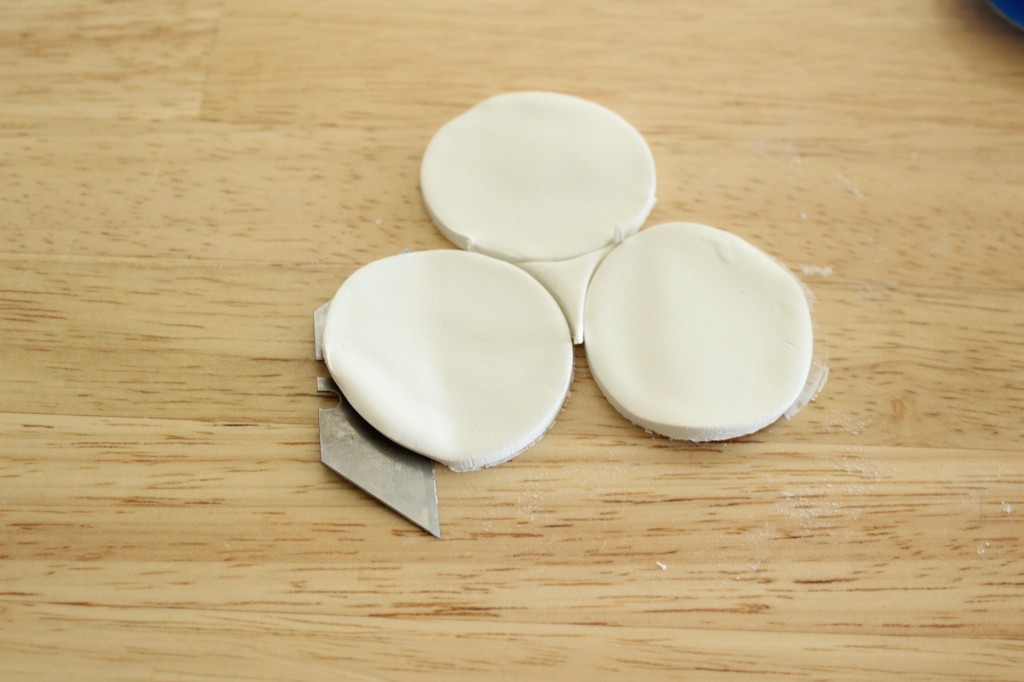
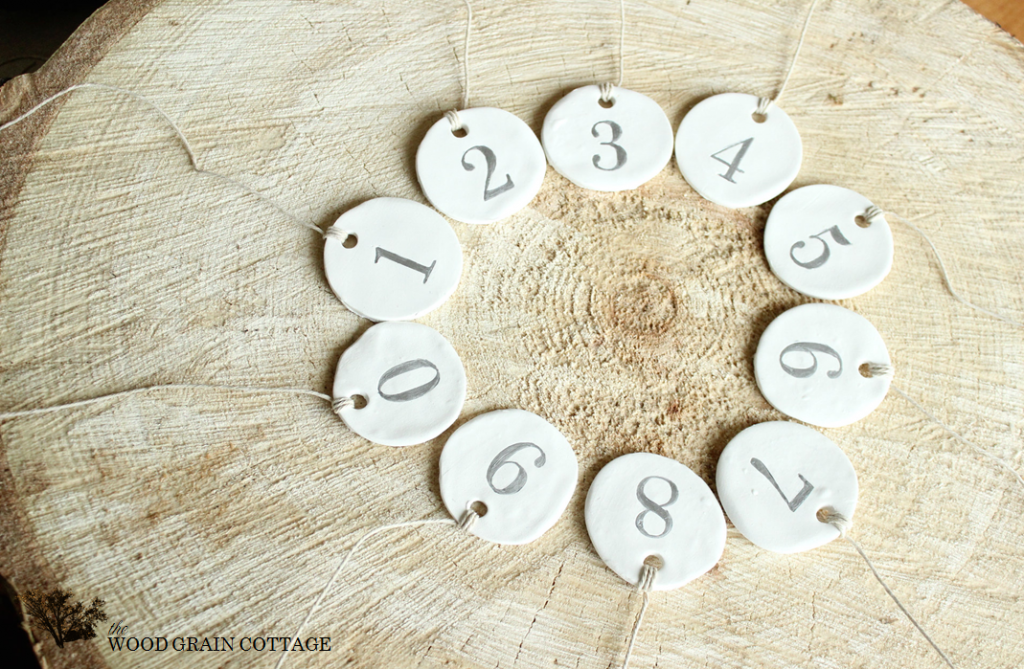
With a straw, I cut out a small circle for the tag.
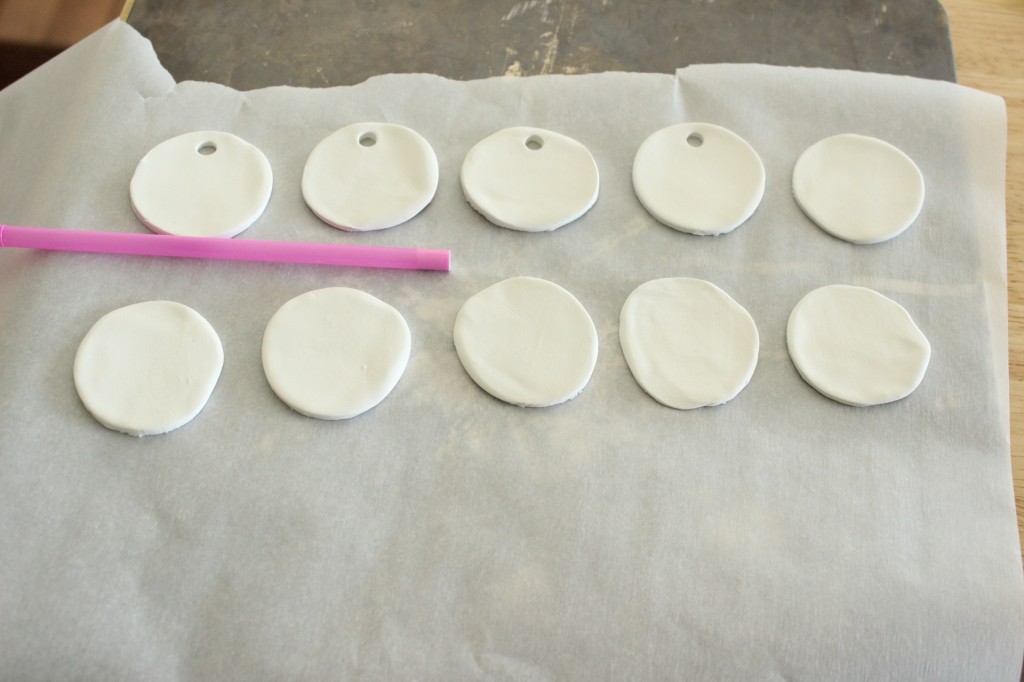
Then, I placed the numbers on the clay. But, instead of using the toothpick to trace each number, I decided to lightly roll the number into the clay.
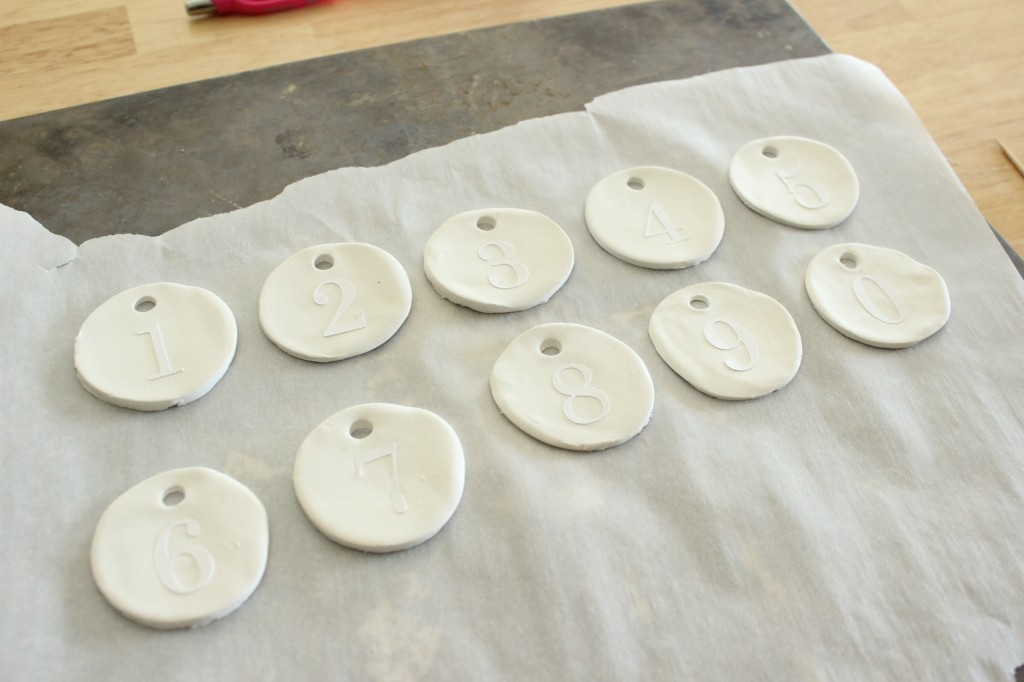
This left the perfect number outline!
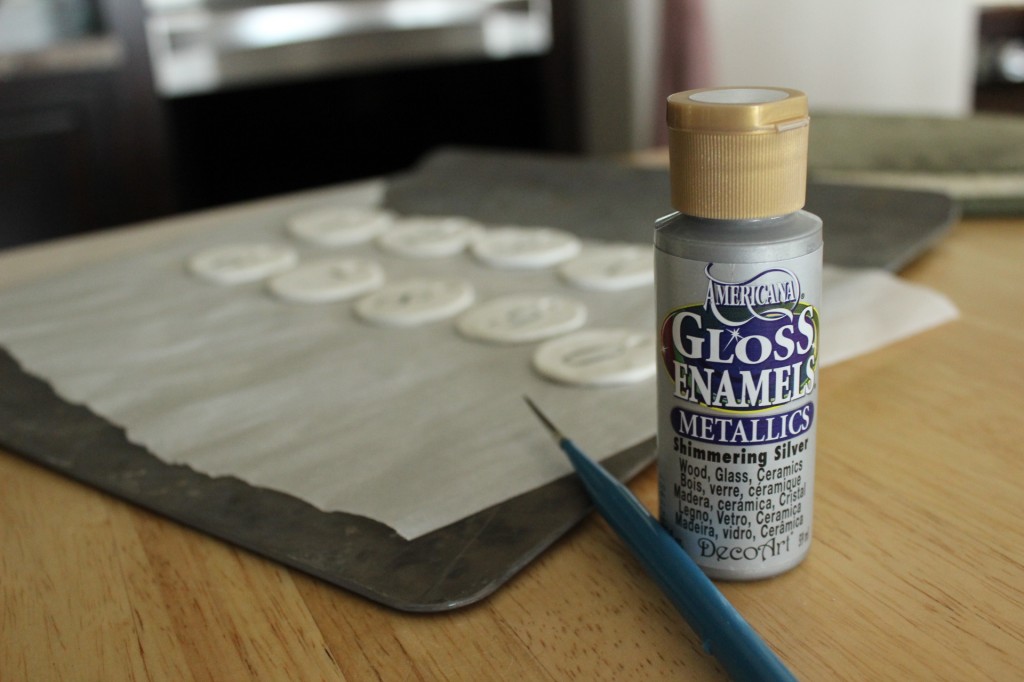
Then, I baked them at 275 degrees for 15 minutes.
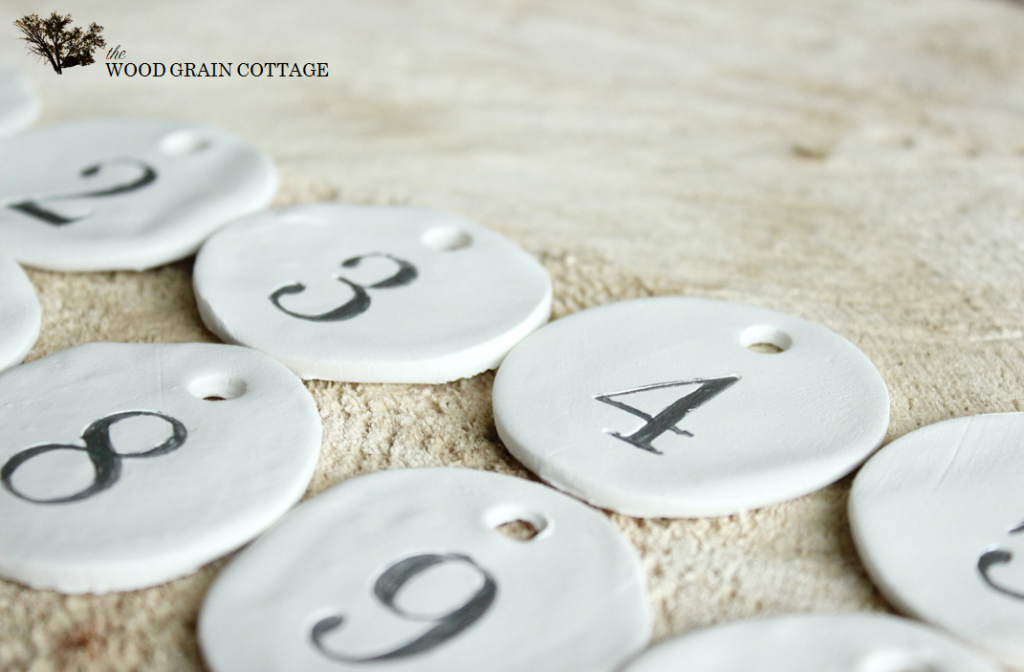
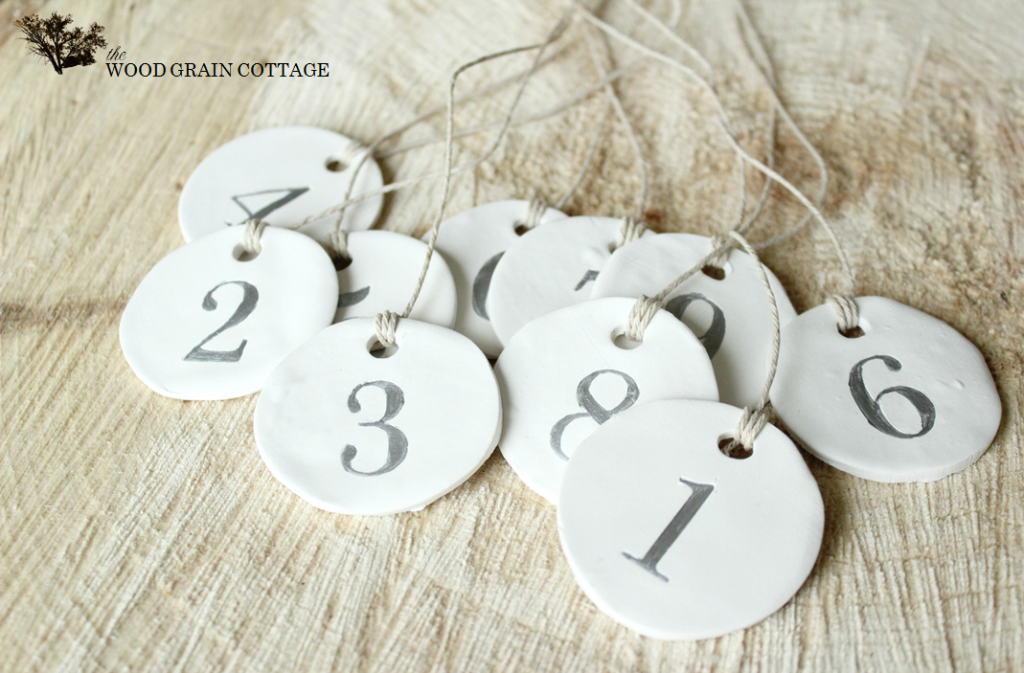
They looked so much better then the first batch, but there are a few little bubbles here and there.
Once they had cooled off, I used some metallic paint to paint inside the number outlines.
I let them dry, then grabbed my hemp string for the the tag.
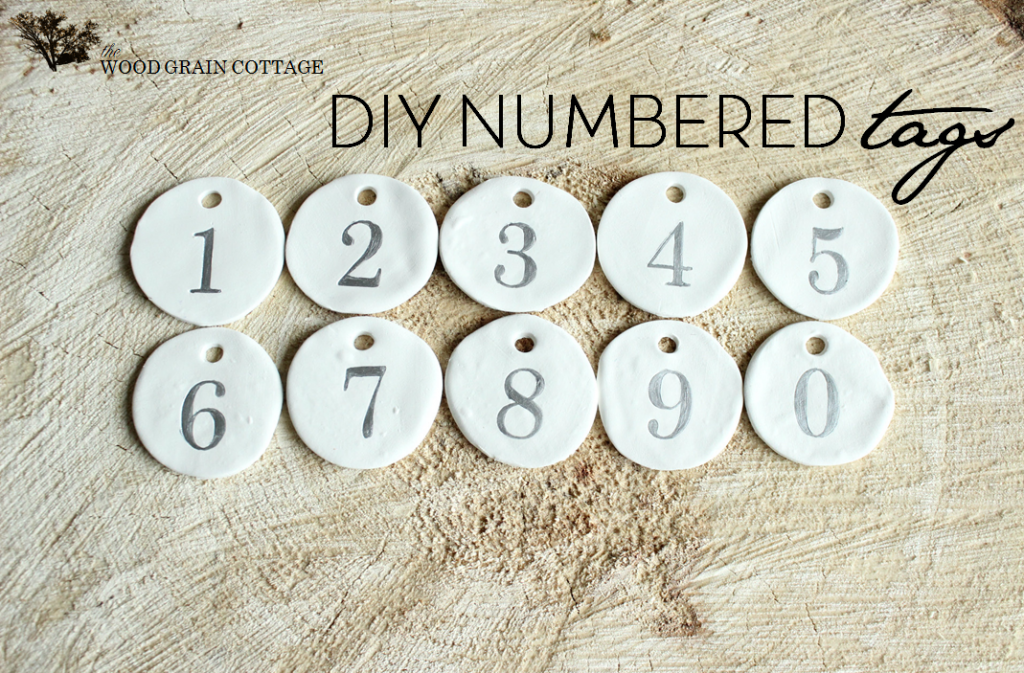
I think they turned out great. And it was quite the interesting project since I ended up trying both popular methods.
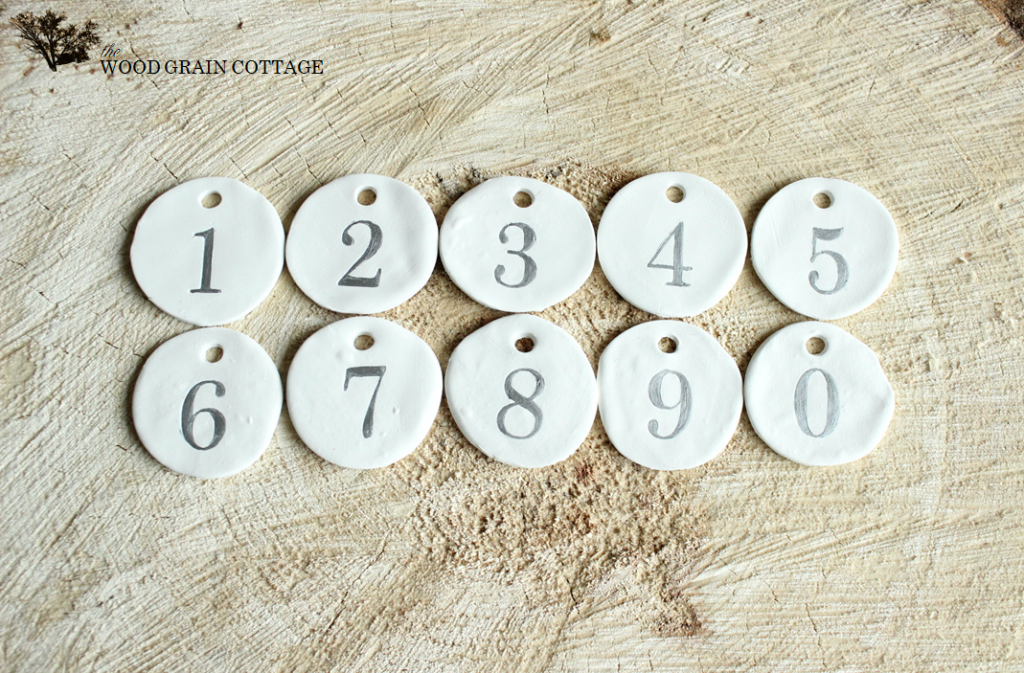
They’re just so darn cute!
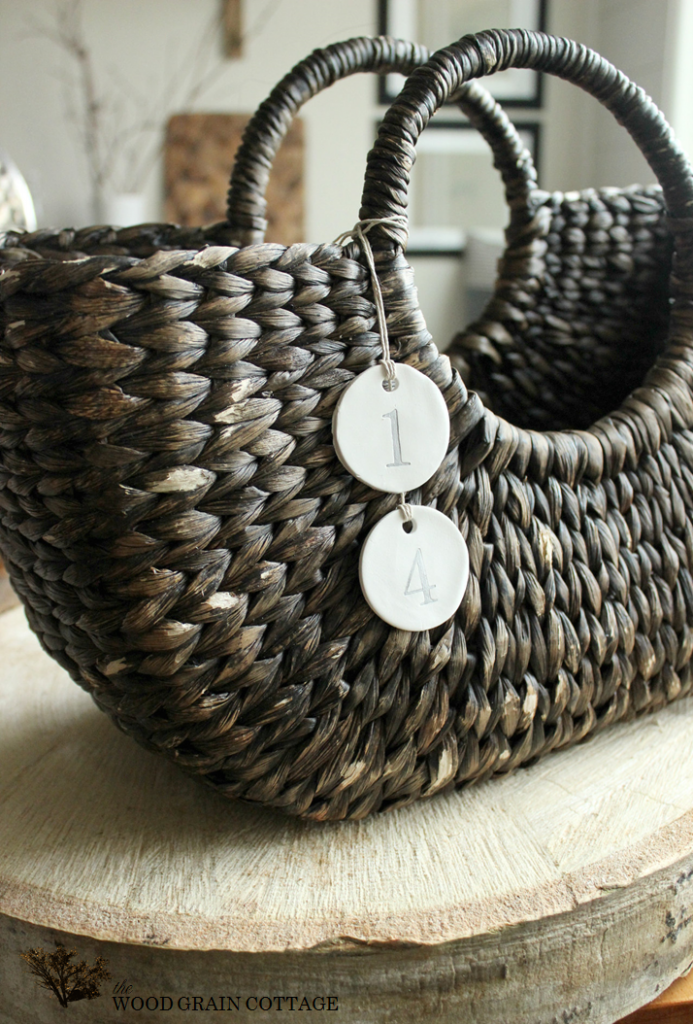
The hemp string is so simple, but perfect for the tags.
The tags really shine!
And, they look fabulous with just about anything!
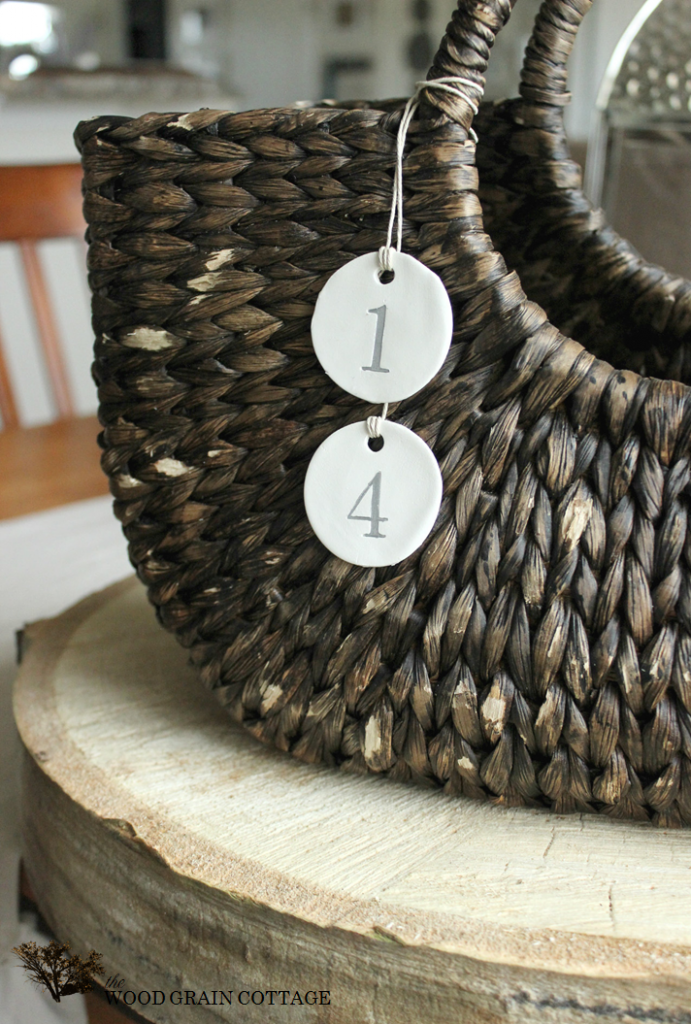
Especially baskets.
So, there you have it! The easiest way that produces the best results is without a doubt the polymer clay method.
Now, I’m thinking that I need to make a few more… only bigger this time and with a few words! I’m thinking an organization project is in order!

P.S. I guest posted on I Heart Nap Time this weekend for Jamieyln’s Hello Summer Series! Stop by to see our latest addition to the patio!
Linking up to:
Leave a Reply

Join me as I share several easy to implement ideas that will give your home a breath of fresh air and leave you feeling excited about the changes you see by the end of the week!

Great Job! I think I need to make some!!!
THANK YOU so very much Vickie! You do need to make some— they’re a lovely little DIY! 🙂
-Shayna
Hi Shayna,
New followerer to your blog, but don’t think I have ever commented.
I love the clay tags as well. I love that you shared about both your experiences and which one worked best for you. They do look great on baskets!
I made some a while back except I used stamps and a different kind of clay that air dries. I had great results. LOL, I can’t remember if I blogged about it though.
Hi Cheryl! Welcome to the WGC! So happy to have you! 🙂
I’m so happy you love the clay tags too! I bet yours turned out perfect… a stamp would be wonderful! And if you haven’t, you should totally blog about them!:)
-Shayna
I love these! It’s very nice that you showed both the dough and clay versions. I’m with you, the clay looks MUCH better!
Tania
THANK YOU so much Tania! I’m happy you love them too! 🙂
-Shayna
these are very pretty Shayna, glad you showed us how to and the difference between them! 🙂
I like that you used metallic paint for the numbers; very nice! 🙂
hope you are having a great week too!
THANK YOU Ingrid! There’s a big difference, isn’t there?
Have a great week! 🙂
-Shayna
Hay Just a thought for your wonderful tags . roll em cut um and stamp the numbers on um let them dry right on the wax paper till hard then paint them and let them dry some more and then remove the wax paper from the backs ! they would be perfectly smooth and round .
Hi Karen! Thank you so much for the comment! I love your idea… you’re brilliant! The next time I make them, I’m totally doing everything on the wax paper, that way I don’t have to move them!
THANK YOU! 🙂
-Shayna
good morning dont forget to share. I look forward to seeing your tags again ! Happy day !
I thought if you rolled the numbers in and then cut them out. Is there a place where I can buy cutout numbers . I dont have a machine that does that ? If anyone has stamps that would work too . Have a GOD day .
Hi Karen! I think craft stores have both the letters & numbers in the scrap booking section!
If you can’t find any, let me know and I would be happy to send you a cutout of both! 🙂
Happy Crafting!
-Shayna
Ok thanks I will try looking there fist ! Have a great 4th og JULY !
They are cute!! I definitley like the polymer clay best as well.
PS. I forgot to tell you wax paper is safe in the oven up to 350 because I have baked cookies on it ! I cant wait to make some of them tags LOL
Love it! You’re brilliant! 🙂
-Shayna
Shayna ,
I dont have the ability to cut those numbers out like you . Would you consider sending me a set of numbers and A B C s . I really would love to make some of them there tags ! lol I am really not from the south . Thanks in advace for your consideration. I could pay you if you want . Just in case I am giving you my address .
Best Regards Karen Powell
2584 Chelsea st.
Trenton MI 48183
[…] Like, blue glass and DIY Numbered Tags… […]
Oh I love these! Will definitely try this!! Thanks!!~~Angela
Thank you Angela! They’re so. much. fun! 🙂
-Shayna
These are really cute! How did you “roll” the numbers into the clay?
THANK YOU so much, Lisa! To roll the numbers into the clay, I used my rolling pin to lightly roll them in, being careful not to flatten or “roll out” my circle shapes.
Hope that helps! 🙂
-Shayna
They came out great! The Sculpy was the way to go !
Susan
THANK YOU so much, Susan! Sculpty was definitely the way to go! 🙂
-Shayna
Just the sweetest little pieces of eye candy, that I ever did see…must try these babies!!!
Blessings,
M
THANK YOU, M! I love them! 🙂
-Shayna
Those turned out great! I would use air dry clay. It’s super light and easy to work with. The salt dough works best if it air dries no air bubbles. I can’t wait to try these too:) Thanks for sharing.
THANK YOU so very much Tina! I am definitely going to try the air dry clay next time! Thanks for helping me make that decision! 🙂
-Shayna
[…] Just when I thought it couldn’t get any cuter, I remembered those lovely numbered tags… […]
[…] attach the jingle bells, I used a piece of hemp string, the same that I used for my DIY clay tags, and just wrapped it around the bell […]