

The Office Desk: The Base
When we began the design process for the office, I wanted to make sure I’d have plenty of work space, as well as storage. The best way to do that, was to maximize the room by having the desk run along two of the walls, giving me plenty of work space. Because this is a pretty lengthy tutorial, I’ll be sharing how we installed the office desk throughout the week, but today it’s all about the base.
As I mentioned above, and in this post, I really needed to have ample storage space for both office supplies and files. The base of the office desk needed to be a work horse too, and that’s why we decided on using two IKEA dressers, plus a lateral filing cabinet.
Here’s what we used for the base:
- 2- Malm IKEA Dressers, adapted to fit the proper height for the desk
- 1- Lateral Filing Cabinet, with a similar design to the dressers
First, we made a trip to IKEA to purchase our dressers. We needed something that would provide plenty of drawer space, be sturdy enough to be the base of the desk (and hold the weight of the desk top), and be reasonable in price. We spent a good amount of time debating on a few different options, but the Malm dresser was the clear winner. I loved the simple design, the drawer space… and the price!
We put them together right after the walls were finished…


Once they were assembled, we could get a final height for the desk, taking into account our carpet and pad…

With the dressers assembled, we started on the lateral filing cabinet, which we knew was shorter than the dressers, and that we’d have to build a base to add extra height…

Assembly went smoothly, and we were left with a nice, basic white filing cabinet…
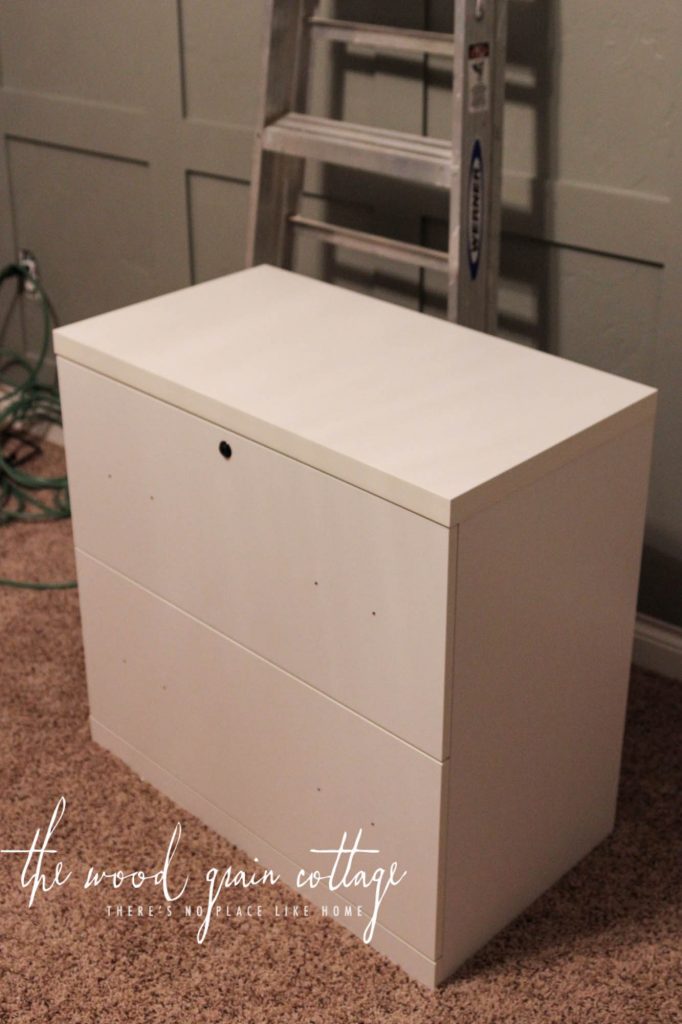
The filing cabinet had a finished height of 28 1/4″ tall, and the dressers were 30 3/4″ tall. To determine the final height of the desk, we had to know the thickness of our countertop, which after much debate, we decided on these countertops from IKEA. I’ll be sharing the tutorial on that part of the project later in the week, but we had to know exactly how tall everything would be before we could build a base for the filing cabinet.
After a bit of debate, we decided to remove the top portion of the Malm dressers…

Removing it brought the height of the desk down an inch, which was better for the overall desk height, as well as the way the countertop looks with the dresser.

Installing the countertop directly on top of the dresser frame created a much more seamless look, which I liked much better than leaving the original dresser top in place. That also meant we wouldn’t need to build as large of a riser for the filing cabinet.
Here’s how we built the riser:
Please note: Some of the links in this post are affiliate links, which allows us to make a small commission from your purchase, but your purchase price stays the same. Thank you for helping support our blog! We greatly appreciate it!
Supplies:
- 1- 2″ x 3″ x 8′ board, cut to size
- 3″ torx screws
- Table Saw, this is similar to ours
- Miter Saw, this is similar to ours
- Countersink
- Clamps
- Screw Driver/ Drill
- Tri Square
- Tape Measure
- 5/32 Drill Bit, for pilot holes
- Small Cabinet Screws, these are similar
- Wall Putty
- Painters Tape
- Paint Brush
- White Paint, I used Super White by Benjamin Moore in semi-gloss
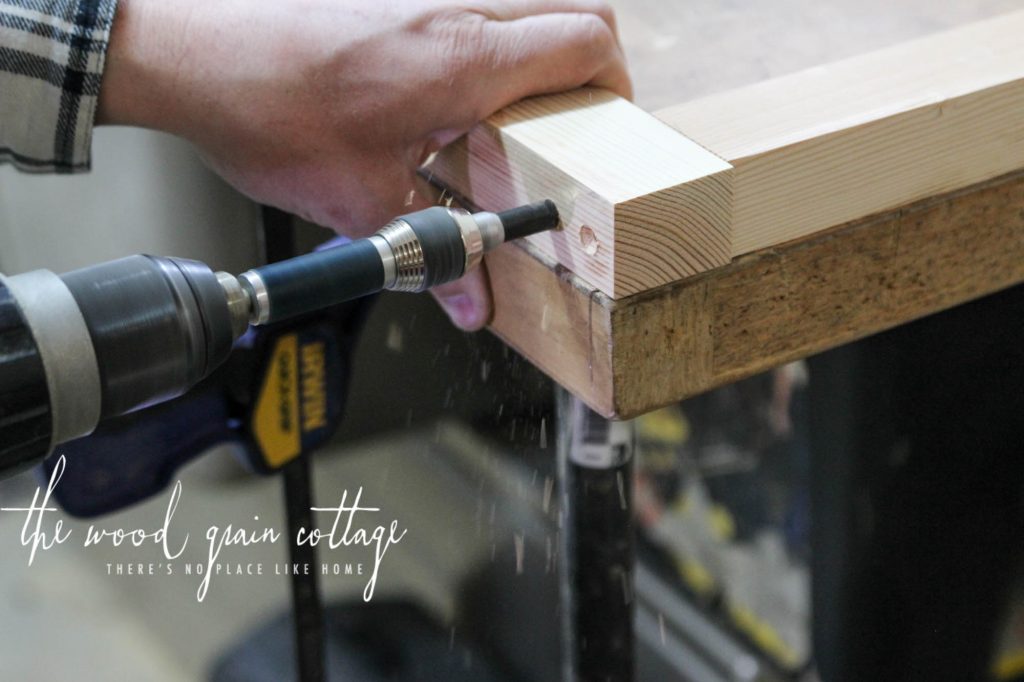
With the height determined, we started on the wood riser. We used a 2″ x 3″ board, and trimmed it down to size with our table saw until it fit the overall height we needed, which was 1 5/16″ tall x 1 3/4″ wide…

With the boards cut to the right size and length, we started building the frame…

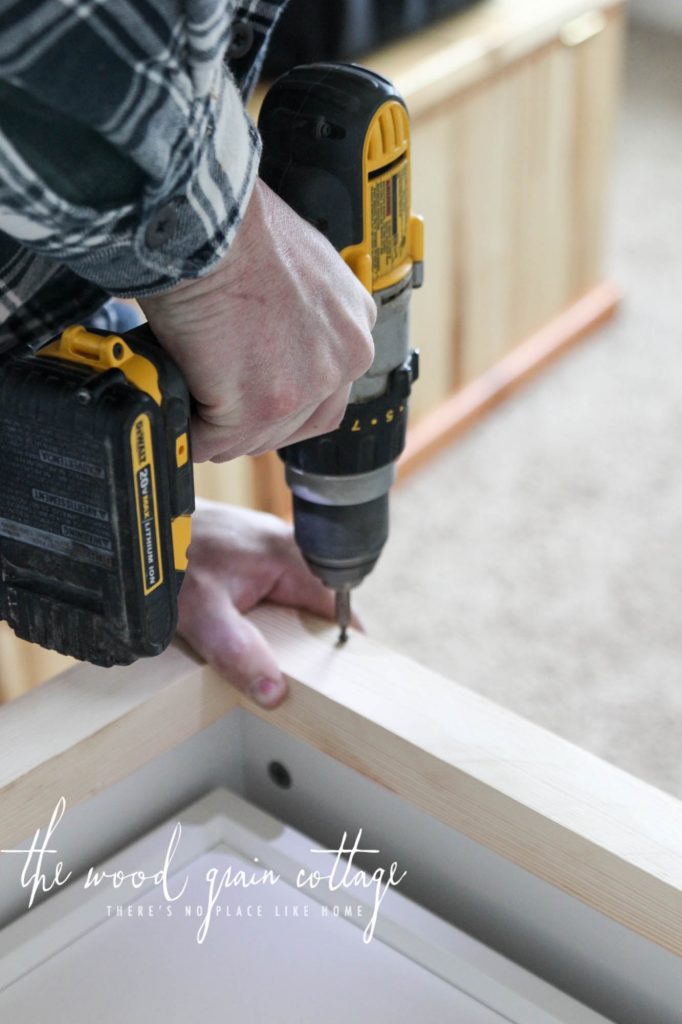
Anthony pre-drilled the screw holes…

And then added the screws…
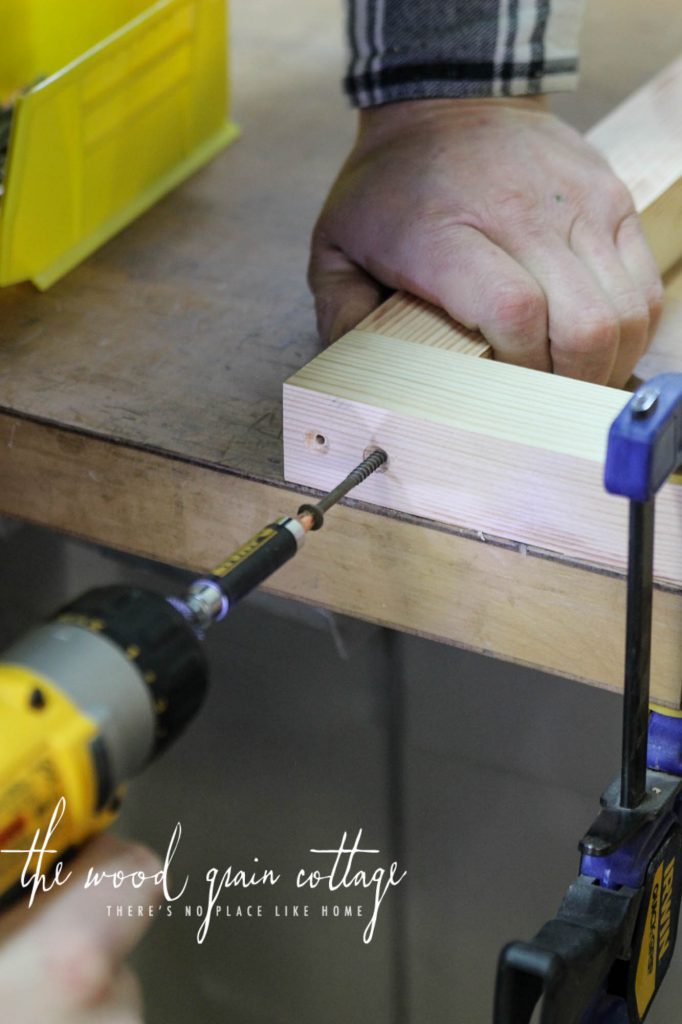
We followed the same steps on each side of the riser, and then used a tape measure to make sure it was square, which it was 🙂 …

Then, Anthony used his tri-square to measure and mark where to drill pilot holes to attach the riser to the filing cabinet…

We used our drill press to insure the holes were straight, but you could easily use a regular drill…
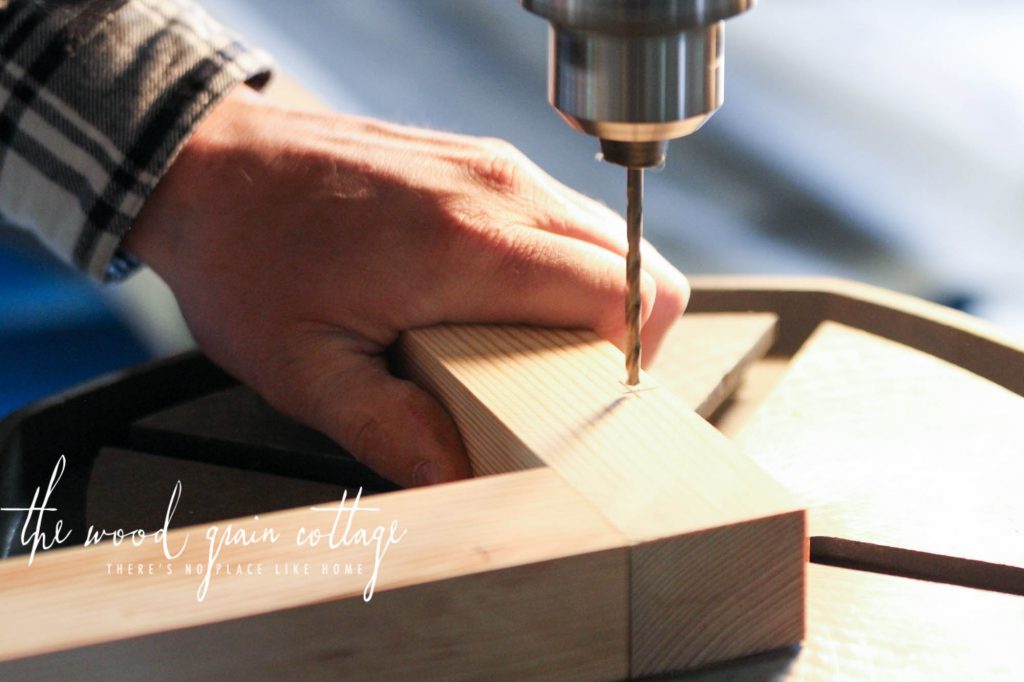
Once all the holes were drilled, here’s what we were left with…

With the riser done, we flipped over the filing cabinet and sat it in place…
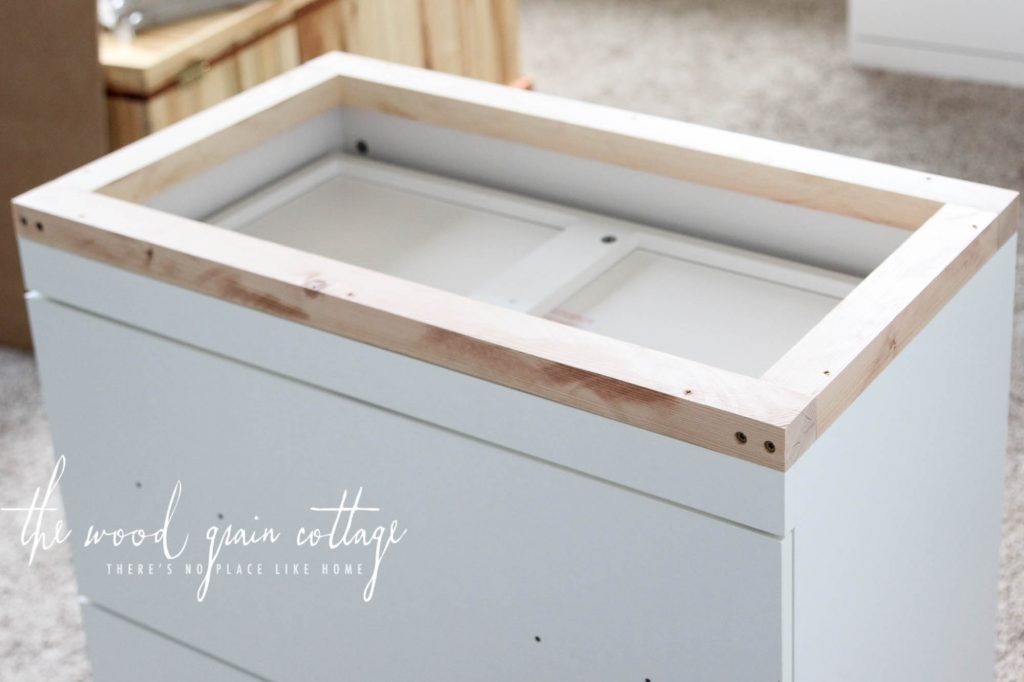
It fit perfectly, sitting flush on each side, so we used these small cabinet screws we had in our stash to attach the riser to the cabinet…

We added the screws to each drill hole…
And then flipped the filing cabinet back over to make sure everything was in tip top shape…

And just like that, it was ready to be painted. We tipped it back over and I filled the holes with wall putty…
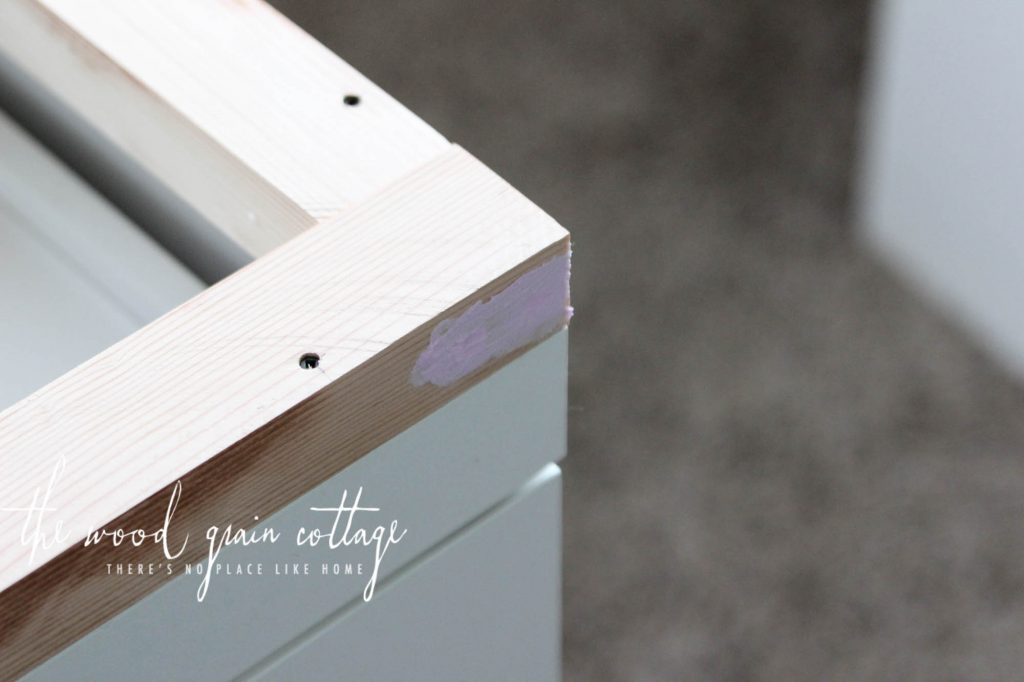
Once the putty was dry, I sanded it smooth, wiped everything clean and then taped off the filing cabinet…

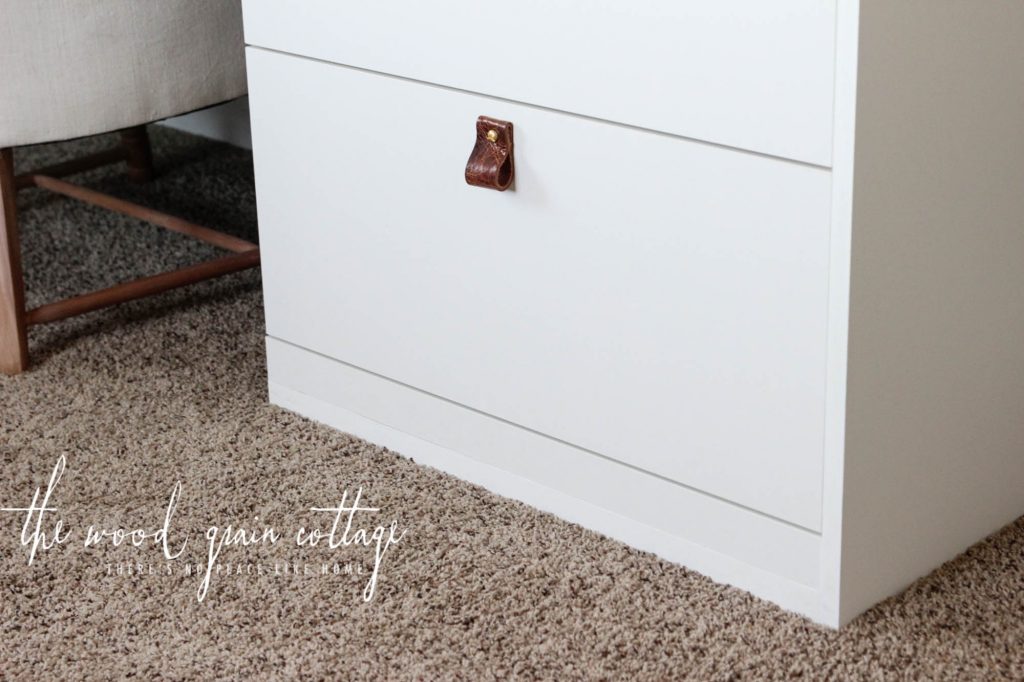
I added three coats of super white paint by Benjamin Moore in semi-gloss. It’s a little bit brighter white than the actual filing cabinet, but it’s close enough to create a seamless look…

Once the paint was dry, the filing cabinet was ready! Here’s how it looks right now…
The height matched up perfectly with the dressers, so the next step, was installing the actual counter top, which I’ll be sharing next!
Here’s a peek at how everything’s come together so far!
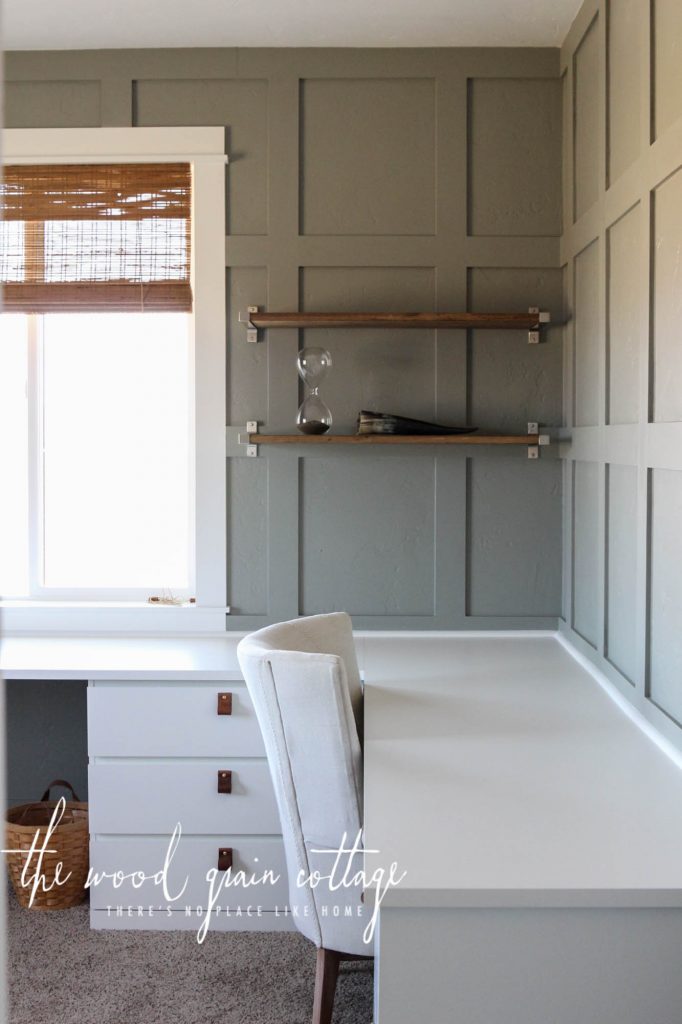
We still have a little ways to go before we’re ready to call this room “finished”, but we’re sooo close! More tutorials coming soon, and I’m so happy to say that I’ve already added all our files into the filing cabinet! We were originally going to do two of them, but after a little debate, we decided to only install one. I’ve shredded more paper in the last few days than I ever thought possible. I’ve purged so many things we don’t need, and we’re slowly but surely making the shift to try and go paperless! If you have experience with that, please share your system below! 🙂
Stay tuned for the next part of building our desk!
Wow!! I love it! The room is going to look so good when you are all done. Can’t wait to see it. Great job!! It will be so much more efficient. You are lucky to have such a talented husband.
Thank you! We’re looking forward to having a functional and efficient office we both love! And I agree, I’m not sure what I’d do without Anthony! He can make anything possible! 🙂
It looks great so far! Where did you get the shelves?
Thank you! We built the shelves. You can read about them here: https://www.thewoodgraincottage.com/2017/03/03/the-office-shelves/
Everything is looking so great and coming together so well! Can’t wait to hear about those leather pulls!
Great work!!
Thank you so much! I’ll be sharing about the leather pulls next week! 🙂
Everything looks great !!
Lovely job. I am looking forward to more. Of this type of projects.