

The Office Shelves
When I was designing the space for the office, one of my major focuses, was making sure we had plenty of storage space. Our current office lacks in that area, and it seemed papers, projects, tools and office supplies were stacking up in every corner. I tried so hard to manage the chaos, but without a place for everything to go, it basically took over the room. I swore that wasn’t going to happen in our new office, so I made sure to add plenty of storage space. Here’s how we added the office shelves…
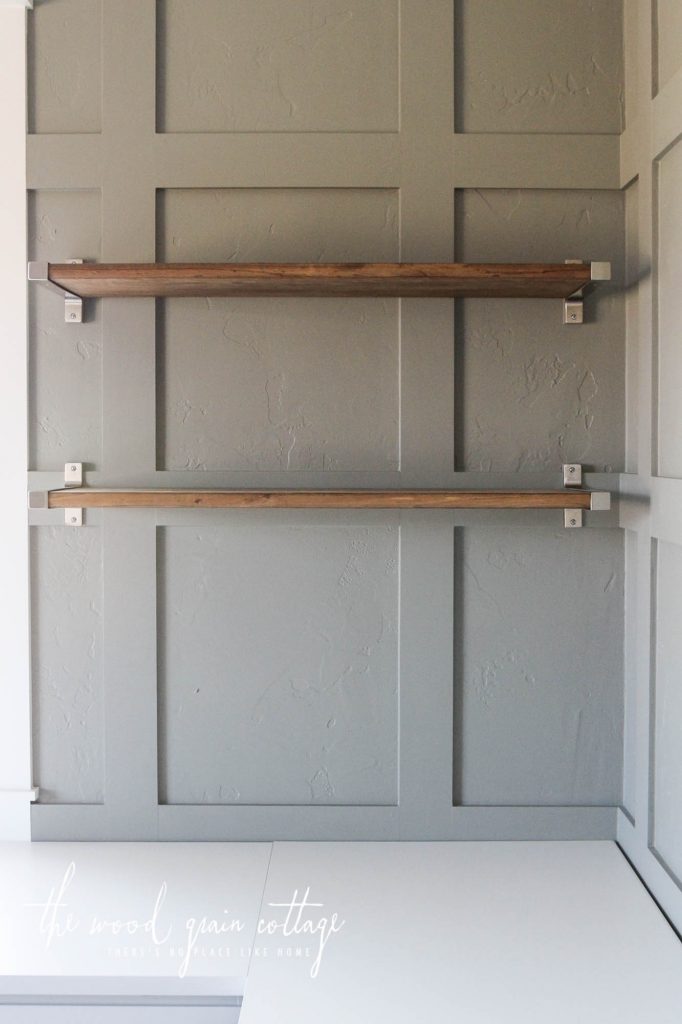
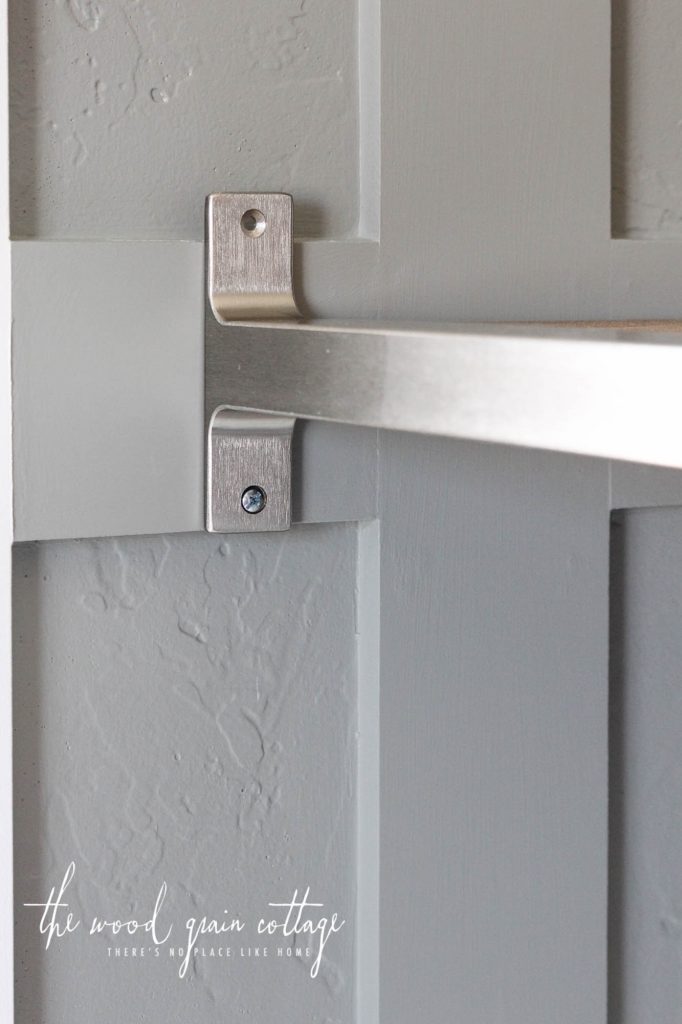
I had originally thought that we’d build our own floating shelves for the room, and I was going to have them be a little bit thicker than what we ended up doing, but because we changed our plans on the actual desk top, these shelves came to mind. More about that in another post (coming soon!), but I knew the next best thing was going with a really simple bracket that brought in a clean, more modern look to the shelves. If I’m being truthful, these shelves are anything but new to the blogging world since so many people have used the IKEA brackets, but their clean lines and simple look sold me. I wanted the shelves to be warm, but clean cut and a seamless addition to the walls. We had a little bit of extra work attaching them, specifically because of our awesome grid board and batten, but it was an easy enough fix and I couldn’t be happier with how it all came together!
Please note: Some of the links in this post are affiliate links, which allows us to make a small commission from your purchase, but your purchase price stays the same. Thank you for helping support our blog! We greatly appreciate it!
SUPPLIES:
- 4- Packages of the IKEA EKBY BJARNUM 11″ brackets
- 4- 11.5″ Pine Stair Treads, 1″ thickness
- 16 Drywall Anchors/ Screws. We bought ours at Ace, but these are similar.
- 1/2″ MDF pieces, cut to size
- Table Saw, this is similar to ours
- Miter Saw, this is similar to ours
- Provincial by Minwax Stain
- Cloth Rag
- Screw Driver/ Drill
- 1/8″ & 3/8″ Drill Bit
- Tape Measure
- Level
- Paint Brush
- Touch up wall paint, World’s Away by Valspar in eggshell
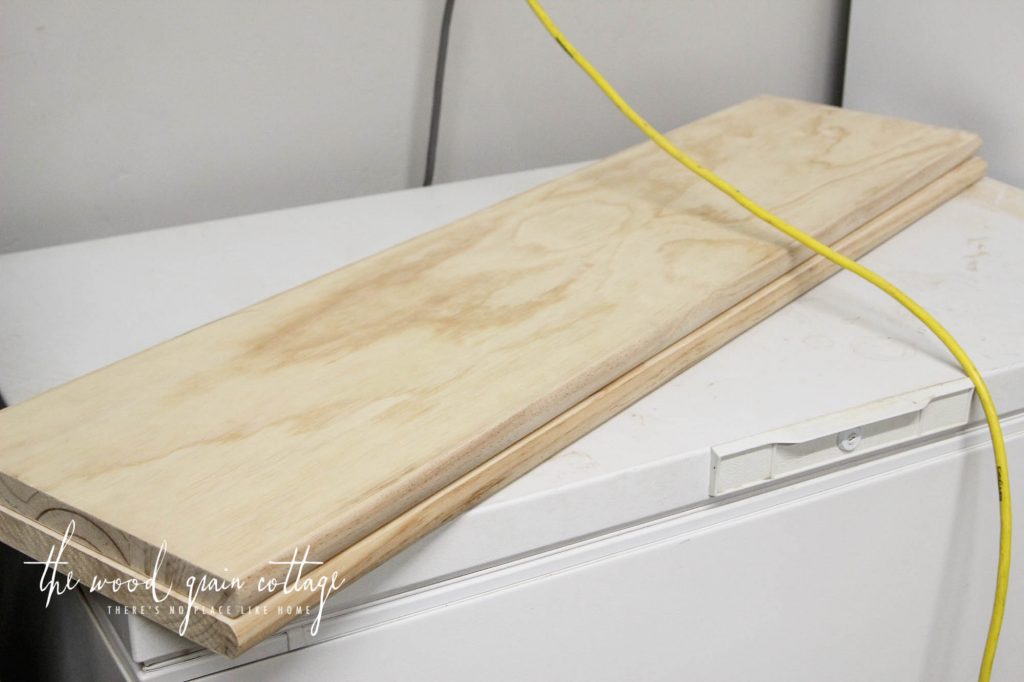
First, we needed to cut down the pine stair treads. If you’ve ever tried to use the IKEA Ekby brackets, you know that they’re designed to be used with the IKEA boards. It’s a little bit difficult to actually find something that will work, just because of the thickness of the wood… and unfortunately, the IKEA boards aren’t the prettiest. The brackets on the other hand look great, the trick is finding the right thickness of wood to slide into each side of the bracket. Anthony and I tossed around a few different ideas, but ended up taking the bracket with us to Home Depot. We found the pine stair treads, and they were the perfect solutions because they were a true 1″ thickness… not to be confused with 1x material, which isn’t truly an inch think. The stair treads were the clear winner, and I loved the rounded bullnose edge.
Once we got them home, we measured and trimmed them down with the table saw to fit inside the brackets…
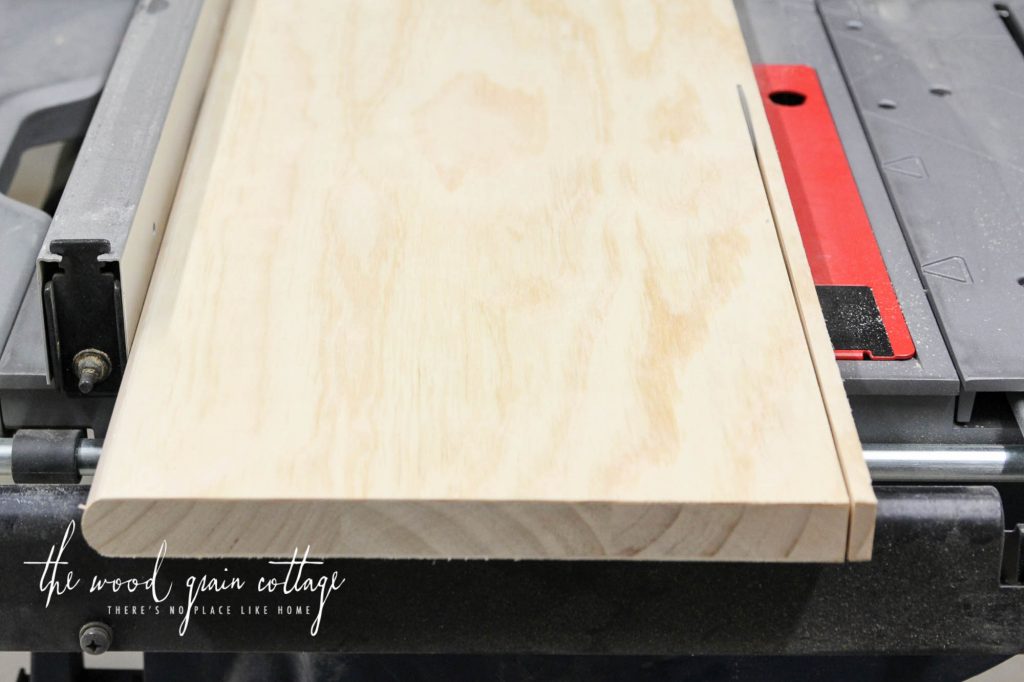

Then, we decided on the length of the shelves and the cut the wood to size…

We followed the same steps until all four boards were cut to the right size. Because our window isn’t centered in the room, we have two different lengths of shelves. The right side is longer, and the shelves are 38″ long, and the left side shelves are 34.5″ long.
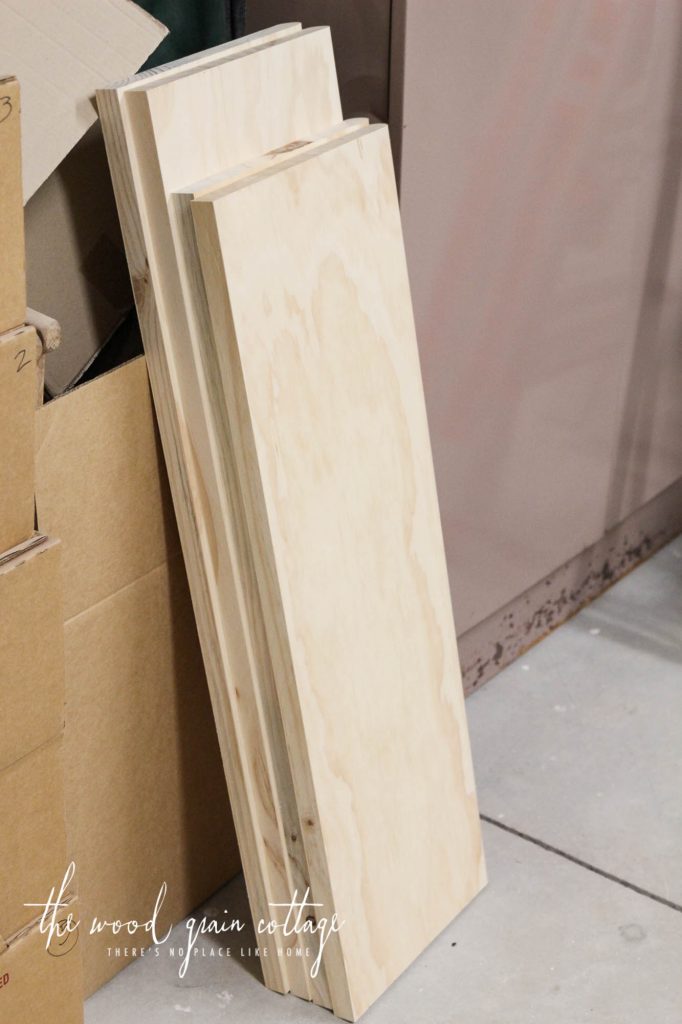
I used a piece of sandpaper to make sure all the edges were smooth…

And then I started staining them. I wanted a warmer, richer looking shelf, so I chose Provincial by Minwax. I love the depth to the color and knew it would be perfect with the wall color…


After the shelves were stained, we fit the boards inside each set of brackets and started determining the height for them to hang at…
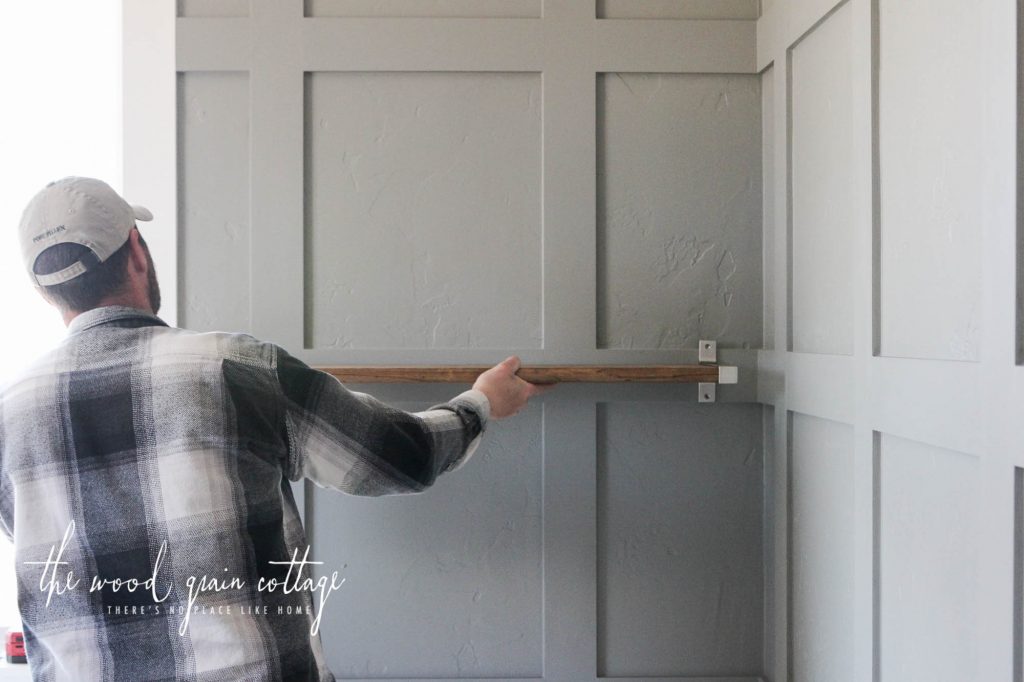
This brought us to phase 2 of installing the shelves… the walls have lots of dimension from the grid board and batten we installed, but they don’t allow everything sit flush or install at an even level…

It just so happened that the wall portion of the bracket was wider than our 4″ strips, so we had to add extra pieces of the same 1/2″ MDF to make everything even so the shelves would sit flat on the wall…

To do that, we decided where we wanted the shelves, and marked each spot. I wanted a 3″ space on each side of the shelf, so Anthony cut a 3″ board to make installing them that much easier…

We made sure they were level, then started marking the holes…
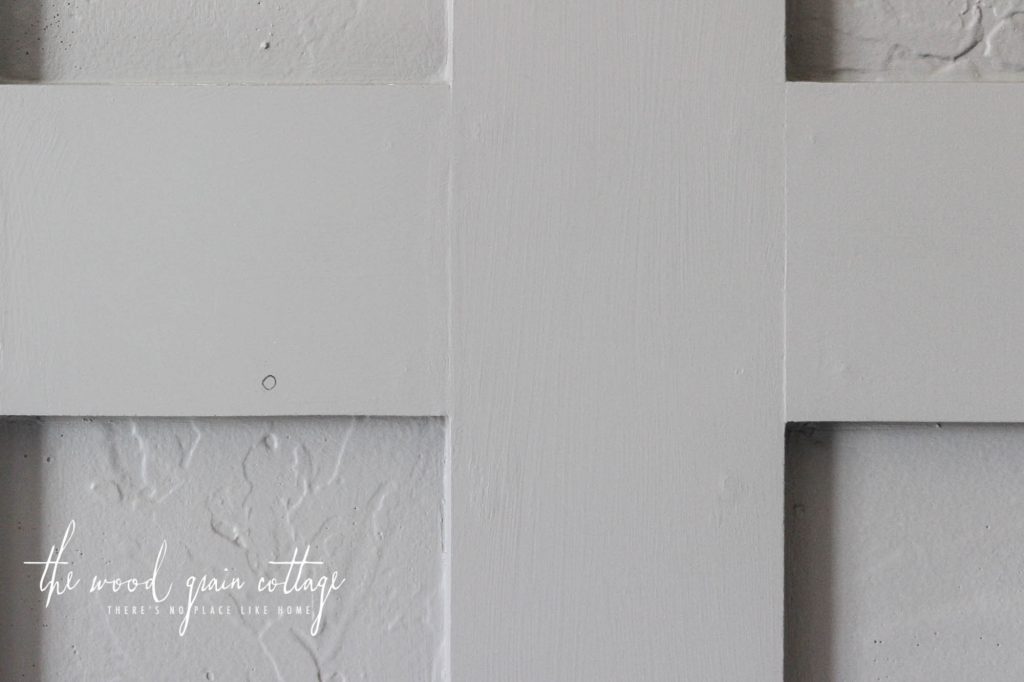
We knew the shelves wouldn’t be attached to any studs, so we trusted on these heavy duty anchors to hold them in place (we used them on our master bathroom shelves and they’ve worked great)…

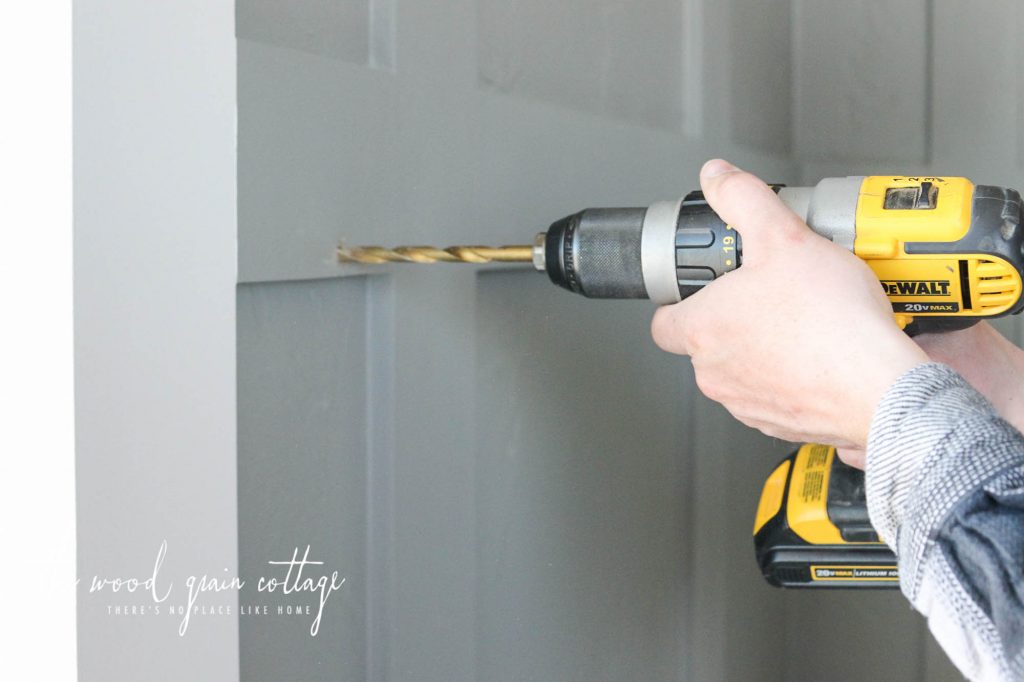
Anthony used an 1/8″ drill bit first to go through both the MDF and drywall, creating a pilot hole for the anchor in the drywall, and then used a 3/8″ bit to drill just through the MDF…
With the holes drilled, we hammered in the screw/ anchor…
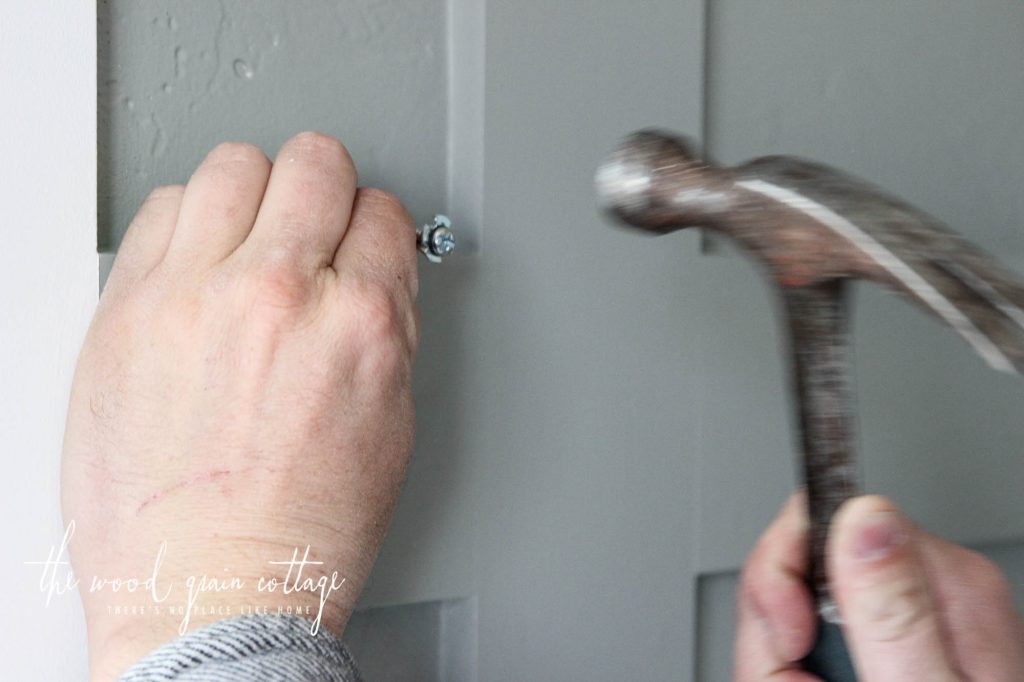

We then removed the screw portion of the anchor…


He did the same thing to the other side, and we mounted the shelf to see where we needed to add extra MDF strips…
Anthony cut a piece of the MDF to the right width, and then we marked how much of it we needed, and where the screw hole would need to be…
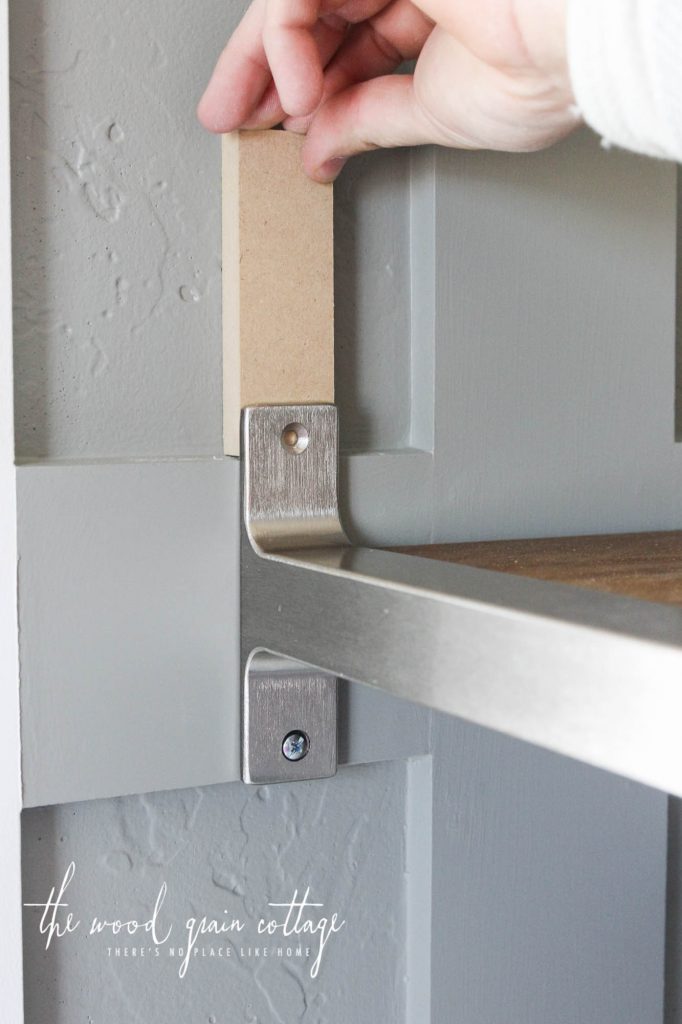
He drilled the hole in the MDF…

Then we cut them to size and put them behind the bracket, using the 1/8″ drill bit to go into the drywall as a pilot hole…

We removed the bracket…
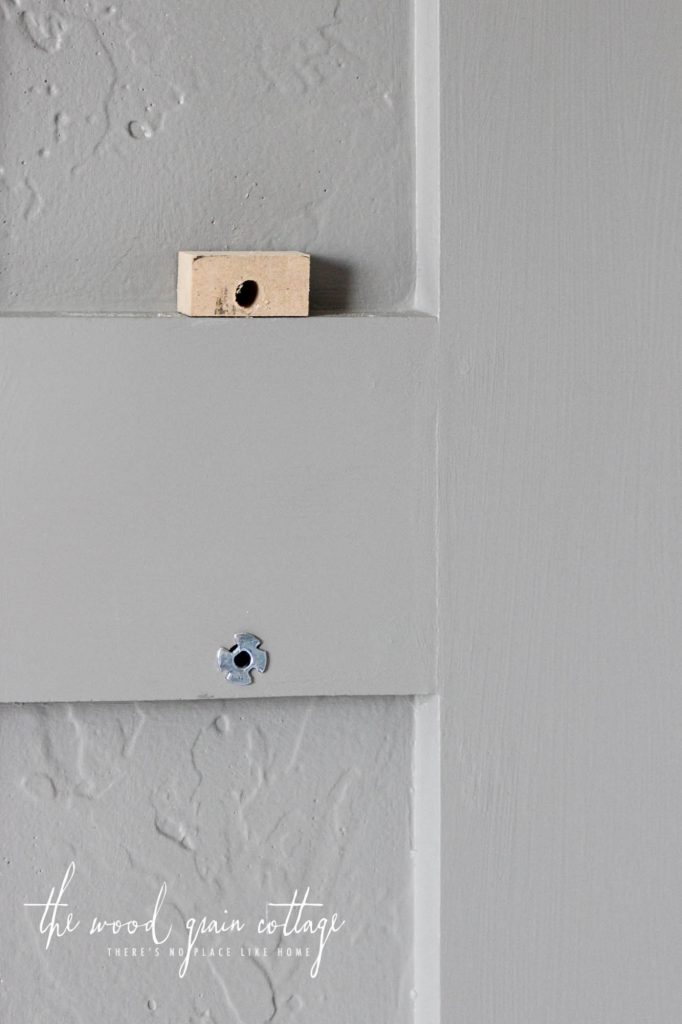
Then installed the anchor into the MDF…

We did the same thing for the other bottom shelf on the left side… and then started on the upper shelves. We followed the same steps, only we had to add an entire piece of MDF behind the brackets to mount to the wall…


We contemplated adding a piece of the MDF behind the actual shelf board because of the slight gap, but it wasn’t that noticeable… so we left it! With the shelves in place, I used some leftover wall paint to touch up the MDF pieces we just added…

Here’s a more finished shot of the shelves…

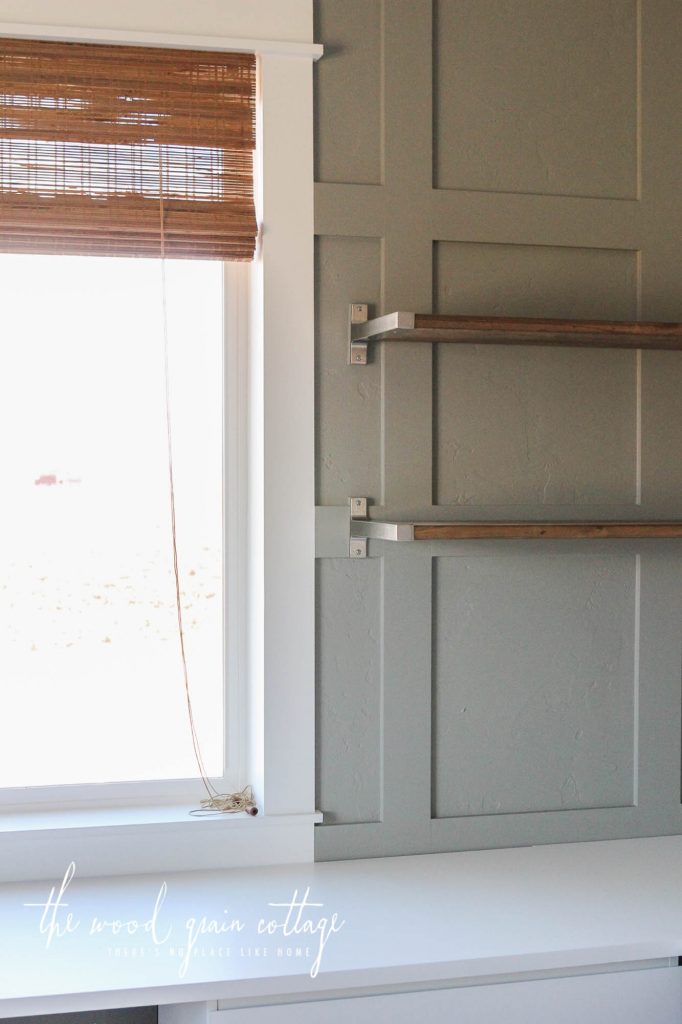
They’re honestly the perfect addition to the room, and the subtle brackets are just enough of a contrast with the other metal elements we’ll be adding to the room. The stain is the perfect warm element to the room, and ties in beautifully with the blinds, and our cabinet hardware, which I’ll be sharing soon! Until then, here’s a peek! 🙂

This room is utterly beautiful. I’ve said it about a 100 times, and I’m sure I’ll be saying it 100 more once we finally get around to adding the finishing details.


It’s all coming together, and after the shelves were up, we were finally able to start installing the counter-top! Happy day! I’ll be sharing all about that next week, but I may just be moving several office items into the new room this weekend! (Clapping hands!)
Have a great weekend, and I’ll see you next week with more office progress and tutorials! 🙂
P.S.- You can see more office details and projects here!
Love the shelves and I can’t wait to see the finished office!
My next shelves will be stair treads, too. 🙂
I am utterly in awe of all the diy you have done over the years!! This was amazing how you figured out how to adapt plans to make the shelving work with your wall design. Like I said, I’m thinking, would I have gotten frustrated? I don’t know!! It’s encouraging to see you calmly explaining and photographing it all!! It is looking great.
Thank you so much! The walls do provide a little bit of a challenge when it comes to hanging things, but they’re beautiful, so I think it’s worth the little extra work! 🙂
Hi again Shayna,
Lovely shelves and great installation job to Anthony. I’ve bought my brackets and stair treads….ready to start painting/staining them. Can you take me through your thought process to decide to leave the rounded edge of the board on instead of cutting it off and turning that edge to the back, to have a square edge in front to fit inside the bracket? We were thinking of doing it that way but would like to hear about your experience. I can’t quite see the detail of the rounded edge inside of the bracket.
Thanks for your great tutorial and looking forward to seeing the whole office!
Thank you! For the shelves, I actually loved the rounded edge of the stair tread rather than the straight edge. It’s hard to tell in person, but you can see the round edge in person, and I think it adds a little bit of “softness” to the room since there are so many square, straight lines. The round edges just look lovely to me, but I know the shelves would look just as good with a square front edge as well. I hope that helps! 🙂
Love how the office is coming along! Did I spy some leather drawer pulls in one of the photos? I would love to know where you got these! I am trying to fine some that aren’t too expensive since I need 18 of them.
Thanks 🙂
You did spy dome leather drawer pulls! We actually made them ourselves! I’ll be sharing the DIY soon! 🙂