
Grid Board & Batten In The Office
Ready to add interest to your walls? We recently added grid board and batten in the office and I’m sharing our full tutorial!
Our new office space is coming together beautifully, but when we started with the blank and bare guest room (read more about the room switch here), I knew I wanted something to help transform the space. I wanted something different. I wanted a place where I would feel inspired to work everyday. I wanted to feel cozy and warm and welcomed. Adding grid board & batten in the office did just that, and paved the way for everything else we’ll be adding and creating for the room…
From the very beginning, I knew I wanted to do some sort of a wall treatment, but I wasn’t exactly sure which way I wanted to go with it, although this picture inspired me a whole lot. I spent a few days debating on exactly what I wanted to do, and we spent plenty of time measuring out different options, putting tape on the wall for perspective and creating drawings to narrow it all down. From the start, my heart was set on doing grid board and batten, but I didn’t know if I’d want it installed on every wall, all the way to the ceiling, or what size boxes to create. After all the drawings, taping and measuring, we finally devised a plan…

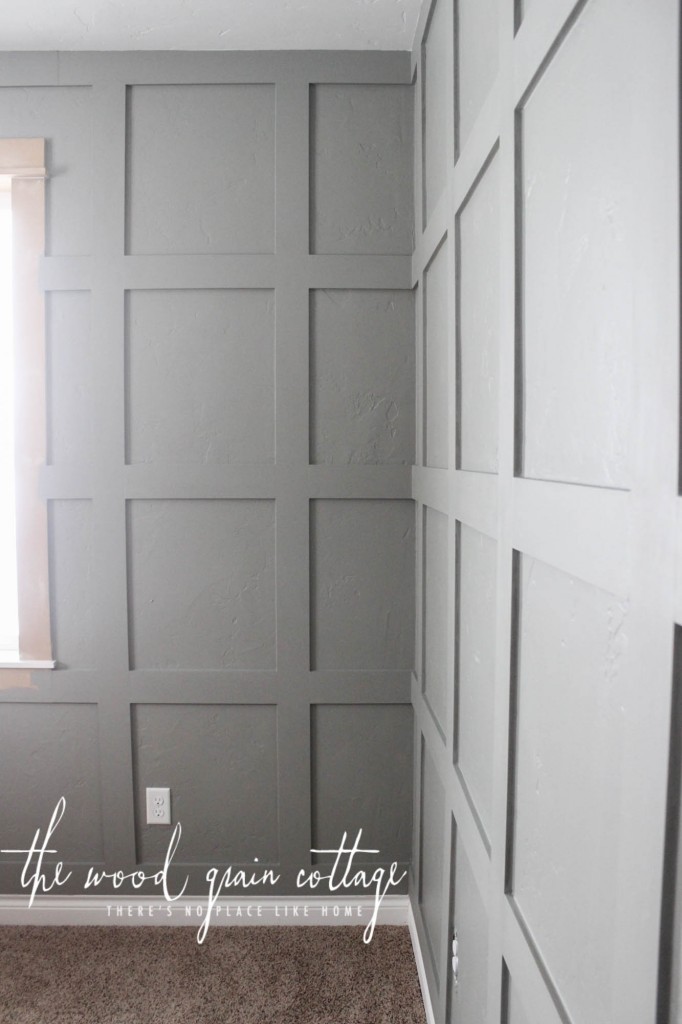
And man oh man did those walls turn out incredible. They have completely transformed the room and I can not wait to have the space done so that I can fully enjoy everything this room has to offer. The walls are just the beginning, but they absolutely set the tone for the room.
Here’s how we installed them, and what we used:
Grid Board & Batten In The Office

Affiliate links are provided below. Full disclosure here.
Supplies:
- 1/2″ MDF 4′ x 8′ sheet, we used 3 sheets, cut into 4″ strips
- Table Saw
- Chop Saw
- Brad Nailer
- 1 1/4″ 18 Gauge Brad Nails
- Air Compressor
- Level
- Measuring Tape
- Caulking Gun
- Caulking, we used 5 tubes
- Wall Putty, we used a 1/2 pint
- Sandpaper
- Skinny Foam Roller
- 1 Gallon Paint
Step One: Paint The Walls
To start, I painted the walls World’s Away by Valspar in eggshell…

I knew there would be no way I’d want to paint the walls after the grids were installed. No fun there.

Step Two: Rip Down MDF Material
For the actual wall treatment, we first decided on the size of the grid pieces. We used 1/2″ MDF 4’x8′ sheets that we ripped length wise into 4″ strips.
Step Three: Install Top & Bottom Wall Pieces
With the strips cut, we installed the MDF pieces along the top of the wall, right at the ceiling. We used our 18 gauge nail gun and nailed the strips into place, making sure everything was level as we went…


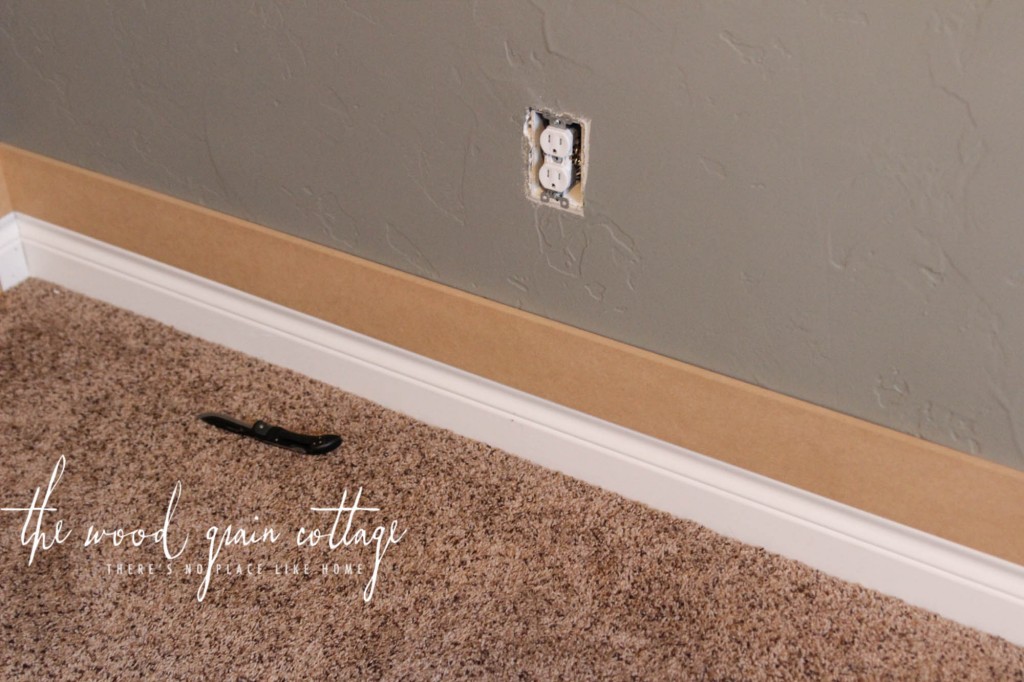
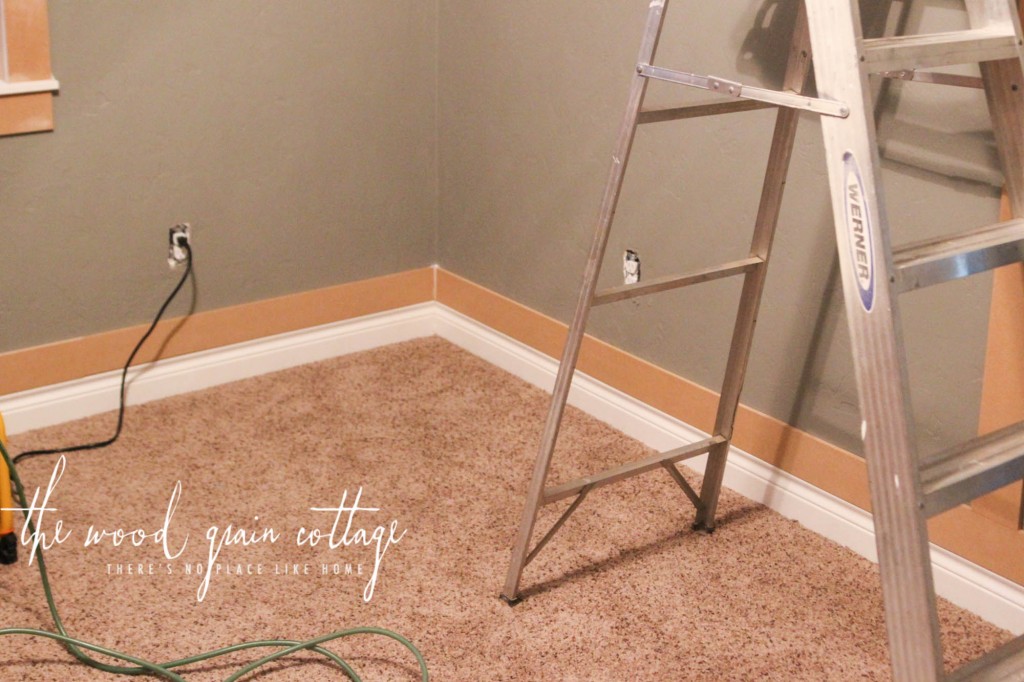
We also installed the strips right above our existing baseboards all the way around the room…
Step Four: Install Vertical Boards
With the pieces installed along the top and bottom of the walls, we started installing the vertical boards. And this is where it got a little bit tricky because of how we wanted to install the grids in the room, and how we wanted them to continue around the room and wrap around each wall, making them look like they “continued” around the room.
Based on our room size and shape (140″ x 149″), and the size of our “boxes” we decided to have the first vertical board on the north and south wall of the room start in the center of the wall. On the east and west walls of room, we placed the grid space as the center of the room. This insured that the dimension of our boxes would appear to be similar in size as they wrapped around the wall. This will vary depending upon your room size and shape.
Anthony began nailing the wall strips in place, measuring the length as he went, and using the level to make certain they were straight…

We placed the vertical boards 18″ apart, to the inside of each board.
He cut a guide piece to length and used that as an easy way to get the space between each vertical piece installed easier and faster…
Then, he used our nail gun to attach them to the wall…

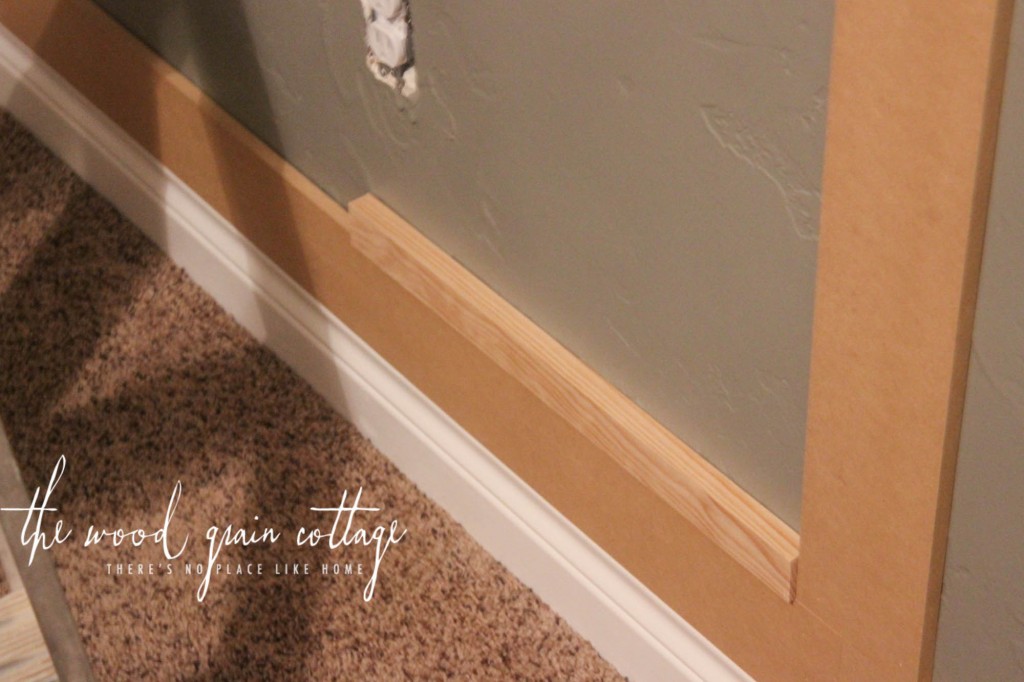
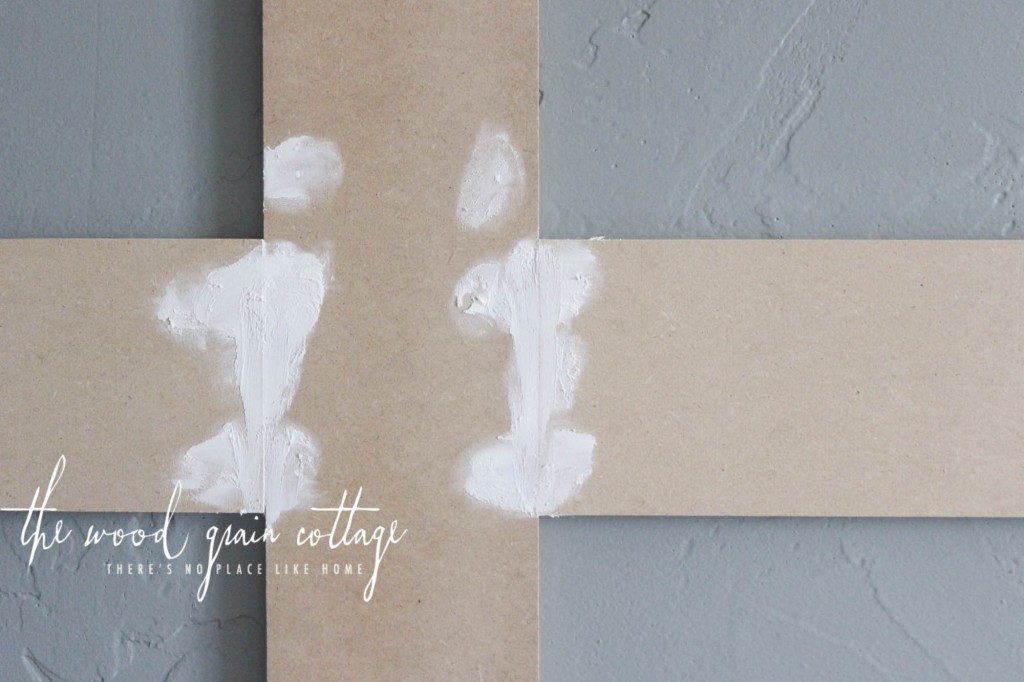
Our wall texture did make things a little bit difficult, just because they aren’t completely smooth. In several different spots, if we were to nail the board in place, they would have sank too far inside the wall, leaving a big gap. To fix it so the boards sat more flush with one another, we shimmed behind the boards that needed it with paper.
Anthony cut the paper into strips and folded them to the thickness he needed…
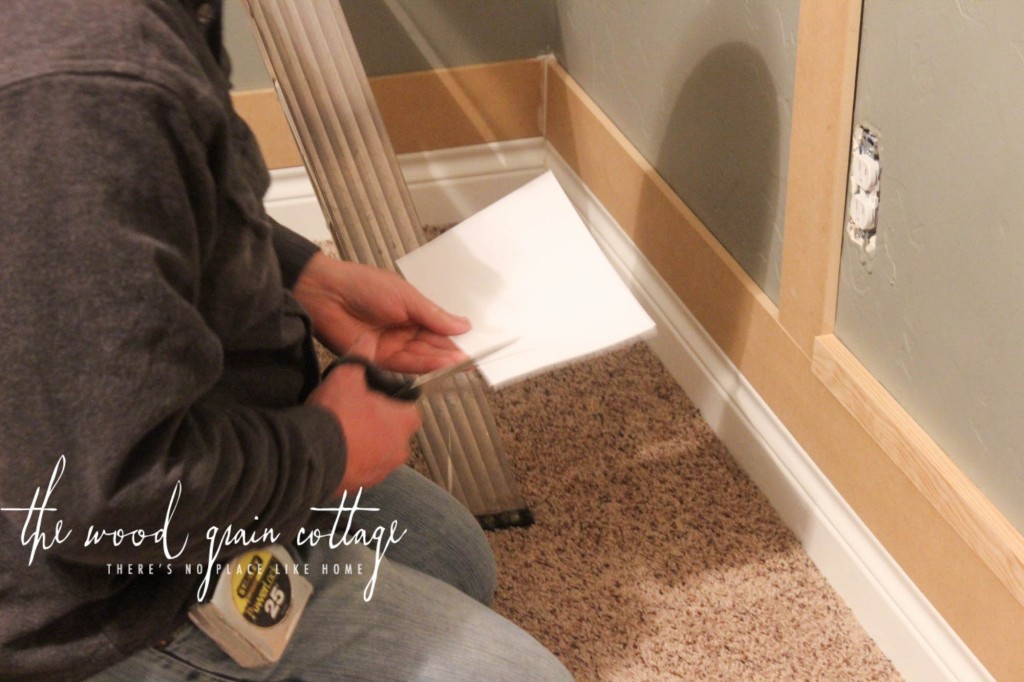
And then shoved them behind the wall strip…

We then nailed the board in place, and future caulking would cover up the evidence of any shim. And just like that, the boards sat flush with one another. We had to do this in several different places.

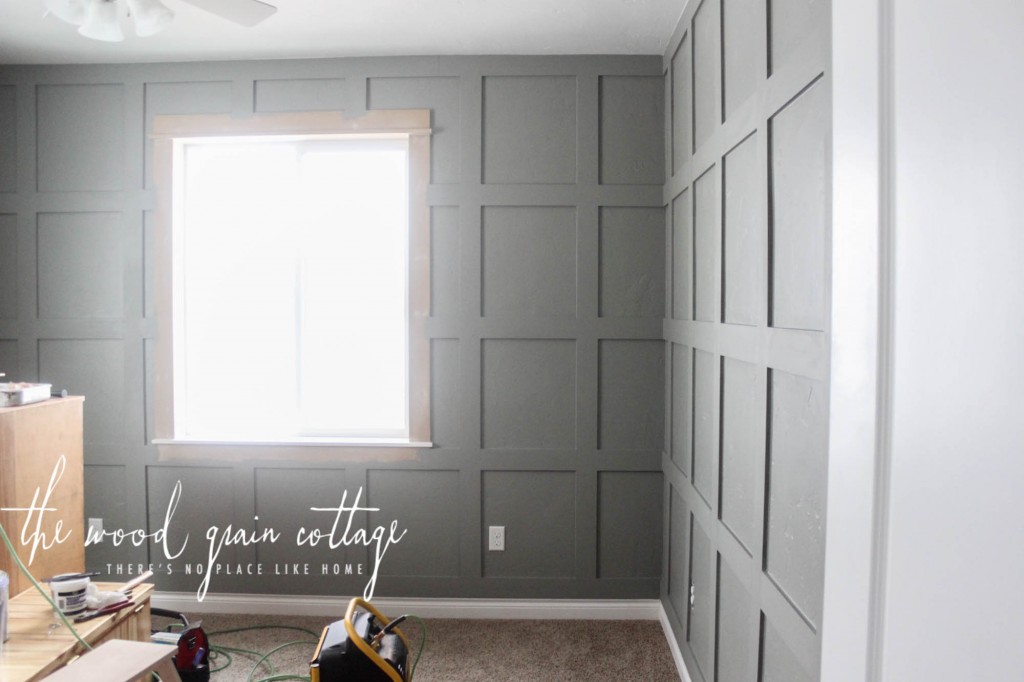
Before we knew it, this is what we were left with…
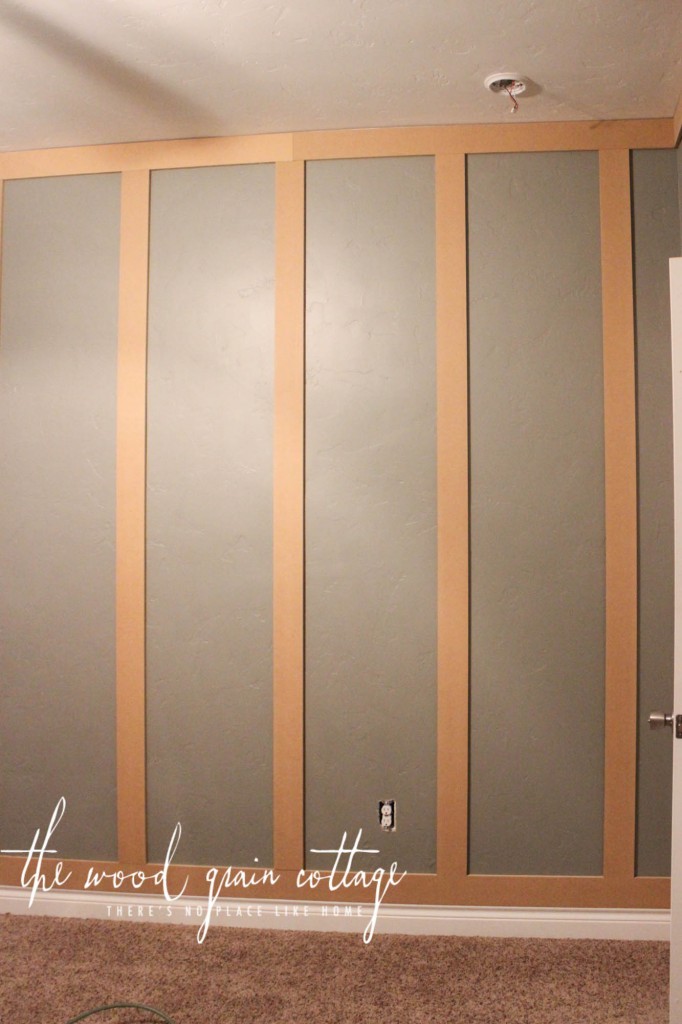
Step Five: Install Horizontal Pieces
Next, we started cutting and installing the short pieces that would go between each vertical board. Since this was the first wall we were installing the grids on, I had him show me two different options. Originally, I was going to have three boxes, but he installed one at a lower level and I loved how it looked…

I went ahead and had him install each different size in one full section for a good visual…

I loved the smaller boxes and the dimension they added. I knew they’d be more work to install on every wall, but my heart was set on them.
The inside height of each box ended up being 21″ tall.
Again, Anthony cut two guide pieces, cut to the length of the inside of the ‘box’ (21″), which made the installation of the horizontal pieces much easier…
We nailed the boards in place, and continued our way up, and across, the wall…

The picture below shows what I mentioned above about the grids needing to continue their way around the wall. We installed the short pieces at the end of the wall, and would continue adding the same board on the other wall to create a seamless appearance…

We continued the same pattern as the first wall, just working our way around the room…
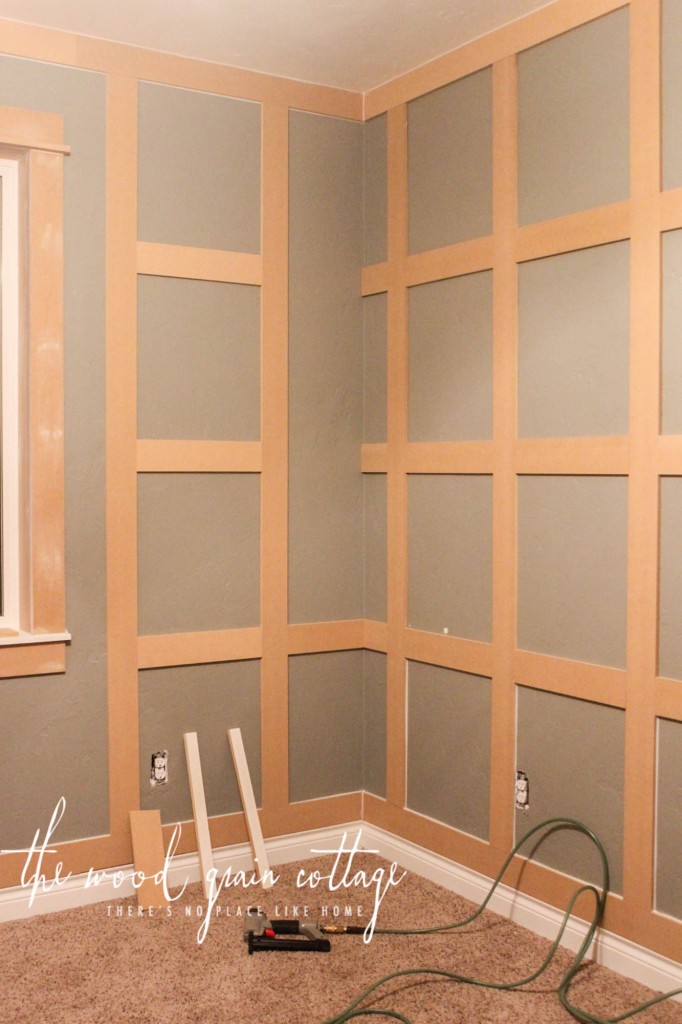
And because we took the time to measure the walls, we could somewhat determine how big our boxes should be based on the wall size and how we wanted them to wrap around each wall. The corner boxes are slightly smaller in width than the rest of the boxes, but not enough that you would be able to know at a glance.

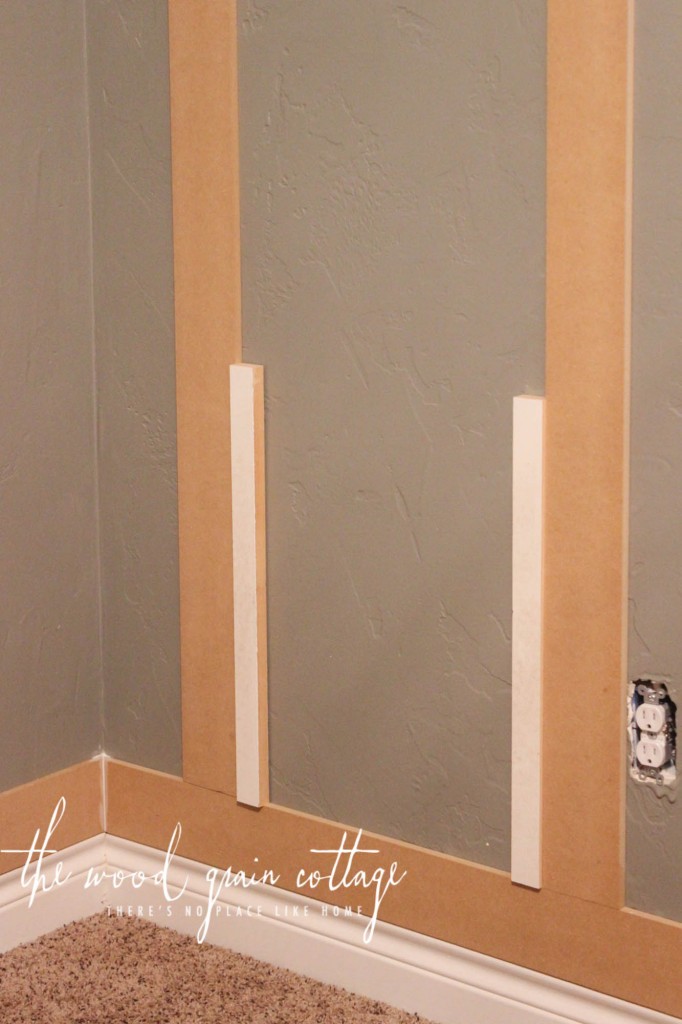
We also had to take into consideration both windows in the room, and the doors, which I’ll show you a little later in the tutorial. I decided early, before choosing what to do on the walls, that I wanted to trim out our windows. This made installing the grid boxes a little bit more difficult, just because we had to notch around the window trim…
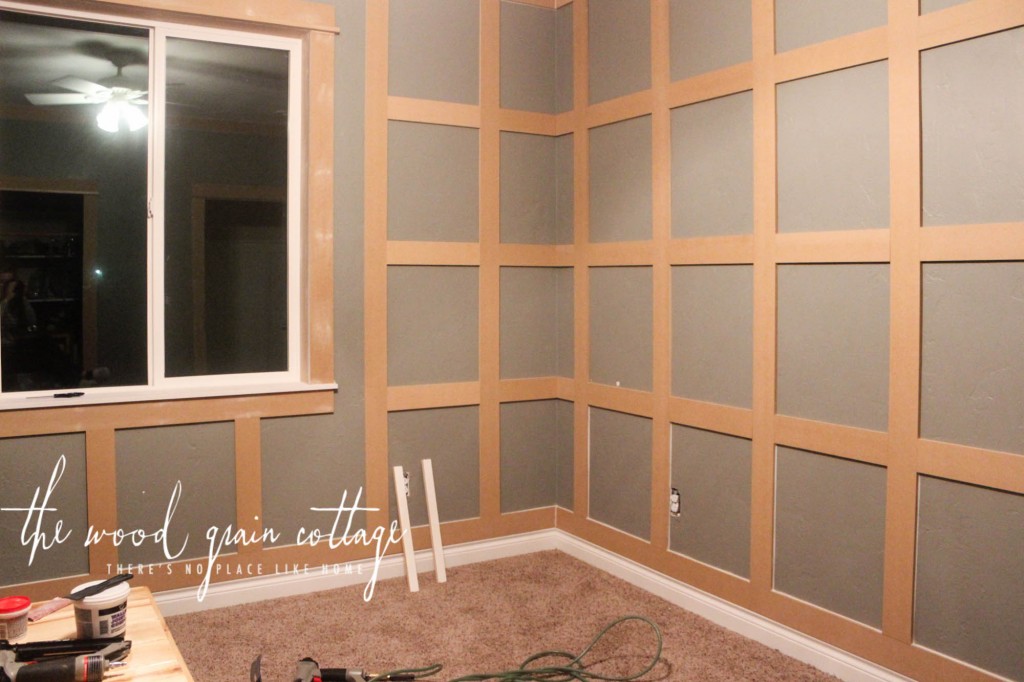

We continued working our way around the room, and over the course of a few days, we had most of the walls done…

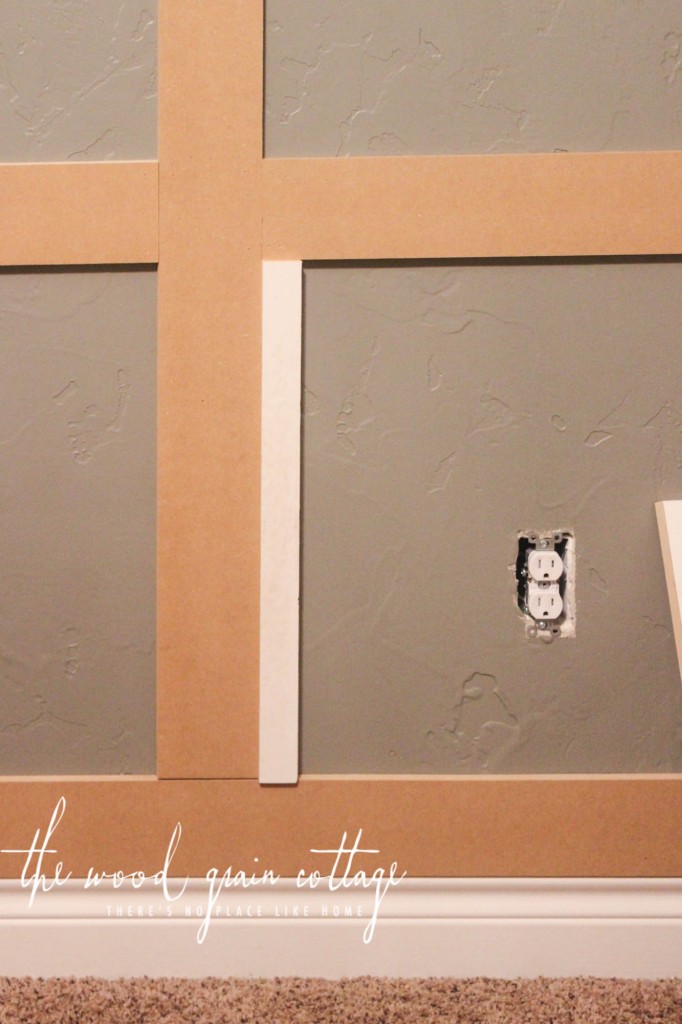
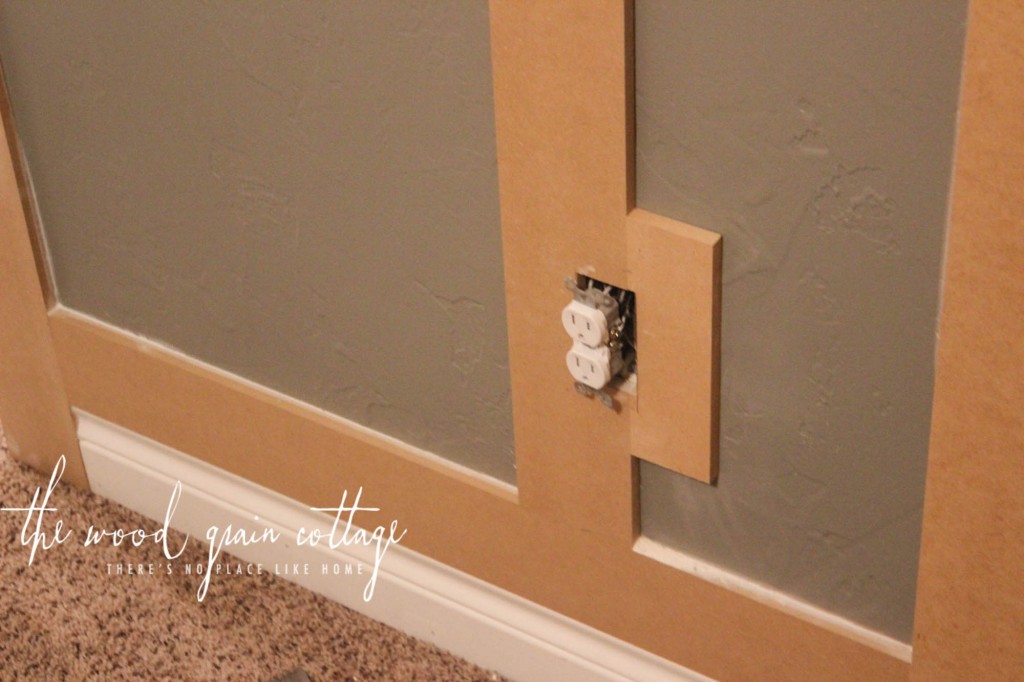
There were a few different places where the pieces came into contact with an electrical outlet, so we trimmed them out to make it look more seamless…
Step Six: Caulk & Fill Nail Holes
As Anthony worked on the walls, I began the very long task of caulking each box and filling the nail holes and seams. This took a while, but I was able to work on it a little at a time, which was good because there was a lot of it to do. Blood, sweat and tears went into this project. Okay, maybe not the tears, but definitely blood and sweat. I had to alternate fingers and switch tasks because my fingers were raw in several places from caulking.

I won’t kid you, this was time consuming, but I knew it would be worth it in the end…

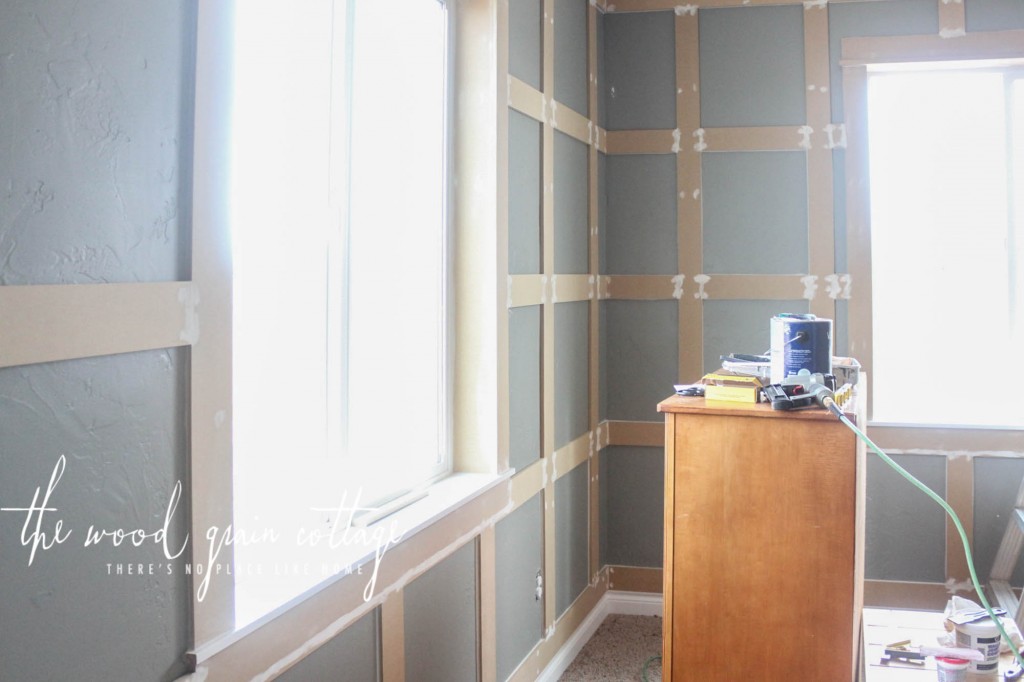
I used wall putty to fill the nail holes and seams, and then went back over every strip with a piece of sandpaper to make sure everything was smooth…
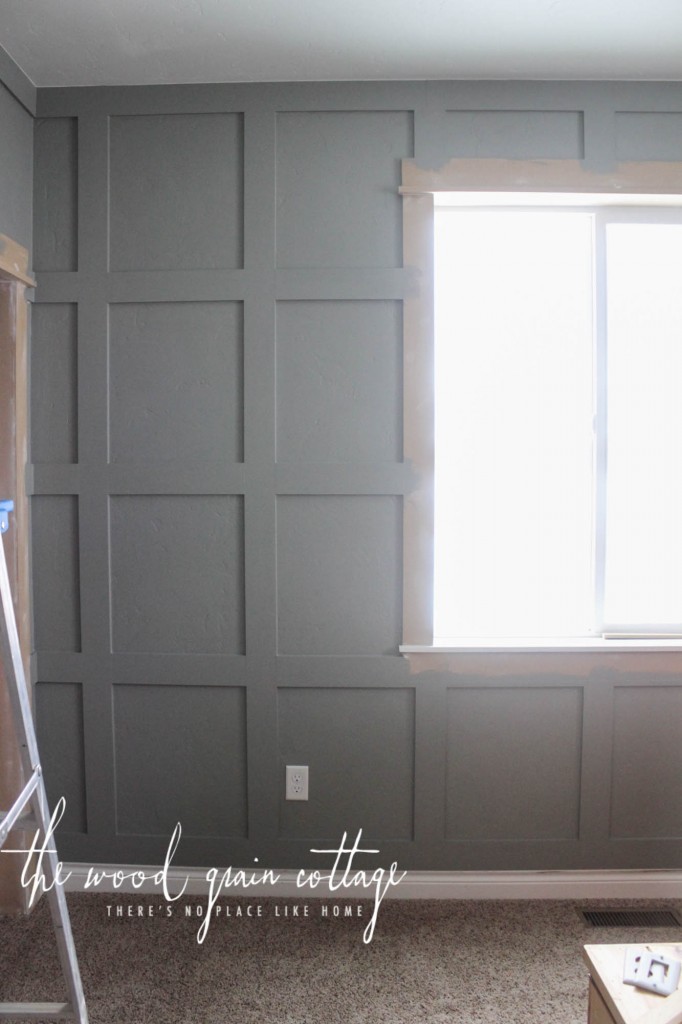
Step Seven: Paint The Wall Strips
Once I had everything sanded, I used my vacuum to remove all the dust, and then wiped the boards clean. I was finally ready to paint…


This went by pretty fast, just because I already had the walls painted, and was just painting the strips and cutting in each and every box…
I went back and forth on painting the window trim the same color as the wall, but I really wanted to keep the white paint on our existing baseboards, and I knew white window trim would tie in with it beautifully. I’ll be sharing more about the window trim a little bit later.
Overall, I am absolutely, positively in love with the walls. Were they a labor of love? You bet. Were they worth it? Absolutely.
I’m also in love with the color. I went a little bit outside of my norm and didn’t paint them white (haha) but again, I trusted my gut. I wanted the office to have warmth, depth and a certain level of sophistication. The color is perfect, and I love how it changes throughout the day. At times it appears very gray, and others it looks more green. It’s exactly what I was going for, and I love the depth the grids add. I love the look of the shadows inside each and every box. You could say this is a favorite project of mine, and the perfect backdrop for our new office.

Coming up, I’ll be sharing more about the window trim, the new closet doors we built, the desk area and so much more! We’ve also made a few other small updates around the house, so I’ll be sharing them as well. We certainly have a lot of changes happening around the house, and it’s been fun and exciting to see everything come together!
Here’s to having a completed office soon, I know I need it… especially before tax season, hahaha! 🙂
Oh wow, tons of work but so pretty. I love the color too.
Prettiest little boxes I ever did see 😉
It looks amazing!
Love, love, love!!!! Thank you soooooo much for this post. I wanted to do this exact thing as ournextvoriject and now I can easily show my hubby how. 🙂
Love the new walls and the color!! Can’t wait to see the rest of the room!
That looks awesome!!! Can’t wait to see it come together.
Really loving this. You did an amazing job. Love the color also.
Love this!! I’ve been wanting to do this in our house too.. one day hopefully ?
Thank you sooo much for revealing your project! My walls also have the texture and thought I could never achieve this look because of that. Anthony is an absolute treasure because most husbands (mine included) would run and hide. So I know what will be my next project!! Cannot wait to see your whole office when it’s done. Again, thank you!
This looks so great and I just love the wall color choice! I am looking forward to seeing the finished project!
Best,
Kelly
It’s really incredible how can it change just with imagination, work and some tools.
Congratulations!!
This is an inspiration. It’s amazing what can be achieved with MDF & paint. You’ve got me thinking of some great ideas in my home. Thanks!
This looks great! Quick question: how did you treat the pieces of mdf that did not have a stud to nail into? If your boxes were 21″ square (and studs are usually 16″ apart), I would think that many of your boards didn’t hit a stud. I guess the vertical boards would maybe hit studs at the top and the bottom (but maybe not because of the top and bottom boards)?
Did you just nail the finish nails into the drywall? Did you put the nails at an angle? I guess the caulk would also act as an adhesive and would help? (particularly with the textured walls because you’d be running caulk the whole length of every board). Did you consider using construction adhesive or liquid nails or anything behind the boards? (makes them messy to remove or if you screw up and need to move one).
I might worry that the vertical pieces (since they are long and heavier) would need a stud nail somewhere? How is everything holding up? Any advice on this?
Thanks in advance!!
Thank you Gary! We didn’t worry too much about hitting the studs as we nailed the mdf to the wall. There are plenty of nails to hold it all in place, and yes, we did add them at an angle throughout the wall. We’ve had zero problems with it, and we’ve used this same method throughout several different walls in our home. 🙂
Nice project. I like how you went around the corner. We are looking at doing one wall as an accent wall in the bedroom. I’m wondering how easy it was to cut the mdf in relation to keeping straight and clean lines? thanks.
Thank you! We didn’t have any issue ripping the MDF into strips on the table saw. Everything came out nice and straight. I hope that helps!
I really like this room. Great work. Thanks for all the details. I notice the final pictures don’t show the window trim color . Did you use white trim on the windows? We are planning a similar project and can’t decide if the window trim should be same color as wall. Do you have a photo on your site of the finished window trim? I looked around but could not find any.
Thanks again
Tom
Thank you! You can see a picture of the window trim here: https://www.thewoodgraincottage.com/the-office-blinds/
Looks beautiful. Did you have to prime the mdf strips? I keep reading that after you cut the mdf would need an oil primer but we want to do a bedroom and not a bathroom so I wondered if I could skip that step.
Thank you so much! No, I did not prime the mdf strips. The paint I used was a paint + primer blend, but I don’t think it’s necessary to prime mdf separately.
Did you paint the window trim the color of the wall or white like the baseboard?
I painted it white like the baseboard. You can see more views of it here: https://www.thewoodgraincottage.com/the-office-blinds/