
DIY Basement Shelving
Looking for a great way to build extra storage? Our DIY Basement Shelving is the perfect solution for so many problem storage areas! Customize the size to fit your space.
You may remember from my 2016 goals post, that I would really like to to can and preserve more food this summer. Last year I didn’t do anything, and our pantry showed the results. Almost all of our jars were empty, and it was a hard thing to look at.
This year, I made a promise to myself… I am canning. The hardest part about canning though, is that you need somewhere to store all of those full jars. And since we have a basement, we’ve had the perfect place, with one exception…. the shelving space. I begged and pleaded with Anthony to please (and pretty please) help me build some shelves this year. He typically has more time in the winter for these types of big projects, and he made time for my shelves.
So, today I’m sharing the tutorial on how we made our DIY basement shelves. Mind you, this isn’t a *pretty* post, but rather a real life project that’s made a world of difference.
How How We Made Our DIY Basement Shelving:

Affiliate links are provided below. Full disclosure here.
Supplies:
- 2″ x 4″ x 10′ Boards, cut to size
- 3/4″- 4′ x 8′ OSB, cut to size
- Circular Saw
- Chop Saw
- Screw Driver/ Drill
- 3″ Torx Deck Screws
- Straight Edge
- Clamps
- Countersink
- Measuring Tape
- Sandpaper, medium grit, to remove any rough spots from cutting the wood to size
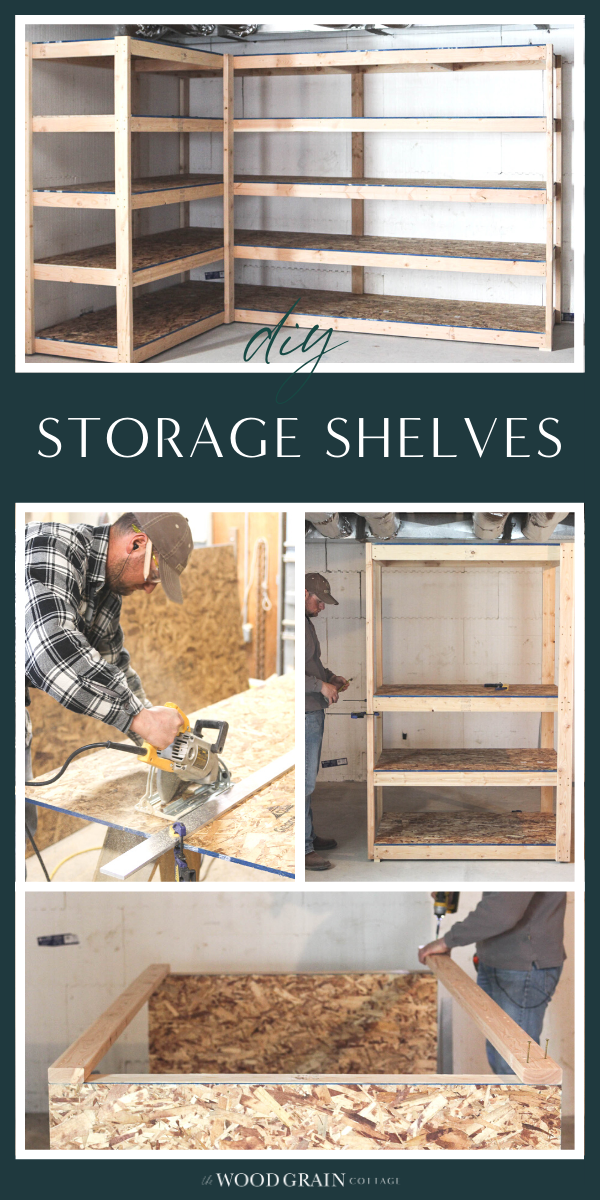
Step One: Determine Shelving Size
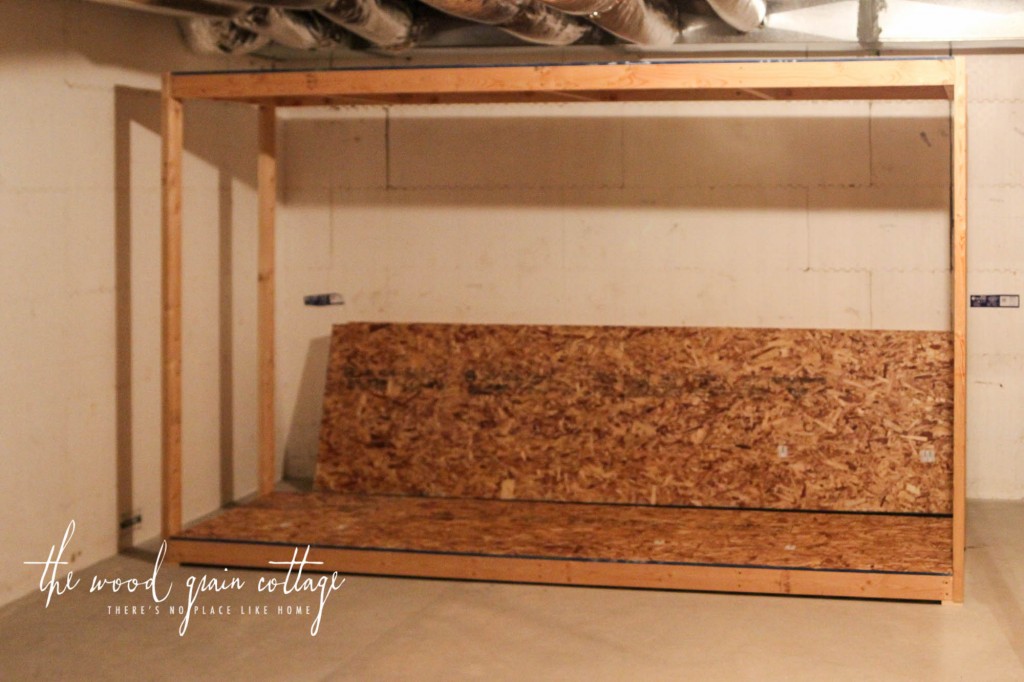
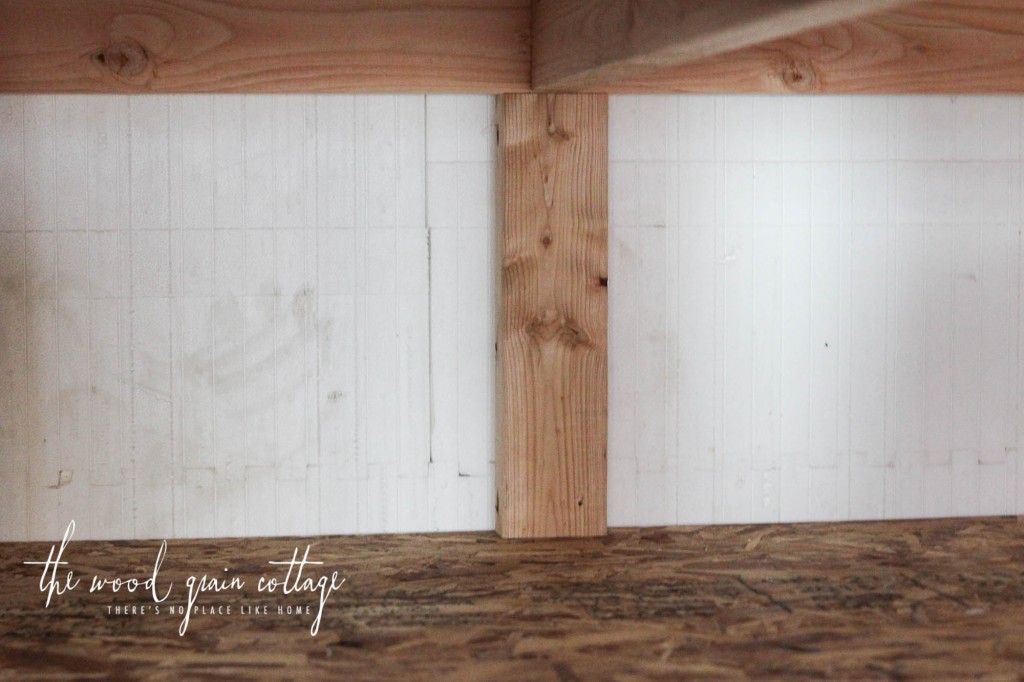
First, I decided on a size for our shelving. Our basement isn’t finished yet, but we do have a pretty good idea for the floor plan down there, so we built the shelving to fit the space that will be for my fruit room, or also known as the cold storage room. Because we basically knew where the walls would go when we finish the basement, the size of our shelving unit fits into those specifications. If you use this tutorial as a guide, feel free to adjust the size.
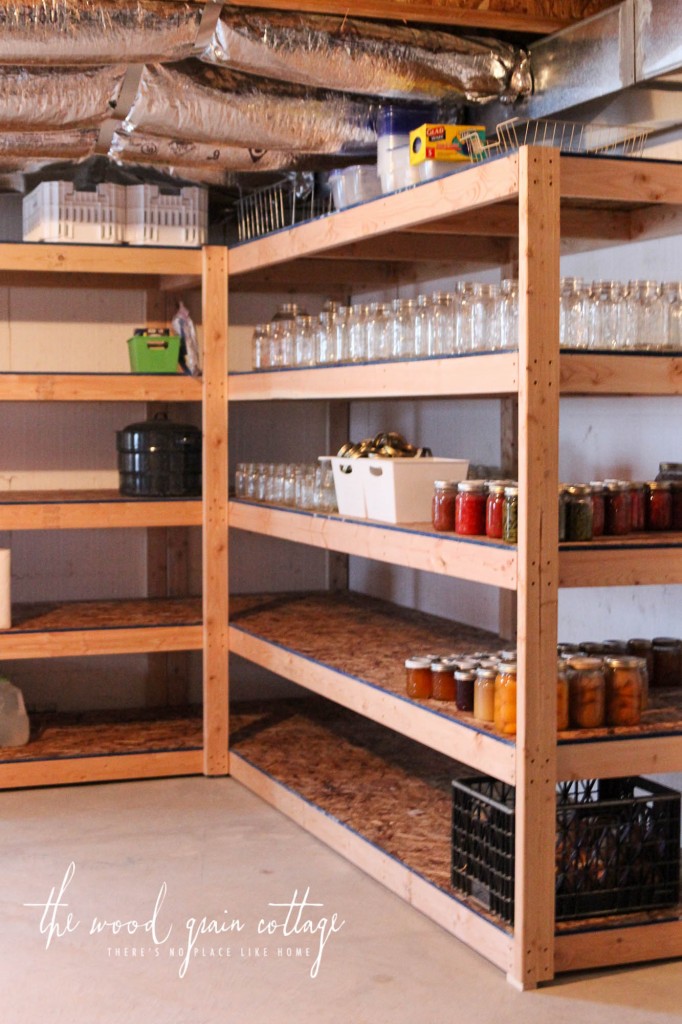
To get the most use out of the shelving, I wanted them to be in a “L” shape. Not only did it fit the “room” best, but it would provide ample storage space, which made me extremely excited. For the small part of the shelf, we made it 4′ wide x 32″ deep x 77″ tall. For the long side piece, we decided on 10′ wide x 32″ deep x 77″ tall.
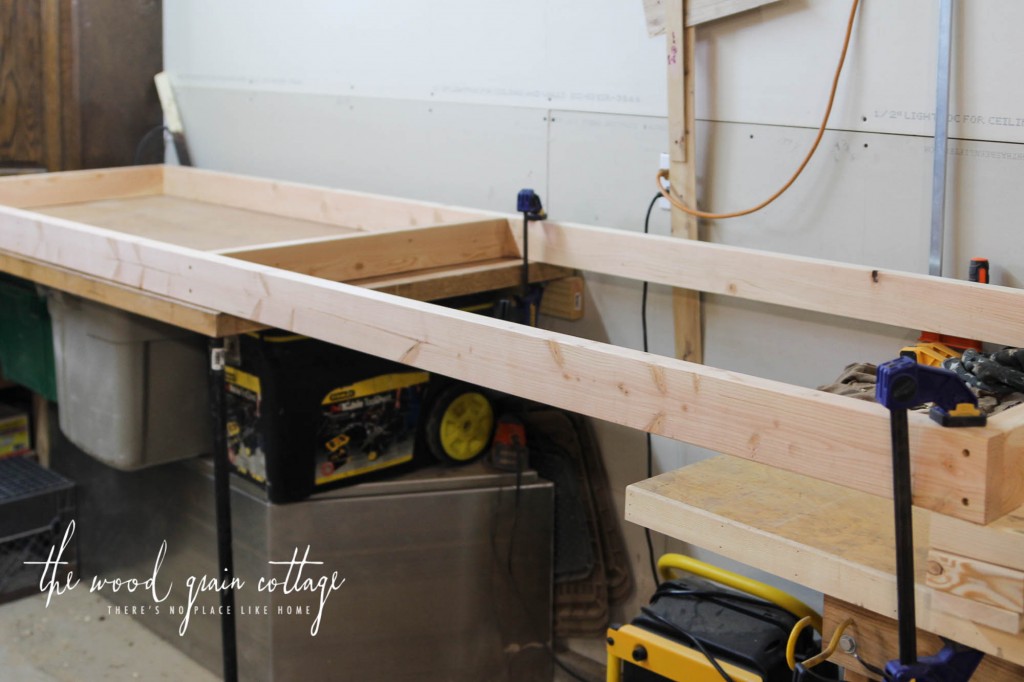
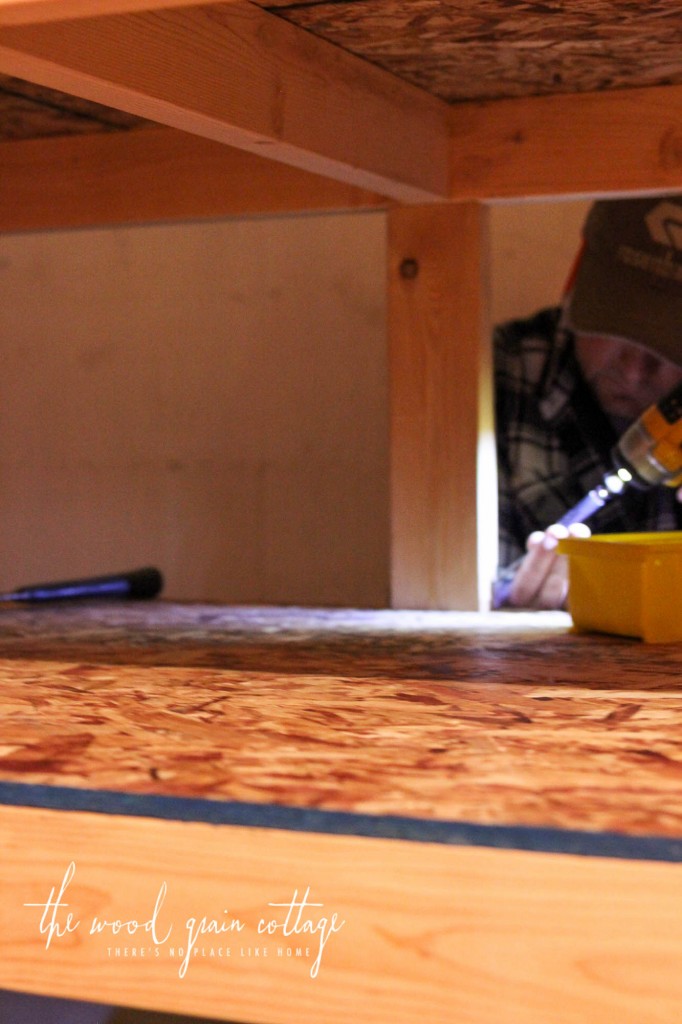
Step Two: Build Shelving Frame
Anthony started by making the actual frame for each shelf. This picture only shows one middle bracing for the shelving support, but he went back through and added two more on each side for extra support.

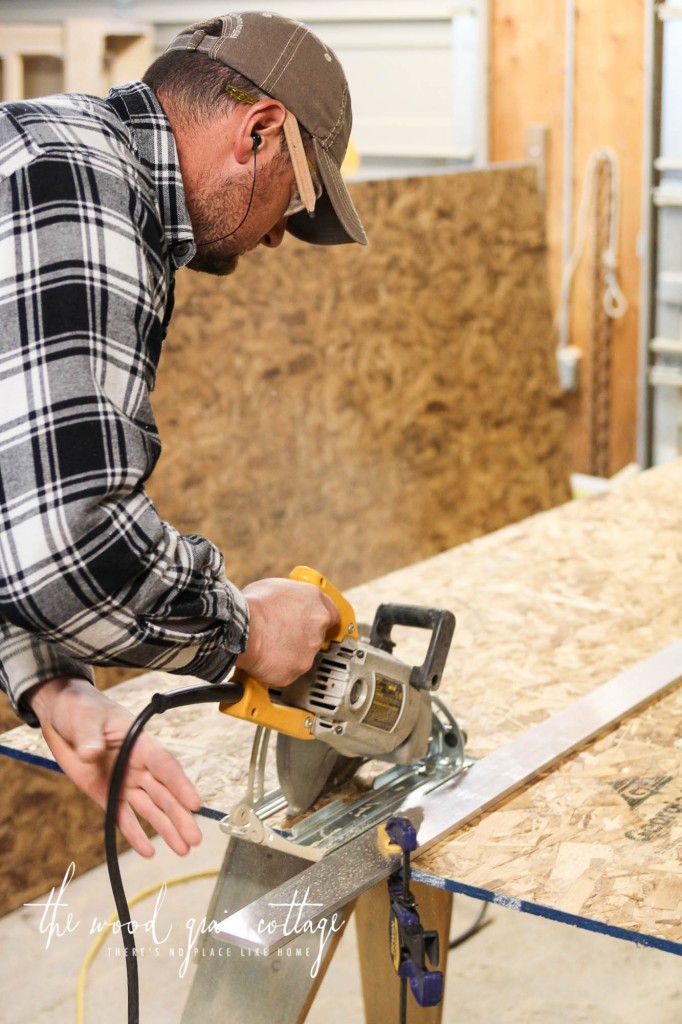
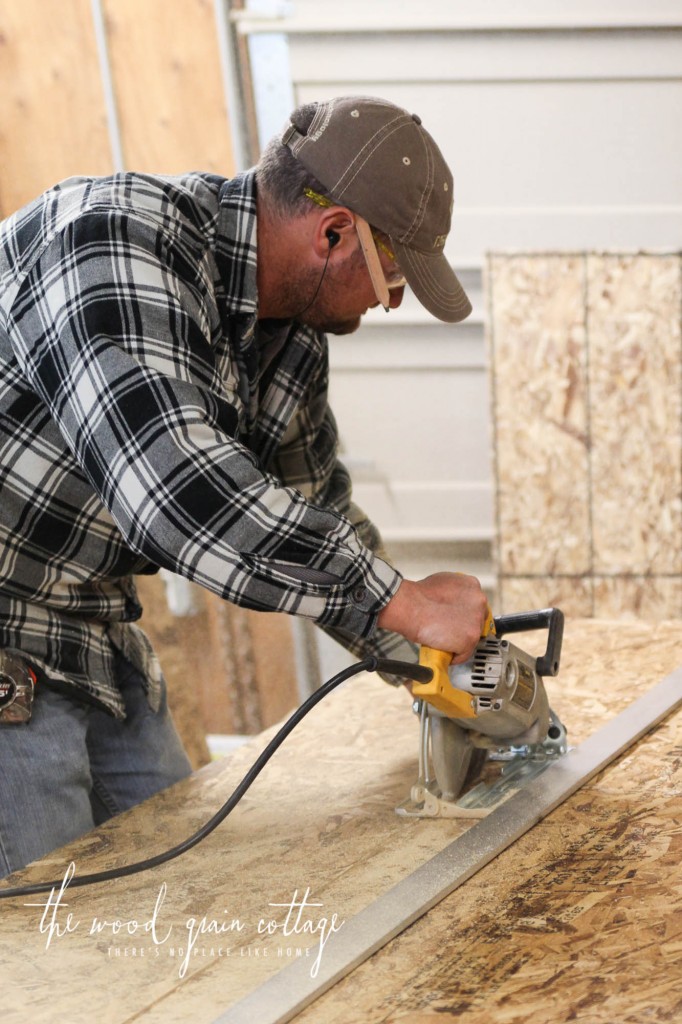
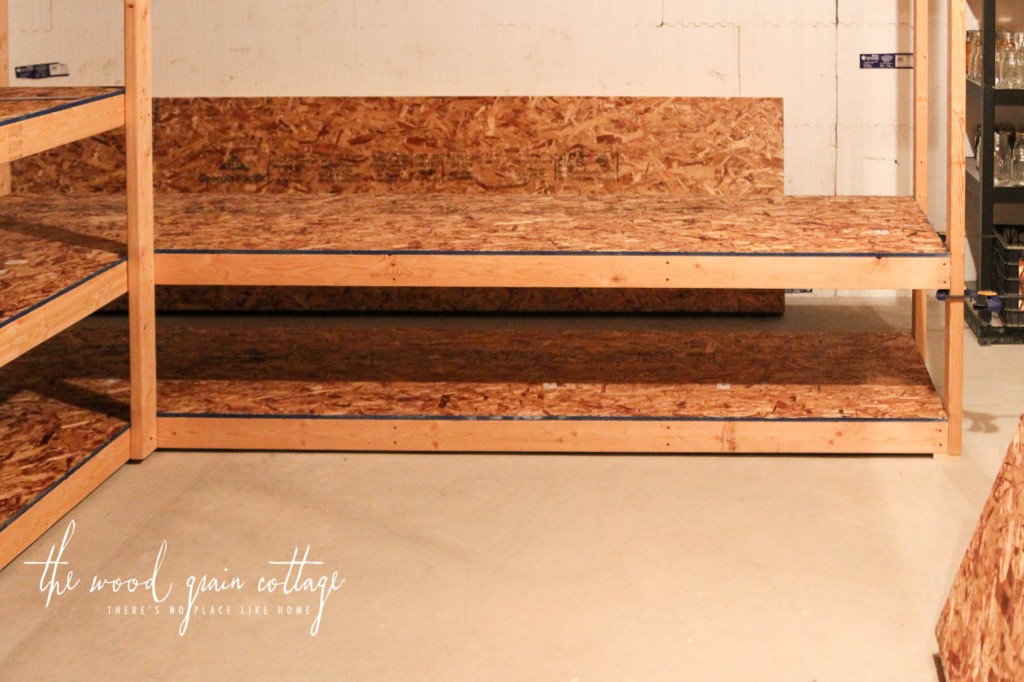
Step Three: Cut Shelving Material
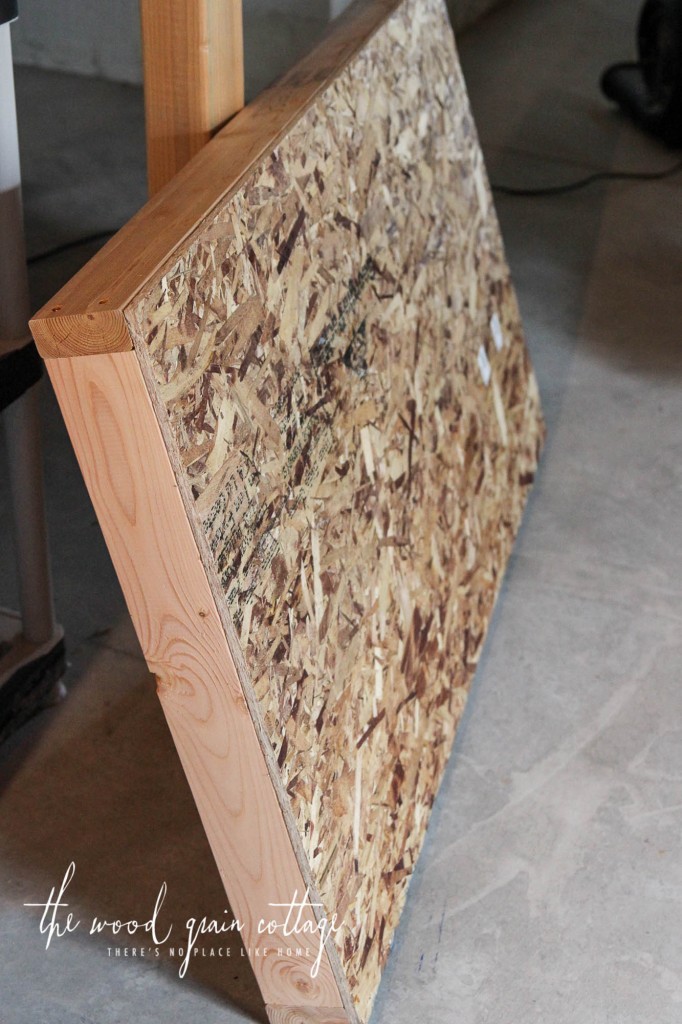
Then, we used 3/4″ OSB for the shelf. We ripped down the 4′ x 8′ sheets…

Once he had the OSB cut, he screwed them to the shelf frame, and we were left with this, our shelf…
Step Four: Assemble Shelves
When he had all of the shelves put together, we began building the shelving unit in our basement. We started with the small shelf first, adding the top and bottom shelf. We used two 2″ x 4″ boards, cut to length, as the actual “frame”.
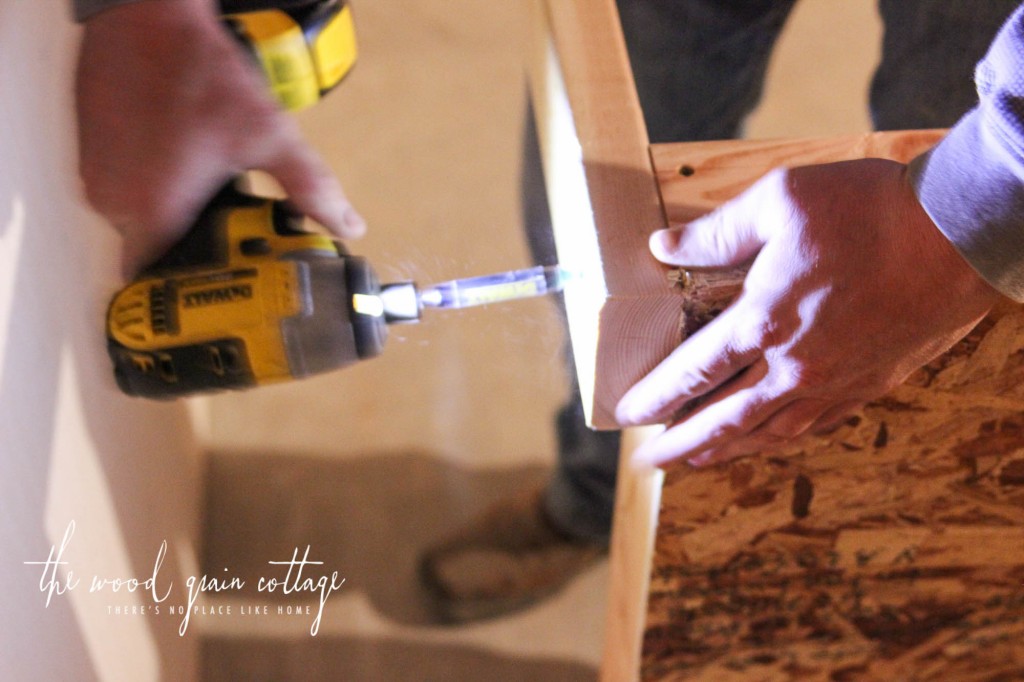
Anthony pre-drilled all of the screw holes…
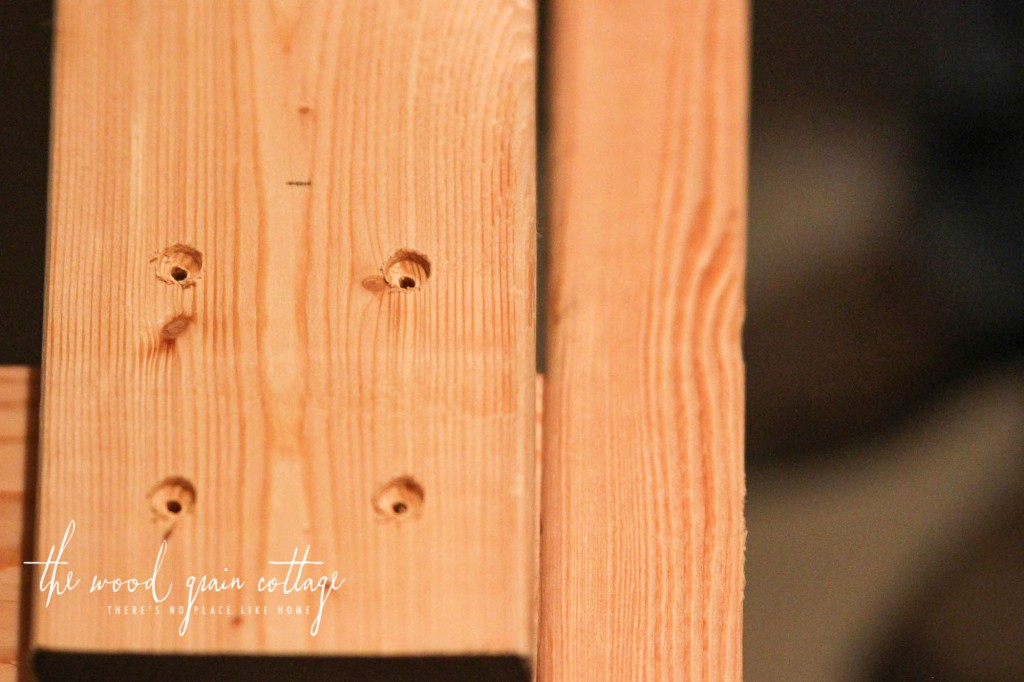
And we used screws to attach everything…
Once we had the back side done, we rotated the shelving unit and added the boards to the front…
Then, we tipped it right side up, and added the middle shelves…
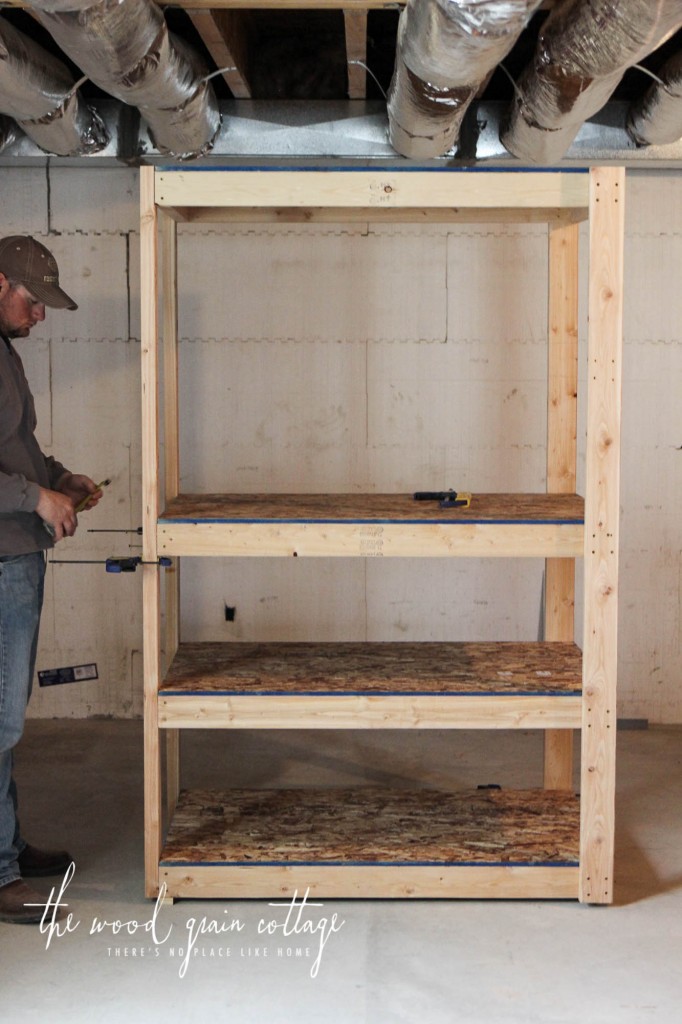
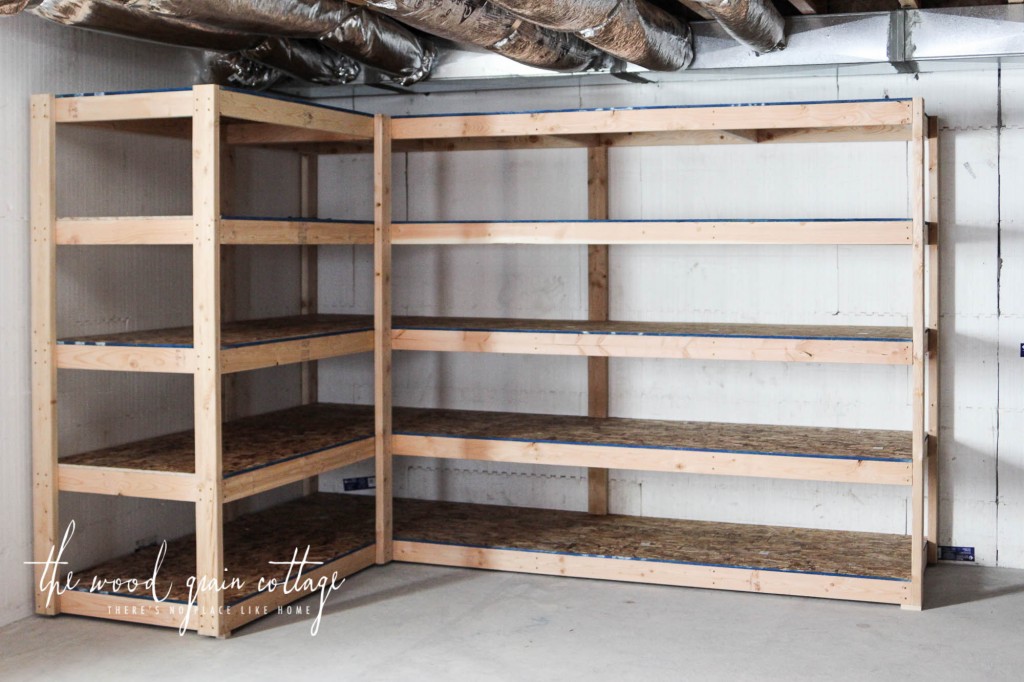
Once we had all of the shelves in place, we were left with this…

With the small side done, we started working on the large side. Carrying the huge shelves down into our basement is a memory I want to forget. It was partly brutal, partly exhilarating, and partly exciting…. but if I had to pick one to stick with, it would be brutal.
We followed the same steps as the small section of shelving, but this was definitely more time consuming.
We added the side boards and screwed them in place…
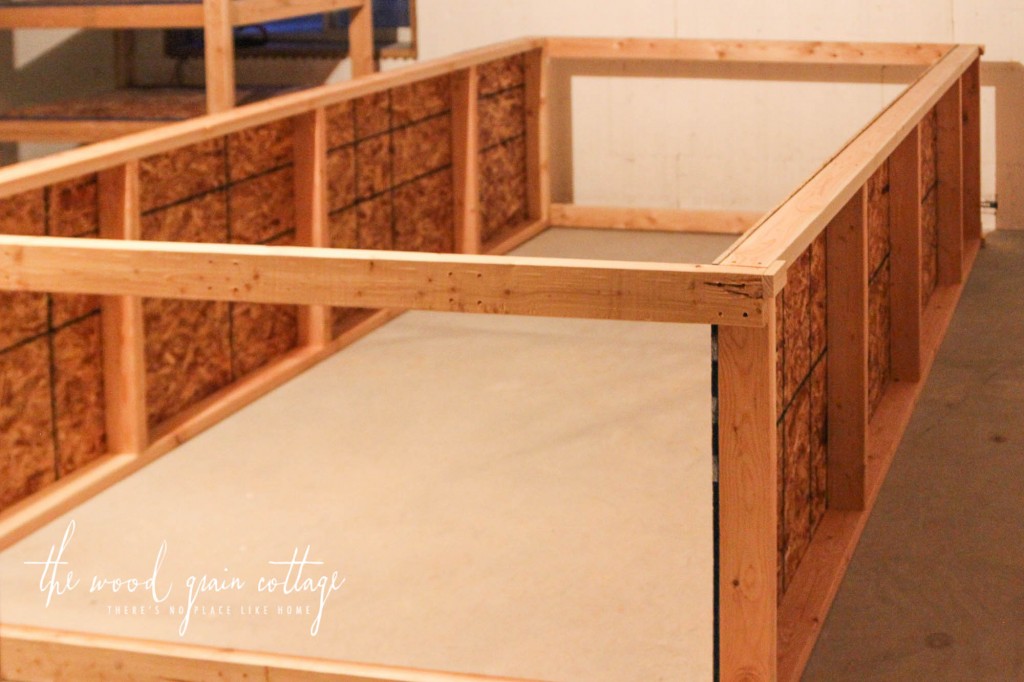
Once we had the frame attached, we flipped the shelving unit over, and had this…
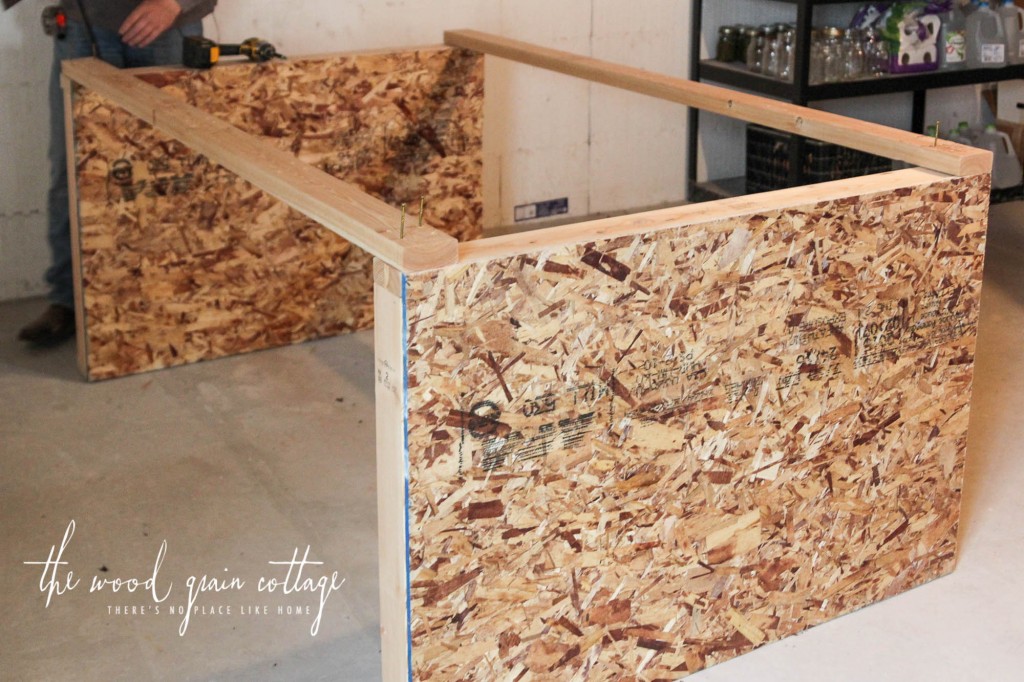
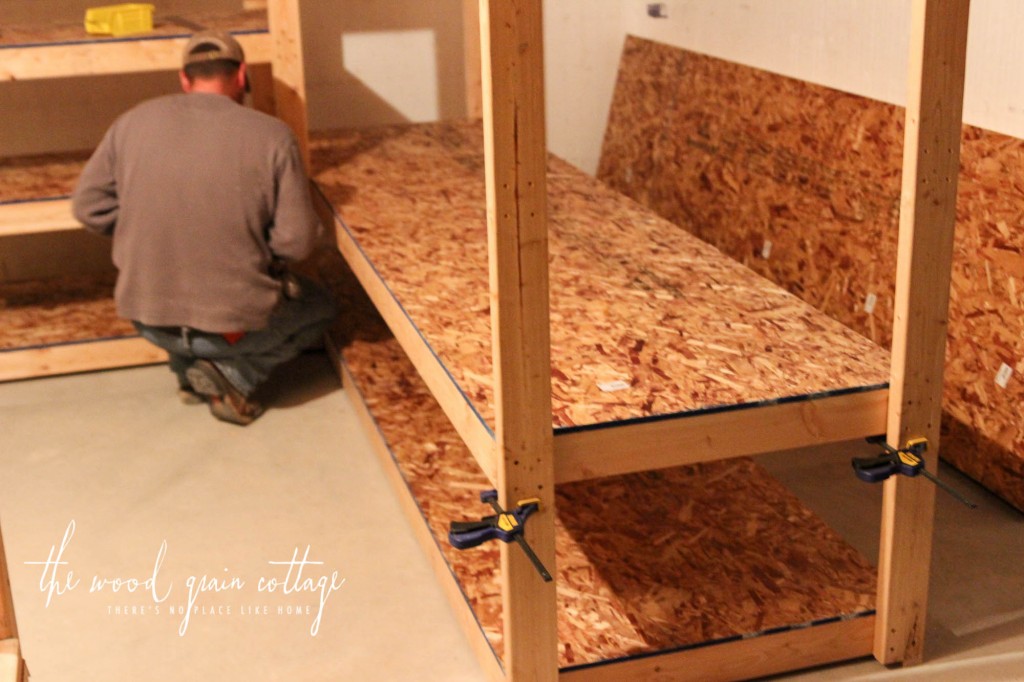
With the large unit in place, we moved over the little one, and Anthony connected them with screws…


Once they were attached, we added the bottom shelf first, using clamps to help hold the shelves in place while Anthony attached them with screws. No pictures of this step, because I was holding onto the other end of the shelf for dear life…
The picture below shows how we used the clamps as a “bracket” to keep the shelves in place. Thank goodness for those!
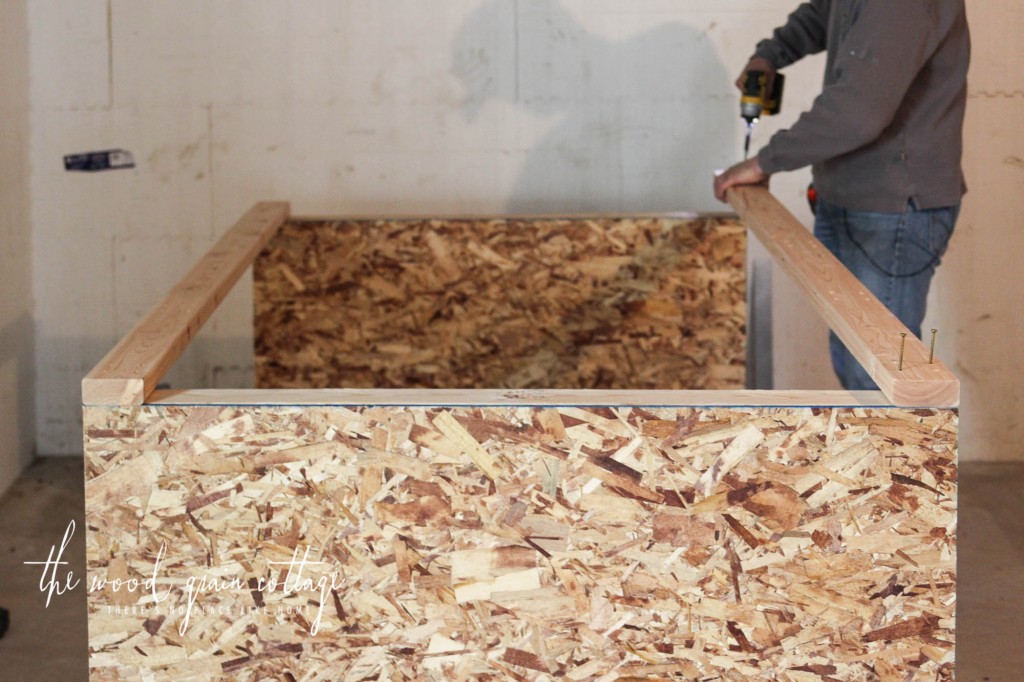
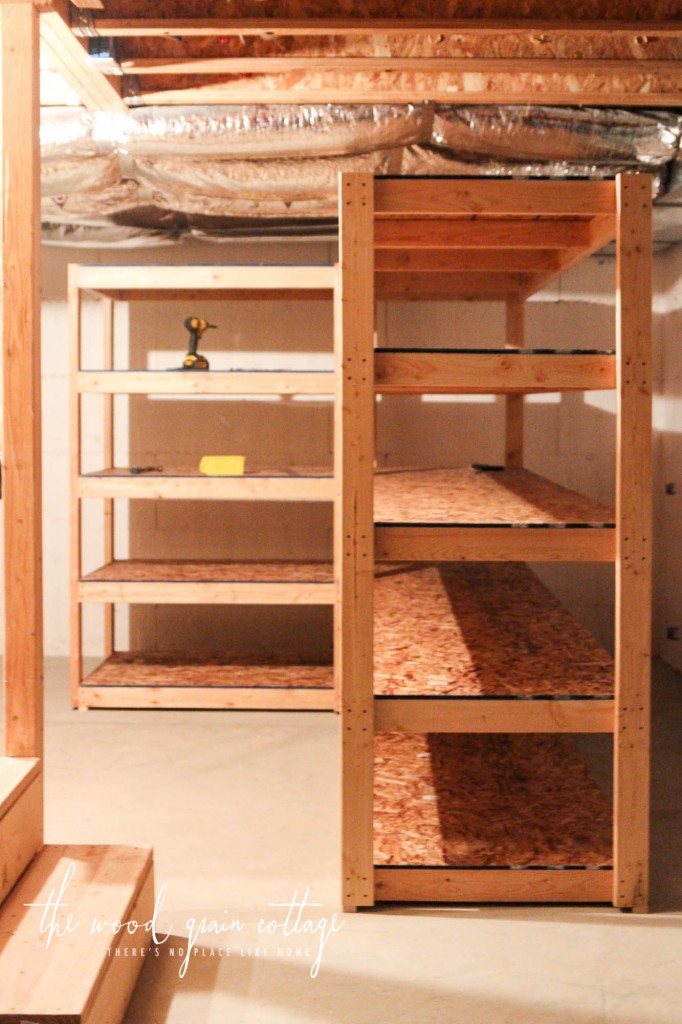
Then, we added the top shelf…

And finally, the middle shelf…

Oh man. This is such a beautiful sight!
Step Five: Add Extra Bracing
For some extra support on the large shelves, Anthony cut extra pieces of 2″ x 4″ to stick in the middle of each shelf…
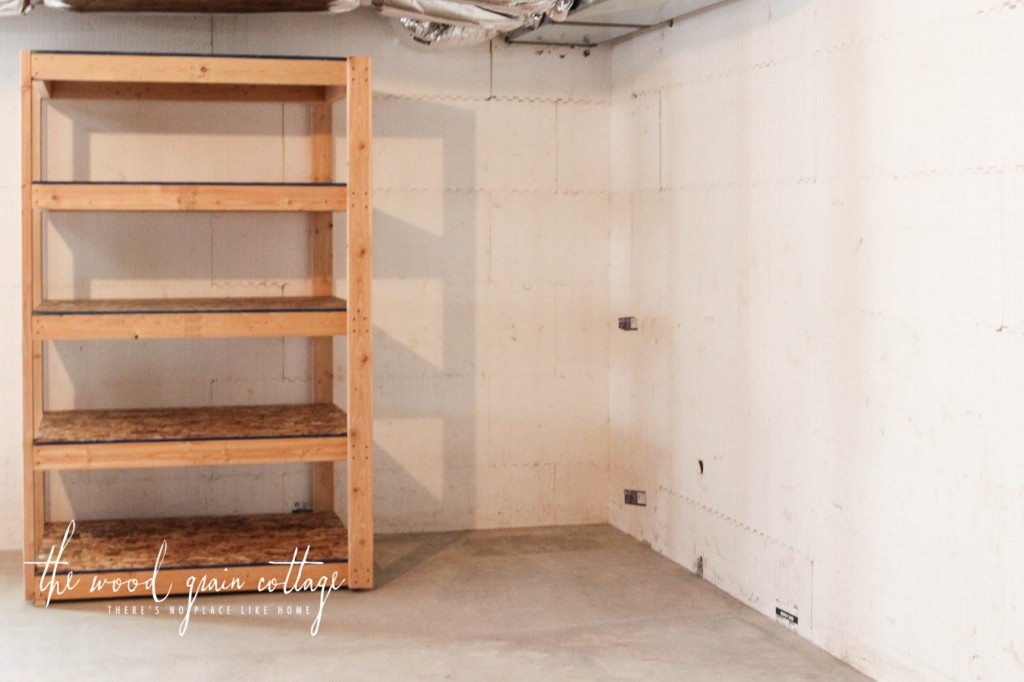
Step Six: Enjoy!
After that, the shelves were finished…
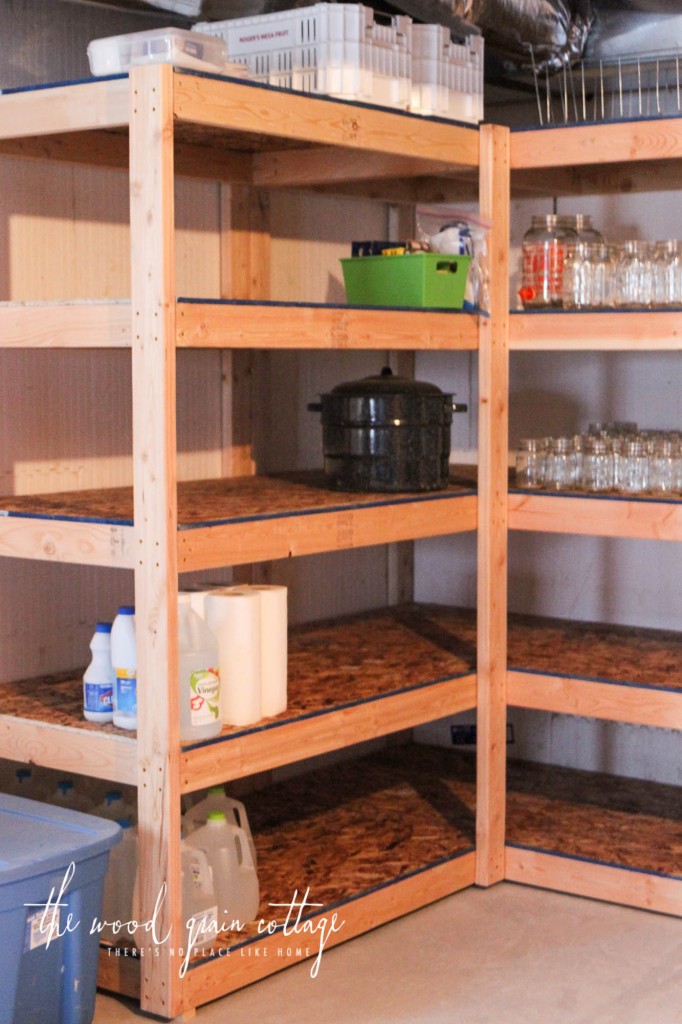
At some point, Anthony and I will probably install some fronts & sides to each shelf, that way jars won’t slide off, but for now we’re calling them done.
I couldn’t wait to start adding to them! Total happy dance moment!

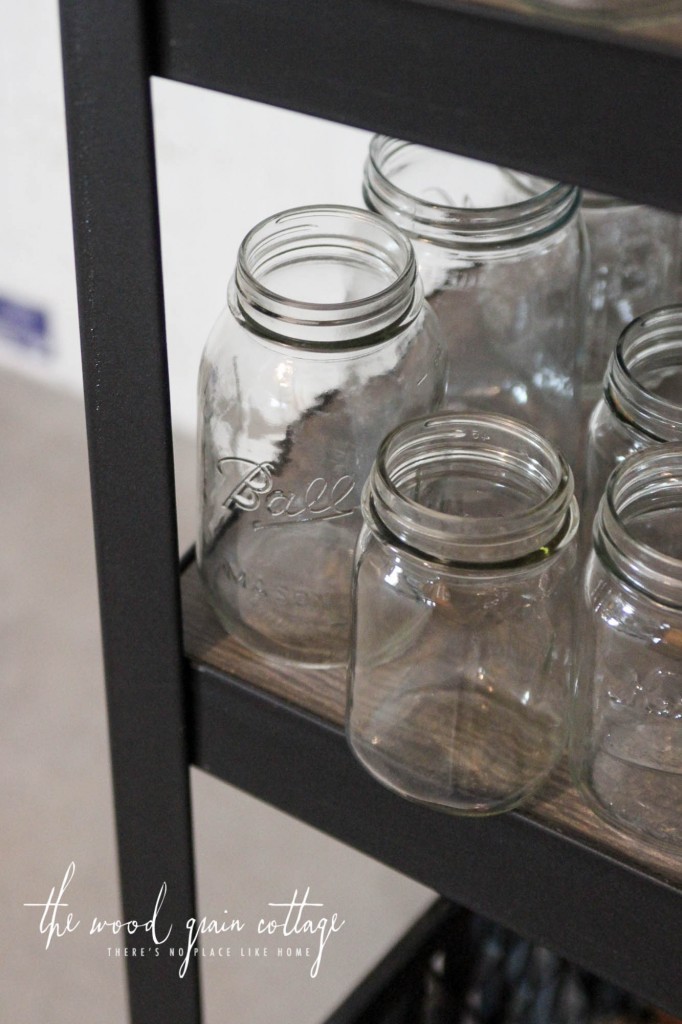
I have plenty of space to keep adding, and after I had all of the jars out of boxes and placed in an orderly fashion (I was lucky enough to get the old jars from two of my great grandmothers!), I found three more boxes in our garage. …sigh…. So back to organizing I went.
I just love that I have extra space to keep adding to our food storage, and pantry items.
I mean, anything is better than this, right?
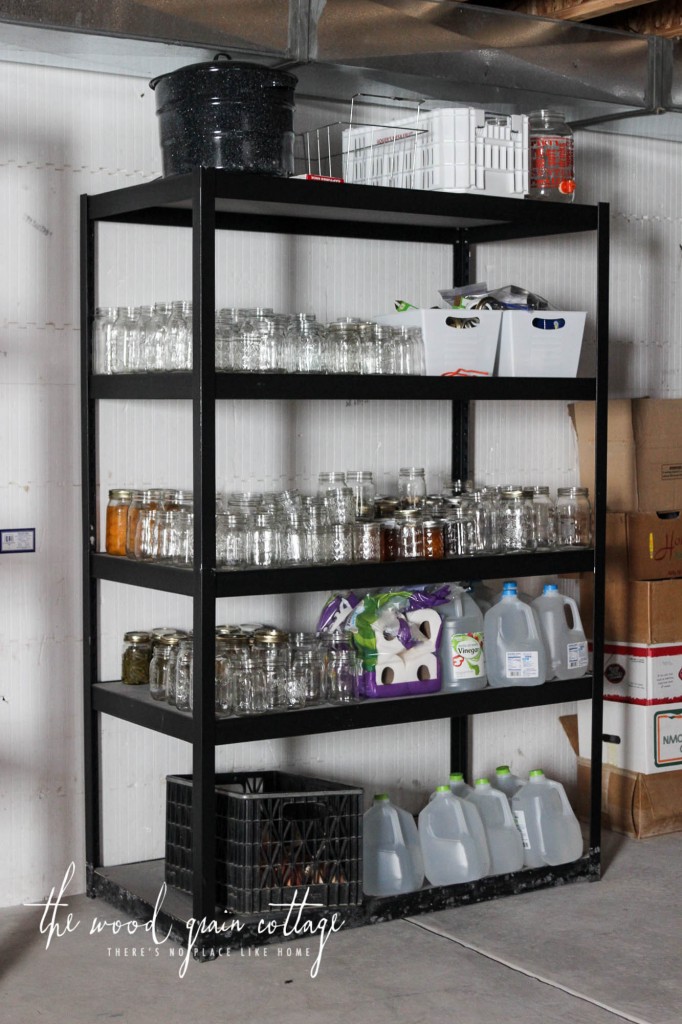
At any point, a few jars could have fallen off…
I’ll take my new shelves any day over those!
Don’t forget to pin this project! 🙂
I love your new shelves. They’ll look wonderful with all your jars filled come this fall. I noticed that you had your canner sitting on one of the shelves. I’ve canned for years, and let me tell you something that will save you tons of time–a pressure canner. I don’t even own one of those canners like you have anymore. You can preserve everything with the pressure canner–fruits, vegetables, meats. They’re a little expensive, but so worth it if you’re going to be doing a lot of canning. Try it. You’ll love it.
Wonderful shelves. There is nothing prettier than a full pantry. Best of luck with your garden.
Oh my, love the shelves, my hubs did this a long time ago in our house, i was lucky to have a dad and dad in law that worked with wood so i learned a lot from them as well. by the way you and your hubs are such a cute couple and good looking, i dont know what i enjoyed more your shelves or hubs working on them. Have fun filling your new shelves.
I was going to tell you to put a lip on all sides of all shelves. After all that hard work, you dont want to lose any. I can lots every summer. Always plan to scale back and it hasnt happen yet. After raising 7 children, it’s pretty much me and hubs now. I love your style totally. I love bringing twigs and branches in from our woods.
I love those shelves!!! Definitely put a “lip” on them. Canning is hard work and you sure don’t want your beautiful food to get knocked off the shelves :)! We are “canners” too. We didn’t even have a garden last year and my pantry shows it. The hubs has already plowed our garden this year, but no planting yet . . . just a little too early. Looking forward to some blog posts on your way of canning food. Blessings from Missouri!!
Dear sweet friend,
Those shelves are wonderful. I showed them to my sweetheart(husband). He built me two several years ago. Now, they are full, mostly green beans. I have learned to keep the lids and seals upstairs because the dampness can cause rust. Also, I turn my jars upside down to keep dust out of them. My mother has canned all my life, but I only started in 2008. If you do not have The Ball Blue Book of Preserving, buy it. WalMart has it. If you cannot find it, send me your snail mail. I have several books on my tablet and other hard copies, but it is my go to for information. The internet is also helpful. Happy canning from middle TN!
Carol
We’ve had these in our basement, but I just had my husband build me some in our garage. LIFE. CHANGING!! Can’t wait to see all of those beautiful jars filled. I LOVE canning!!
How far apart were your shelves in height? From the math I would say roughly 15 in. Apart, but looking at it, it looks like you have more than that in space between the shelves. Thanks by the way for the info. I am planning on building some shelves for my basement.
I have all these 2×4’s and plywood that my dad stuck in my garage over a year ago. Now I know what I’m going to do with it ? Thank you for doing a step by step. I hope mine’s is just as beautiful.
What are those little blocks under the corners of each of your shelves and why are they there?
Thanks,
This looks like a great progect! I myself have shelves and shelves AND sheves;)
With disasters that can happen where ever you live, we did this.
Bolt a ring screw to each 4×4 through the sheet rock at intervals so that you can tie your sheves to the house. (Earthquake,tornado, ect.) Then get bungee cords with hooks on the end to go around your breakables and hook them to the bolts that you put in the 4x4s.. when you look at it like this.. movement. It makes you redo where you put your glass. And heavier items.
That’s a great suggestion! Thank you!
Total cost of he project? Thanks
With the COVID-19 pandemic going on I’ve had a lot of time on my hands, so I decided to clean and organize my garage. My wife and I pay for a storage unit for all of our holiday decor and we thought we could X it if we built shelving in the garage. I followed this build pretty much spot on with the exception of leaving the bottom shelf out on the larger 8’ side to make room for larger items. Turned out great! No more storage unit!!!
Same here! Just bought a house before the whole CoVid mess and now have lots of time to make a proper space to store our camping and outdoor supplies in our basement, can’t wait to get started on this!
FYI that is not plywood, but is OSB. It would be best if you could update the list and instructions accordingly. Plywood is a bunch more expensive than OSB, and wouldnt want someone to waste money on plywood if not needed.
Thanks for catching my error. I’ve updated the post!
Also does not say how many pieces of each you bought? How many 2x4s how many pieces of plywood?
Looks like something I need to do. My mother has a three-car garage packed full of junk! Heck she needs to throw things away… RIGHT… wait for the third-degree scolding.
Hi, I’m french sorry for my english. I saw your shelves on instagram and it’s a beautiful project.
It’s a good idea for futur shelves in my basement.
Thank you
What is the reason for placing the shelf on top of some small blocks in the end? Is it important for air to be able to flow underneath for some reason?
We added the small blocks underneath the bottom shelves to help level them out. Hope that helps.
Love these and I’m going to make them this weekend. However I’d love to know what the make and model of the circular saw your husband used to cut the osb board? I’m afraid I’ll get one that’s too powerful for me and I like how that one rests on the osb board. Thank you for the detailed post I think even I can make these!
Thank you! This circular saw is very similar to what we used: https://rstyle.me/+b2zGTrtiPErp51-kVdueaQ. I hope that helps! 🙂
When we built our house many years ago, the storage room was the first room to be finished. Our storage was immediately stowed away and made life so much easier while we worked on the rest of the house.
(We lived in our shop, 40×60, one big room for two years while building the house. Nice to be mortgage free!)
Great looking shelves! In one of your pictures it looks like Anthony is using some sort of screw toe nail jig to attach the back supports. Is that a Kreg pocket hole jig? If not, can you tell me what brand it is? Also, since you didn’t have access to put screws in the end of the middle two shelves on the left side of the longer section, did he toe nail the screws there as well? Thanks!
Very nice shelves, and informative post. I’m living in a remote part of a 3rd world country so shelves like these would be nice to have in any house… and not limited to the basement, because basements don’t really exist in the tropics lol
This shelves are very good. I need something like it. Can you tell me the cost?