
Laundry Room Farmhouse Light
See how I made our laundry room farmhouse light. I’m sharing my full, step by step tutorial and how I made it for under $30!
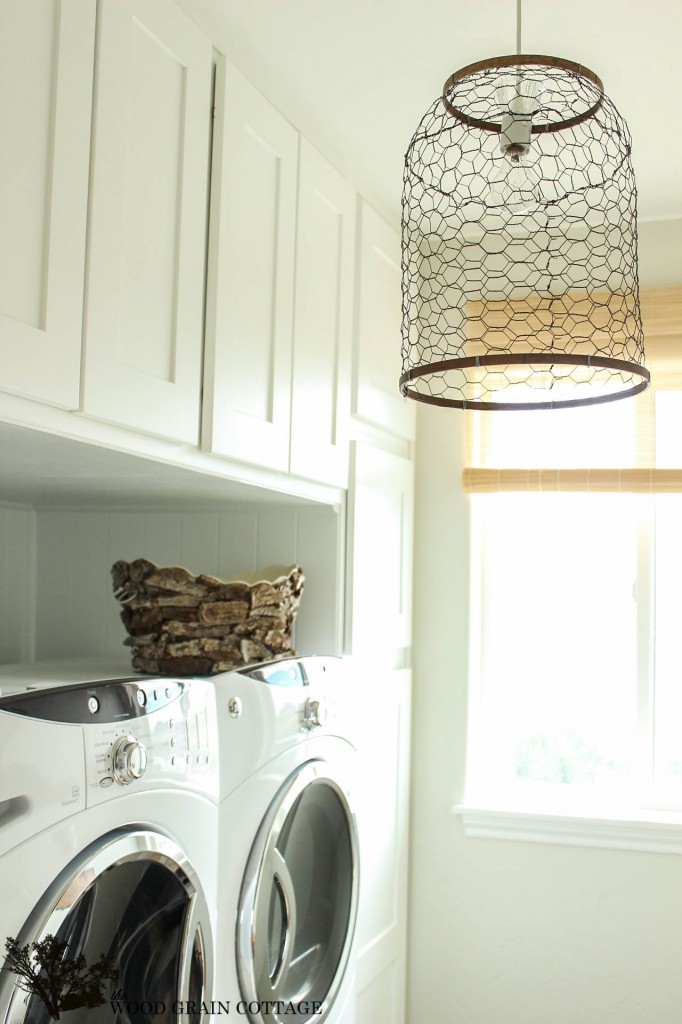
As you know, we’ve been working on our laundry room. It’s been a process, but we are so close to being done!
And since today is $30 Thursday, I thought I would use the $30 budget to create a new light fixture for the laundry room.
If you’re new here, $30 Thursday is held the first Thursday of each month. April from House by Hoff, Jen from Migonis Home and I challenge ourselves to create a project that’s under $30 and easy enough that anyone can make it.
For this round, I created this:

I would be lying if I told you that I’m not completely obsessed with it. I totally am. Especially since I’ve seen versions on the internet for waaay more than I spent on this.
I had a few requirements for the laundry room light. I wanted it to be unique, include wood tones, and look farmhouse vintage.
I think it’s perfect! Originally, we had a cheap-o $10 Ikea light in there. It worked perfect, but I always had the intention of switching it out later. With this light, I was able to reuse most of it, and just removed the previous plastic shade.
Here’s how I made it, and what I used:
Laundry Room Farmhouse Light
Please note: Some of the links in this post are affiliate links, which allows us to make a small commission from your purchase, but your purchase price stays the same. Thank you for helping support our blog! We greatly appreciate it!
Supplies:
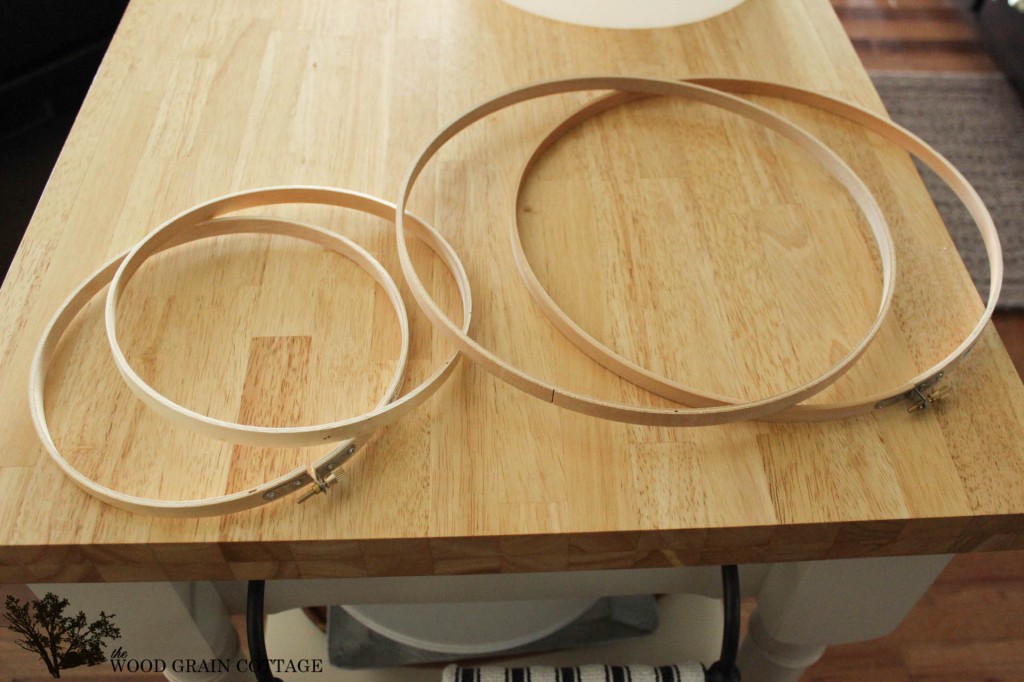
- 12″ Embroidery Hoop
- 6″ Embroidery Hoop
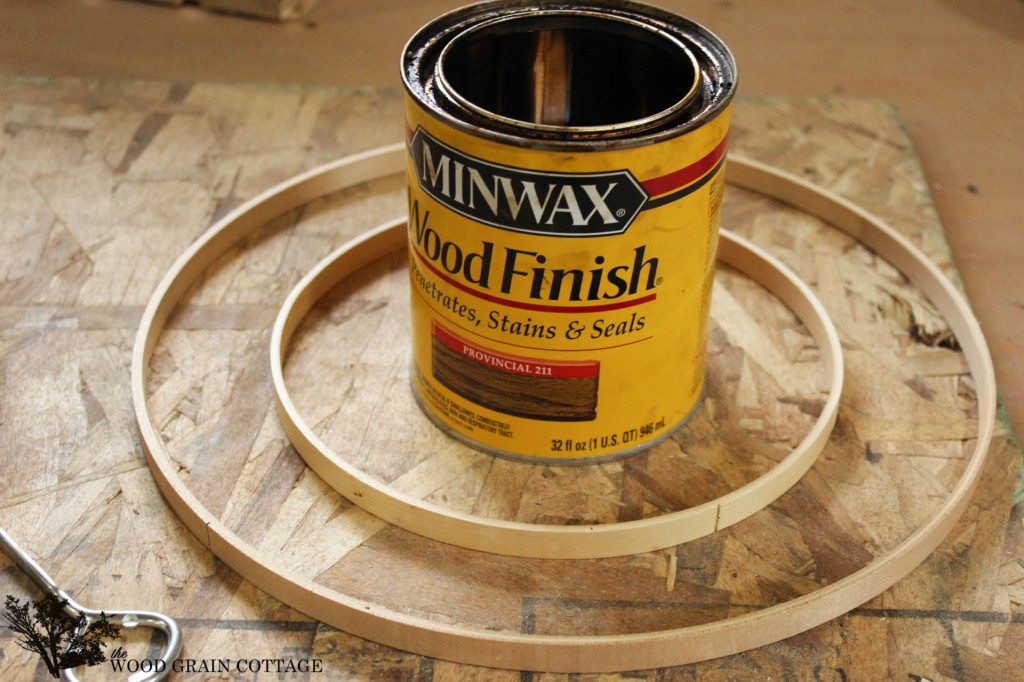
- Minwax Provincial Stain
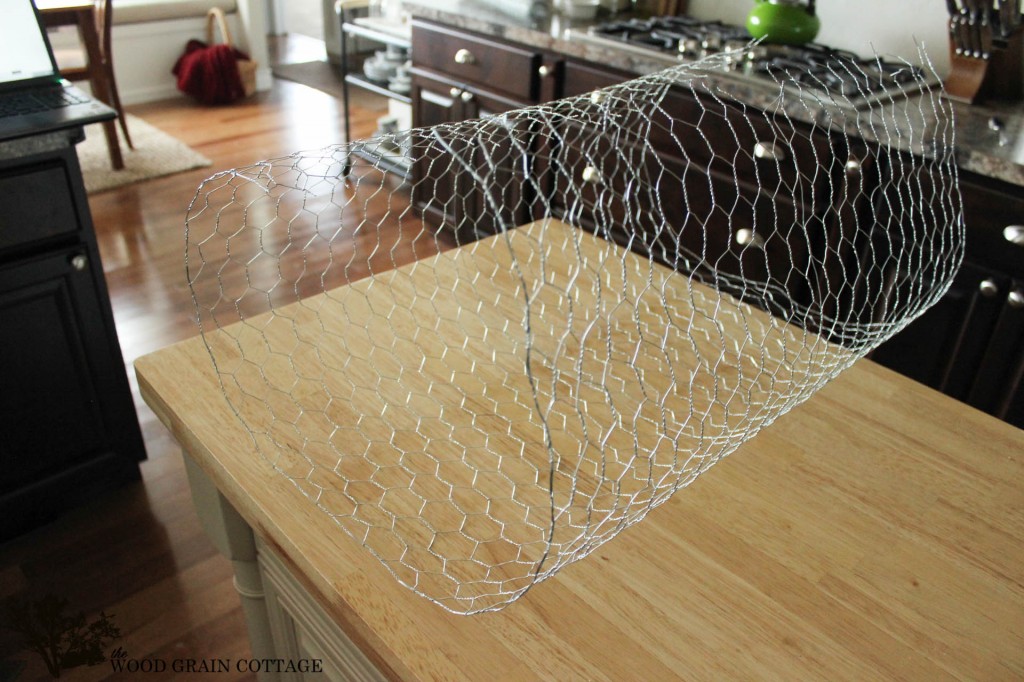
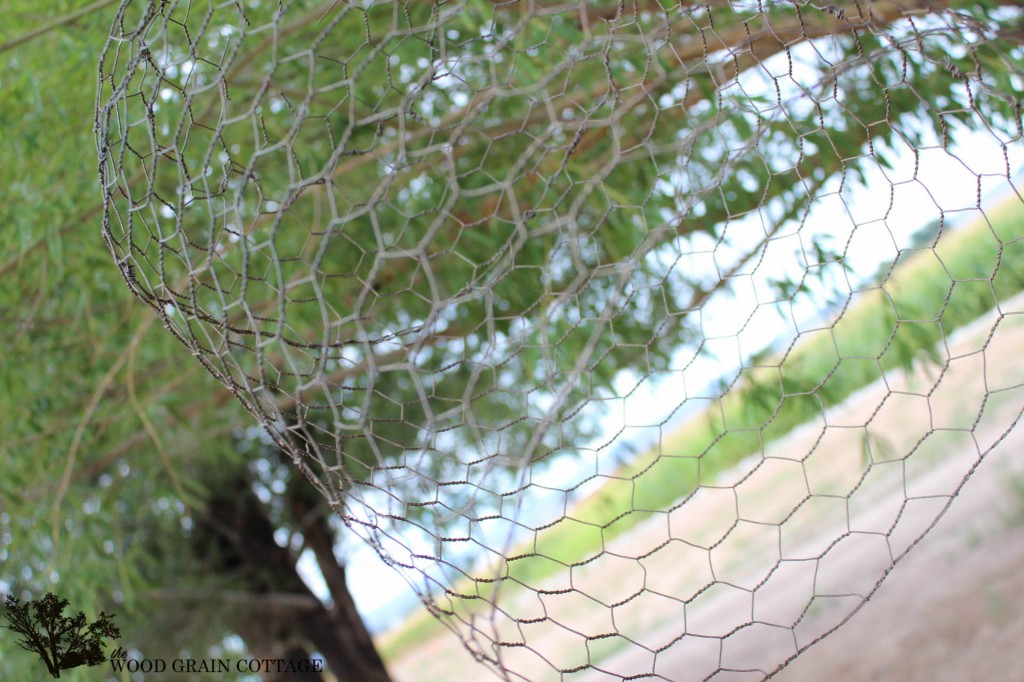
- Chicken Wire
- Metal Snips
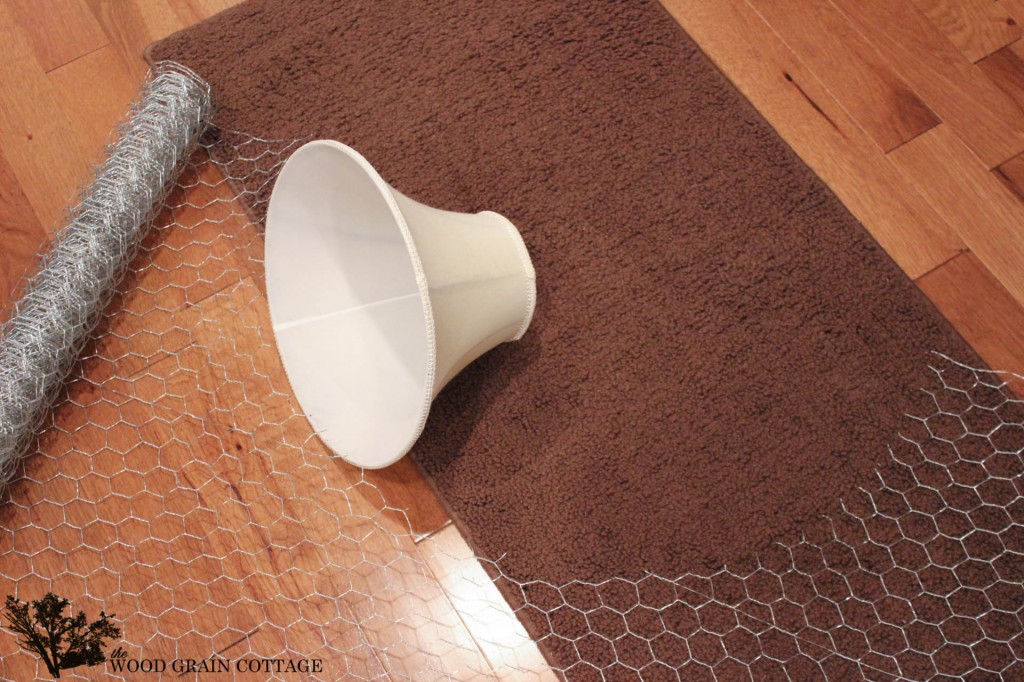
- 12″ Lampshade, as a guide only. I had this on hand.
- Sharpie
- Pendant Light Fixture, this is similar
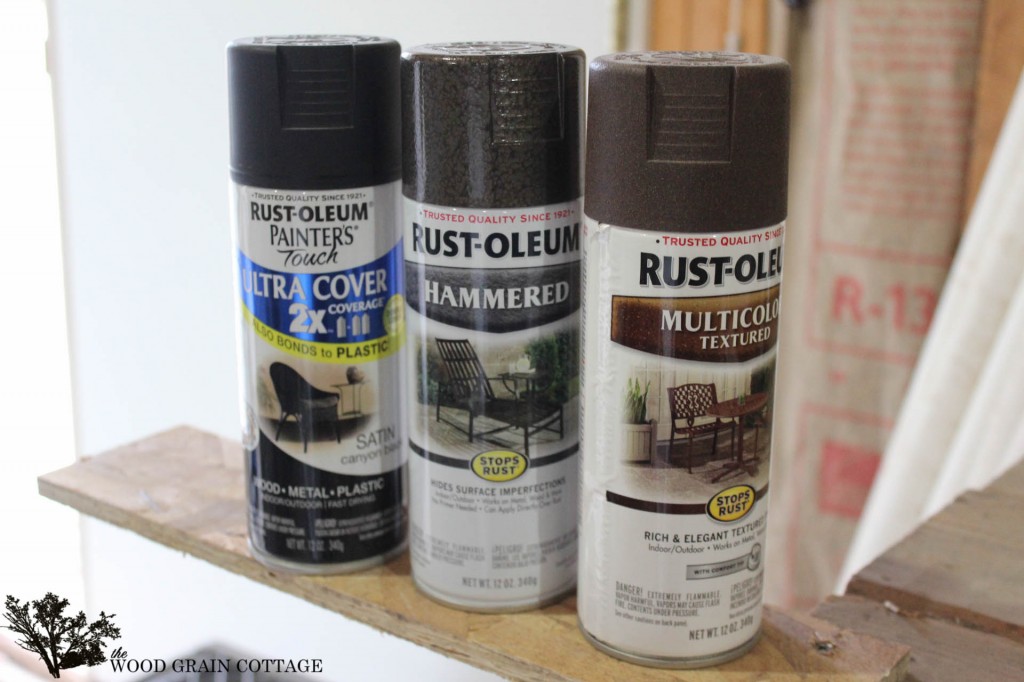
- Black Spray Paint, in satin
- Hammered Spray Paint, in Oil Rubbed Bronze
- Multicolored Textured Spray Paint, in Autumn Brown
- Wire Hanger
- Wire
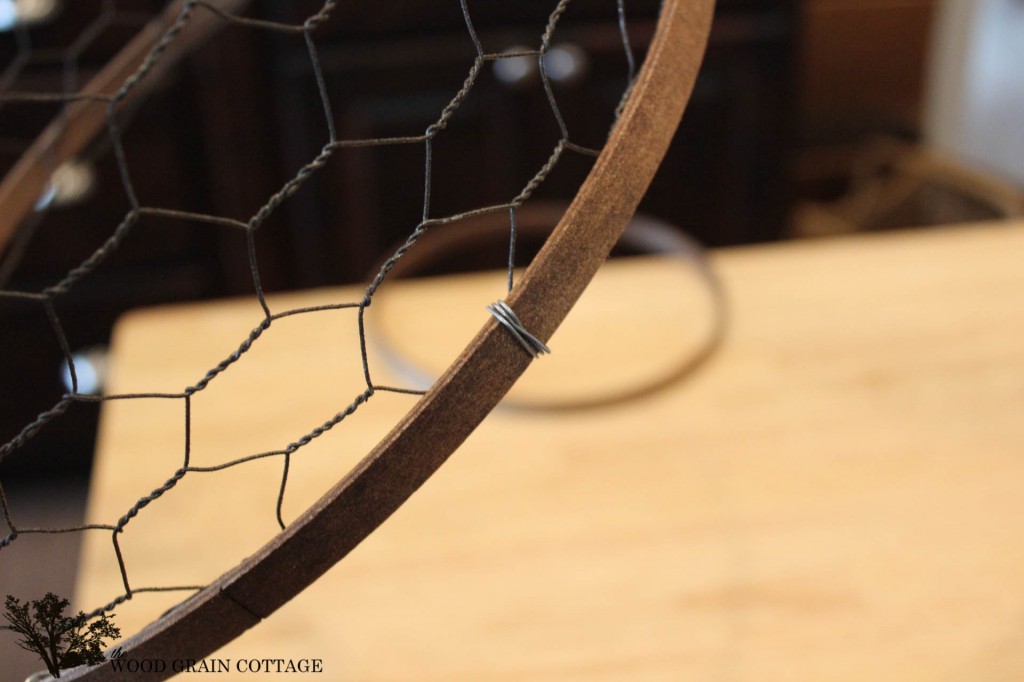
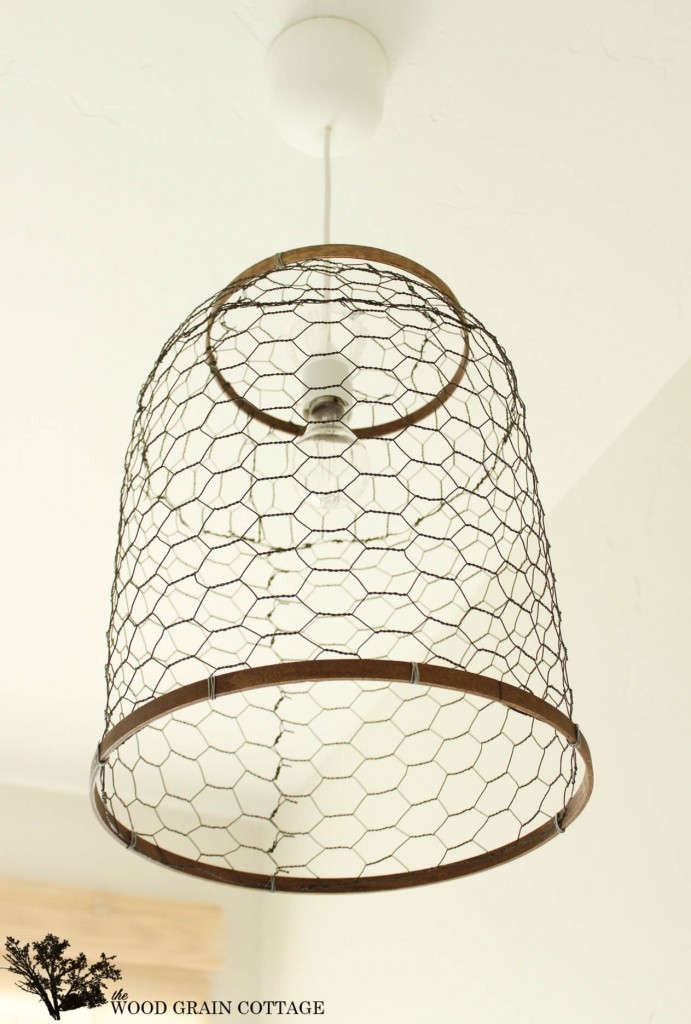
First, I started with two embroidery hoops. I used a 12″ and a 6″.
I removed the inner circle from both hoops…
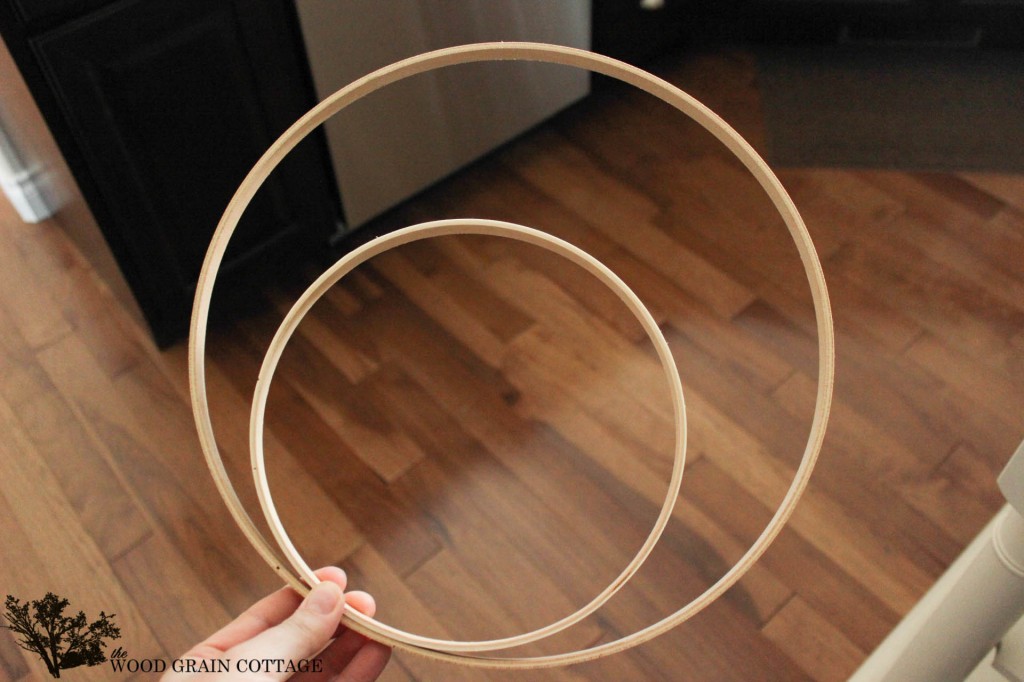
And stained them with Provincial by Minwax…
Once the wood dried, I grabbed my chicken wire and rolled it out.

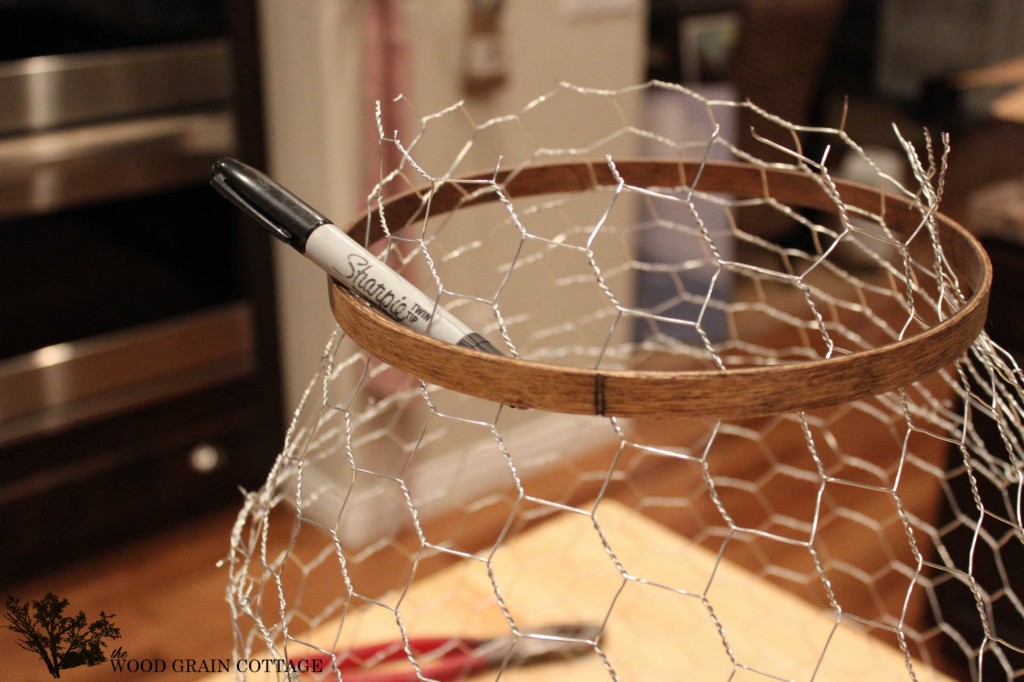
Then, I used the 12 inch embrodery hoop to determine the size of the light fixture…

Once I had the size measured, I used my metal snips and cut the wire.
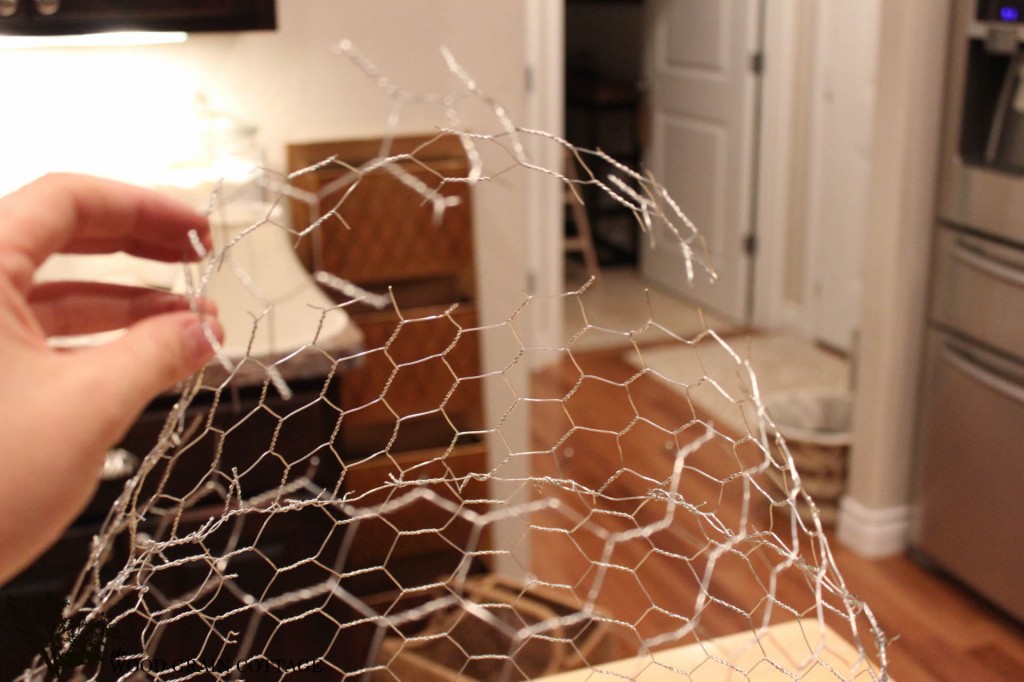
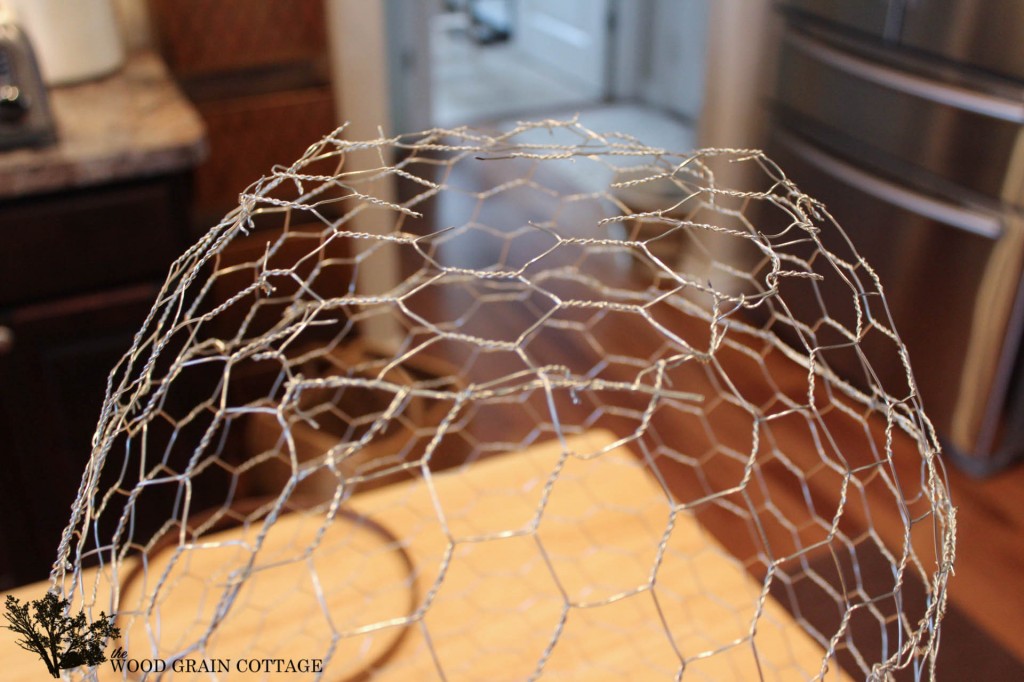
I shaped the wire to fit the embroidery hoop and started wrapping the loose chicken wire together.

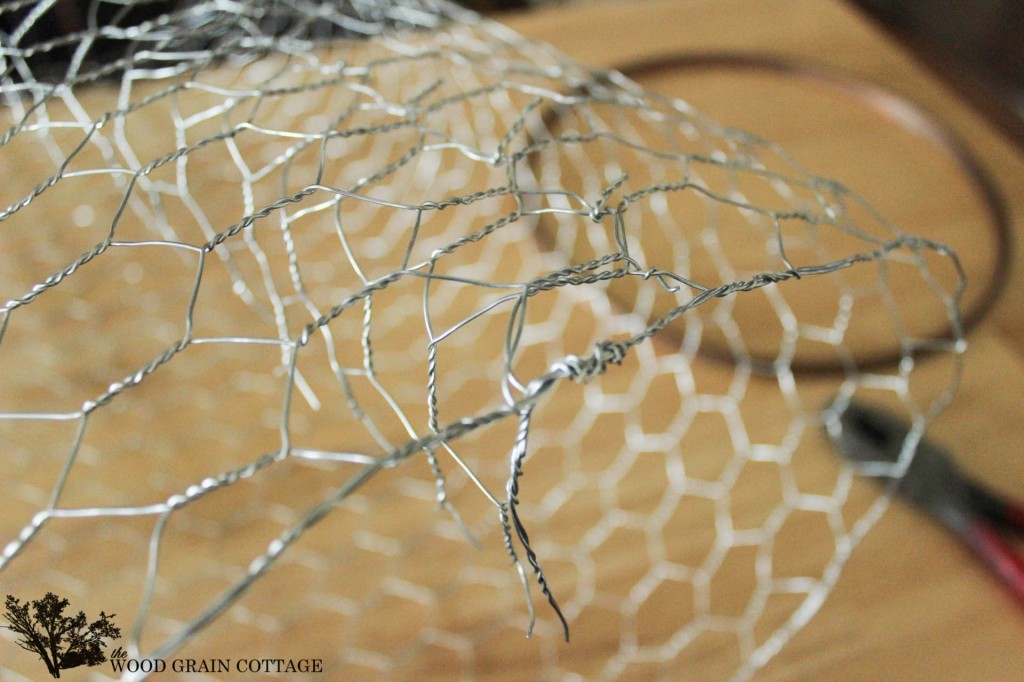
Once I had the sides tied together, I picked out the height and used my wire snips to remove any excess wire.
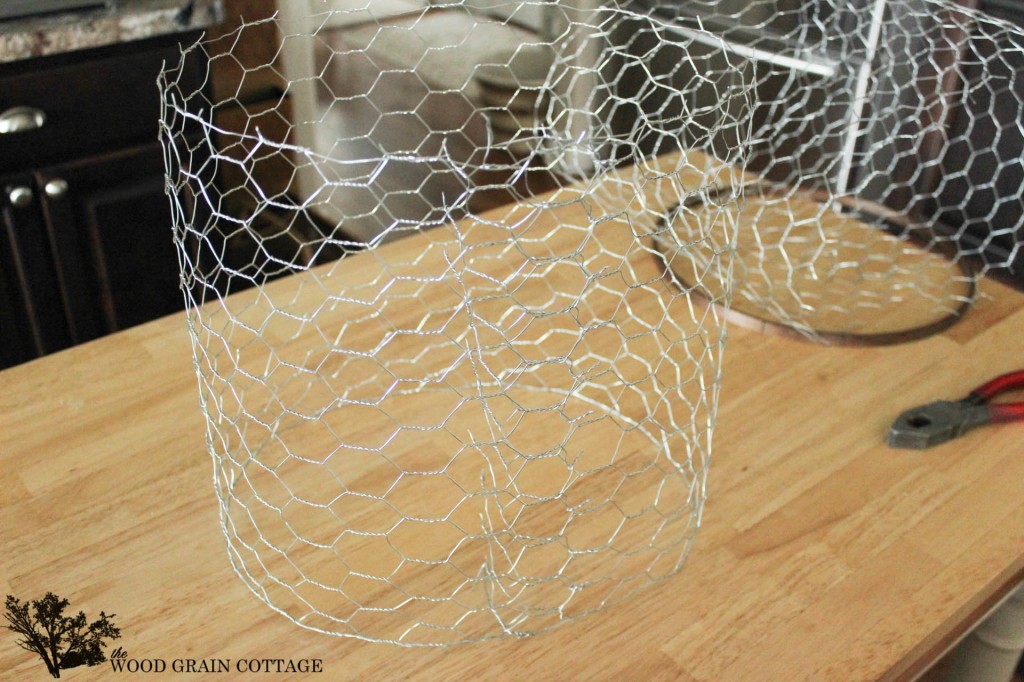
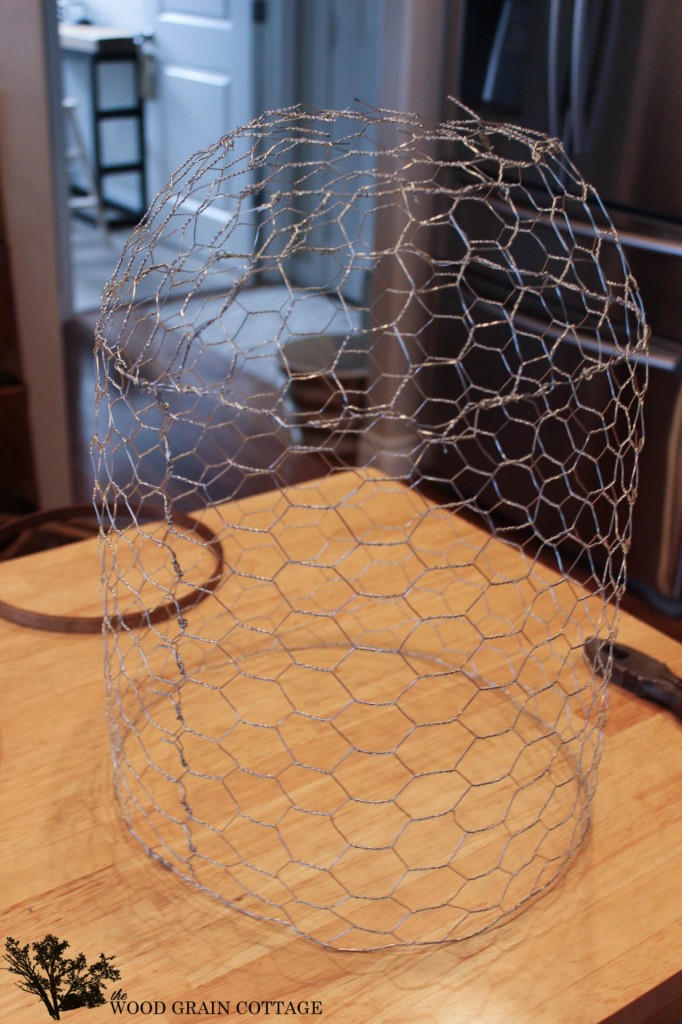
To determine the proper size for the “top” of the light fixture, I used a 12 inch lampshade as a guide.

I laid it on top of the the chicken wire and used a sharpie to mark the areas I needed to cut…
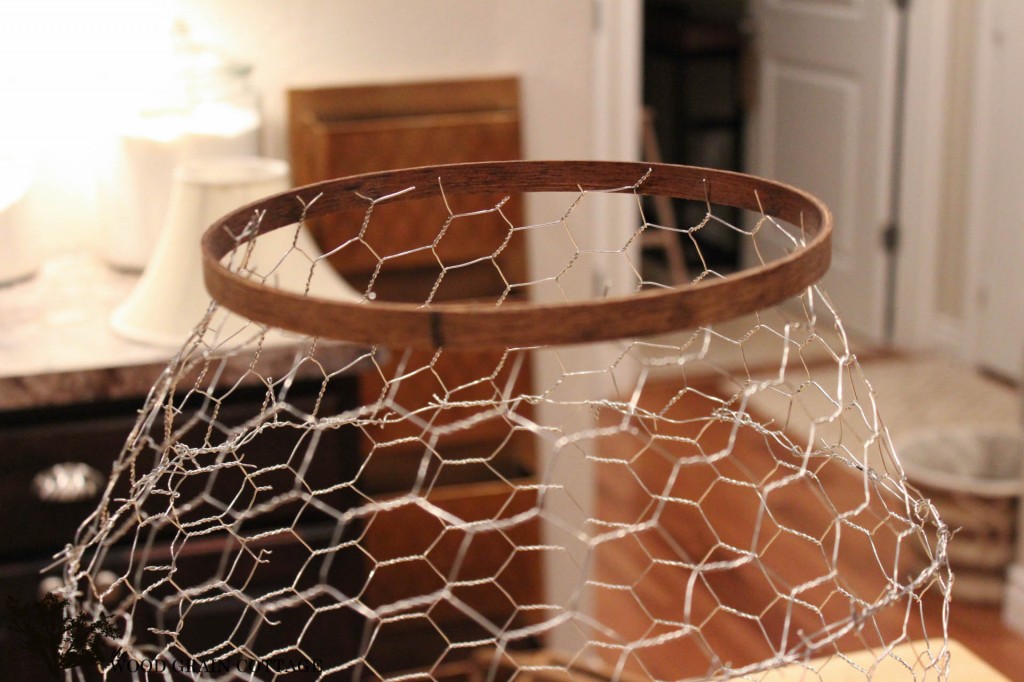
Then I just started attaching the two pieces together with the loose wire.
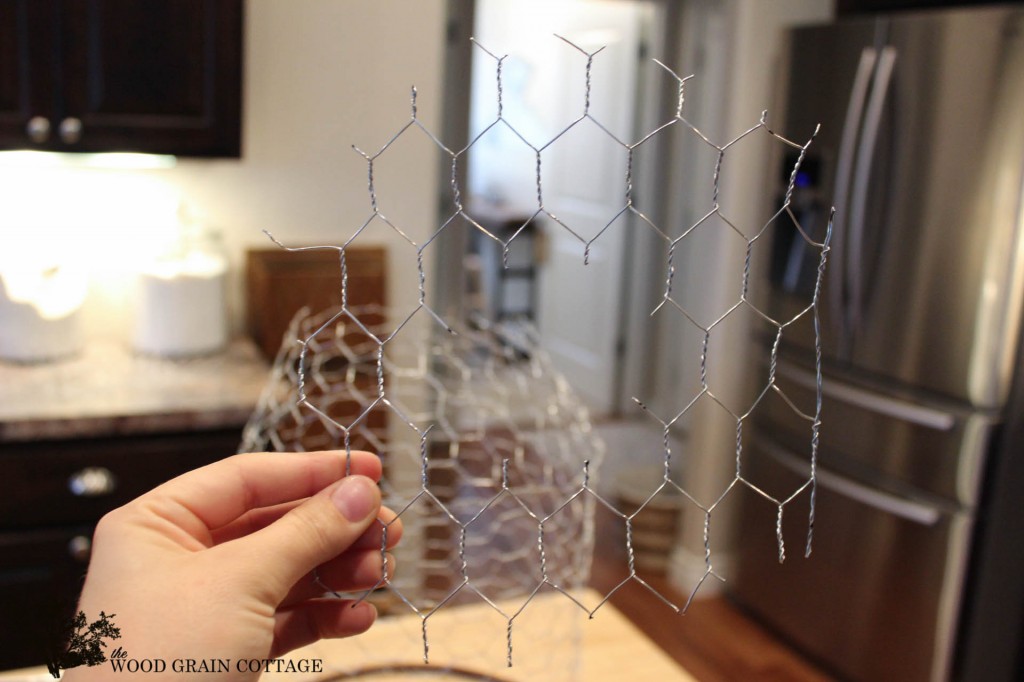
To determine the height of the top, I used the 6 inch embroidery hoop and pushed it over the top of the wire…
I used a sharpie to mark the areas where I need to cut, then removed the excess wire.
Which left me with this:
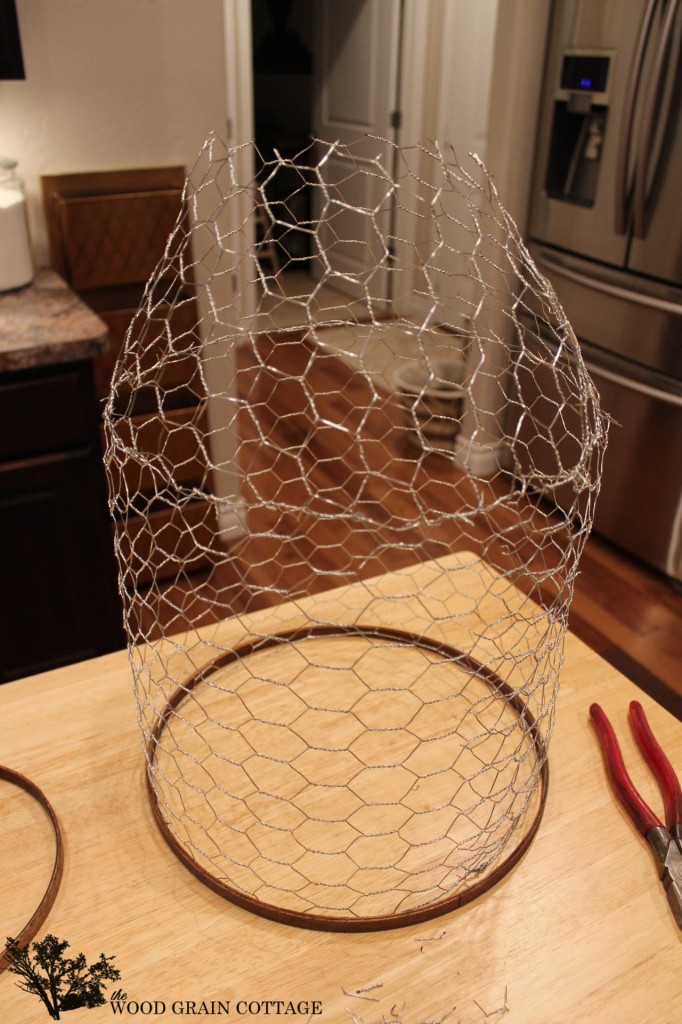
Then, to add the final “top” piece, I shaped a small piece of chicken wire to the size of the top.
To determine the top “hole” I used the existing light to guestimate how big of an opening it would need, and snipped a hole that would fit over the current light.
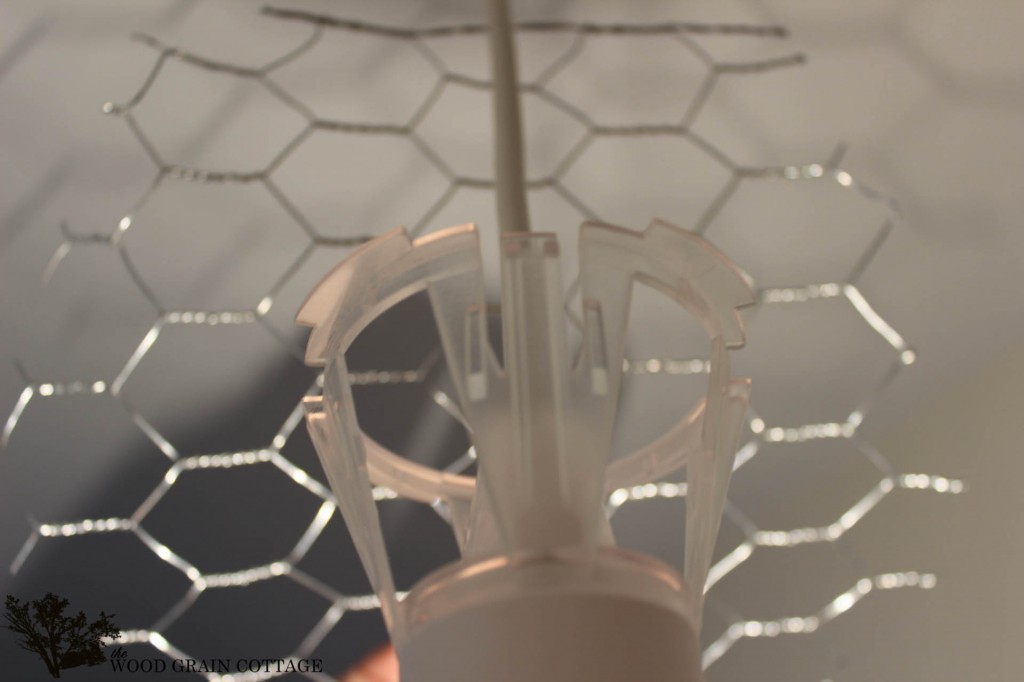
Then I attached it to the very top.
With that, I had a completed light fixture shape and it was ready for spray paint.
I used a combination of these three for the finish…
After suspending the light fixture from a wire hanger, I gave the entire fixture a coat of black.

Then, I sprayed on a coat of the hammered oil rubbed bronze and finished with a heavy coat of the textured spray paint.
Not only did it add a coat of grainy texture, but the color combination is fabulous and it looks a bit vintage and time warn.
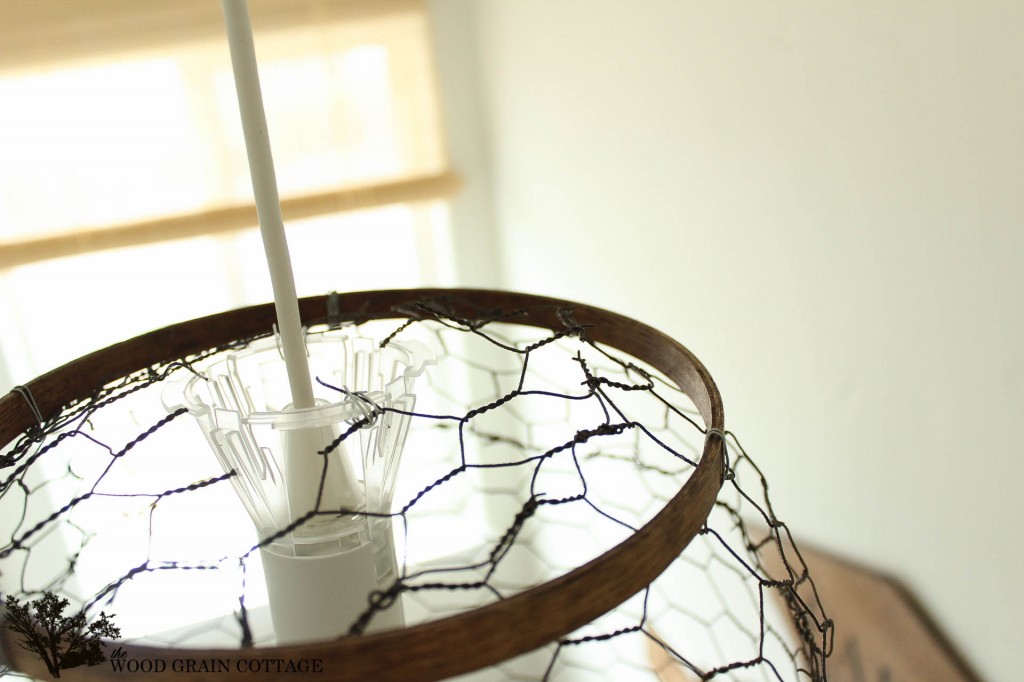
The final step was to add the stained embroidery hoops, which are held on with wire…

I did the same thing to the top…

To attach the wire light fixture to the previous light, I used wire and wrapped it around the chicken wire and plastic light bulb cover.
I played around with it and pulled wire here and there to get everything even, and once it was, I couldn’t help but admire the results!

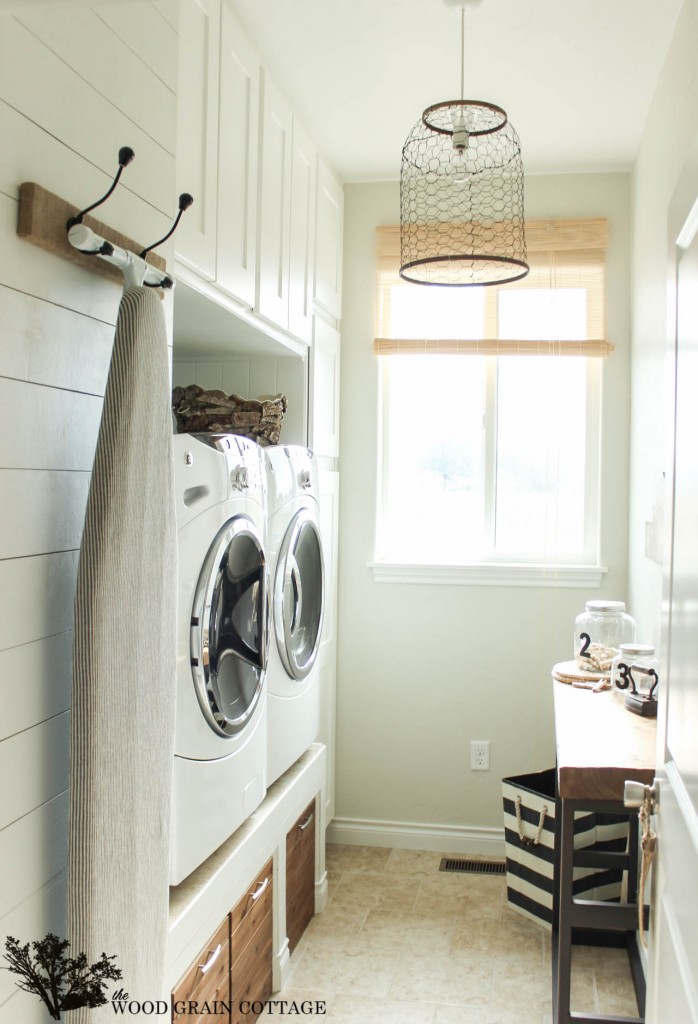
I love how it adds that vintage farmhouse feel, while the wood draws your eye up.

It looks perfect with everything else in the room…
And it’s just what I wanted in there.
Something unique….

With wood tones….

And a vintage farmhouse feel…
I love how this room is coming together. I kid you not, it’s such a pleasure to do laundry.
Here’s a little before & after with the new light:
It looks so much better and I’m absolutely thrilled with how it turned out.
Here’s what April & Jen have been up to this month…
April from House by Hoff created this absolutely fabulous chalkboard calendar… out of an old window! She has brilliant ideas for old windows… just look at it!


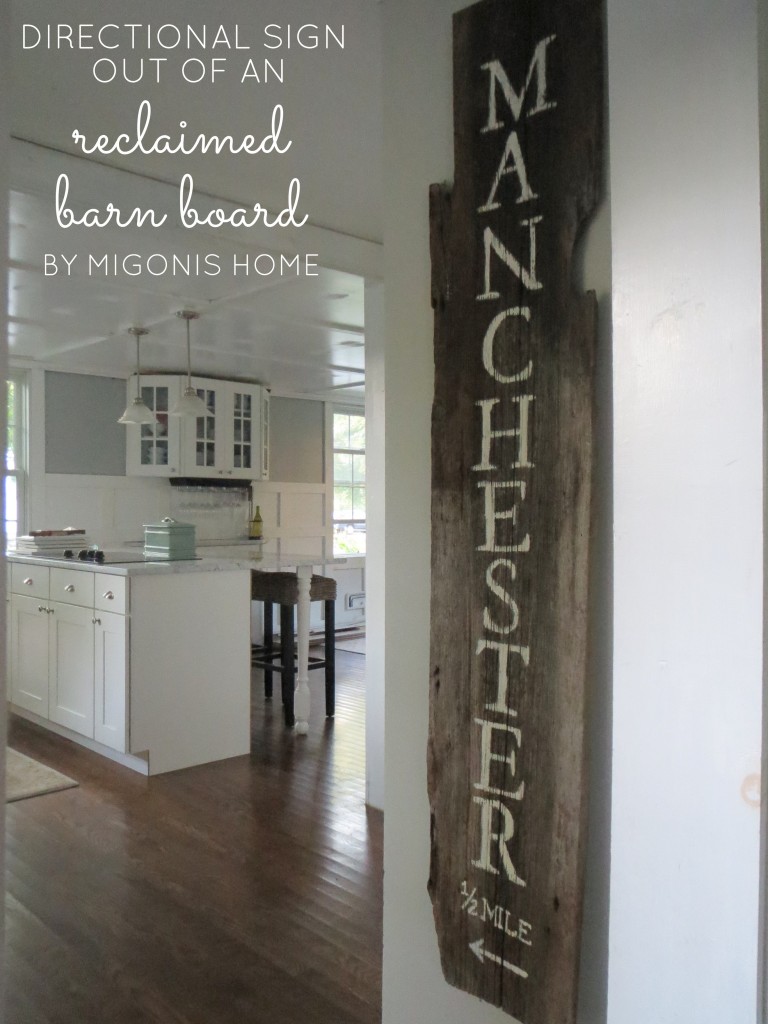
And Jen from Migonis Home made this completely amazing directional sign from a reclaimed barn board! It’s large & in charge and I love it!

I love $30 Thursday… and for good reason! Be sure to follow our pinterest board. It’s such an inspirational place and each project can be made for $30 or less!
Have a terrific Thursday!
Brilliant!!! I absolutely adore it!
THANK YOU so much, Jennifer! I adore it too! 😉
-Shayna
Shayna,
You absolutely amaze me with your creativity! That light fixture looks fabulous!
THANK YOU so very much, Cheryl! 🙂
-Shayna
What a creative idea! It definitely says vintage farmhouse. Your sign is fantastic too! I’m a new follower.
THANK YOU so very much, Adina! I’m so happy to have you as a new follower! 🙂
Welcome to the WGC!
-Shayna
Wow! Very cool! I love it!!
THANK YOU so much, Lisa! 🙂
-Shayna
I love the chicken wire light fixture – gives me a great idea for my entry way – My home is a split level and the light fixture wiring is right at the entrance with a short stairway to the left of it – so I need something that is not bulky and this is perfect! thanks for the inspiration and instructions!
THANK YOU so much, Lourdes! I’m so happy it’s inspired you to make your own! It’s not bulky at all!
Enjoy! 🙂
-Shayna
Need I say,” YOU DID IT AGAIN!” OMGness, Shayna!!! LOVE IT!!! Share those creative juices, would ya!!!
Blessings & <3
M
Big Smiles (& Hugs!) are being sent your way, M! THANK YOU! 🙂
-Shayna
Wow, This is amazing! I have been racking my brain trying to find out what to do in my kitchen! I am so doing one of these! Thank you for all the awesome instruction and pictures! Looks amazing in your laundry room!
Jen
THANK YOU so much, Jennifer! I’m so happy it’s inspired you to make your own! You will love it! 🙂
-Shayna
All three of you girls are on fire! Awesome projects. Love them all!!!! The new light fixture is uber cute Shayna. Just perfect 🙂
THANK YOU so much, Shannon! I totally loved April & Jen’s projects too! Love, Love!
-Shayna
This is so cool, and I’m going to attempt to do this for my kitchen. What a creative mind you have 🙂
Laura
THANK YOU so much, Laura! I am so happy that you are going to make one for your kitchen! Let me know how it turns out! 🙂
-Shayna
You have got to be one of the most talented bloggers I follow, Jennifer. I am always amazed by your projects and creativity. But I’m even more amazed at the quality of what you make. This light looks like something you could go to the store and buy, not a DIY that was made with embroidery hoops and chicken wire! I love each and everything you post!
THANK YOU so much for the SUPER SWEET comment, Jamie! I am so happy you love my projects! I’m a bit of a perfectionist DIY’er (hubby is too), so we try to make everything as perfect as possible. I’m just happy when it works out! 😉
BIG hugs to you!
-Shayna
Gorgeous! I love it Shayna! you are so creative as always! 🙂 & it makes your laundry room feel more complete! 🙂 I love it, love it, love it !!!
THANK YOU so much, Ingrid! I agree, it makes our laundry room feel more complete! 🙂
Thanks for the sunshine!
-Shayna
Might be my favorite $30 Thursday project or yours yet…and that’s saying a lot, because I always love your projects! You made it look so professional and finished! LOVE THIS!!!
Awe, April! THANK YOU! I love it too… I walk in there just to stare at it! And today’s laundry day! 😉
-Shayna
I love it. I agree with Jamie above about yours looking professional. I have seen a few lights made with chicken wire but they usually looked too funky for me. :0
I am pinning this to save and maybe get around to myself. Thanks so much!
Pamela! THANK YOU! I’m so happy you love it. 🙂
Thanks for pinning too!
-Shayna
I love this! You and your chicken wire!! LOL! Seriously though, the light cover looks so cool!
Tania
THANK YOU so much, Tania! I know… I have a thing for chicken wire and I’ve enjoyed challenging myself to find ways to use the roll! 🙂
-Shayna
Okay I could hardly get over my shock and awe as I was reading this post… I am sooo impressed and inspired by your creativity! Wow!! Have to share on my facebook page:)
Awe, Krista! THANK YOU so much! 🙂
Hugs!
-Shayna
Love! Love! Love! I’m so doing this!!!! It turned out awesome!!
THANK YOU so much, Meg! I’m so happy you’re going to make your own! Let me know how it turns out! 🙂
-Shayna
I think this is a fantastic idea! And your tutorial is also really great. Makes me feel like I might be able to do this too (as much as I dislike working with chicken wire! Actually, I think the chicken wire has it out for ME! Lol). But, anyway, beautiful job! 🙂
THANK YOU so very much, Denise! This is pretty easy to make, but the chicken wire does like to bite a bit! 🙂
-Shayna
How cute is this and so ingenious. I love the way it looks in your laundry room. I am following you and receiving posts via email.
THANK YOU so very much, Tina! I’m thrilled to have you as a new follower! 🙂
Welcome to the WGC!
-Shayna
Love this! So creative! Off to pin. I found you on the link up palooza!
THANK YOU so much! I’m happy you found me- and THANK YOU for the pin! 🙂
-Shayna
Beautiful work! What a well thought out plan, and the results are lovely! Thank you for sharing this!
THANK YOU so much, Abi! I love it too! 🙂
-Shayna
Ummm, this is AMAZING! Love your creativity and it’s just beautiful! I’m featuring on my Facebook page tomorrow. Hope you don’t mind. 🙂
THANK YOU so much for the super sweet comment, Laura! 🙂
Thanks for sharing on facebook too!
-Shayna
Great idea, beautifully executed! Your instructions are really easy to follow too.
THANK YOU so very much, Kiri! 🙂
-Shayna
This is one snazzy light fixture. You made it look so easy to make too. Love the way it looks in your laundry room!
THANK YOU so much, Crystal! It was pretty easy to make and I love the way it looks too! 🙂
-Shayna
That light is absolutely gorgeous! You did a fantastic job with it!
THANK YOU so very much, Nicki! 🙂
-Shayna
I am loving that light! I just wish I had 1 tiny ounce of your creativity.
Again, thank you for providing such clear, easy-to-read, instructions.
Marilyn (in Dallas)
Awe- THANK YOU so much, Marilyn! I really love it too! 🙂
-Shayna
This is absolutely beautiful! I LOVE LOVE LOVE IT! I would love to attempt to make one for above my kitchen table! I love how it looks in your laundry room!
THANK YOU so much, Shirley! I love how it turned out too! Good luck with yours! 🙂
-Shayna
Shayna,
this is so cute and creative! I never would have thought to make a light like this myself! Amazing job, I may just have to copy you ( Mine may not turn out as well though!).
THANK YOU so much, Holly! I’m so happy you’re going to make your own! It will turn our fabulous! 🙂
-Shayna
wow, this is super cool, I love it! perfect for a farmhouse laundry room!
THANK YOU so much, Debra! 🙂
-Shayna
You are hands down the smartest lady on earth. I adore your new light fixture. It’s the perfect accent for your laundry room and oh so dreamy to a lover of chicken wire like myself.
Awe- THANK YOU so much, Robin! You brought the biggest smile to my face! 🙂
-Shayna
This is amazing!!!! Incredible!!! Thank you for linking up, this beautiful light will be featured Sat:). Jen -City Farmhouse
THANK YOU so very much, Jen! I am so honored {& really excited} to be included in your Saturday features! 🙂
Hugs to YOU!
-Shayna
I SO love this idea! New follower to your blog and I’m going to spend some time browsing, but I would LOVE if you would come link up to my From the Farm Blog Hop. It just started this morning. We would love to see you there!
Lisa
Fresh Eggs Daily
http://www.fresh-eggs-daily.com/2013/09/from-farm-blog-hop-and-diy-table-from.html
THANK YOU so much, Lisa! I am so happy to have you as a new reader! Welcome to the WGC! 🙂
I’m off to check out your blog and link up!
-Shayna
Awesome! You did a great job, I love it!
THANK YOU so much, Cristina! 🙂
-Shayna
So cute! It is a perfect fit for your laundry room!
THANK YOU so much, Kelly! I love how it looks in there! 🙂
-Shayna
That light fixture is so cool. Great idea!
THANK YOU so much, Kim! 🙂
-Shayna
A nice touch for the modern laundry room.
THANK YOU so much! 🙂
-Shayna
Beautiful idea, what a great piece that goes with everything!
THANK YOU so much, Lily! I love how it looks in the room! 🙂
-Shayna
Good morning from 1840 Farm! Your post was my selection for a weekly favorite from last week’s From the Farm Blog Hop. Your post is one of the six featured posts in this week’s hop. Come take a look and grab a From the Farm Favorite badge to proudly display on your blog. While you’re there, you can add up to three links to this week’s hop. I can’t wait to see what you share!
Jennifer @1840Farm
THANK YOU so much Jennifer! I’m so honored, & excited, to be included in your weekly favorites! 🙂
-Shayna
Love everything about this! You’re so right that it brings the laundry room to a whole new level. ~M.
http://redesignedbym.wordpress.com/
THANK YOU so much, M! 🙂
-Shayna
Wonderful DIY! It’s featured in a roundup of the best DIY lamps & lampshades from September on my blog. Love your work 🙂
THANK YOU so much, Kiri! I’m so happy to be included in your round up! 😀
-Shayna
This is the coolest thing in DIY lighting I have come across. I think I can actually do this! I am pinning, and came over from my friend Shannon’s blog at Fox Hollow Cottage. Thanks for sharing!
THANK YOU so very much, Karen! I’m so happy you’re going to make your own! 😀
Welcome to the WGC! So happy you came to visit! 😀
-Shayna
I just saw this post perusing the web and wanted to know the light that you used in this project, is it some type of pendant light?
Hi Audrey! The light is from ikea: http://www.ikea.com/us/en/catalog/products/20038219/
I just took off the white plastic shade and wired on the new one. 😀
I hope that helps!
-Shayna
INGENIOUSLY BRILLIANT & perfect for a laundry room or mudroom. Love, love, love. (Can say it enough)
As usual, your DIY photos/instructions inspire & make it a do-able project. (I think this qualifies as an “IKEA Hack” — you used a cheap Ikea product to make a more expensive & lovely product from another source). Thanks for generously sharing your idea & how to duplicate it!
A note — I don’t think your instructions EVER confuse me . So you might want to restate (clarify) your “rings” comment — you said you “removed the inner rings” and in the next picture said stained them. It took me a third read to get what you were saying (I couldn’t see your dots); even though I could SEE what you did in the photos, I thought your description meant you “discarded” the inner rings & used the outer rings . Crafty DIY-ers will easily figure it out. Less crafty or less visual people might be a little confused A clearer way to state that would be to say, “I only used the inner rings” Second note – did you save the outer rings for some future project or did you trash/recycle them? Do you have a DIY/crafting “supply stash” in your basement? Do you have something in mind for the outer rings? I find lots of uses for the inner rings, but rarely (if ever) for the outer rings of embroidery hoops. Would love to see what inspired ideas you might have .
Thanks again.
Your chicken wire light looks amazing! Love it.. so clever and soooooo inexpensive compared to other lights.
This is beautiful! I’m wondering if you used 1-inch or 2-inch chicken wire? Couldn’t tell from the photos.
Congratulations! I love the light fixture. We have a tiny little entry way from the backyard that leads into the kitchen and to the basement. I think this would be the perfect place for your Farmhouse Light! Thanks for the inspiration!
Love your laundry room! Quick question- did you have any
Shaking issues with your washer and dryer on
Your diy pedestal?
Thank you so very much! Our washer does shake a bit, but I’ve never had any problems with the pedestal. It’s very sturdy. I hope that helps. 🙂
Amazing DIY!!! I can’t wait to try and make one too!!
What a great idea (and such cute light for the laundry room)! I’m sure that my kids would LOVE it as well!
This is the coolest thing in DIY lighting I have come across. Your chicken wire light looks amazing! Love it.. so clever and so inexpensive compared to other lights.