
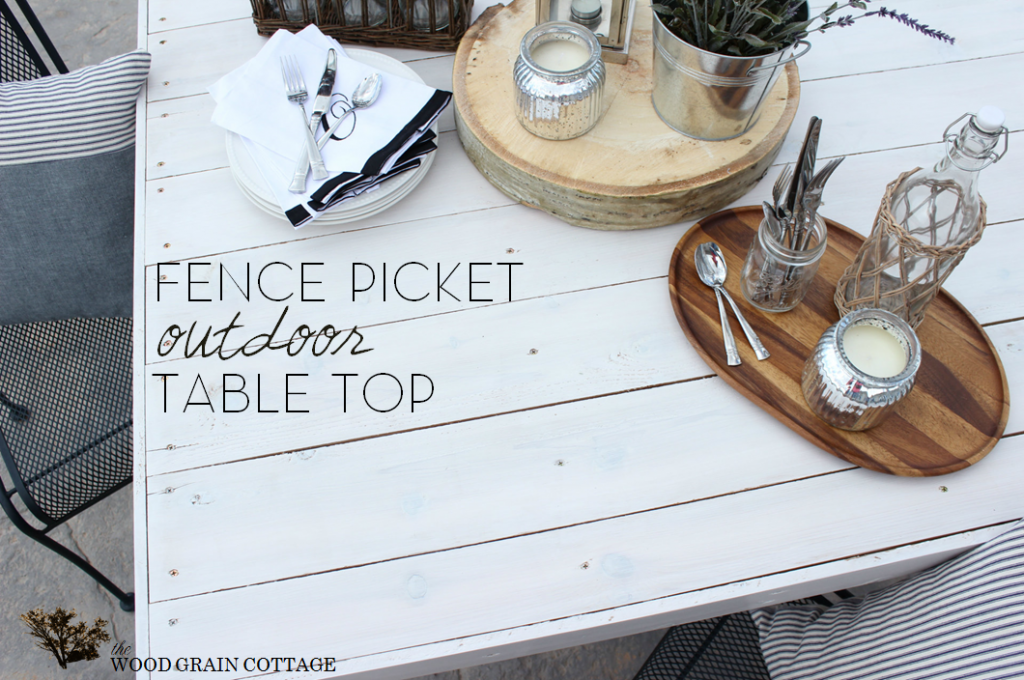
Fence Picket Outdoor Table Top
I have a confession, and it’s kind of funny….
We have a lovely patio area… but no patio table. Ha!
When we built our home we added a big patio off the back. One that overlooks incredible mountain and farm views. It’s lovely out there, especially when we’re entirely surrounded by corn.
But until a few weeks ago, it sat empty.
Well, not entirely. We do have a grill and two chaise lounges that I swiped off the side of road pre-blogging. (Anthony should have known then…)
But other than that, it was empty. And what’s a patio without a patio table? It’s like macaroni without cheese. It’s just wrong.
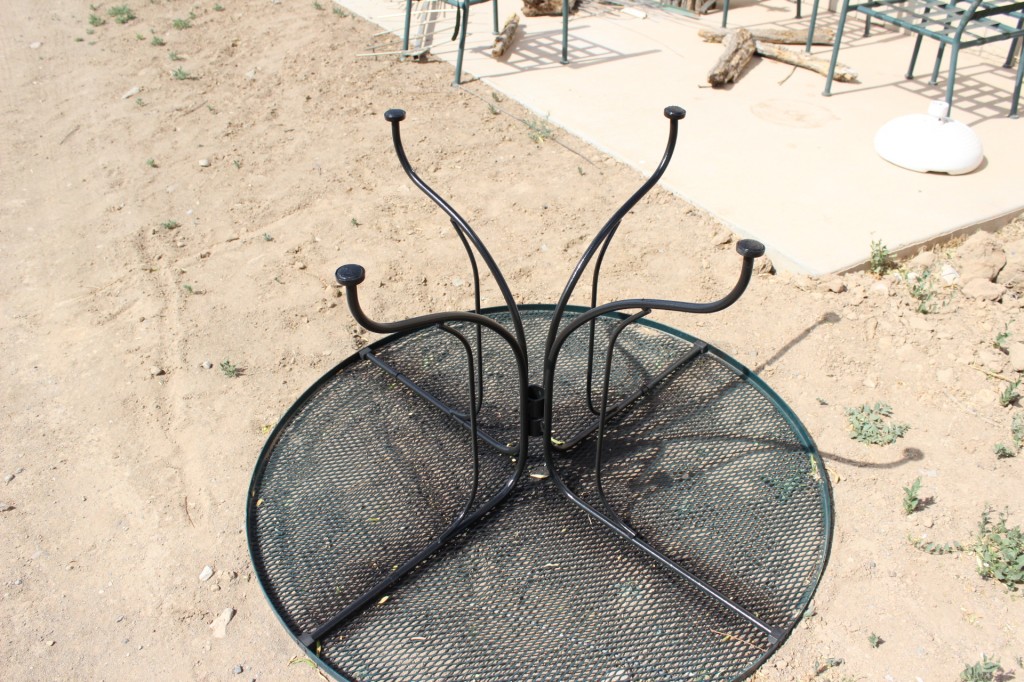
Luckily, a while back I scored a round metal patio table for free. It was in pretty good shape, but I wanted to make it look a bit more custom and more our style.
I’m so happy I took it… All it needed was a new top…
It started as your basic metal table, but in need of some serious new paint.

Here’s what we used to transform our table:
-15- 5.5″ wide x 6′ cedar fence pickets. They’re outdoor durable and cost effective!
-3- 10′ redwood 2 x 4’s
-2″ gold deck screws
-Electric hand sander
-Sandpaper, 60 & 120 grit
-Outdoor stain
-Oil paint brush
First, I flipped the table upside down and sprayed the legs with a gloss black spray paint.
Then, we used the redwood 2 x 4’s to create a frame for the new top. Since the table is 4 ft round, we made the frame 4′ 5″ x 4′ 5″.

To give it extra support, we added two boards in the middle and used 2″ gold deck screws to secure everything in place.

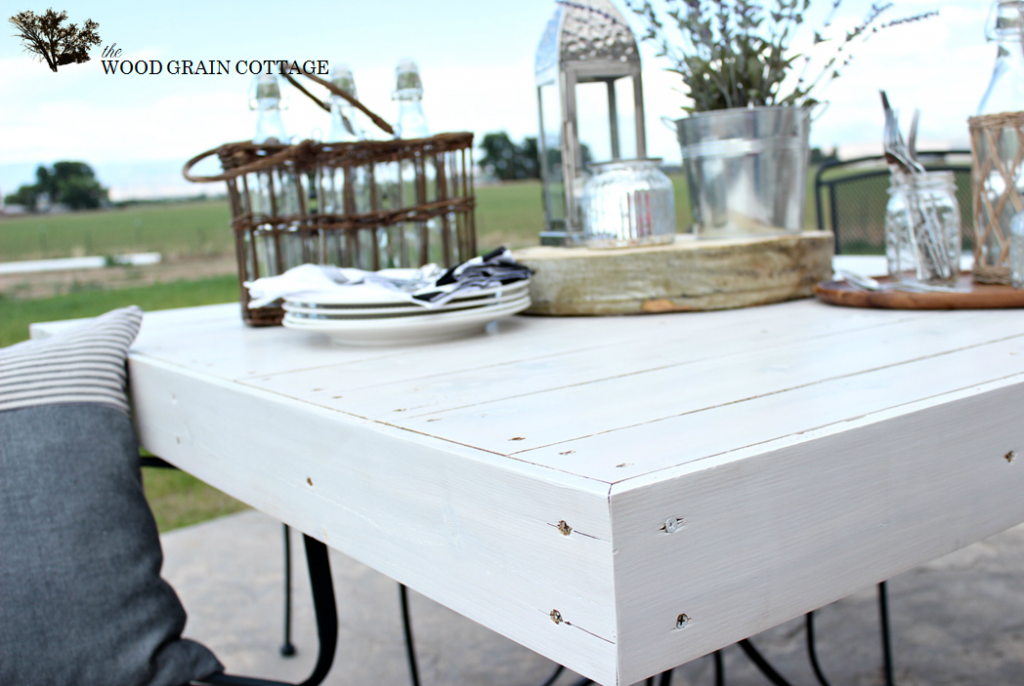
Once the frame was built, we began trimming down the cedar fence pickets…
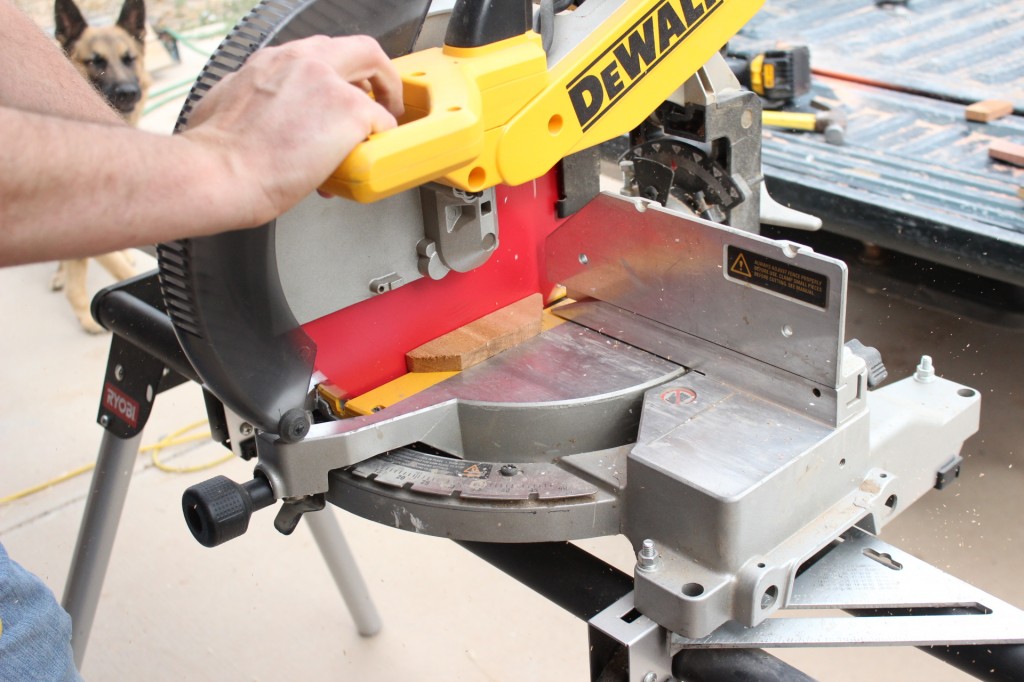
While Anthony cut all the boards to the proper length, I used our electric sander with 60 grit sandpaper and sanded the top side of each board smooth.
Then, we began laying them out on the frame.
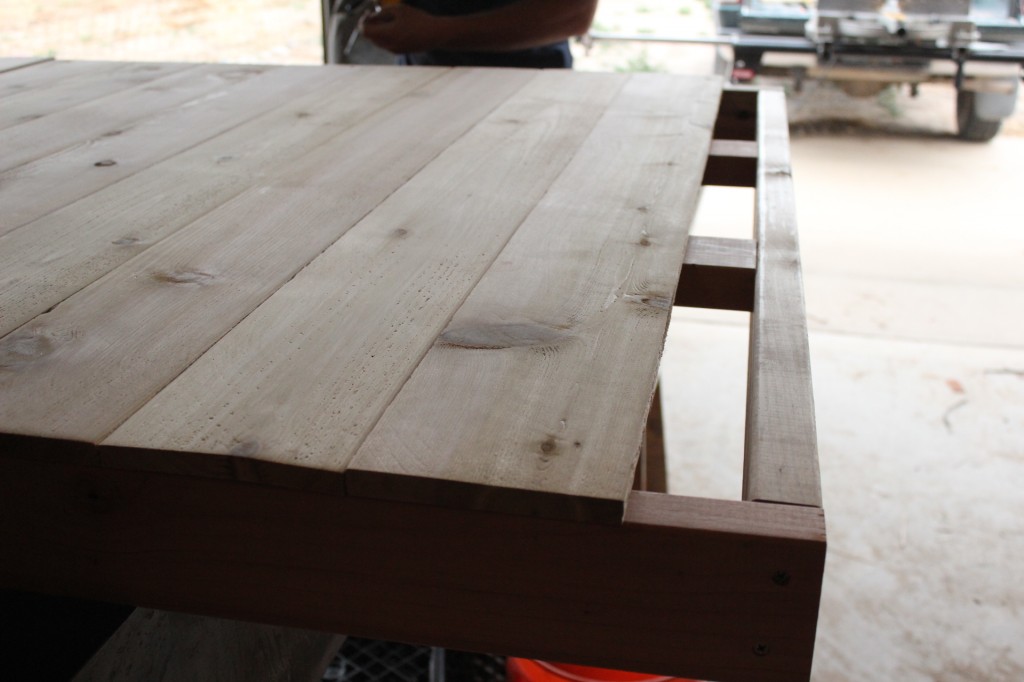
For the layout, we started with a seam as the middle, and built out from there. We used a set of clamps to get the boards as tight as possible, then used gold deck screws to secure them in place.

We made sure all the boards were lined up as we screwed them in place…
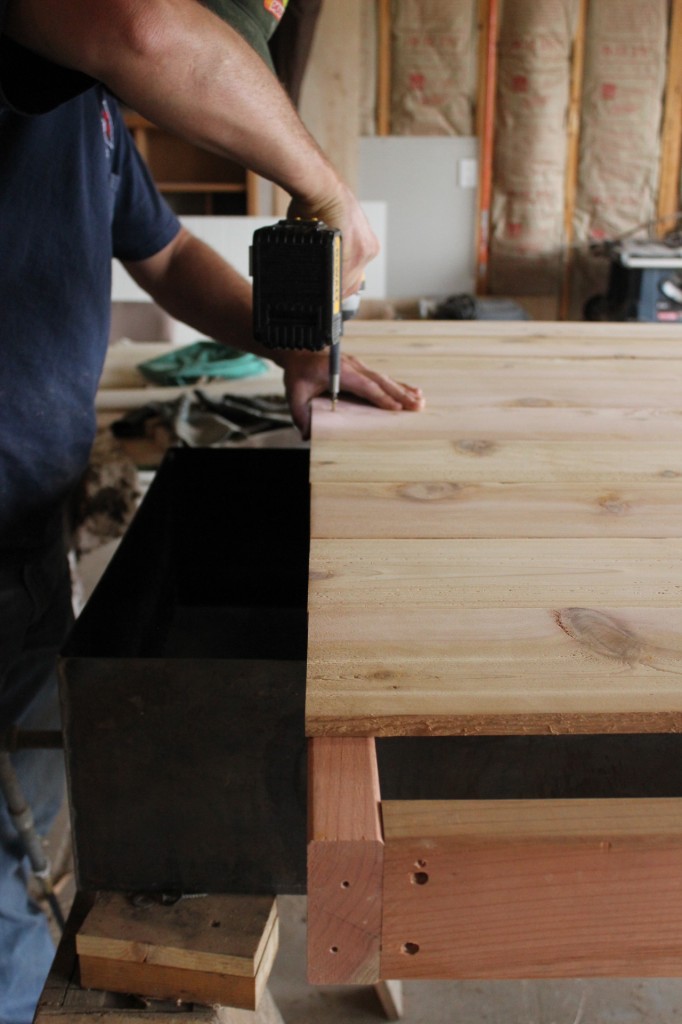
Then, to make sure the top was really secured, we used a level and made a mark on every picket on each middle support. We made sure each mark was centered, then added screws.

With all the pickets in place, we used the same wood to trim the outside. We used clamps to hold each side piece in place, then added the screws.

To make sure everything was really smooth, I used my electric sander with 120 grit sandpaper and went over the entire thing, being careful on each corner.
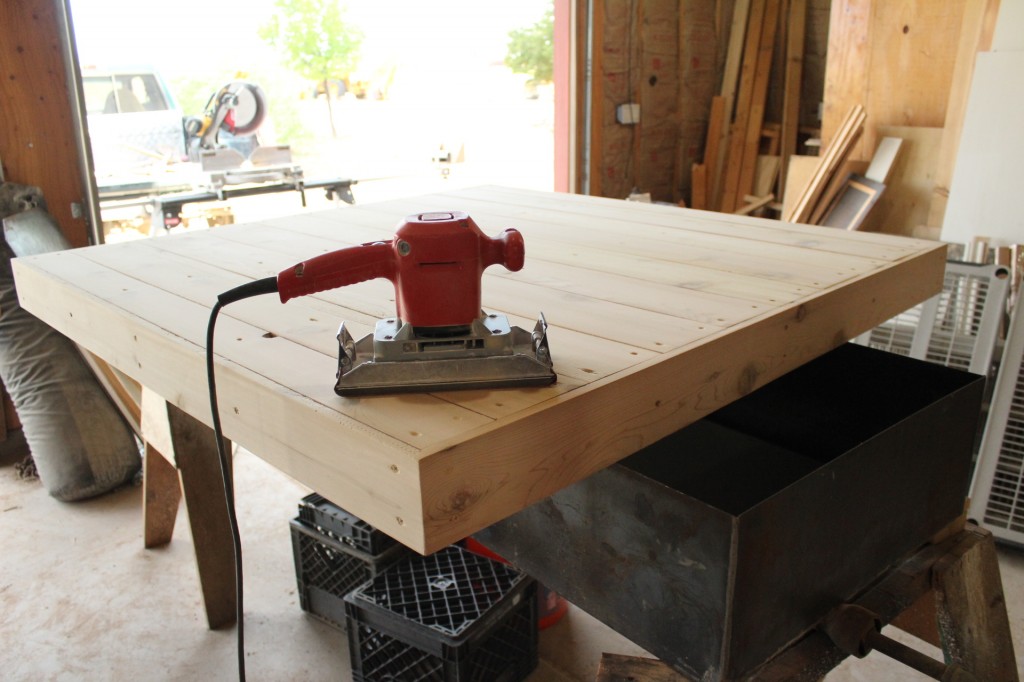
Once I was done sanding, I used our air compressor and blew off any remaining dust, then followed that by wiping it down with a cheesecloth.
I added 3 coats of Behr’s ultra-white semi- transparent deck stain and let it dry completely. Because the stain is said to have the sealer included with it, I didn’t seal the top with an additional sealer. I’m sure that I probably will in the future though…
To secure it to the existing table top, we used screws and drilled through the metal “grid” and into the wood supports on the bottom of the new top.
With that, the table was done and we were ready to enjoy it!
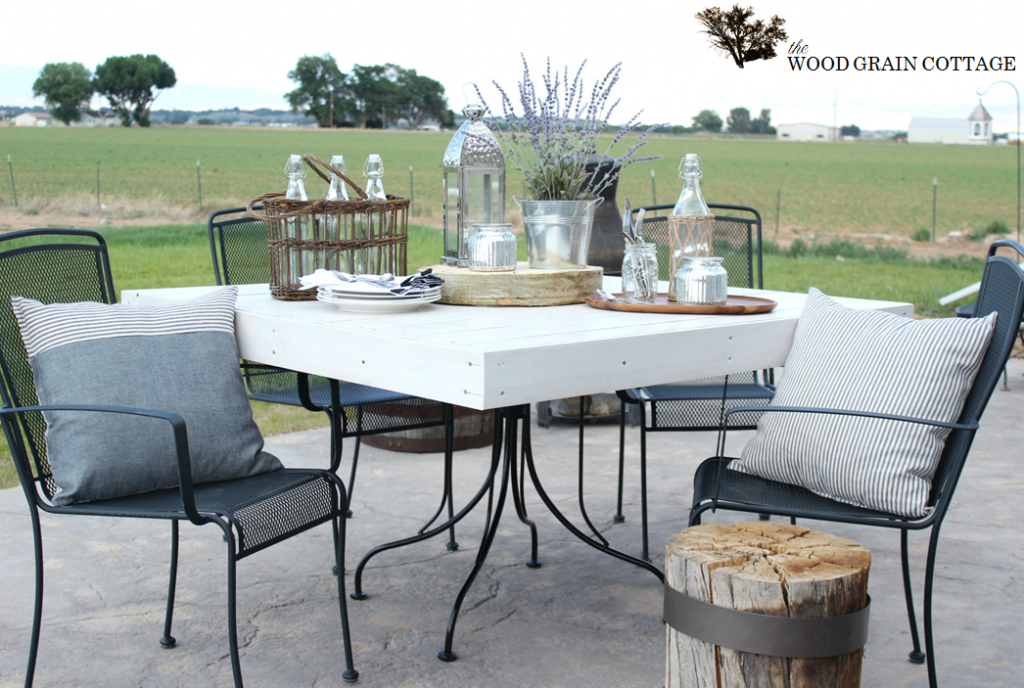
It’s absolutely amazing to see how much the top has transformed the entire table.
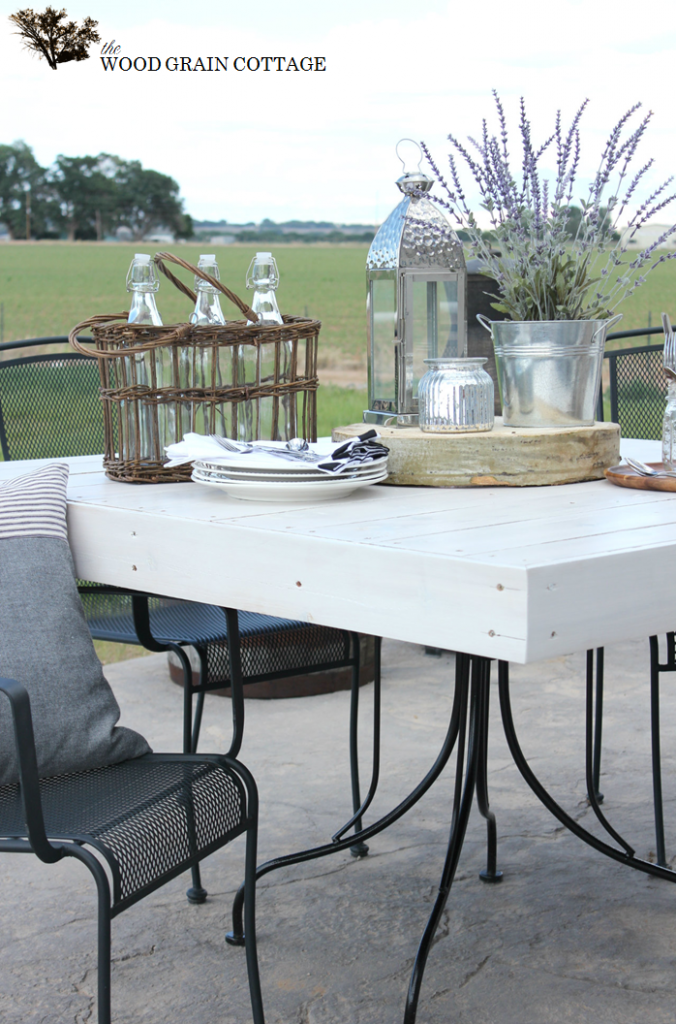
It’s just lovely…
I mean, would you even believe that it’s made from cheap cedar fence pickets?
Probably not.
And the best part?

The entire thing cost us around $70.00.

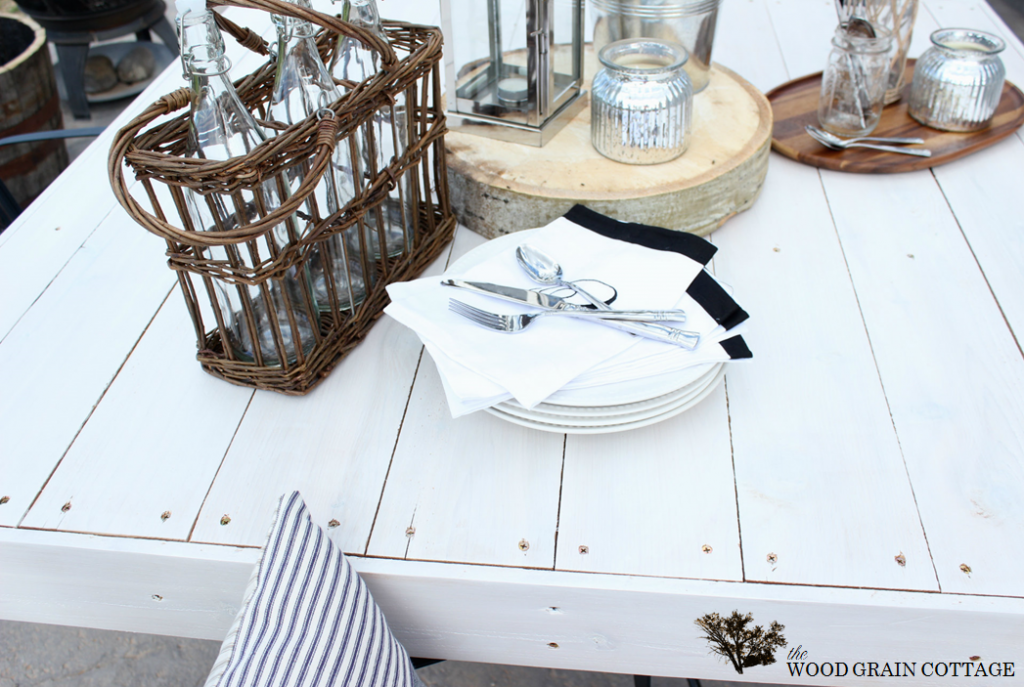
I’d say that’s a whole lot of bang for the buck! Especially since the new top can seat up to 8.
I have a pretty good feeling that we’ll be spending even more time outside on our patio…
….Now that we have table….

I originally shared this post over at I Heart Nap Time.
Pssst! The Wood Grain Cottage is now offering advertising spaces! For more information click here.
Linking up to:
Great ideas! Thanks for the inspiration! Totally doing this.
THANK YOU so much, Missy! So happy you found it inspiring! 🙂
-Shayna
AMAZING! Gorgeous table setting too and love that it can seat 8… smart move making it that big! 🙂
THANK YOU so much, Jen! I’m happy we made it big too! 🙂
-Shayna
INCREDIBLE!!! Gorgeous…all of it! All that eye candy in one place, where do i begin? You have such talent, Shayna:) Enjoy…
Blessings & <3,
M
THANK YOU so much, M! You always bring sunshine to my day! 🙂
-Shayna
WOW! your table is beautiful! 🙂 I love it Shayna! 🙂 you guys did an amazing job and I love how big it is too! (can sit 8 people; very good) 🙂 & I love this white that you used; so fresh and bright; perfect for the summer! 🙂 & can’t believe it was done with fence pickets !!! 🙂
THANK YOU so much, Ingrid! You always leave the sweetest comments! 🙂
-Shayna
Amazing!! I love this! We have a metal table on our back deck, but its rectangular. I bet something like this would do wonders for our space!! Thanks so much for sharing & for the great tutorial! You always have such lovely projects!
THANK YOU so much for the super sweet comment, Tonya! I think this would work perfectly on your rectangular table. It certainly made ours look a ton better! 🙂
-Shayna
Awesome upcycle! I love the new top… and it looks like a fabulous calm little spot to sit and enjoy a meal or drink outdoors!
THANK YOU so much, Krista! You’re right, it is a fabulous calm spot to sit and enjoy! 🙂
-Shayna
That looks so great! I am sitting with one of those tables on my back patio! Perfect timing to run into your blog! PS I also love that little wood slice that your plant is sitting on!
That looks so great! I am sitting with one of those patio tables on my back porch right now! What perfect timing to come across your blog! PS~ I love that little wood slice that your plant is sitting on!
THANK YOU so very much! I’m so happy you found me too! 🙂
-Shayna
Your table turned out wonderful. Love the look of the wood top with the metal legs. You have created a wonderful patio space.
Thanks for sharing,
Suzanne
Pieced Pastimes
THANK YOU so very much, Suzanne! 🙂
-Shayna
Love the table! Such a great idea. I had a patio table which was glass and it broke. I felt so bad of getting rid of the table and chairs just because It had no top, Now I am kicking myself. I could have done this. If you get a chance, please link up to my linky party: http://suburbsmama.blogspot.com/2013/07/sunday-linky-18.html
THANK YOU so very much! I know what you mean, I try to re-use most of our things too! 🙂
Thanks for the invite to your party. I’ll stop by to link up!
-Shayna
What a great idea to use the existing table base. Turned out lovely!
THANK YOU so very much! 🙂
-Shayna
This is AWESOME!! Truly awesome! What a transformation! Pinning! I love your blog! I would love for you to share and link up at my weekly TGIF Link Party if you haven’t already this week. Your favorite posts, most popular, recent or new! The party is open every Thursday night and closes Wednesday’s at midnight. Followed by (Not SO) Wordless Wednesday! http://apeekintomyparadise.blogspot.com/.
I would be honored if you join us and follow to stay connected Have a wonderful week!
Hugs, Cathy
Great job! I did something similar with a coffee table made out of that black metal. I love yours and the black chairs look awesome with it! Nice job.
THANK YOU so very much, Susan! 🙂
-Shayna
That is such a great idea and it’s gorgeous! I’ve pinned and I’m including a link back in this week’s DIY highlights. 🙂 Thanks for sharing, Shanna!
THANK YOU so very much, Roeshel! How exciting! 🙂
-Shayna
Typo! I meant, Shayna! 🙂 Hope you’re having a great week!
What a great idea! Love your work! So glad to have found your blog through Karianne at Thistlewood Farms. I also love the basket with the glass bottles. Can you tell me where you got them please?
Have a great day!
Kim
THANK YOU so very much for the super sweet comment, Kim! 🙂
I found the basket and bottles at TJMax.
Hope that helps! 🙂
-Shayna
Very nice! I should talk my hubby into doing this for ours. I have the exact same table & chair set. I do not care for round eating tables, MUCH prefer the square! ~ Mama Ging
THANK YOU so much, Jill! I hope you can sweet talk your hubby into making one! I prefer the square tables too… and this fits more people! 🙂
-Shayna