
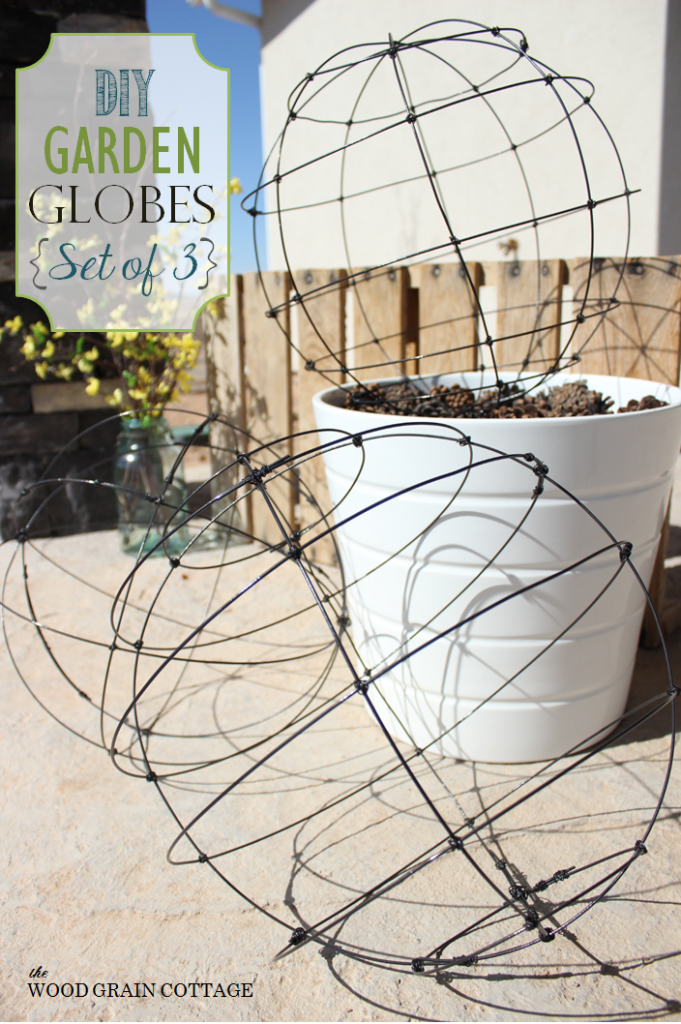
$30 Thursday: DIY Wire Garden Globes {Set of 3}
See how easy it is to make these DIY Wire Garden Globes. I’m sharing my step by step tutorial. They’re perfect for your yard or front porch.
Welcome to the second edition of $30 Thursday! April and I have teamed up again to bring you two more projects that can be made for $30 or less! Love it!
Remember April? Be sure to click over and see her project too!

Alrighty- let’s do this!
DIY WIRE GARDEN GLOBES
I’ve had my eye on wire garden globes for forever… I almost bought a few of them several different times but kept holding back knowing that I could get more bang for my buck if I made them myself.
I’m so happy I waited! I love how mine turned out!
At first I struggled with the best {and cheapest} way to make them. I wanted to use a thick wire so that they were a bit more “chunky”, but the thicker wire didn’t want to bend like I hoped. The smaller wire was the best choice.
Please note: Some of the links in this post are affiliate links, which allows us to make a small commission from your purchase, but your purchase price stays the same. Thank you for helping support our blog! We greatly appreciate it!
Supplies:
- 14 Gauge Galvanized Steel Wire
- 22 Gauge Galvanized Steel Wire
- Wire Cutters
- Needle Nose Pliers
- Black Hammered Spray Paint
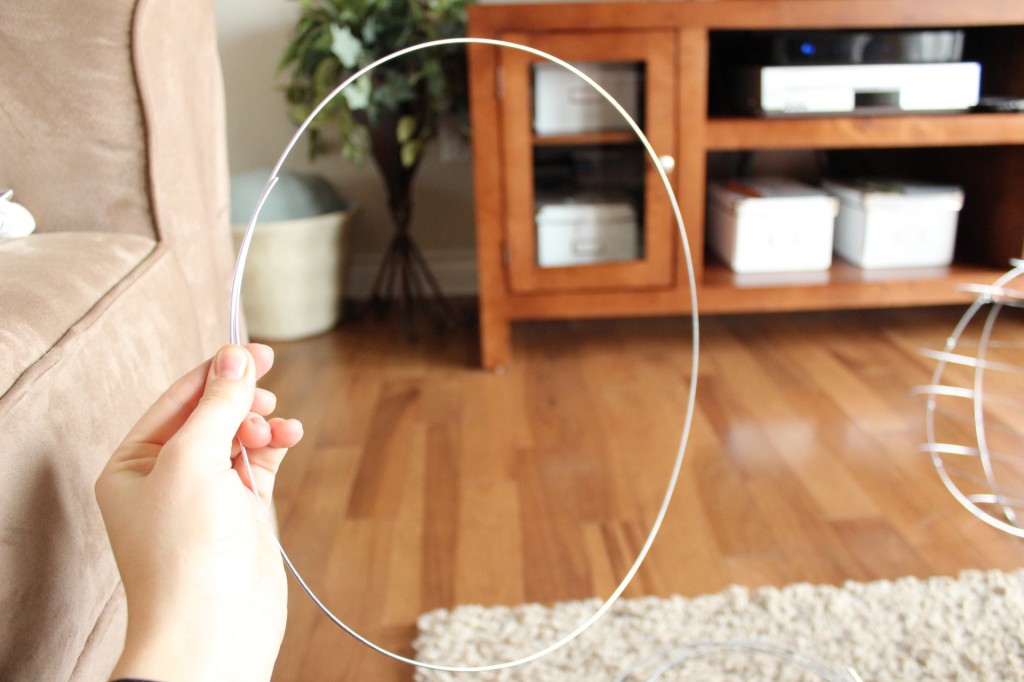
First, I decided how big I wanted the overall size of the globe to be.

Then I used my wire cutters to snip the wire. I used the cut wire as a template and cut three more sections the same length as the first one.
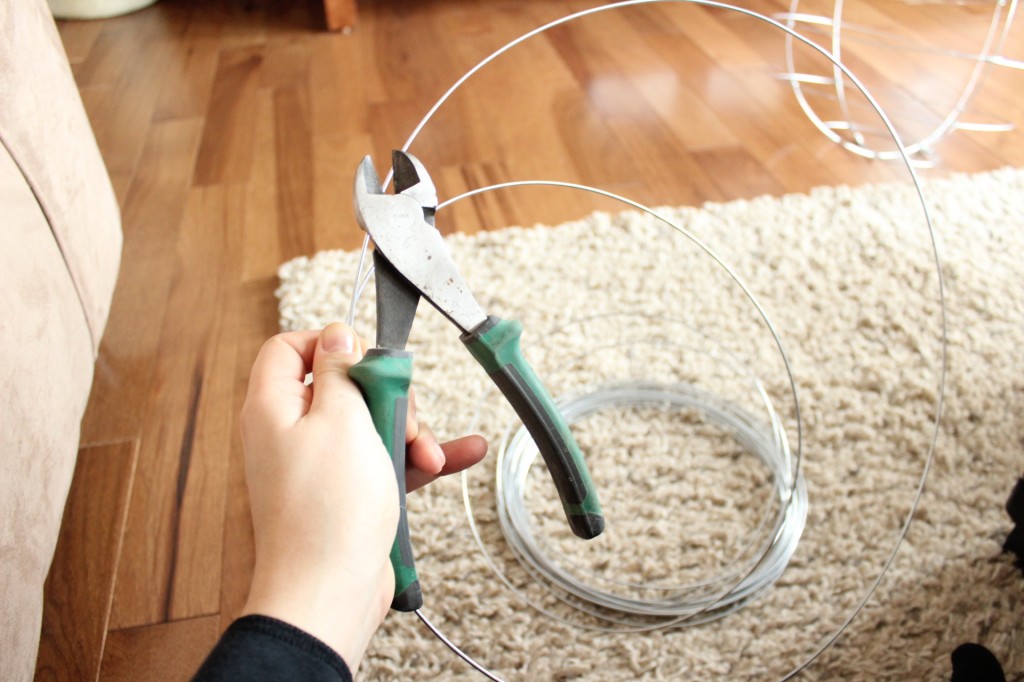
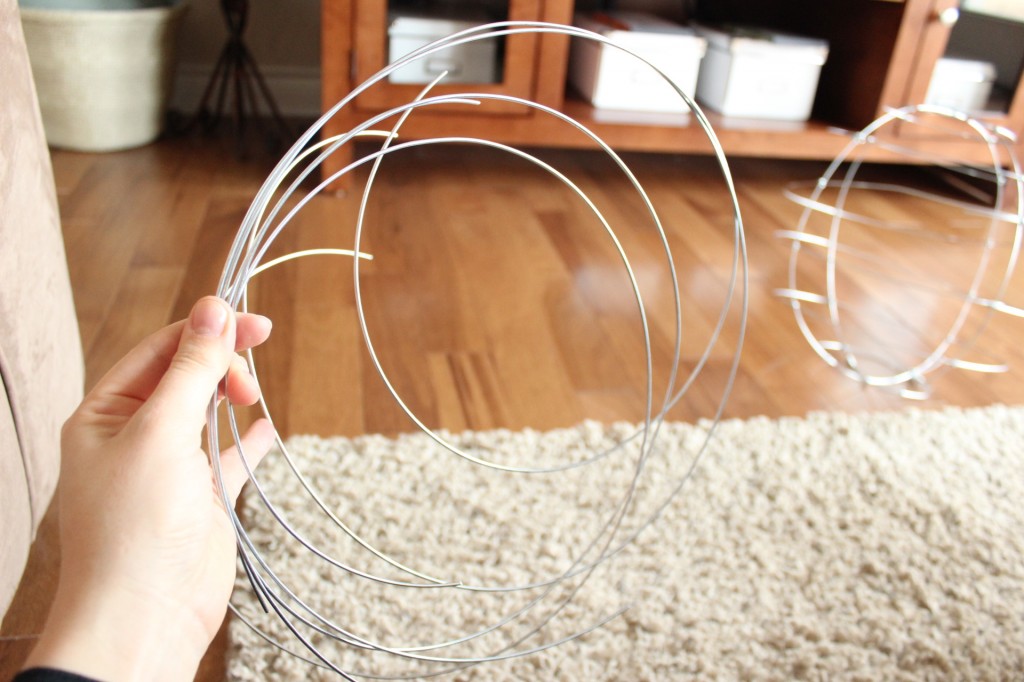
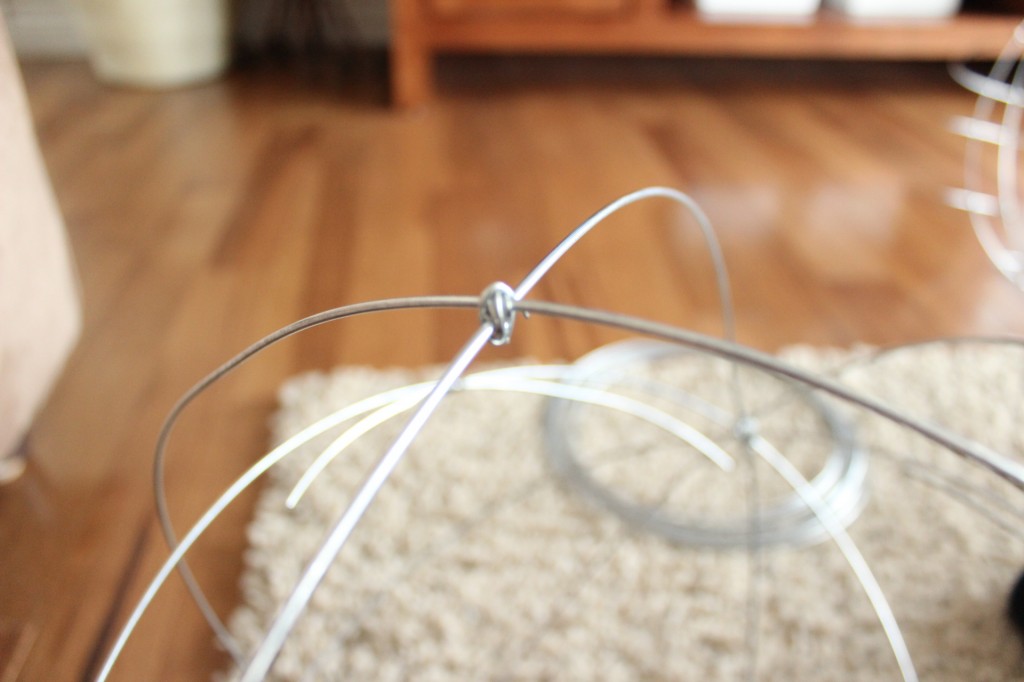
Once all four are cut, gently bend the wire to form a circle.
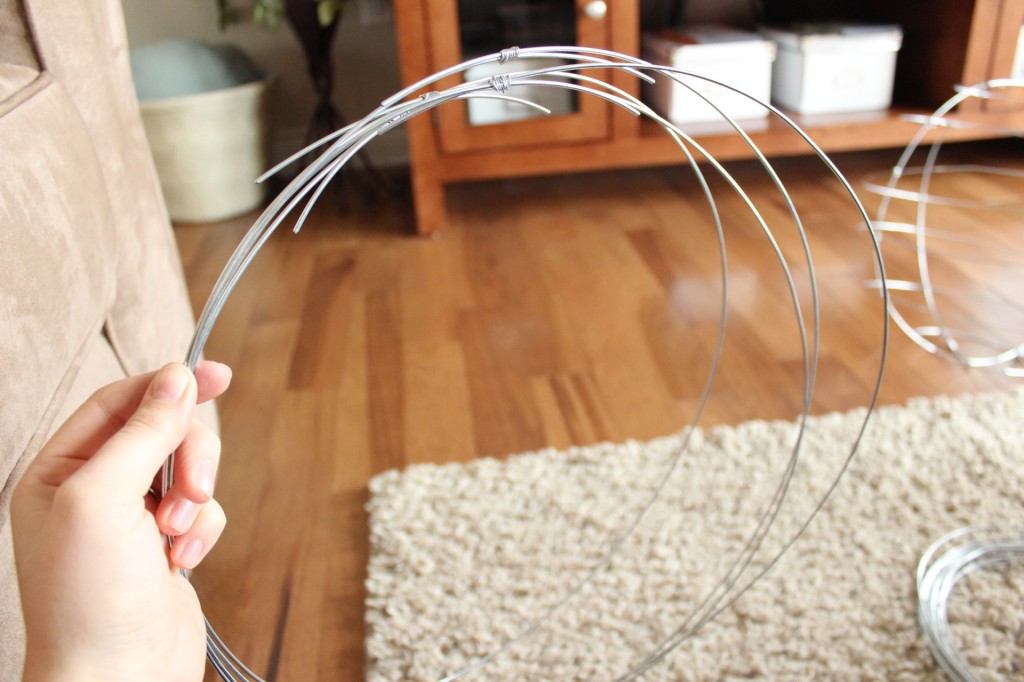
Grab the smaller galvanized wire and cut a piece about 4 inches long. Use your fingers to pinch the top of the circle together and tightly wrap the wire around the seam. Be sure to overlap the wire a good 1″- 2″ on each side.

With the needle nose pliers, squeeze the wire together being sure to push down any points that popped up.


Do the same thing to all four circles, making sure each shape is the same size.
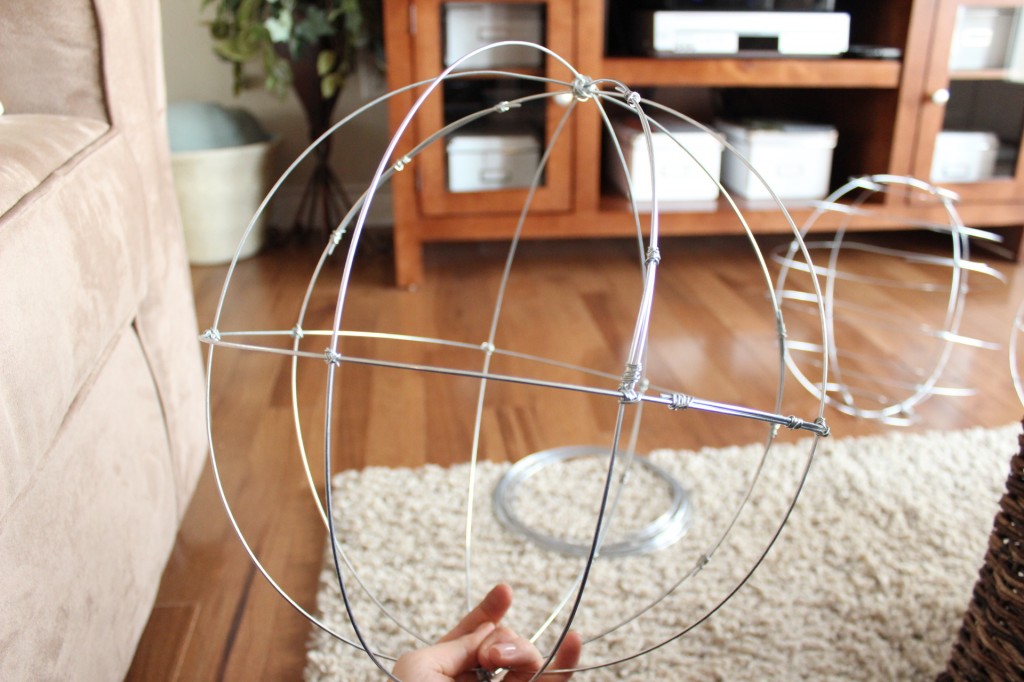
Next, grab two of the four circles. To form the first shape of the ball, hold the top of the circles together and gently spread them apart.
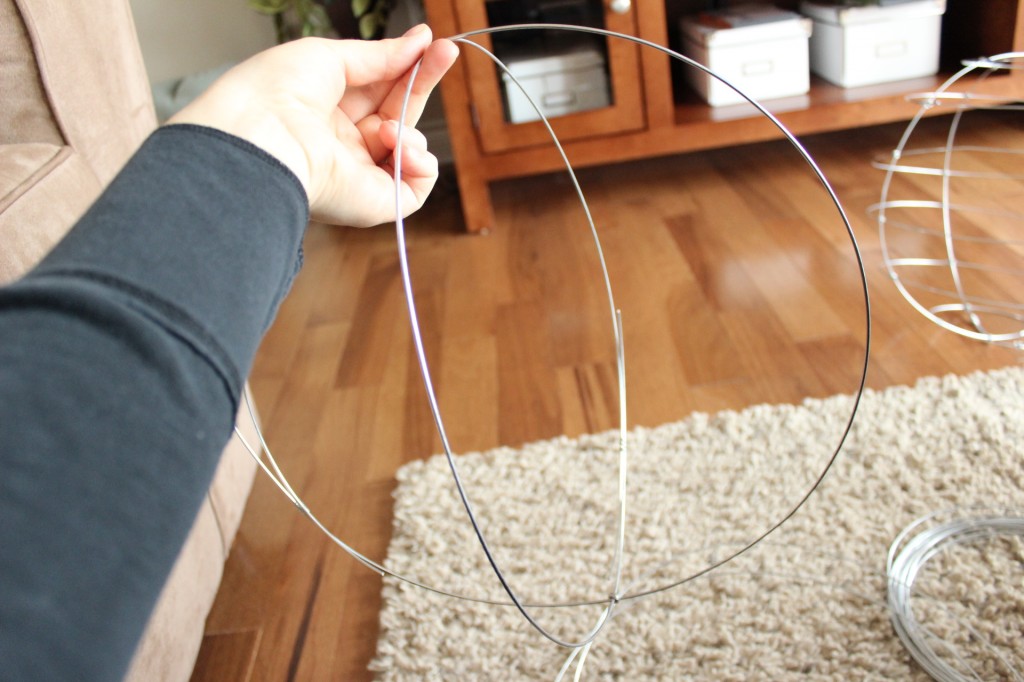
Use the small wire to tightly wrap the top and bottom joints together. Be sure to use the needle nose pliers to make sure the wires are pressed together.

Repeat with the other two circles, making sure to space them evenly to form the globe.

Tie all the joints together with the small wire, then take the wire roll and gently wrap it around the middle of the globe. Be sure to add an extra 2 inches to the length and snip it with the wire cutters.
Use the small wire to wrap the two ends together and place it around the middle.
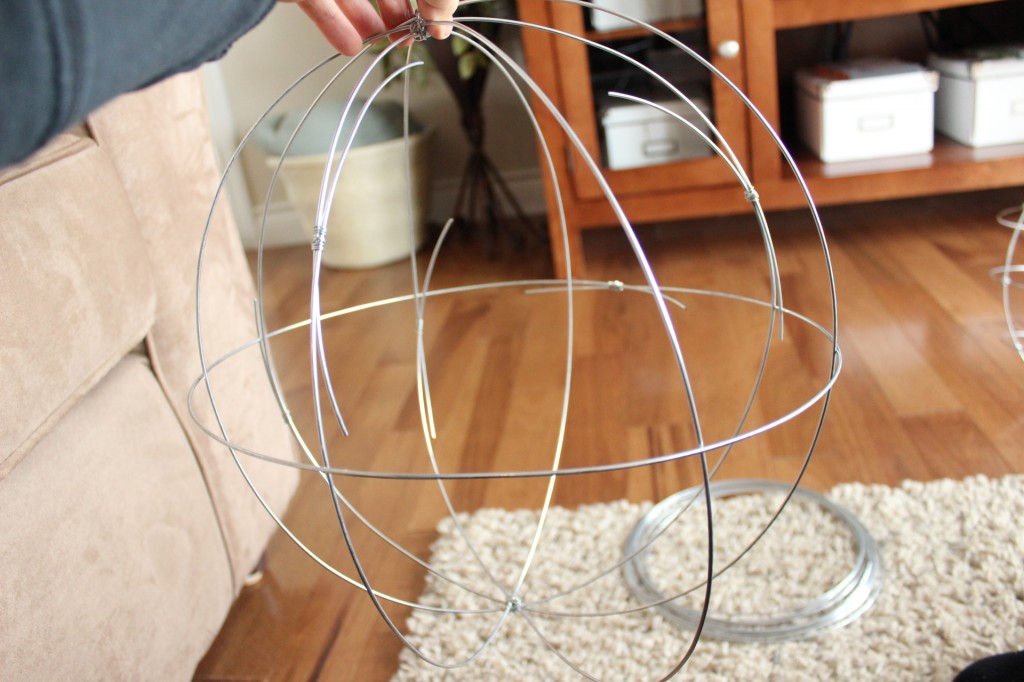
Secure all connecting joints with the small wire.

Now, use the small wire to wrap all overlapping wire. You could snip it down, but I wouldn’t do that. I tried it and it didn’t work. The wire would separate and I had to start over. Plus, the little wire adds a texture to the otherwise slick wire.
I made each globe differently, so this one only had one horizontal wire, where the other globes had several. To add more horizontal wires, follow the same steps that were used to add the first one. If you choose to add additional wires, be sure to secure the middle one first.
Grab your globe and spray paint. To paint each globe, I hung them from a tree branch suspended by a wire coat hanger. It worked perfectly!

After I gave each globe a coat of spray paint, I flipped them over and sprayed the underside. I let them dry completely.
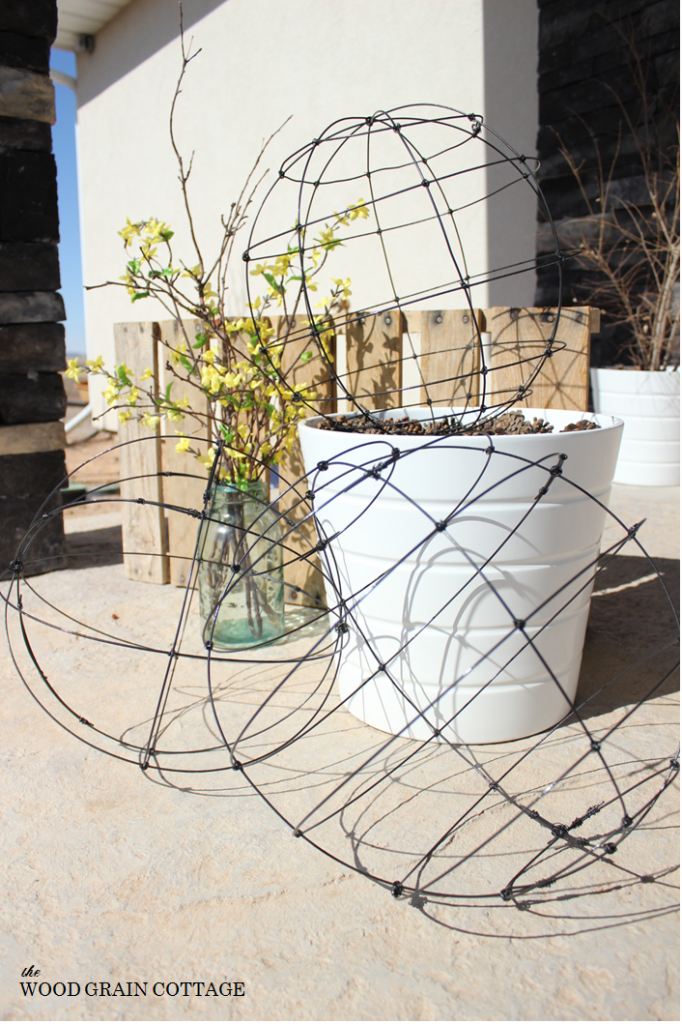
The finished results are superb!
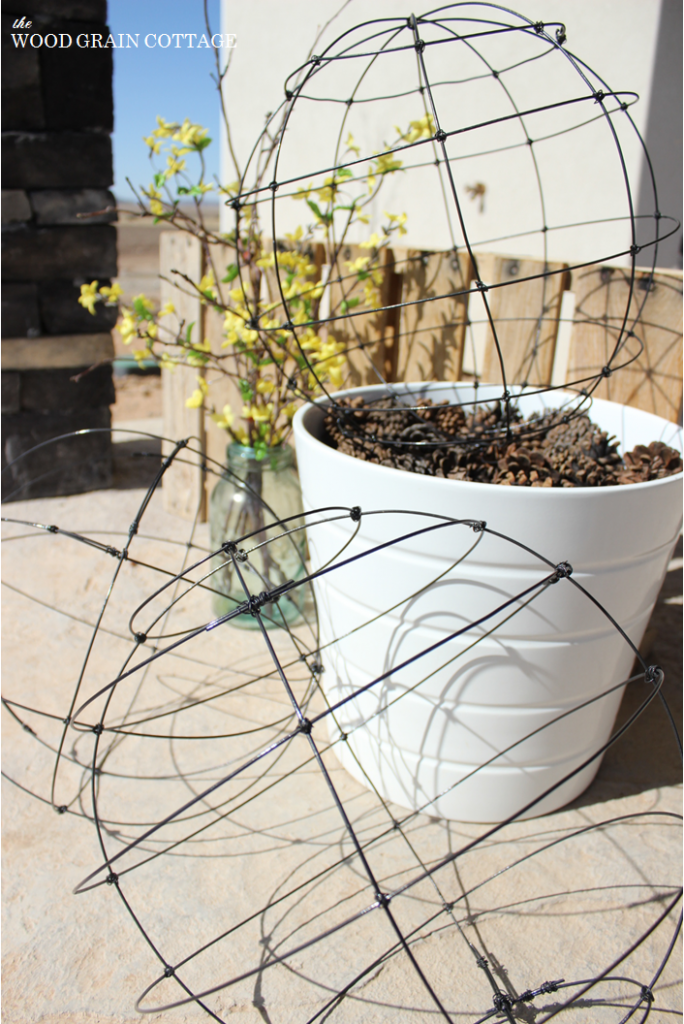
I am simply loving the way they turned out! I can’t wait for spring and summer! They will look awesome with plants, and I’m really anxious to hang them from a tree. They look ridiculously cool hanging from the tree branches. Add a LED candle, or even wrap them with string lights and they would be a show stopper for outside parties or lit up for Christmas!
Versatility always makes me happy! Plus, I used the Rustoleum rust spray paint so I don’t have to worry about them being outside with our random Colorado weather!

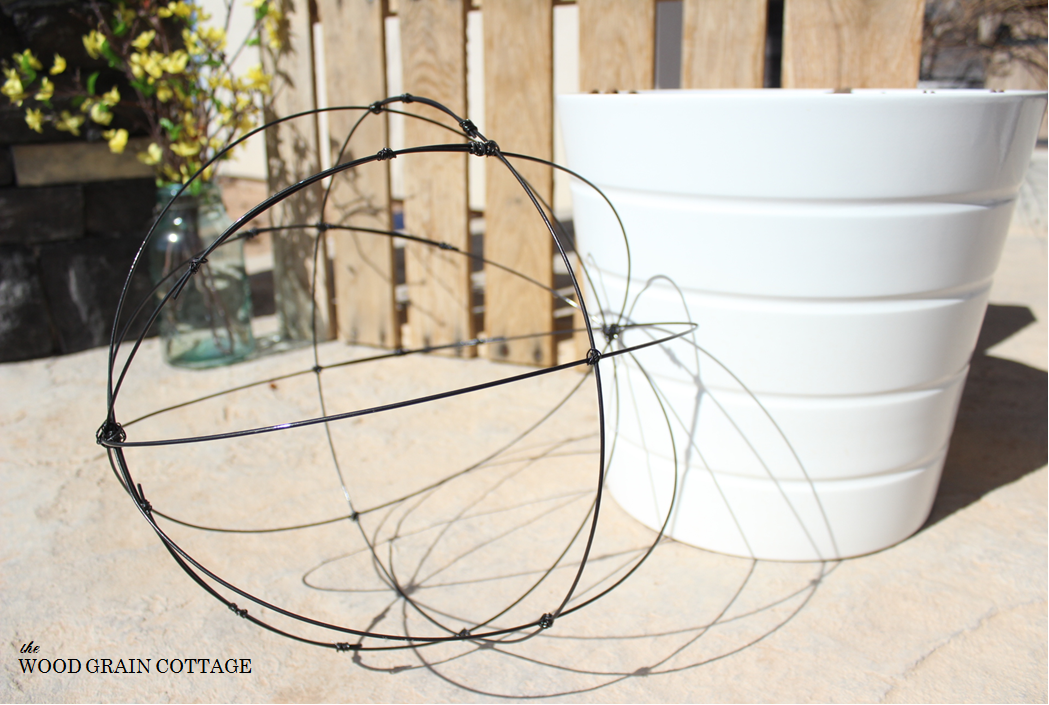
I tried a different method with this globe. I wrapped the wire around a beach ball. While it worked, one way or another I still had to add the horizontal wires. In the end, I think it was easier to form each circle rather than wrapping it around the ball. Both ways produce a lovely globe.
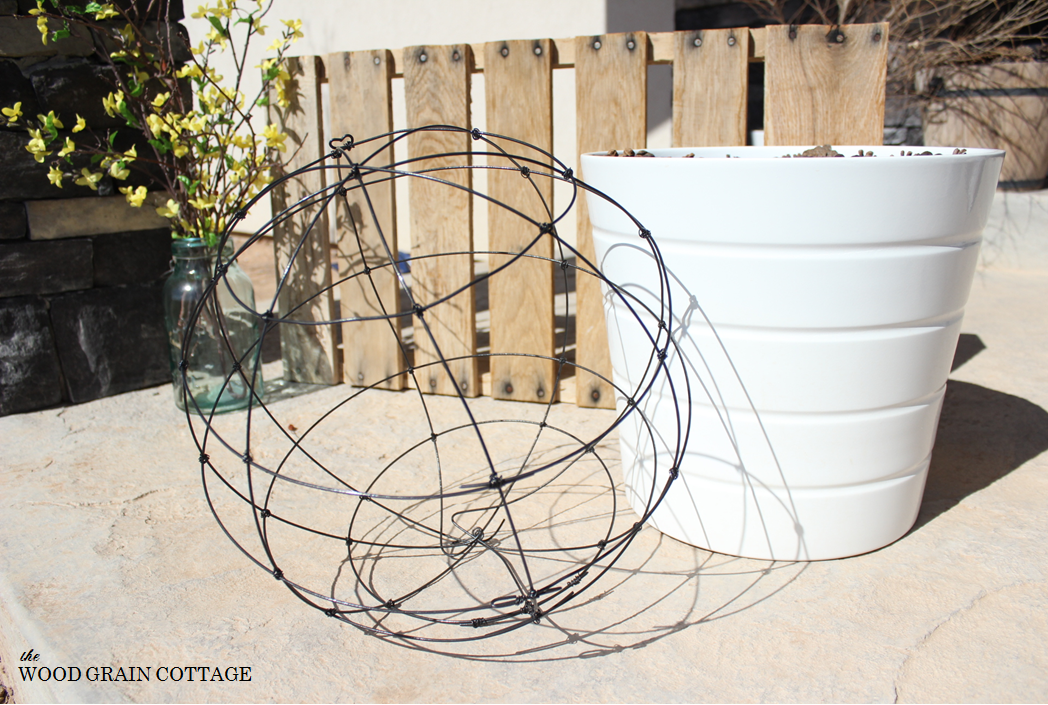
I made them all the same size, but gave each one a different pattern.
I’m planning on making a few more since I didn’t use all the wire. My mom already has her order in too! 🙂
They’re too cool! And EASY!
Be sure to check out April’s DIY Fabric Strip Lampshade! It’s awesome!
Too Cute!
April and I are both pinning these projects to our $30 Thursday pinterest board. Be sure to follow along! It’s a great place to get a little inspiration and all the projects are totally easy on the wallet!
Hi there – just clicked over from checking out Aprils cute little lamp shade. Your globes are adorable! I am seriously loving your series, ladies!
Hi Chelsea! Thanks for stopping by! I’m so glad you like the globes- and our series! 🙂
-Shayna
Love these garden globes, they look easy to make and look great! 🙂 Loving these series! 🙂
Thank you Ingrid! They are easy to make- and the results are wonderful! I’m glad you like this series! 🙂
-Shayna
My mom would like to place her order too…She’s loving these! 🙂 I am too, great job!!!
Thanks April! 🙂 I’m glad your mom likes them too! If you lived closer we could have a party and make them! 🙂
Virtual hugs!
-Shayna
Those globes are adorable! I just love them stacked outside by your flower pots, too cute and great idea!
Thank you so much Christina! I’m glad you like them! 🙂
-Shayna
What a great idea! I might try this for some topiaries I was eyeing..
I found you today thru the Linky Party at Liz Marie, where I’m #141. I hope you get a chance to stop by my blog and leave a comment, too!
~ Megin of VMG206
http://www.vmg206.blogspot.com
Thank you Megin! I’m glad you found me. I’m off to look at your project! 🙂
-Shayna
Learning a ton from these neat arcitles.
Hey Shayna! Found you at the Power of Pinterest Party, and just subscribed to your blog. These are way cute. Pinning and making them for summer! Thanks for sharing 🙂
Shandy @ Aprons ‘n Pearls
Hi Shandy! I’m so happy you’ve found me- and that you’re a new subscriber! Thanks for your lovely comment! The globes are really easy to make- you’ll love them! 🙂
-Shayna
Okay, I am seriously loving these, not just as outdoor ornaments though… they remind me of that gorgeous globe chandelier from Ballard Designs! Hmmmm… I’m sensing another knockoff that needs done… 😉
Hi Kathryn! Thank you! And I think that you might be reading my mind… shhh! 😉
-Shayna
I absolutely love these globes! Thanks so much for some much needed outdoor inspiration!
Thank you Cheryl! I’m so glad you like them! 🙂
-Shayna
I love these globes. I also have been wanting to buy globes for my garden, but it would be much more practical to make them! Thank you for the great DIY.
Thank you Kimberly! I’m glad you like them! 🙂
-Shayna
Thanks so much for stopping by the POP party. I will be pinning these (great tut!) and sharing on my fb fan page. They are fabulous 🙂 Shannon
Hi Shannon! Thank you for you lovely comment! I’m so glad you like my globes. 🙂 And thank you for the pin and facebook shout out too. 🙂
Big smiles!
-Shayna
I absolutely love these, and they look fairly easy to make! I will be doing this, have to pin, thank you so much!
Saw you sharing at the Spring Thing Linky Party.
Debbie 🙂
Thank you Debbie! I’m so glad you like them! They are very easy to make! 🙂
Enjoy!
-Shayna
this is such a clever idea for the garden. Need to save this for my spring project list.
Thank you Laura! They are a fabulous spring project! 🙂
-Shayna
Very Cute! I love those globes!!
Thank you Candice! 🙂
-Shayna
Great idea – I love orbs in the garden! Pinning these!
Kelly
Thank you Kelly! I’m glad you like them! Thanks for the pin! 🙂
Big Smiles!
-Shayna
Great idea! I made similar orbs with old rusty mattress springs I found, but they were much harder to work with and not everyone has access to such materials. I will definitely have to give these a try. Thanks for sharing!
THANK YOU John! I’m so happy you like them! They’re easy too! 🙂
-Shayna
Love the globes, absolutely love them! Ace Hardware here I come because I have to try these! Thanks for the tutorial.
THANK YOU so much Kerry! I still love those globes…. and they are really easy to make! 🙂
-Shayna
I’m seriously loving these! Right up my alley!
THANK YOU Corinna! 🙂
-Shayna
Thank you so much! I love these! I paid $162 for a 24″ globe yesterday, with plans to make it into a chandelier for my dining room. Never again 🙂
THANK YOU so much Jan! I’m glad you love them! Me too! I bet your chandelier will turn out fabulous! 🙂
-Shayna
So sorry to post again but found an alternative that I thought I would pass on to you. Oasis makes a heavy duty ribbon wire in various widths and in 11 colors! It is more expensive, but I thought how pretty the spheres would look with the sun shining on them if they were made from copper. Then I saw the flat wire in lime green, pink, red, blue, black, copper…… Lot’s of choices 😀
Hi Jan! THANK YOU so much for your comment… don’t be sorry! Thank you so much for sharing this! I haven’t heard of anything like it, but your right, the globes would look fabulous made from copper! Love that idea! Off to check it out! 🙂
-Shayna
I’m so glad I came across this tutorial. I’ve got a project in mind that these would be perfect for!
THANK YOU so much, Katie! I’m so happy you found me too! 😀
-Shayna
These are really cool and a great tutorial too! Thank You!
THANK YOU so very much, Katie! 😀
-Shayna
These globals are very nice! Thanks for sharing. You did a great job with wrapping the wire ends, as it can be challenging to get a neat look. I think this idea would also be great as a kitchen light fixture cover.
THANK YOU so much, Ruth! I completely agree, they would look fabulous as a light fixture! 😀
I would but some moss inside it and an air plant, or fern & maybe a fairy and hang it.
FYI — Painting galvanized metal, with normal alkyd-based paints, will result in poor paint adhesion and the paint will peel. There are different methods of treating galvanized metal before attempting to paint, but I prefer the non-toxic method of spraying the metal with apple cider vinegar several times.
There are better methods (Google for more options), but for proper paint adhesion, you do need to prep the wire first 🙂
Love your tutorial, and your globes are beautiful.
I make these globes also and at Xmas time I wrap them with a LED strings AWESOME