
Fixer Upper Reveal
This post has been a long time coming, and I know several of you have been waiting patiently for me to get my booty in gear and share the full fixer upper reveal. Sometimes, I have a hard time keeping up with everything. This blog has turned into my full time job and I still find myself sucking for air in all the things I need to do. Of course, adding and getting ready for an online shop isn’t easy. And it’s still just me doing the work and getting everything ready. So, my sincere apologies if you’ve been waiting for this post.
Just a heads up, this post is looong…
We started the remodel of our fixer upper last year. It needed so much work. The house was beyond dated, didn’t function well, and was getting ready to fall apart if it stayed sitting as it was. Even with all that, I could see the potential. I knew the house could be a rare gem, and it was just waiting for someone to come along and pour a little bit of money, tlc, and fresh style into it’s old plaster walls (which we ended up removing!).
You may remember what we started with, if not, see here. You can take the tour of the house and see how I changed the floorplan here. Demolition was a fun and very dirty job. As I mentioned above, the walls were lathe and plaster, so as soon as we started removing some of the walls for the new floorplan, the other walls began cracking. So, in the midst of planning on doing all new plumbing, electrical, and adding in central air to remove the small window unit a/c, we also added in the cost of insulating all the exterior walls. And with that, the house was down to the studs.
Once we had the demolition done, we began by securing the floor braces under the house. Several of the rooms had big sagging issues, and by fixing the foundation, we were able to solve that issue. We also adding in the new walls for the master bathroom, guest bathroom, and raised the ceiling in the living room where it originally hung down lower than the original ceilings. The plumbing, electrical, heating/ cooling, and insulation went in as well. Then came the drywall, and the plank wall in the kitchen, and the house instantly started to take shape. That was really exciting! We also poured the new concrete steps for the front entrance.
Once the drywall was done, and they had textured the walls, we painted the entire house. The ceilings were sprayed with several coats of White by Benjamin Moore in flat. The walls are Classic Gray by Benjamin Moore in satin. With the painting done, the cabinets and countertops were installed throughout the house, the lighting installed, and we had our tile guy come in and install the tile. Then, we laid the new engineered hardwood flooring, had carpet installed and finished adding all the trim to the windows, doors, and baseboards. A little bit of touch up painting, misc. carpentry, and this house was basically finished.
And now, I’m sure you’re wondering what the hold up was… Well, when we finished the inside, we were going right into Fall. The guys had replaced most of the busted up siding on the exterior when they were doing the interior demolition, but we still had to clean up the landscaping, move and paint the shed, replace a little bit more siding, caulk, caulk, and more caulk, then paint the house, and the deck. Needless to say, we ran out of time to do all of that before the cold weather struck. So, the house sat quiet until we started back up this spring. As soon as we could get the paint to dry, we started painting.
We waited to get our final inspection and occupancy certificate until everything was done. No need to have the inspector come to find something else that would cause a delay. But, I’m happy to say, the house passed and it’s ready to go!
Now, I’m sure you want to see the pictures. Prepare yourself. 🙂
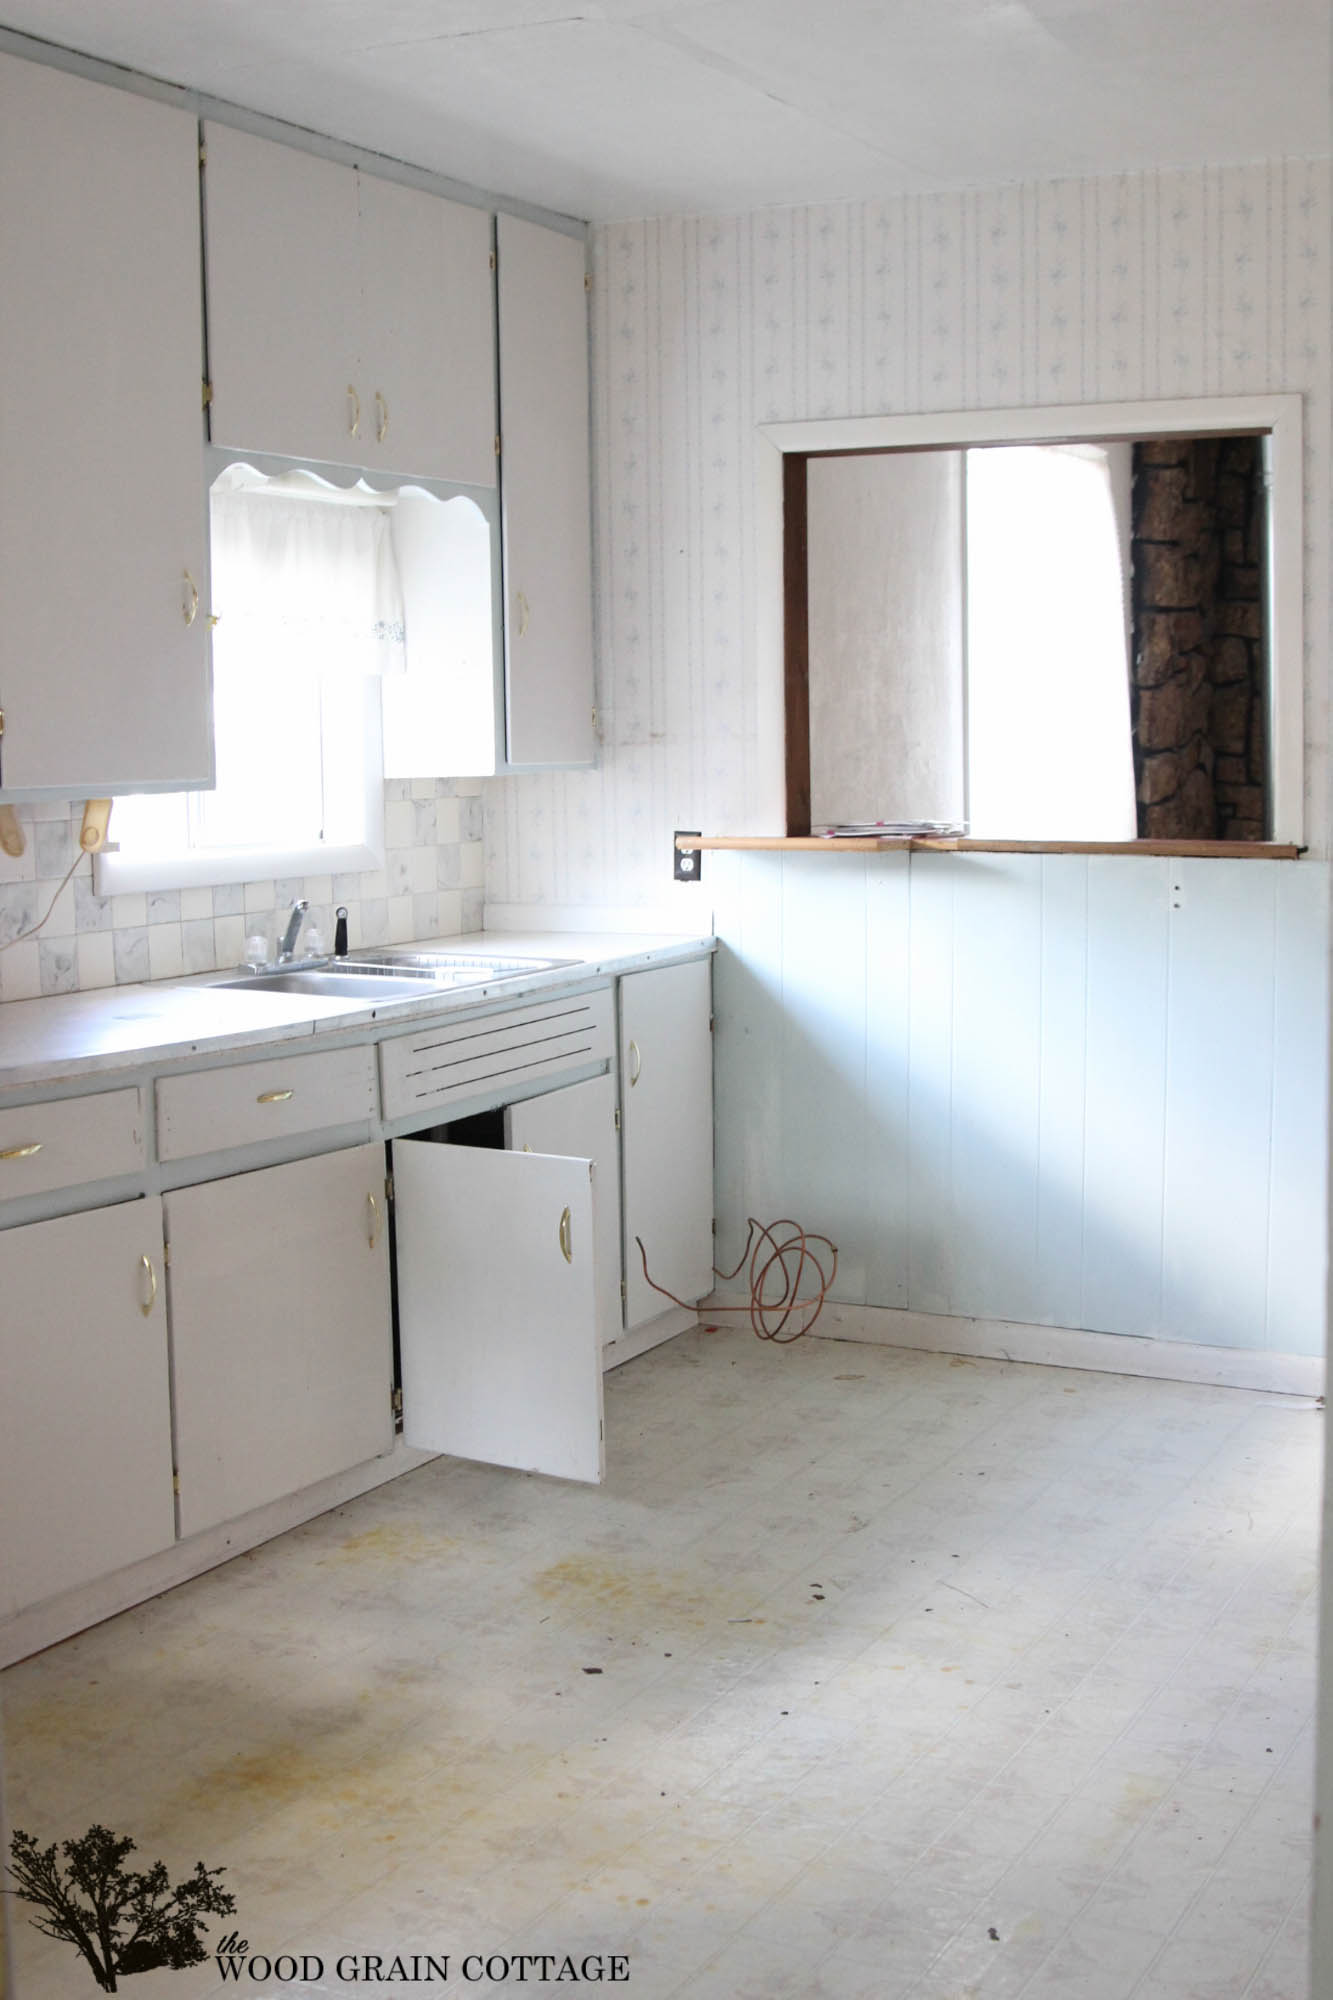
First, let’s start at the heart of the home, the kitchen. It was in sad, sad shape. The floors were sagging, the layout was horrible, and it needed some major updating…
Before:
After:

Before:

After:

Before:

After:

Before:

After:

There’s quite a bit of difference, isn’t there?I decided to really freshen it up. There is so much amazing natural light in this house, and I knew I wanted the entire house to feel, bright, clean, and fresh. I really made the kitchen the focal point of the entire house. You want to walk in here and see all the details. From the white cabinets, sleek stainless steel appliances, dark light fixtures, and clean subway tile mixed with the plank wall, there are so many features to love. The contrasting wood island top hangs over for a little bar seating, and leaves plenty of room for easy movement in the kitchen. Plus, we left the original pantry in place, just updating it with paint, and it adds so much extra storage to this amazing kitchen.
Here’s a few more views…


From the kitchen, you can go straight back to the house and out onto the deck through the mudroom. Here’s another room that just wasn’t functioning at all. Before, you couldn’t open the door all of the way because it would hit the washer and dryer. The storage was weak, and there wasn’t anyplace to really do laundry. The entire room needed reconfigured…
Before:

After:

Before:

After:

Not only did we move the washer and dry location to the opposite side of the laundry room, we also added an entire wall of cabinets. This laundry room packs a serious punch when it comes to storage. Really, this room was the perfect size, but the layout of the furniture and washer and dryer made it very hard to function. I carried the same cabinets into the laundry room as the kitchen, with much of the same hardware, and installed a bench that matches the stain from the kitchen island. The house flows seamlessly from room to room. And because this room is big enough, it could easily handle a black door, a herringbone pattern in the tile, and two large light fixtures.
This room now functions like a dream, and makes a really pretty entrance and exit to the back yard and deck.


If you turn to go back into the kitchen, there’s the bathroom. The original floorplan of the house, was to have this bathroom as a pass through to the master bedroom. Just like the laundry room, this was another room that just wasn’t functioning. The size of the space was great, but the way they had the shower, toilet and vanity made it very choppy. We closed off the pass way to the bedroom and made the only entrance coming in from the kitchen.
Before:
After:

Before:

After:

Keeping with the same consistency as the other rooms, I chose classic subway tile for the shower, and a white penny tile for the floor. I used the same cabinets and counter tops as the kitchen, and the same cabinet hardware. Really, this bathroom is quite large. We were able to use a larger vanity, and mirror, which made the bathroom feel even bigger.


Going back through the kitchen, is what I would call the dining room. We removed the partial wall, raised the header, made the windows bigger, adding new flooring, removed the corner fireplace, added additional lighting, and raised the ceiling in the front room, which gave the entire space a larger, open feeling.
Before:

After:

Before:

After:

Before:
After:

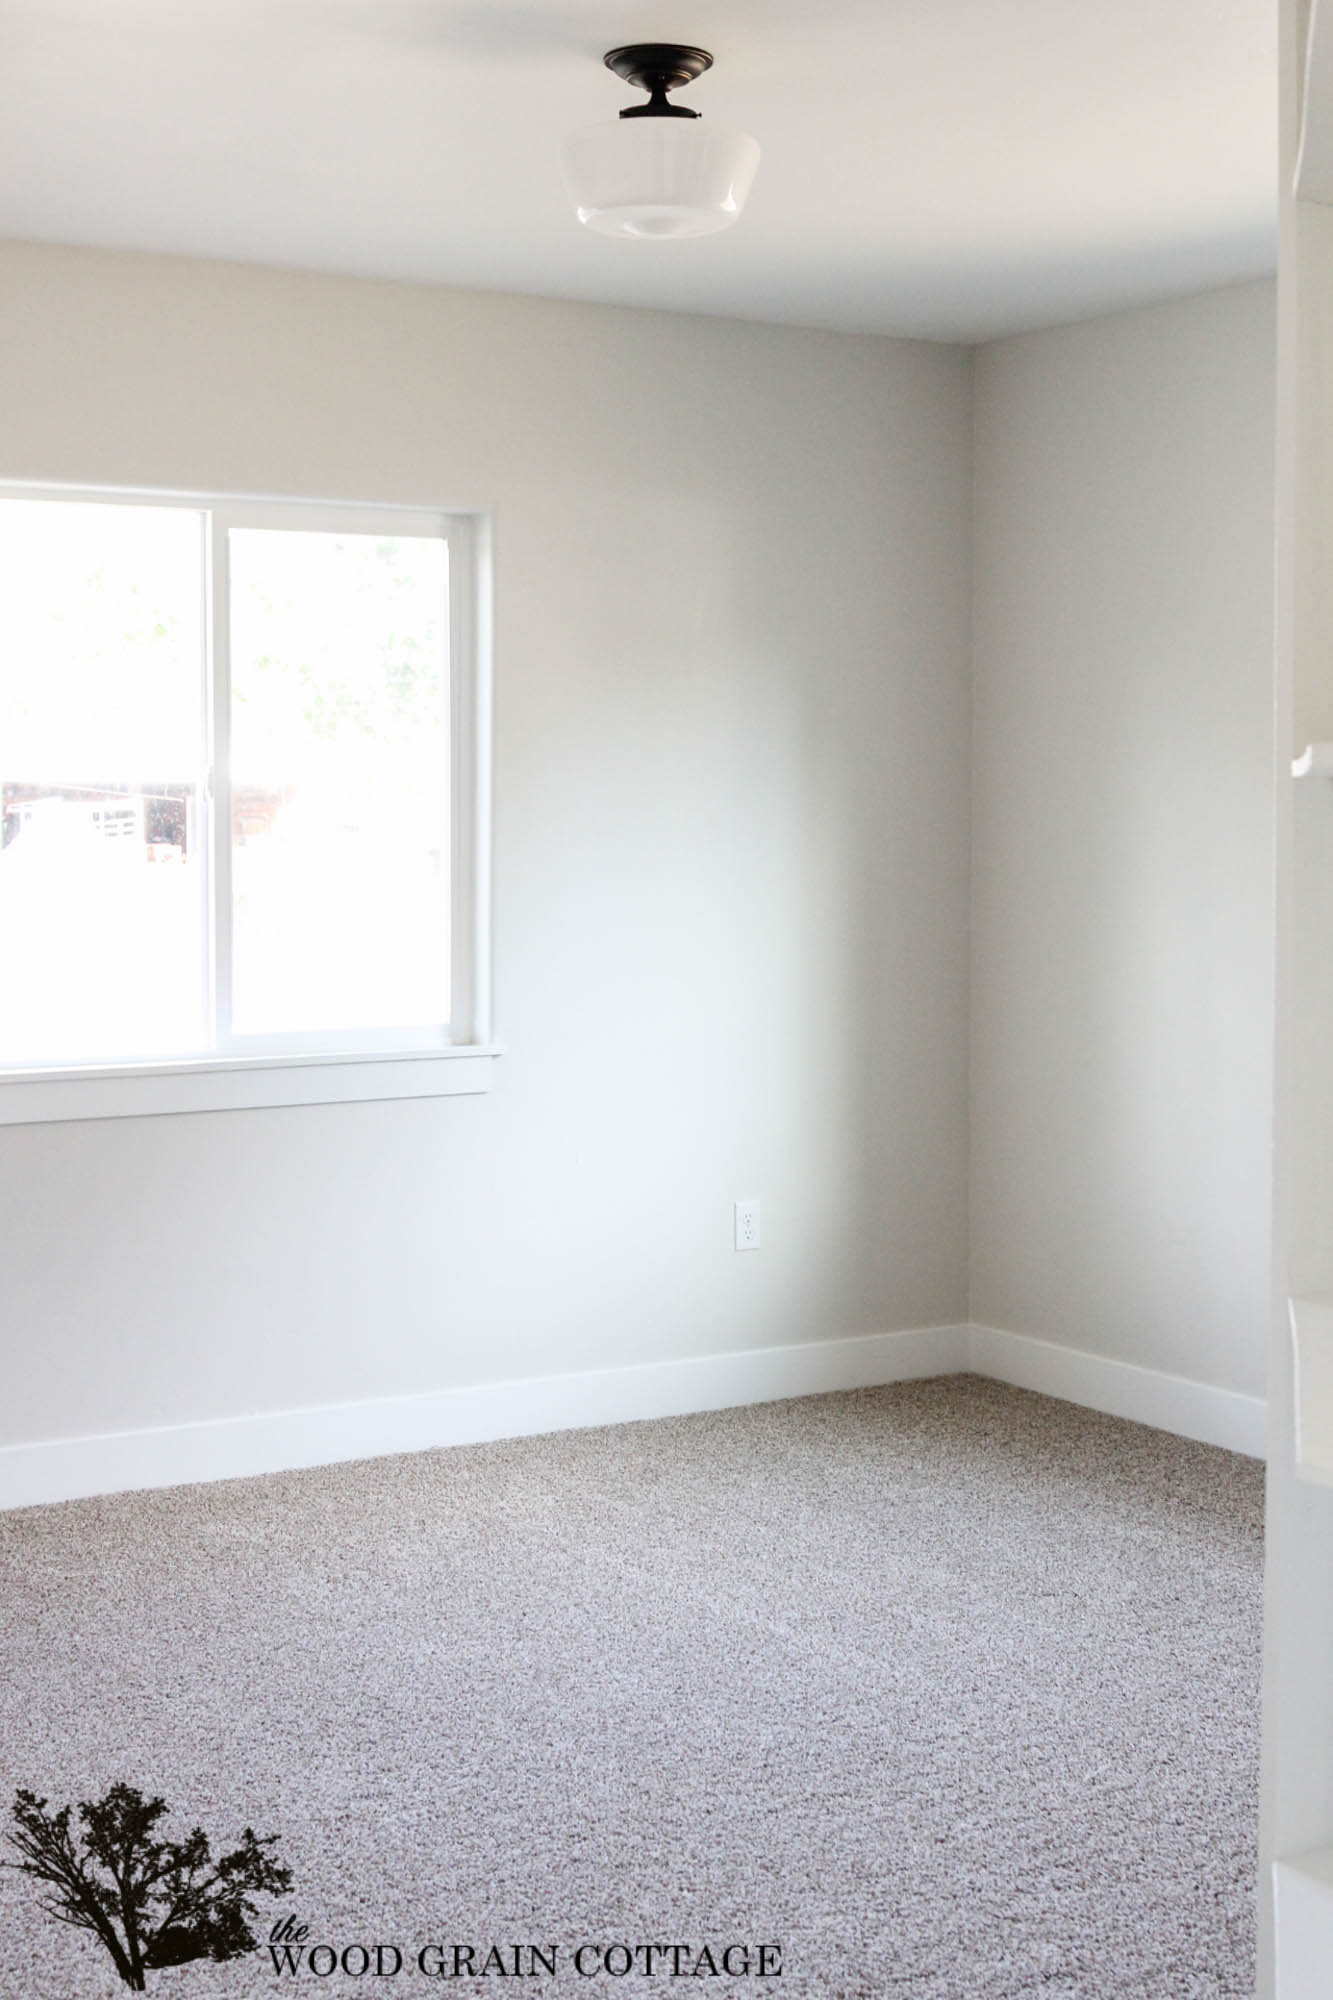
Now for the living room, which is connected to the dining room. We raised the ceiling, added a new door, and made the windows larger. This is a completely different room.
After:


The black door really grounds the space. I love it!
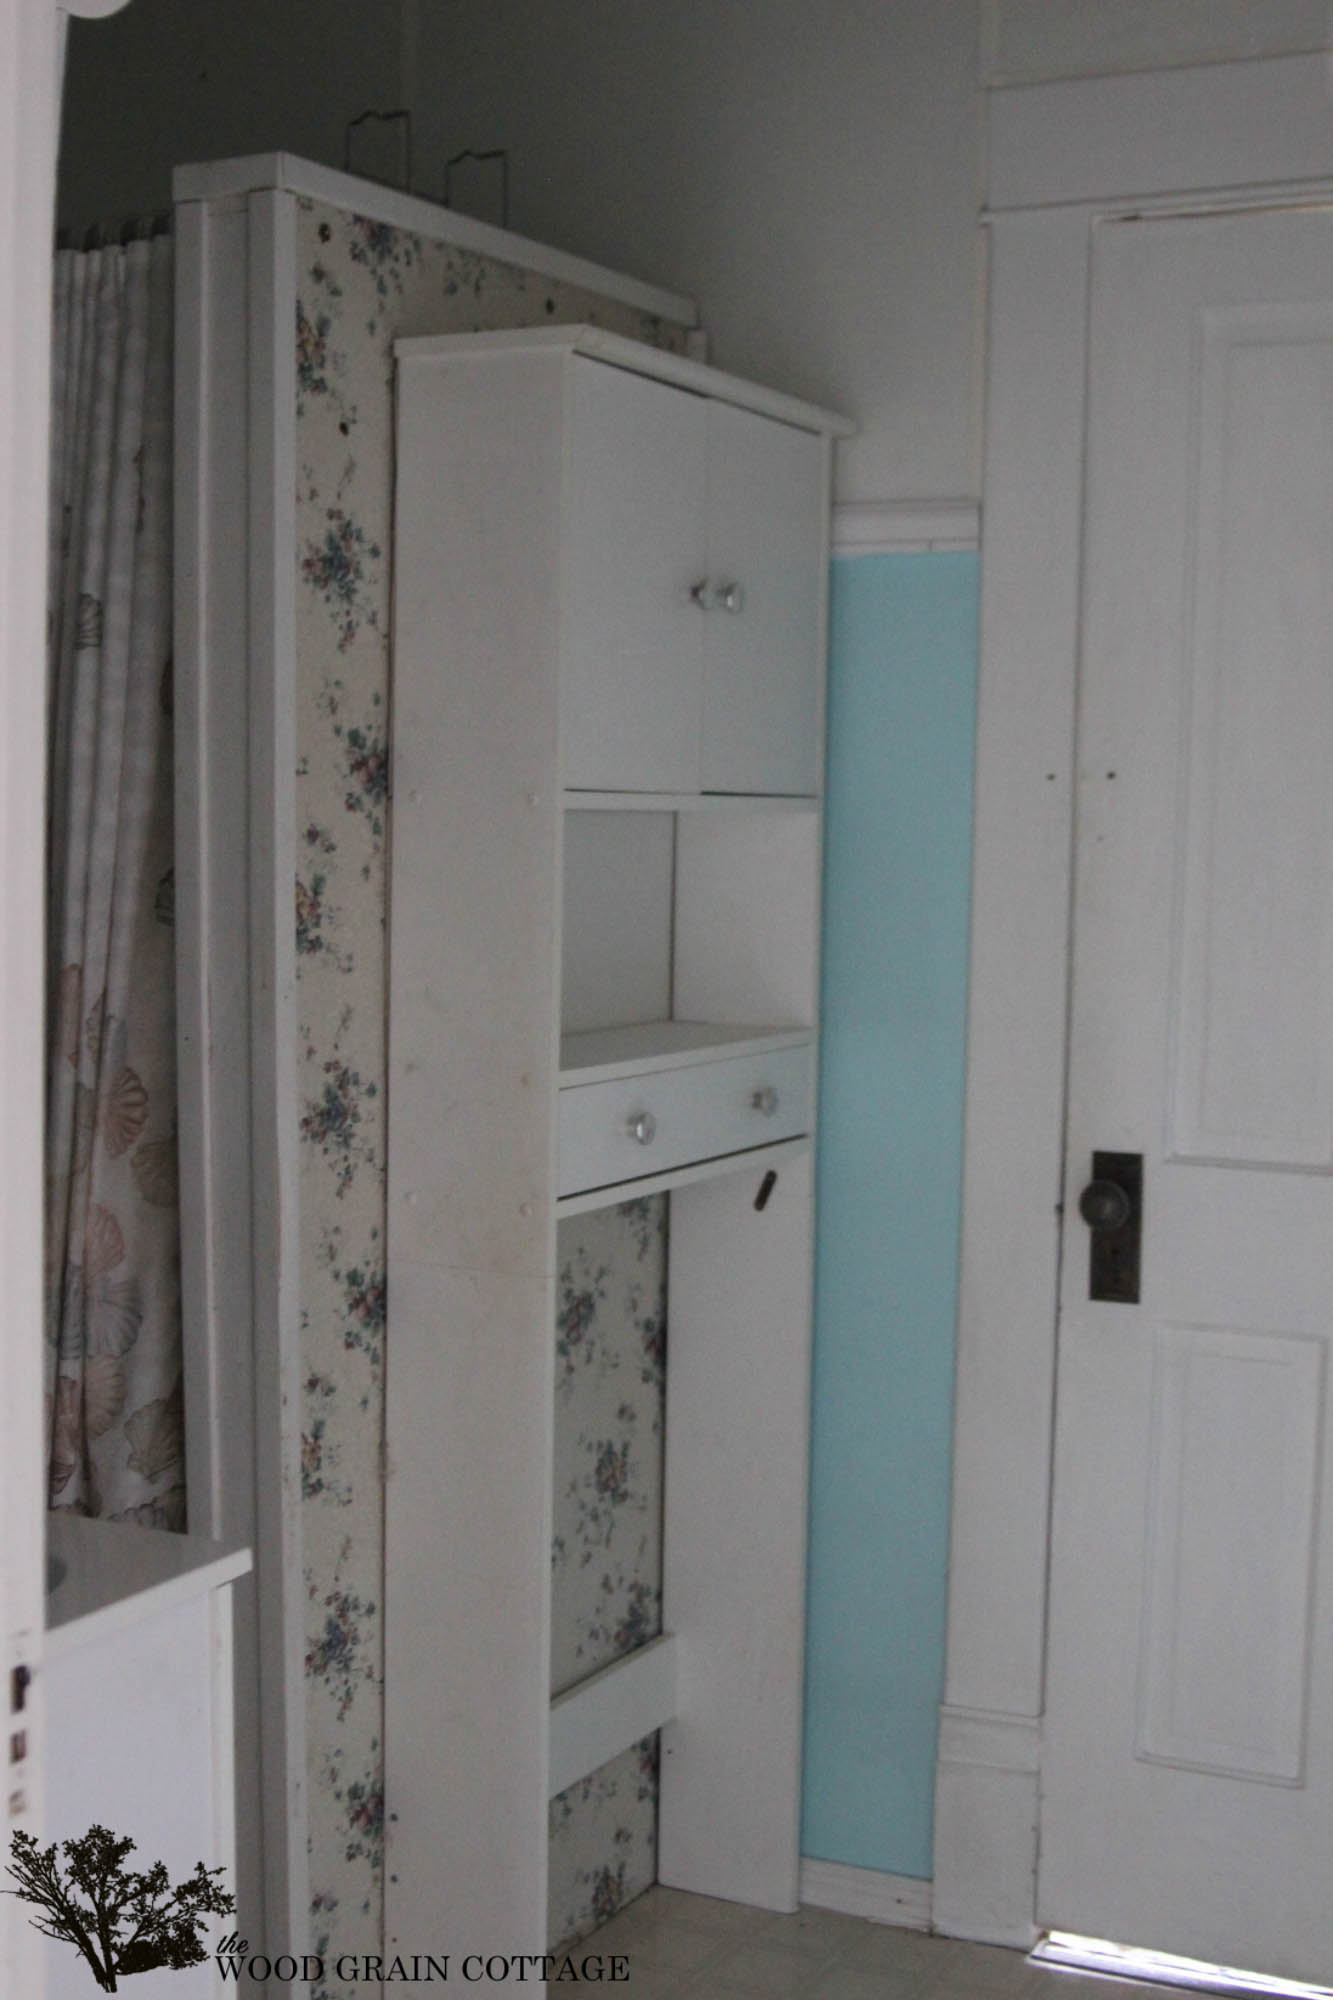
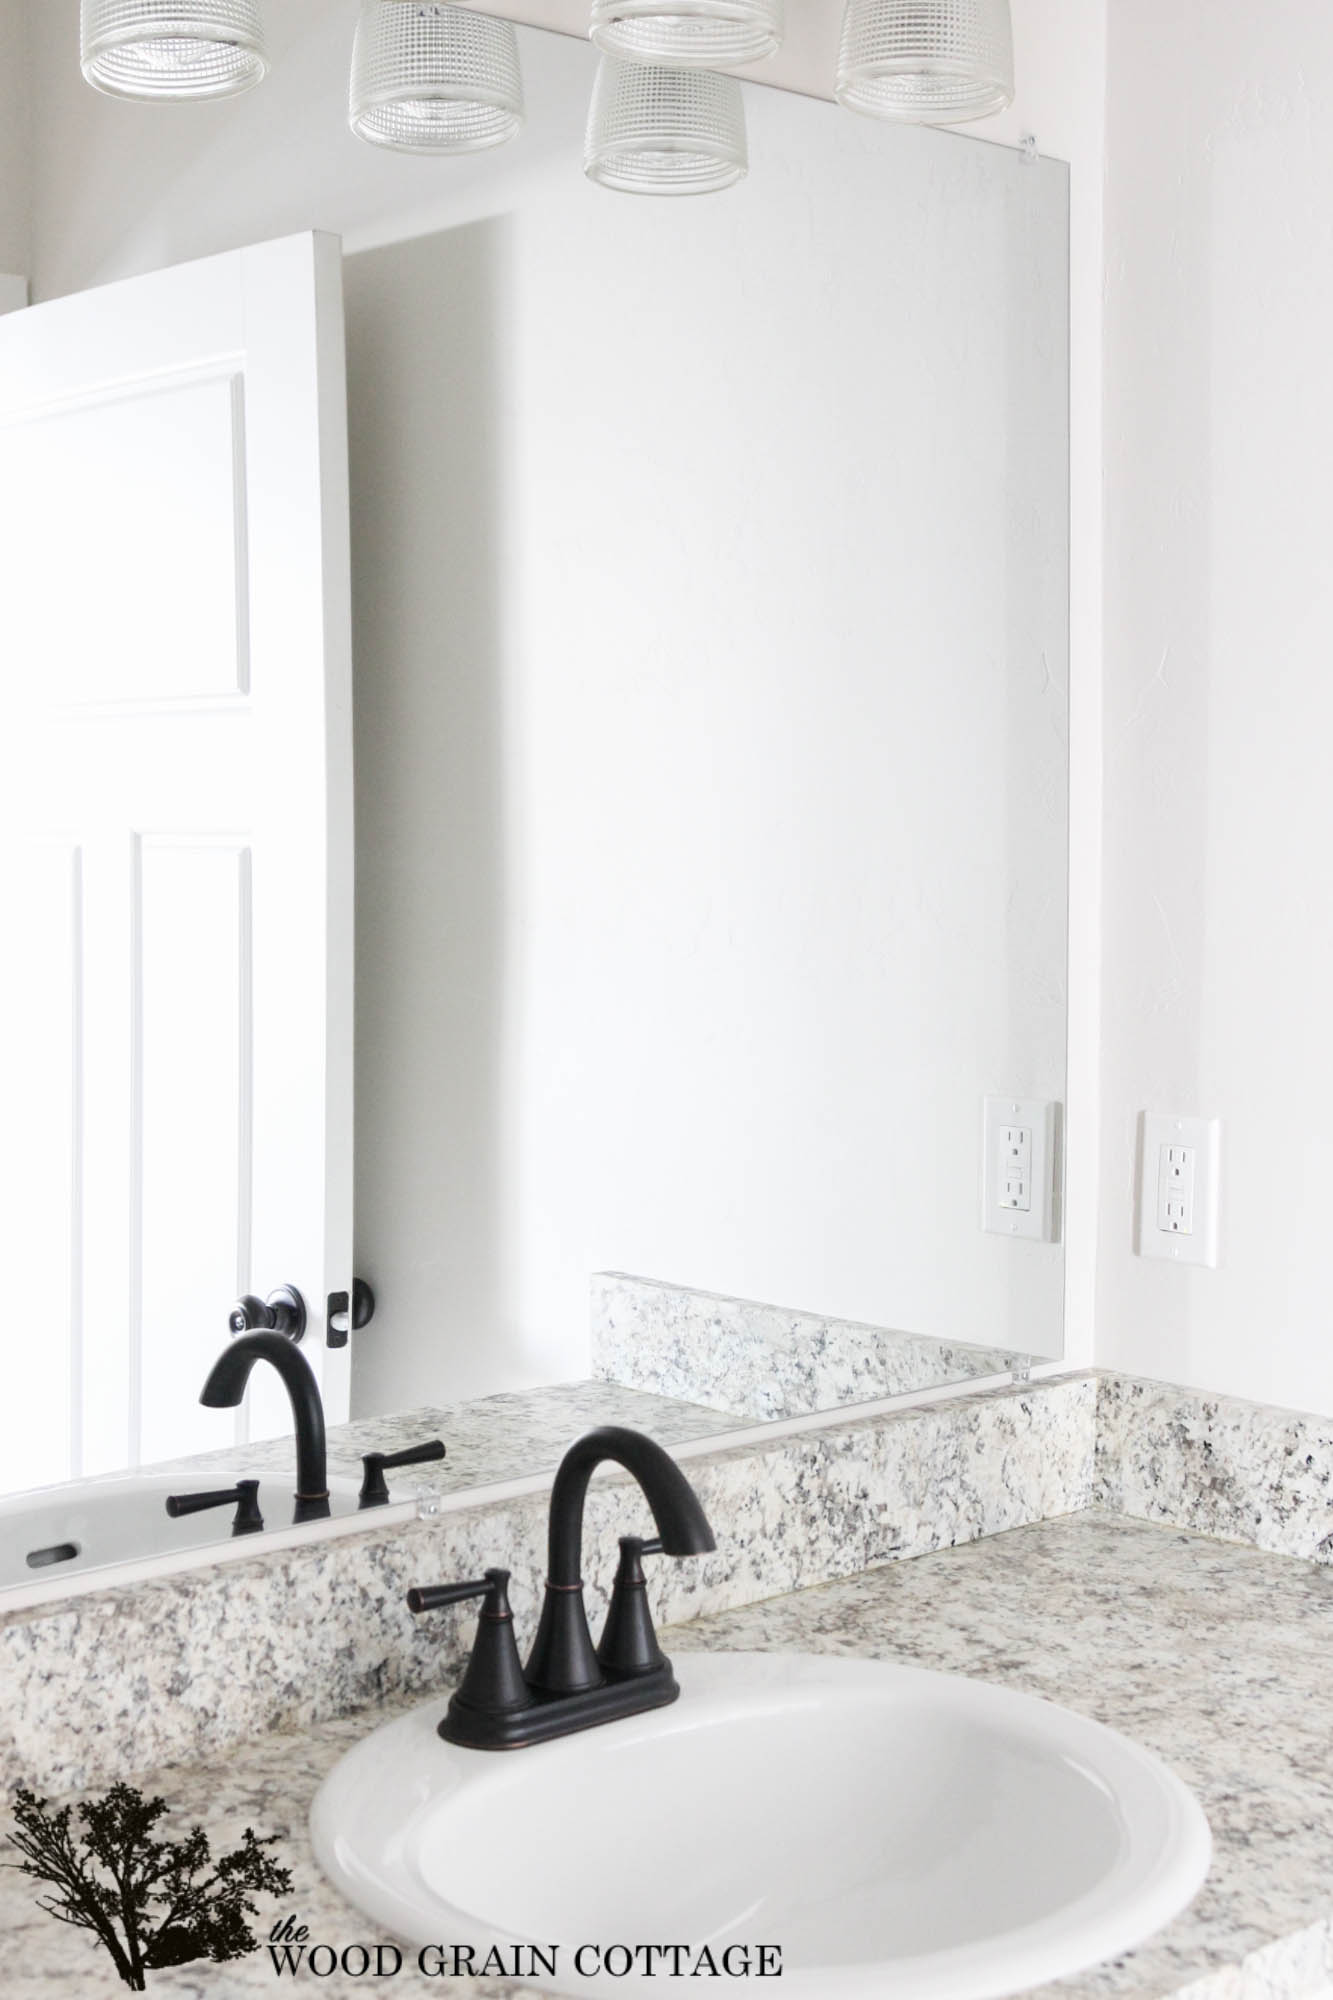
Next, let’s visit the master bedroom and bathroom, which used to be the third bedroom. The room was tiny, and other than adding a third bedroom, it really wasn’t functional for anything other than a small office. And because it was right next to the master bedroom, I decided to knock down the wall between the two rooms, and create one giant room, which later turned into the master bedroom, closet and bathroom. It’s absolutely lovely. I used the same consistency as the other rooms, but tried to keep it it’s own private space. I also rehabbed the original closet in the bedroom. It’s a great piece of history for the house.
Before:

After:

Before:

After:

Before:
After:

Before:

After:


For the bathroom floor, I used the same tile flooring as the laundry room, and just had it laid in the traditional hardwood floor pattern. For the shower floor, I used the same penny tile in the other bathroom. I love the combination.

We also had enough room to add a pantry cabinet to the bathroom. Now, there’s room to store extra towels, soaps, etc.


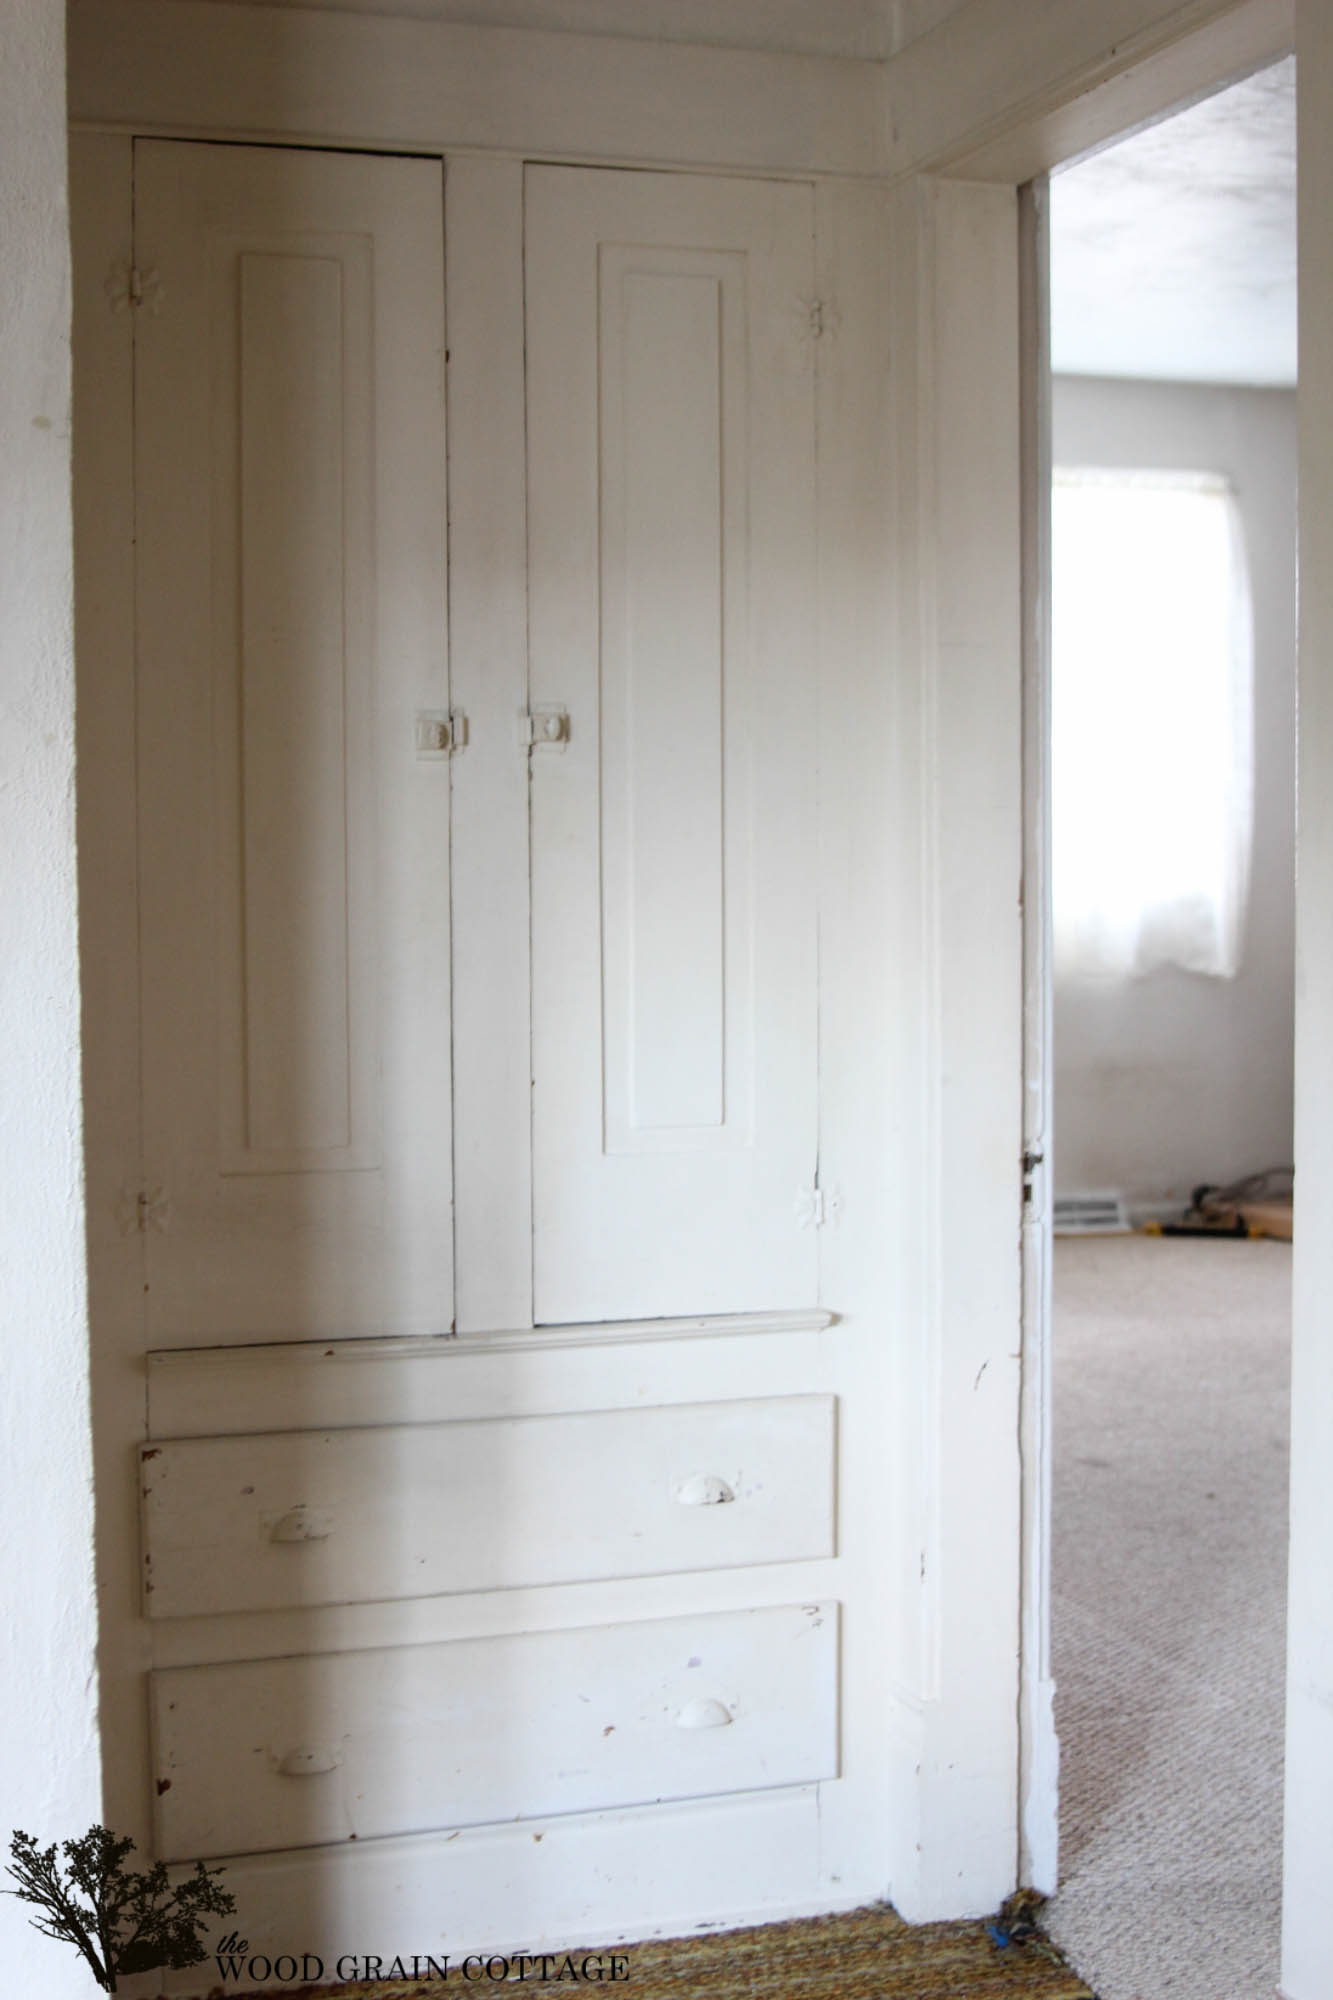
Now, going back out into the living room, you will find the second bedroom. This room received the least amount of work. Other than making the windows bigger and installing new drywall, we left everything the same. It had amazing built-in’s and I didn’t want to change them. They received bead-board to finish them out, then a few fresh coats of paint, as well as some decorative molding for a little bit more interest.
Before:

After:
Before:

After:

The molding on the doors makes all the difference. It really added a bit of sophistication to them. And I love the handles on them…

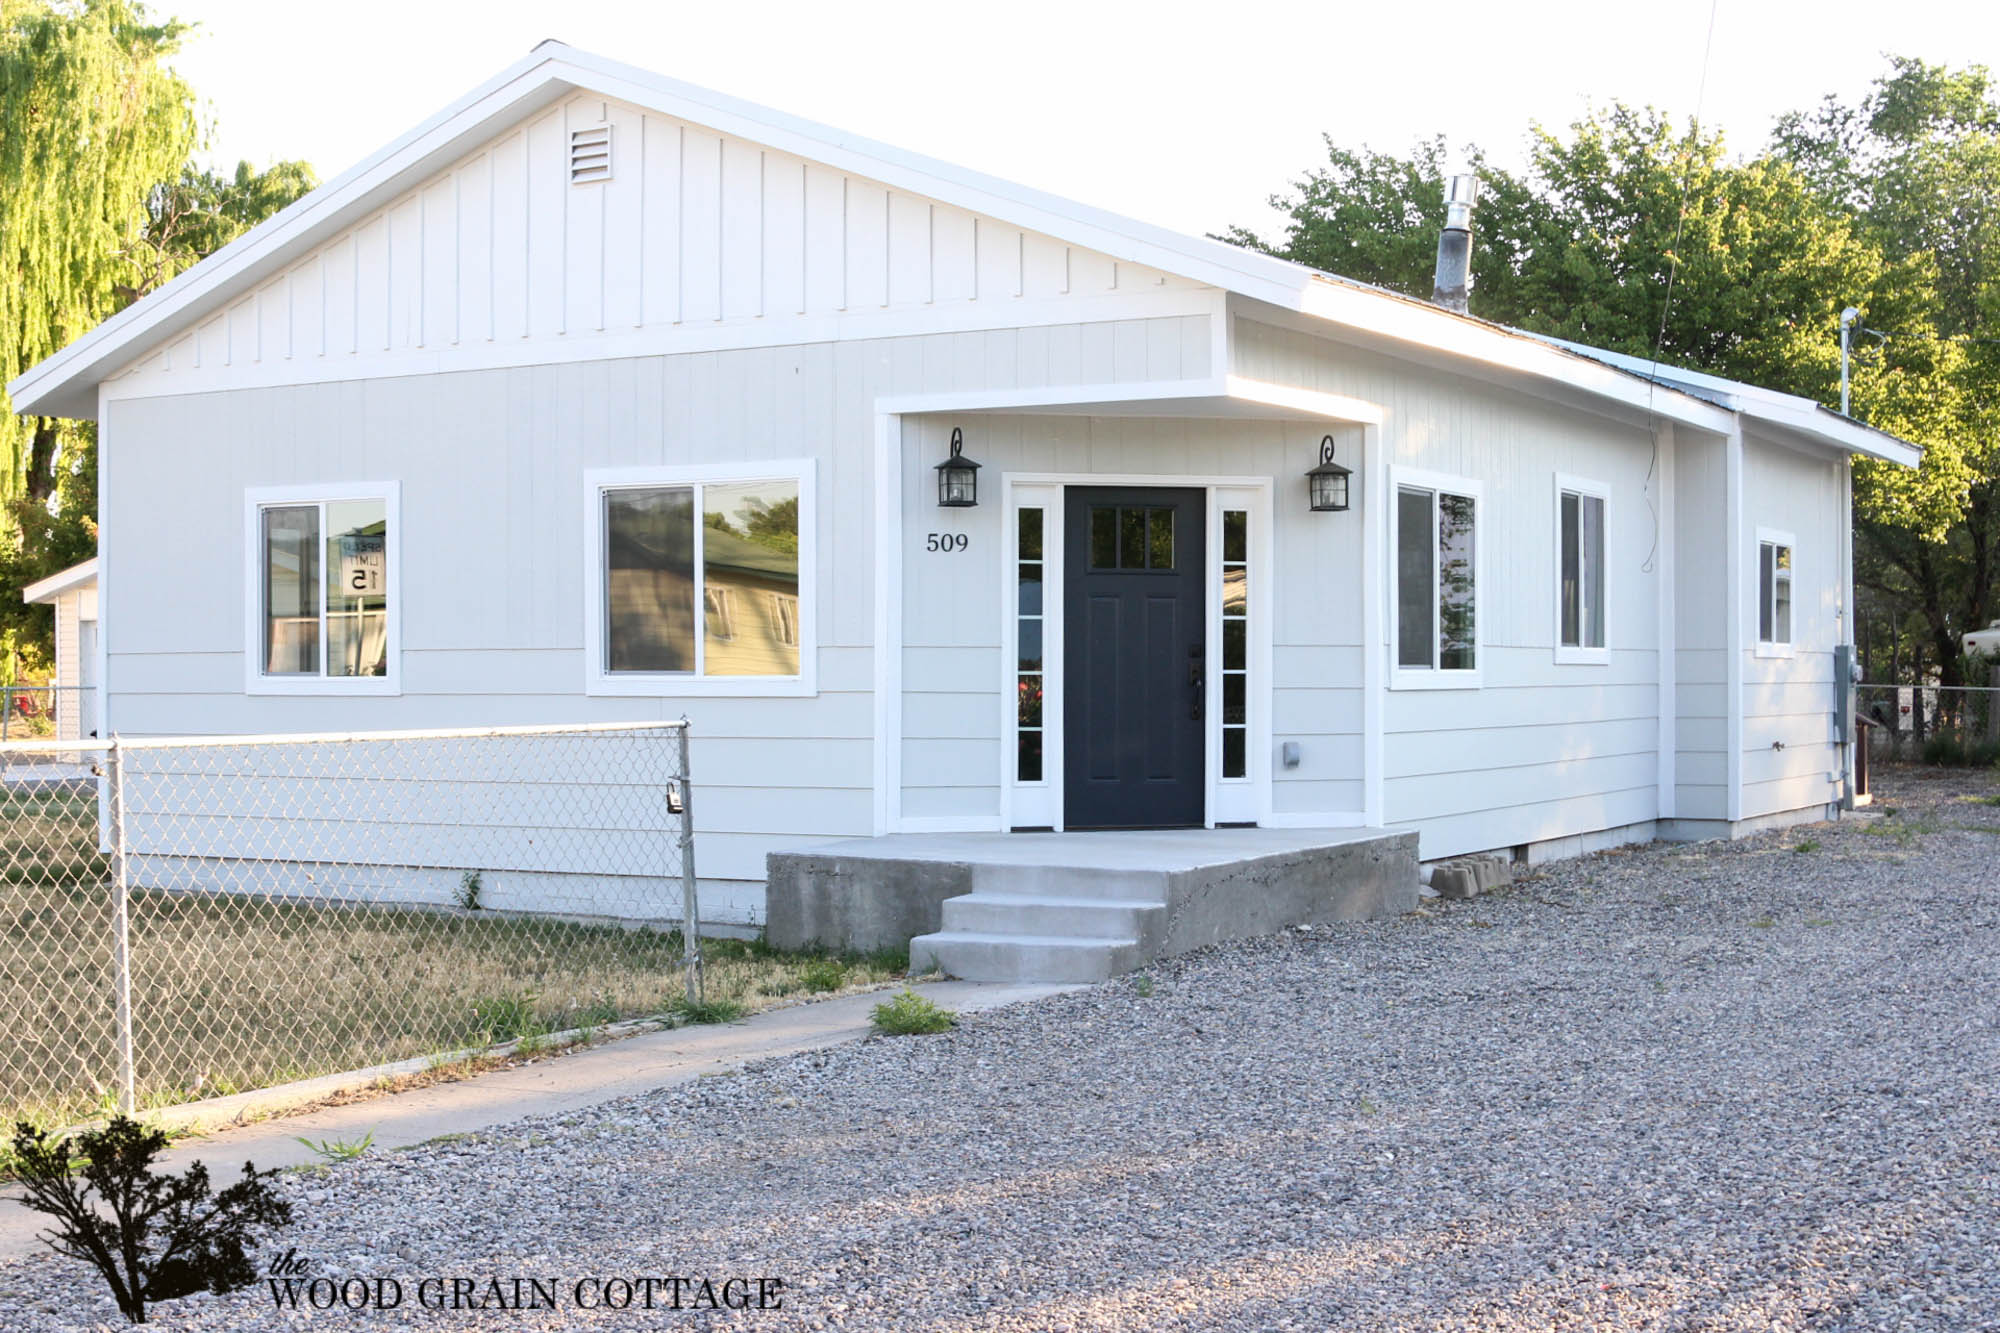
Now for the exterior. I spent a long time deciding on the paint colors. To start, the house came with a baby blue metal roof that was in perfect condition. Other than it being the wrong color, there was nothing wrong with it. So, I embraced it and chose colors that would blend with it. We also tore down the ugly wood deck going into the house, made the front door bigger, added better exterior lighting, new trim work, and loads of caulking and paint. It turned out lovely. I really thought about adding shutters, but it came down to budget.
Before:

After:


And now for the back deck. This was an amazing feature for the house, and it was in relatively good shape. We had to replace a few boards, and add some paint, but that was about it. It’s such a great space for entertaining.
Before:

After:


If there was enough in our budget, I really wanted to add a pergola off the back above the door, but I decided to leave it as is. It would be the perfect place, and it would look amazing. 🙂
So, there you have it! The completely finished, on the market, fixer upper. I put so much time, attention, and love into this house. It was so much fun to see it come to life. When we first bought it, there was such a sad, lonely feeling to the house, but as we started to bring change and fresh ideas, the whole atmosphere changed. Now when I walk in, the house feels happy. I can’t wait for it to have a loving family. And even though I will be a little bit sad when it sells, I can only think back on where it started and how far it came. It’s a stunner!

Next week I’m planning on sharing all of the sources for the items you see in the house.UPDATE:::: Here are the sources!
And I’m also going to share more on my thoughts, the design process and what I would and wouldn’t do again.UPDATE:::: Here are my thoughts!
If you have any questions, leave them in the comments below.
But for now, I’m raising my iced tea and saying cheers. This was one great fixer upper. Until the next…

P.S.- If you want to read more about the different stages of the fixer upper, type “fixer upper” in the search bar.
Oh my God! You did a stunning job! The planning is the most important part and you did a fantastic job. I love how all of the fixtures, doors, counters, tiles and paint all flow and make sense. The black doors are so lovely. Time to give yourself a huge pat on the back! 😀
Agreed! I love it!
Nice!! Where’s the rain gutters on the right side of the house? How does the water flow off so it doesn’t pool next to the house?
Did you use granite in kitchen & bathroom? Looks a little like my granite ( typhoon something?)
Absolutely stunning! You did a wonderful job incorporating old and new. Wow!
I love the towel rack and hooks you put in the bathroom. Can you tell me where you got them from?
Thank you,
Mindy
Give mme details on the bathroom floors.
What am I asking for at the flooring store exactly.
Is the tile ceramic?
Would it work with bead board walls??
Lovely job but I am not surprised!
I was checking my email “real quick” and I couldn’t not click over 😉
BRAVO… on the vision and attention to detail.
It’s going to be someones beautiful new dream home.
Absolutely beautiful!!!!
Woooooooaaaaaaahhhhh! I WANT this house! You guys did a stunning job! I love the tile and lighting and black doors. Makes me wish I lived closer to buy it.
What a stunning job!!!! The house is Absolutely beautiful. The new owners will have a beautiful home….
This is a beautiful home!!! The front door is a looker and the floors are gorgeous. I would love to know what you use on the stainless steel to get that shine. I hope your home finds a family that loves their home.
Wow, it looks fantastic! You had a great vision and really carried it so well throughout the whole home with finishes and the structural changes/fixes. Someone will be very lucky to own that lovely home and the neighbours will most likely appreciate the fresh new exterior too.
Amazing work! I love the addition of the island and all the little details like the hooks in the bathroom. Such a great use of the space and lighting!
i would like to know what you used on your faux shiplap wall or how it was installed, the one in the kitchen across from the island
Absolutely beautiful. Love seeing a real fixer upper! I would like to know the brand and size of fridge you used?
WOW!! A great job!! very well done and I am sure you will have no problem at all flipping the property or renting it out! Great ideas and it flows so well. You must love the accomplishment!
What a beautiful job Shayna ~ I love everything you have done to make this house a home.
I wish I lived closer I would be first in line to purchase it.
I love the kitchen its stunning.
Be very proud of yourselves. Fantastic job.
Happy 4th of July
Rose
Nice job! That house was horrible before!!! Love the makeover – that front entry really caught my eye. Amazing!
What a transfermation…amazing. Glad to see you kept some original doors and the built ins look wonderful. I think, no I cannot pick a favorite. I await the furnishing. You should stand back and smile at all the work you have done to this little house!
Shanya,
Oh my! Oh my! Oh my! Now that is a transformation worth waiting for. Every detail is lovely from the hardware choices to the granite to the subway tile. And those black doors on the built-in…stop it! Love every detail. Well done!
Wow! This is amazing, Shayna – you did an incredible job. Your taste is impeccable and you brought this house back to its former glory – or more!
I’m sure it will sell quickly. I can’t imagine someone not absolutely loving it as soon as they walk in the door.
OMG……the house turned out beautiful! You and your hubby did a fantastic job bringing new life to this house. You have such a way of selecting just the right changes to make it look great. Congrats on the awesome job and I hope you find a buyer who will take care and love the house. Can’t wait to see the sources listing and your next project!
I concur with all the other commenters, you two worked some serious magic on this house. Well done you! Best wishes on garnering a fantastic return on your investment. Cheers, Ardith
Amazing!! Love the changes you made!
Such a gorgeous makeover Shayna!
OH MY GOODNESS!!! What a stunning home you created! Amazing transformation, great work
Wow wow and wow!! You guys did an amazing job and you can see your beautiful sophisticated style through out! Very well done!
I would love to see a source list for this home. It is beautiful and the inspiration for re-doing our new-to-us home. Especially the kitchen.
Great job!
WOW. Just wow!
Wow, you guys did an amazing job! I love that you kept some of the original features and the classic feel of the home. It’s beautiful and I’m sure will make some family very happy to call this place home.
You are amazing! You can totally tell that you gave everything so much thought. It is stunning!
Shayna!!! OMG you are amazing! Unbelievable. I LOVE the herringbone in the mud room and every other details. Sharing on my FB page today.
Hugs, Jamie
Great job Shayna! Very impressive remodel with some great choices on the styling. The herringbone floor is awesome.
Oh my gosh Shayna I love what you did with that house! I could move in there and live forever! White and black are perfect I wouldn’t change a thing! LOVE it!
Susan
This is absolutely stunning – I love every bit of it! Great job!
Dear Shayna, I am just floored by the beautiful transformation. Your taste for the perfect changes is impeccable and your vision, so sophisticated. I hope you find the right family who will love it just as much as you do. What a team you and your husband make, as if you had been together for many, many years. I to, am looking forward to your source list. Thanks for letting us all live vicariously through your eyes. Sincerely, Diena
I love it, absolutely beautiful! Did you replace the kitchen cabinets or only the door ? Do you have post on other houses you. Have flipped ? Excellent job ! Thank you for sharing. Delia, Abilene, tx
Love the bathroom! What color grout did you use? Is it grey?
Love the subway tile! What is the name of the grout color that you used?
What are the measurements for the shower stall?
Beautiful! What color grout is your kitchen backsplash and bathroom??
Thank you! I believe the color is Delorean Gray from Home Depot. 🙂