
Easy Driftwood Mirror
See how I made my own easy driftwood mirror in this simple, easy to follow tutorial. The result is a beautiful mirror!
Can you guess what today is?
Yes, it’s Thursday. But it’s not just any Thursday. It’s $30 Thursday!

Get excited!
For this round, I grabbed a whole heap of inspiration from one of my (& your) favorite projects in May. The driftwood wreath.
My name is Shayna and I have a serious, life-altering addiction to driftwood. Heaven help me.
The texture. The texture. Yowza!
Here’s what I came up with this time:

I’m telling ya. It’s a life altering addiction… Especially when it looks this good! And, you won’t believe how easy it is!
First, I started with a really large mirror. It came with a dresser I bought a long time ago, but I knew it would come in handy one day!

My main issue has always been how small the frame is for the mirror. It looked super plain. And I wanted more of a statement mirror.
Enter in: driftwood. Here’s how I made it, and what I used.
Easy Driftwood Mirror
Please note: Some of the links in this post are affiliate links, which allows us to make a small commission from your purchase, but your purchase price stays the same. Thank you for helping support our blog! We greatly appreciate it!
Project Supplies:
- Driftwood, I found my own, but this is similar.
- 2″ Painters Tape
- Hot Glue Gun
- Glue Sticks
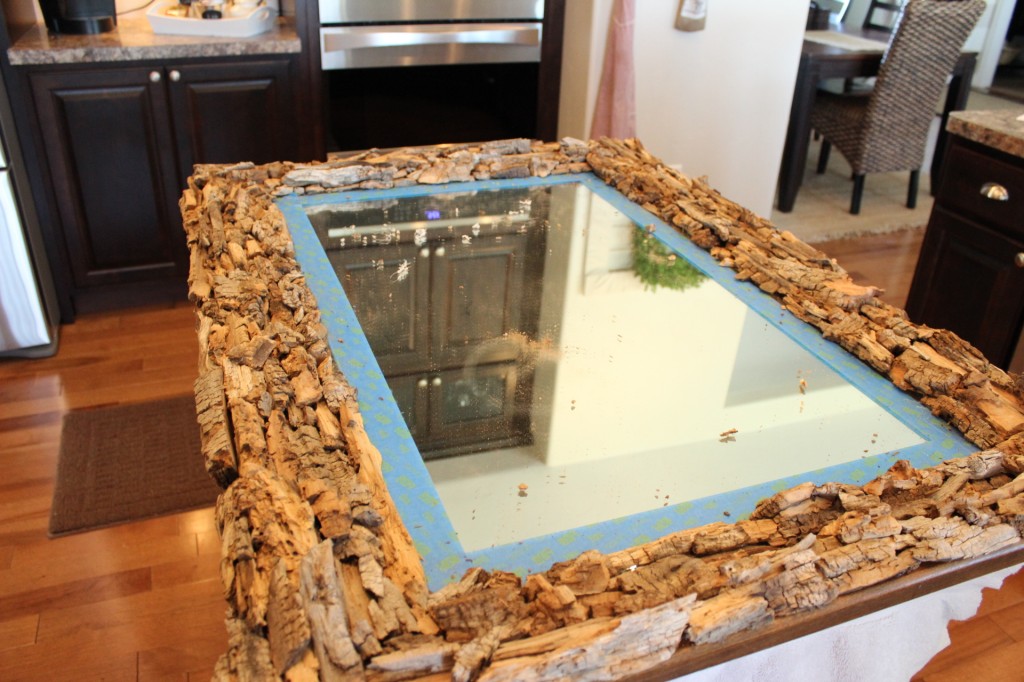
To create the new “frame” I measured 4 inches from the edge of the existing frame and ran tape along each edge.
This gave me a perfect border:

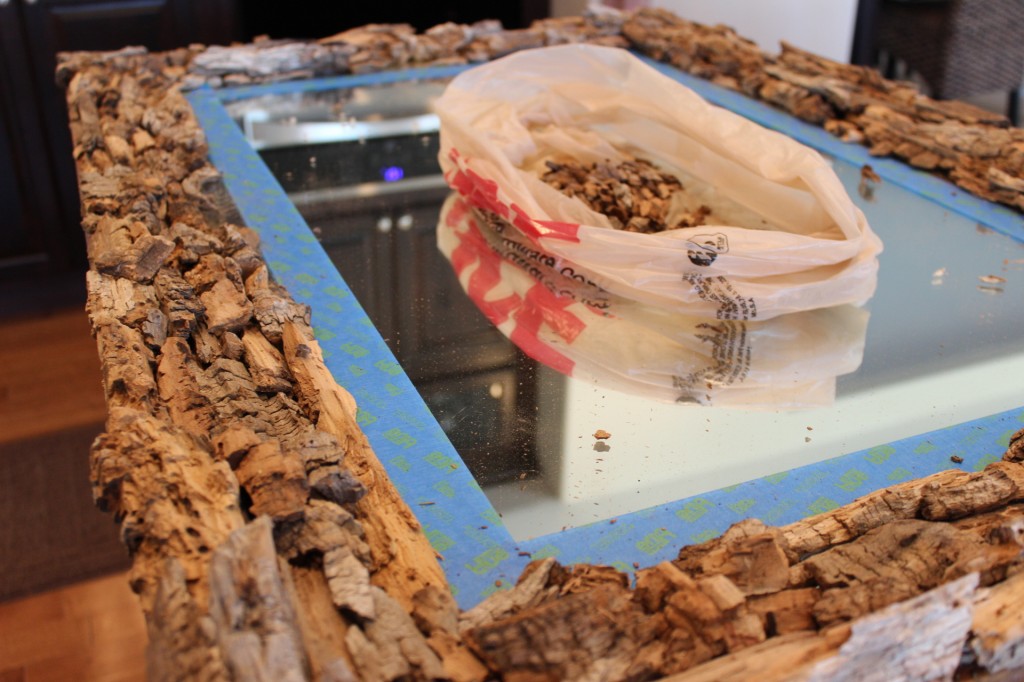
Then, I just started hot gluing driftwood pieces to the mirror and existing frame.

I started at the bottom and worked my way up the sides. I made sure not to glue any of the pieces to the tape since I needed to remove it later.
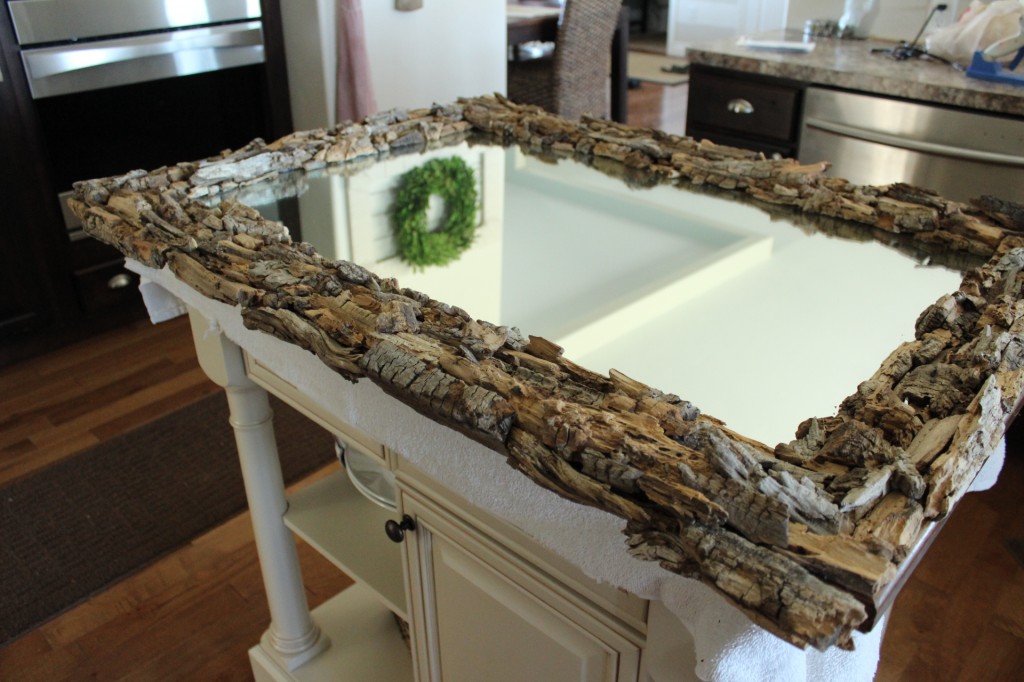
With the top covered, I started on the sides.
Seriously, a cordless glue gun is so handy and makes this a piece of cake! Totally worth the extra money. And the hotter the glue, the better!

Because this mirror is ridiculously heavy (seriously), I didn’t want to cover the bottom. I didn’t know how well the driftwood would hold up with the mirror constantly sitting on it, so I left it with the original frame. Since the mirror is so heavy, I plan on only propping it up against the wall. If I did want to hang it, then I would’ve put driftwood on the bottom too.
I removed the tape and cleaned the mirror.
See? It really was easy!
And my favorite part? It could totally pass for a mirror in a really high end store. It’s that pretty!
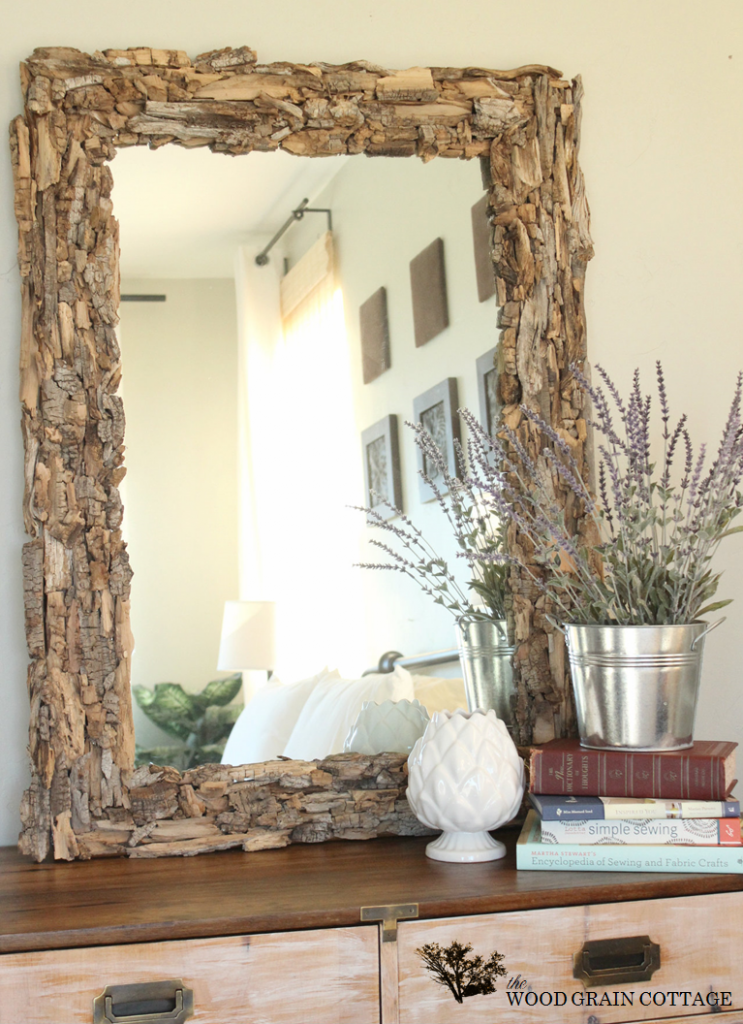
Gah! Look at that texture!
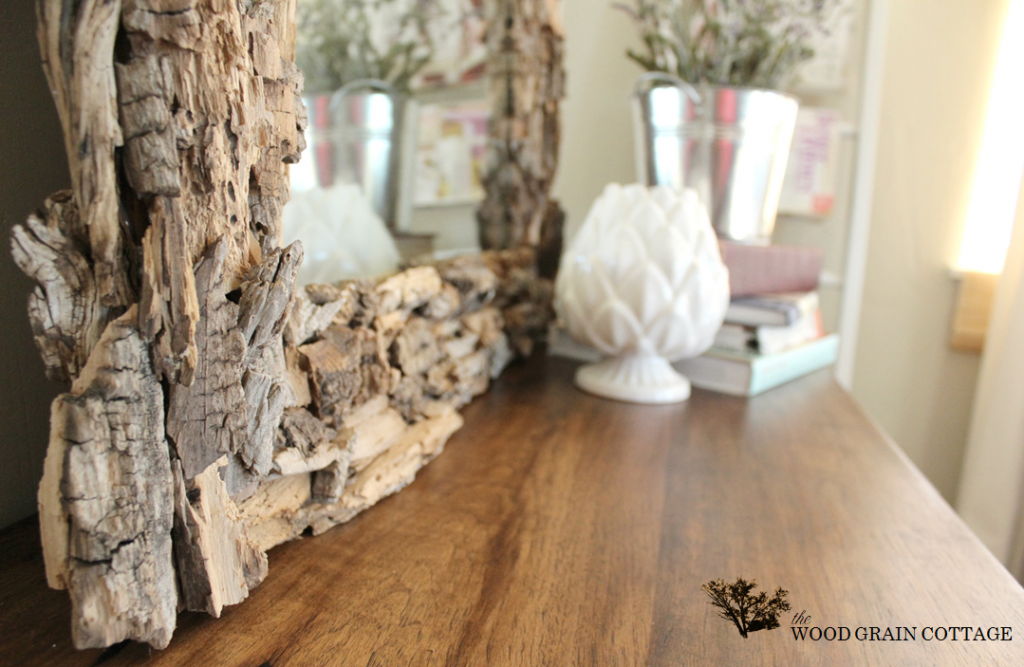
Seriously. I’m in love.

It’s the perfect addition to our bedroom, which seems to always gets the leftovers… I’m bad like that… but I’m totally changing my ways! You’ll see!
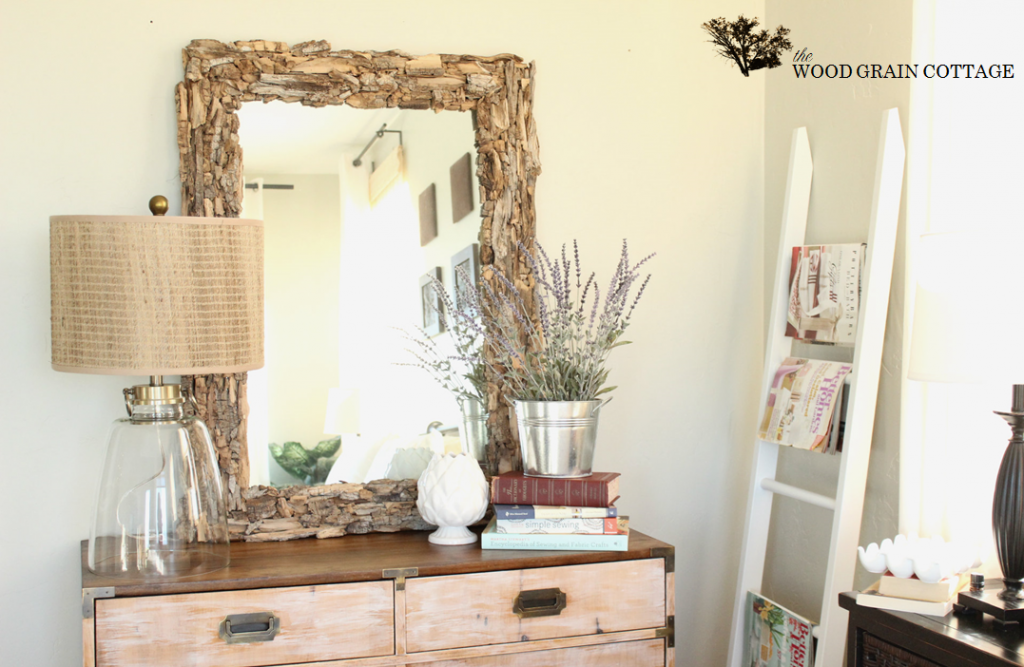
I’m happy to report that this side of the room is looking so much better.

It’s a beauty!
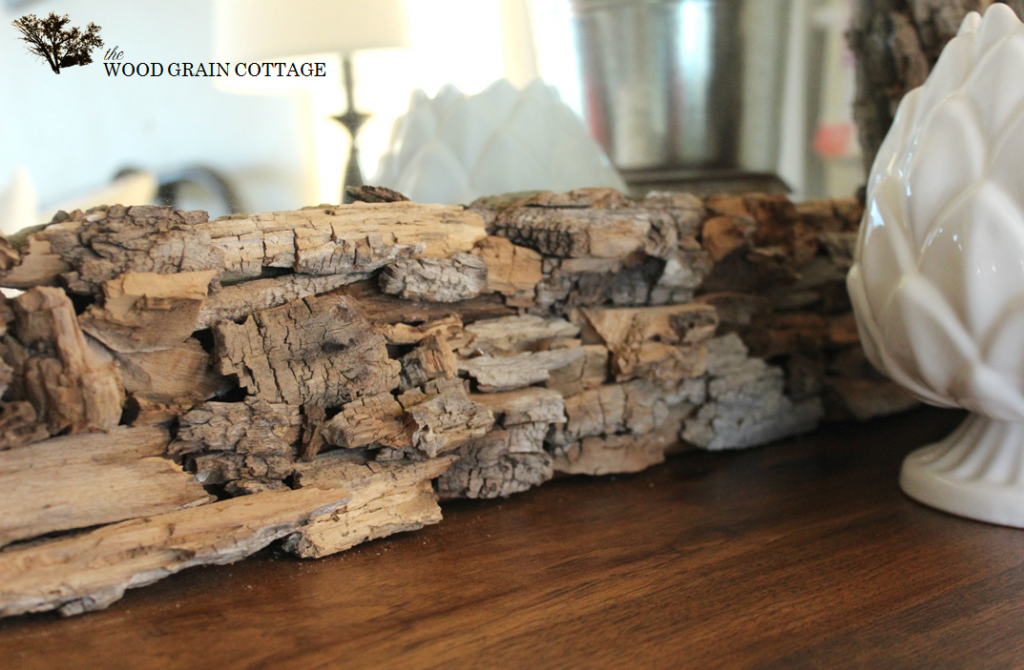
Goodness!
I just love, love, LOVE it! And again, the price couldn’t be better… FREE! I had everything on hand, including the driftwood.
I can’t wait to spill the beans about the dresser too!
___
And now, here are April & Jen’s fantastic projects!
Just look at April’s new towel rack. It’s fabulous and soo cost effective!
And Jen did a terrific job reupholstering this lovely chair. Isn’t it stunning?!
And there you have it! 3 new projects that you can do for $30 or less! Make sure to follow our joint $30 Thursday pinterest board. It’s growing to have quite the collection of great and {affordable} projects!
So, are you inspired yet? I know I am! See why I love $30 Thursday?
Pssst… In case you’ve missed any of my past $30 Thursday projects, I’ve listed them below.
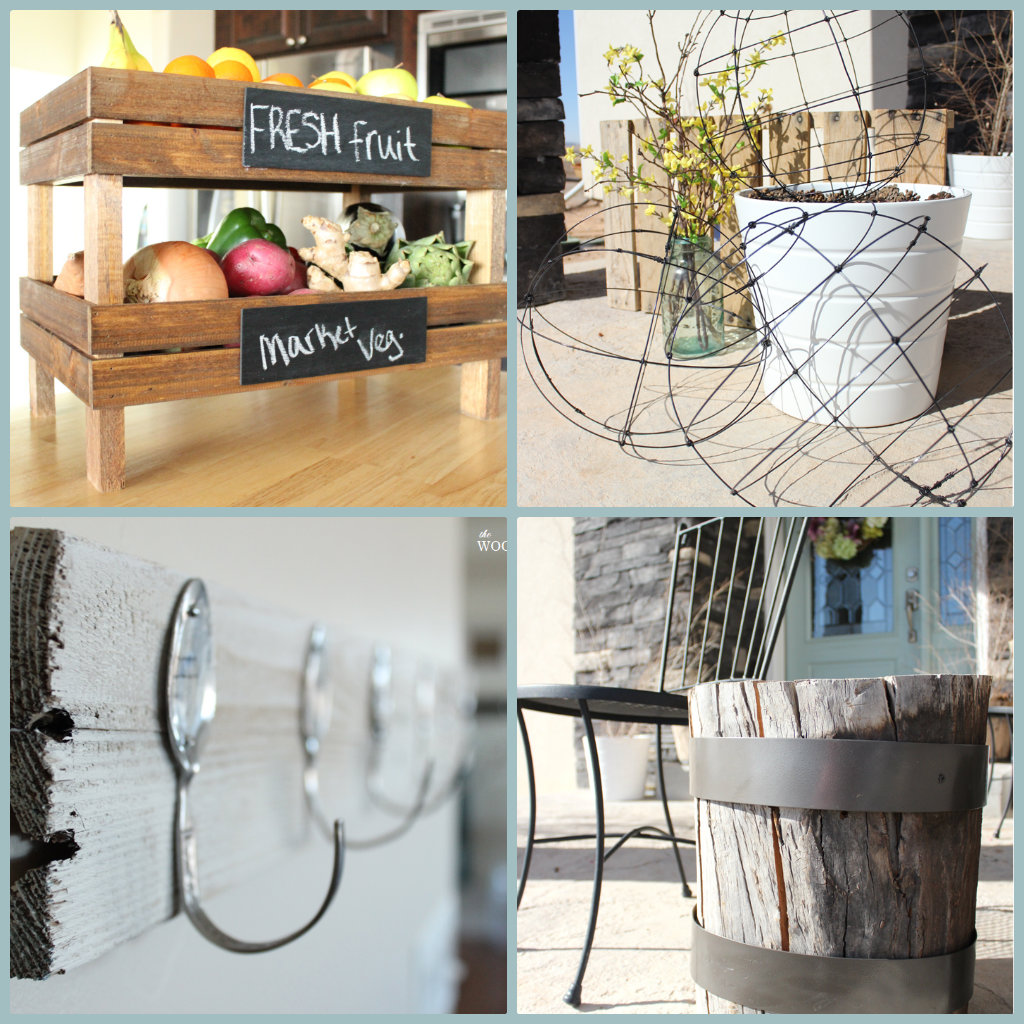
DIY Stackable Fruit Crates // DIY Garden Globes // Spoon & Pallet Hook Rack // Split Stump Side Table
Your mirror is beautiful! I love the driftwood and the impact it makes, fabulous 🙂
xo, Tanya
THANK YOU so much Tanya! I simply love it! 🙂
-Shayna
OMGness!!! Gorgeous…absolutely gorgeous! Nicely done Shayna.
I’d say June is off to a great start, with this dreamy driftwood creation!!!
Blessings,
M
THANK YOU so much, M! You’re too sweet! 🙂
-Shayna
Hi Shayna,
This is the first time I’ve visited your blog and I must tell you I absolutely love it! You’re projects are all what I would love in my home. Beautiful job on the mirror. Don’t be surprised if one pops up on my blog. One question-where did you get the drift wood? I found you through your link on House of Hepworths. Happy Day!
HI Kimberly! I am so happy you found me! Welcome to the WGC! 🙂
I get the driftwood from my aunt and uncle’s property. They own a ranch with river access and it’s all over! You can read more about here:
https://www.thewoodgraincottage.com/2013/05/29/driftwood-wreath/
I’m so happy you like the mirror- please send a picture when you get yours done! 🙂
Hugs!
-Shayna
Where do you get the driftwood?
Hi Vicky! I get the driftwood from my aunt & uncles property. They own a ranch with river access and it’s all over! You can read more about it here:
https://www.thewoodgraincottage.com/2013/05/29/driftwood-wreath/
Hope that helps!
-Shayna
This is my first time to your blog and I absolutely love it! Your projects are beautiful and I love your sense of humor! So nice to meet you!!~~Angela
Welcome to the WGC, Angela! So happy to have you! 🙂
-Shayna
June is starting great for you my friend! Love, love how you made this mirror so pretty! you did a great job! it’s beautiful! & love the pictures too! 🙂
Hope you will have a great weekend!
Awe- INGRID! THANK YOU so much pretty lady!
Have a superb weekend! 🙂
-Shayna
Absolutely LOVED this mirror! You were featured at Give Me the Goods Monday! Head over to check it out and grab a button: http://www.rainonatinroof.com/2013/06/give-me-goods-monday-features-11.html
Jenna @ Rain on a Tin Roof
How exciting Jenna! So happy you loved it! 🙂
-Shayna
Unbelievable!! You always do such amazing work.
Jamie @ somuchbetterwithage.com
THANK YOU Jamie! What a lovely comment! 🙂
-Shayna
Really really love that mirror. Fabulous job.
THANK YOU so much Kim! That makes me really happy!:)
-Shayna
Love it! I’ve seen those before and always loved them. They can be hard to find in a store. I like that you were able to make it with materials you already had on hand! It looks great in your bedroom!
THANK YOU so much Kelly! You’re right, these can be hard to find in stores, luckily I had all the materials at my fingertips! 🙂
-Shayna
I love this mirror!! You did an amazing job on it!! I am totally going to copy you and try to make one. We live in Florida and when we go to the beach I always collect the small (or large) pieces of driftwood. Thanks for the inspiration!!
Awe- THANK YOU so much Vickie! I hope you do make your own! You’ll love it! 🙂
-Shayna
I love driftwood, and I love your mirror! This really is fabulously done! So glad I found you at Savvy Southern Style 🙂
Awe- THANK YOU so much Kerry! I love driftwood too- and it changed this mirror for the better! 🙂
So happy you found me too! 🙂
-Shayna
This is just beautiful!
THANK YOU so much! I’m so happy you like it! 🙂
-Shayna
SUPERB!!!!!!!!
THANK YOU AND CONGRATULATIONS.
ANA (PORTUGAL)
THANK YOU so much Ana! 🙂
-Shayna
Freaking gorgeous!! You are one of favorite blogs to follow! PS…I could use an 12in piece of driftwood to put some hooks on for my dog leashes…got any lying around..LOL! Have a great weekend.
THANK YOU so much Consie! I’m so happy to have you as a reader! 🙂
If I find a piece of driftwood like that, I’ll be sure to let you know! I know you’ll put it to good use!
Have a great weekend!
-Shayna
love your mirror and i would love to feature it, please let me know if this would be ok
lauren
THANK YOU so much, Lauren! I would be happy to have you feature it on your blog! 🙂
-Shayna
great ill let you know when i post it, thanks again
lauren
Beautiful mirror. Here is a suggestion since I had a problem with hot glue staying on in the heat: adhere your driftwood with hot glue but back it up with another glue such as E6000 and in the event the mirror is in a hot environment, the wood will not fall off. I made my daughter a shell mirror once and used hot glue and when we returned from vacation many of the shells had fallen off b/c the A/C shut off during an electrical failure. So now, whenever I make something like this I always use two kinds of glue. Hot glue for that quick adhering and a stronger glue that is not affected by heat for durability. Hope this helps. Clare
THANK YOU so much, Clare! You have a fabulous suggestion! Luckily, I haven’t had any problems yet, but if I do I’ll try it your way! 🙂
-Shayna
I absolutely love the mirror! I am wanting to make one similar to this. Thanks for linking it up to my party. I am featuring it in my next post.
Thanks!
THANK YOU so very much, Traci! I’m honored to be included in your highlight feature post! 🙂
-Shayna
LOVE this! If only I had access to driftwood… So smart, and so high end! Well done!
THANK YOU so much Jenny! I love it too! I hope you find some driftwood! 🙂
-Shayna
Hi there 🙂
I found your blog via google and think it’s awesome !
I live in Auckland, New Zealand and decided to take up crafts (really just an excuse to keep busy whilst my kids are at Preschool) Haha, anywho. I’m currently trying to recreate your driftwood mirror which looks fantastic. Driftwood was easy enough to find at every beach around here and I bought a cheap $10 mirror from the Warehouse (similar to Target). I started hot gluing half of the frame and left it for the night. This morning I went to finish it off and realised that some of the pieces had come off 🙁 Do you have any tips for making them stick better? I was thinking about looking at using Gorilla Glue to double bond the Driftwood but I’m not fully sure if it’s a good idea.
Hi Ella! I’m so happy you found my blog! Welcome to the WGC! 🙂
I’m thrilled you are making your own driftwood mirror, but I’m sorry to hear your driftwood pieces have fallen off…. I used my hot hottest hot glue, which gets really hot, and none of my driftwood pieces have moved. Do you have a high or low heat glue gun? If your driftwood pieces are bigger in size, a low heat glue gun might not work. You could try Gorilla Glue, but I would test it on a few pieces before doing the entire mirror.
I hope that helps! 🙂
-Shayna
Oh this is beautiful!!! pinned it!
THANK YOU so much! Thanks for pinning too! 🙂
-Shayna
http://westfurniturerevival.blogspot.com/2013/07/revival-monday-119.html
you can check out the feature here, hope you like it and thanks again
lauren
THANK YOU so much for the feature… I love it! 🙂
-Shayna
Shayna – just saw this on Pinterest and I love it. I’ve been searching for the perfect driftwood, but Arizona doesn’t have much running water to make finding it very easy. ; ) I’ve been looking online to purchase, or at hobby/craft stores and am coming up empty. I envy your running river water. Maybe you could collect and sell yours? I’ve seen the most beautiful high end art pieces made of small very smooth pieces and I’m still searching. This is a beautiful project – I hope you are still enjoying it. I’ll be reading your blog here on out!
THANK YOU so very much! I am definitely still enjoying it! I’m sorry that driftwood is so hard to find… If we ever get to a point where we can sell it, I will let you know!
So happy to have you as a new reader! Welcome to The WGC! 😀
-Shayna
Absolutely love your mirror and have an old mirror that I plan on upcycling and creating a Driftwood masterpiece! Thanks for the inspiration and tutorial x
THANK YOU so much, Ashlea! I’m so happy that you’re inspired to create your own! We still love ours! 😀
Enjoy!
-Shayna
Heres the link to my mirror and how it turned out – its the talking point of my home when you walk in, I love it! http://www.glamourcoastalliving.blogspot.com.au/2014/01/driftwood-art-my-diy-driftwood-mirror.html
THANK YOU so much for sharing your mirror with me, Ashlea! It turned out absolutely wonderful! 😀
This is so incredible! My husband and I are moving into our first home and I’m planning on doing this to our master bath mirrors. Where do you find your driftwood?
THANK YOU so much, Samantha! Your master bath mirrors will look fabulous! I get my driftwood from my Aunt and Uncle’s ranch. They have river access and it’s all over. 😀
Hi Shayna,
Quick question…
How do you clean your drift wood? I am always worried about all the bugs that crawl out of it 🙁
Hi Sherry! I completely understand what you’re saying! 😀 I always wipe the pieces down really well and vacuum them several times. When I first did the project, I was checking them constant to see if we’d accumulated any new friends. So far so good! Phew!
I hope that helps! 😀
The mirror are amazing. seriously i really appreciate these kind of arts.
Amazing content Shayna, You write very wall. i love you posts. but i was reading a post. it describe facts about Driftwood Mirror please look this post. it is useful content
http://alldriftwoodfurniturelove.tumblr.com/post/142788124920/interesting-things-to-know-about-driftwood-mirror
If you want to grow your knowledge only keep visiting this
site and be updated with the hottest news posted here.
Hello,
It is the blog is nice information easy driftwood mirror is great. thank you for share this blog
Hello,
I like the blog that is very benefiting informative information is a driftwood mirror. thank you for share this blog
Awesome wooden mirror frame… Thanks for sharing.