
DIY Laundry Room Side Table- Pottery Barn Style
Remember a while back when I showed you the perfect side table for our laundry room?
No? It’s been awhile….
Well shortly after I proclaimed my whole hearted love for the thing, I talked my welder hubby into making my own version with its own unique dimensions.
For starters, our laundry room is long and narrow. Don’t get me wrong, it’s a nice sized room, it’s just not very wide which makes it difficult for furniture. The last thing I need is to be putting clothes in the washer or pulling them out of the dryer and have my booty smack the table… not fun!
But to know that we could make a lovely table of our own had me smitten… and quite enthusiastic, I might add.
You know how much we love “wood grain”… I’m pretty sure Anthony has it engraved in his DNA! And we love us some metal….
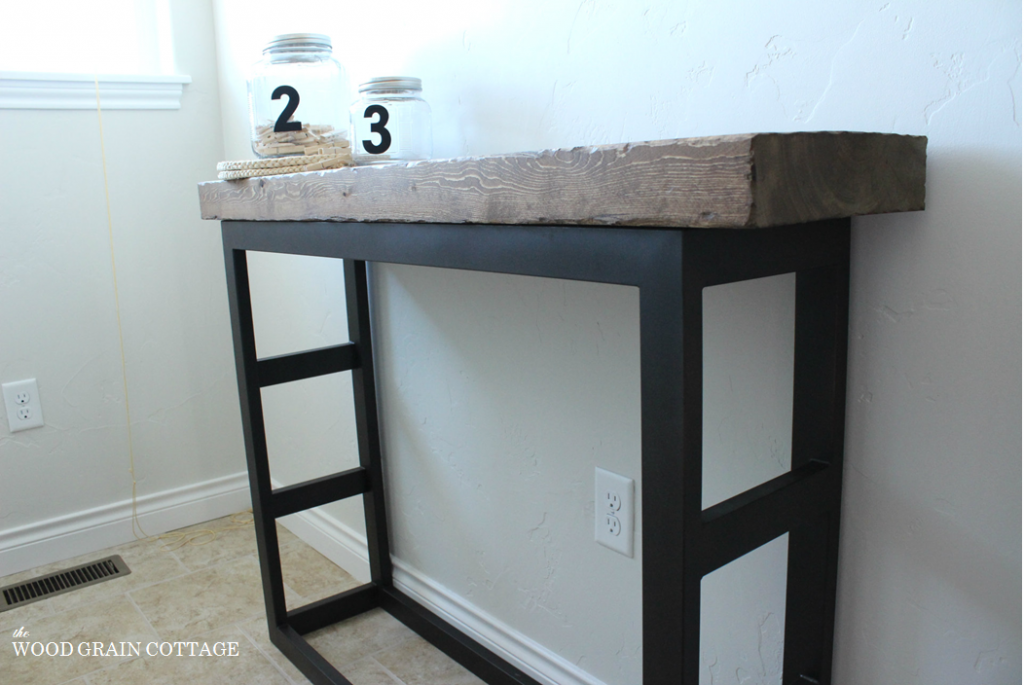
Drum roll please…. here is our version of that lovely Pottery Barn table!
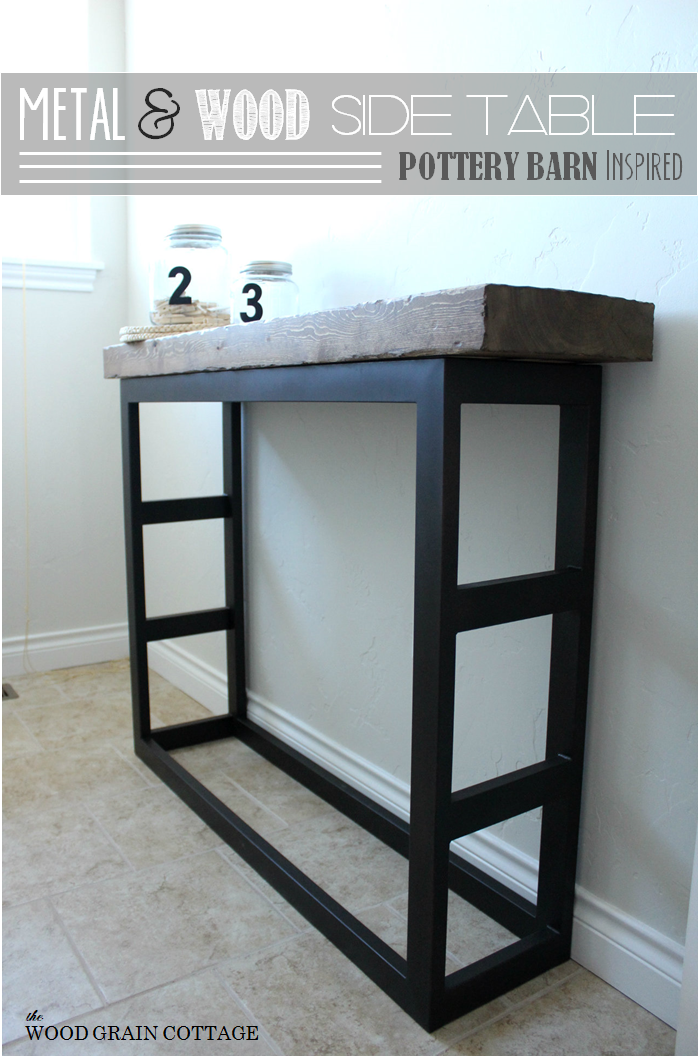
I’m completely whole heartedly in love with my table. I’m not kidding when I say that it is exactly what I envisioned in the laundry room! And to know that we made everything from scratch, well that’s just the delicious cherry and sprinkle part on top!
Plus, Anthony gets just as much of a thrill out of it knowing that he put one of his many skills to work building it: welding!
Here’s how we made it:
Please note: Some of the links in this post are affiliate links, which allows us to make a small commission from your purchase, but your purchase price stays the same. Thank you for helping support our blog! We greatly appreciate it!
Supplies:
- Metal Console Frame, can be made from wood or metal
- Wood Top
- Rustoleum Rusty Metal Primer
- Rustoleum Rusty Metal Primer
- Rustoleum Multicolored Textured Spray Paint, in Autumn Brown
- Early American Stain
- Razor Blade
- Hammer
- Nail Setter
- Fast Drying Polyurethane
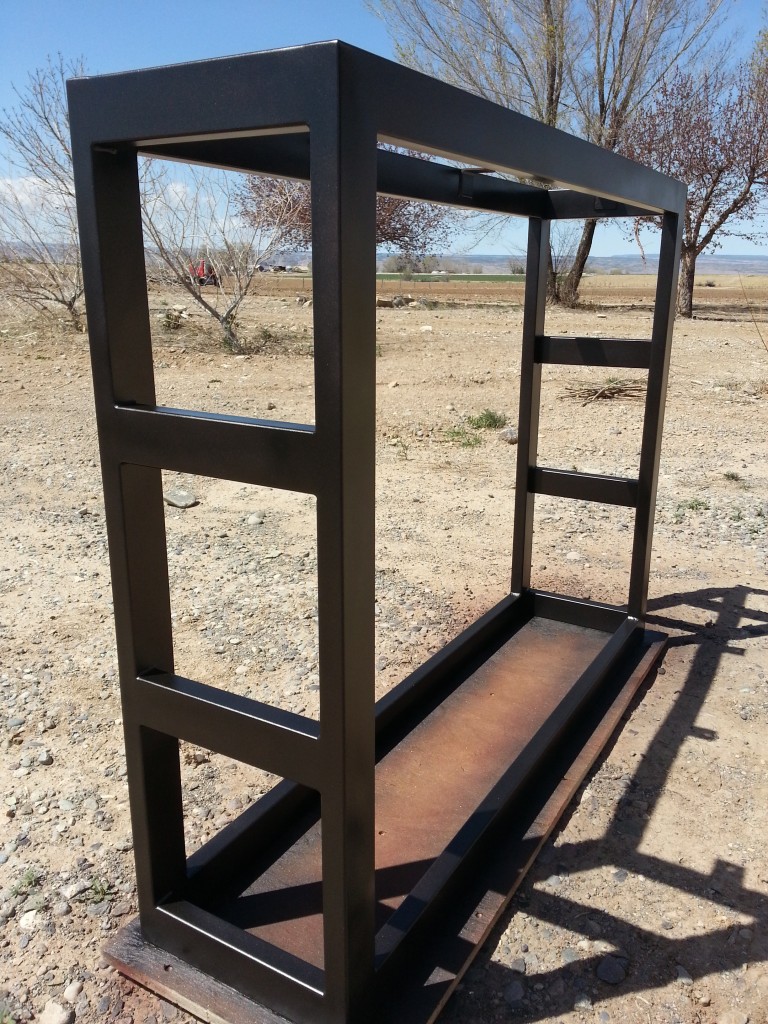
First, I drew up a sketch with the dimensions. He ordered the material at work and did his weldin’ thang. I was zero help during this stage.
Well, I guess I can’t say that… I did bug him incessantly about when he would have it finished…

A little while later he brought home the table frame:


While he had it at the shop, he gave it a serious sanding, so all I had to do was clean it and paint it. I can do that!

I did a little research and discovered that The Handmade Home had already found a nice paint combination to make the metal have an aged appearance. So, I went with that.
First, I gave it a coat of the primer…

Then followed it up with a coat of the dark metallic color…
And followed that up with a light coat of the dark textured spray paint. It gave it a nice “aged” look.

I let the stand dry and moved on to the wood top.
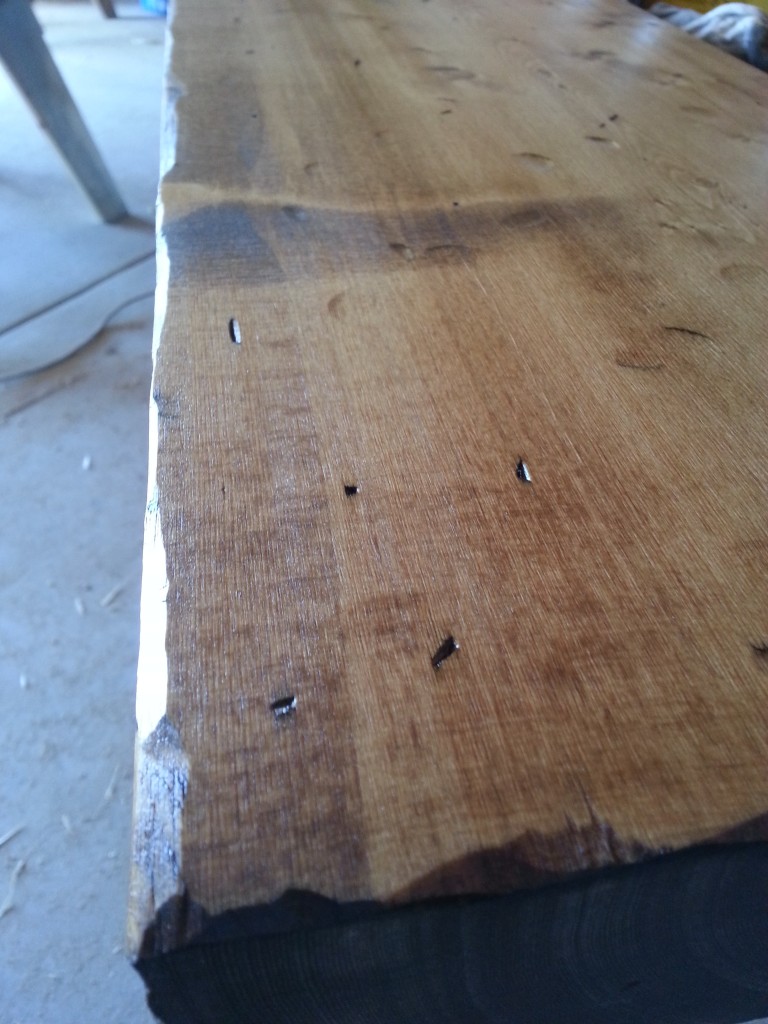
Lucky me, Anthony has a buddy who works at the local saw mill. I was able to give him the dimensions for a 3″ thick x 12″ wide x 4 ft long pine board. He cut it to size and then because it was a “rough” saw blade cut, we had another friend (who works at the local cabinet shop) shape it and smooth it up with a machine at work.
I could have kept the board with the original saw blade cut, but I would have been sanding it for days. It was rough!
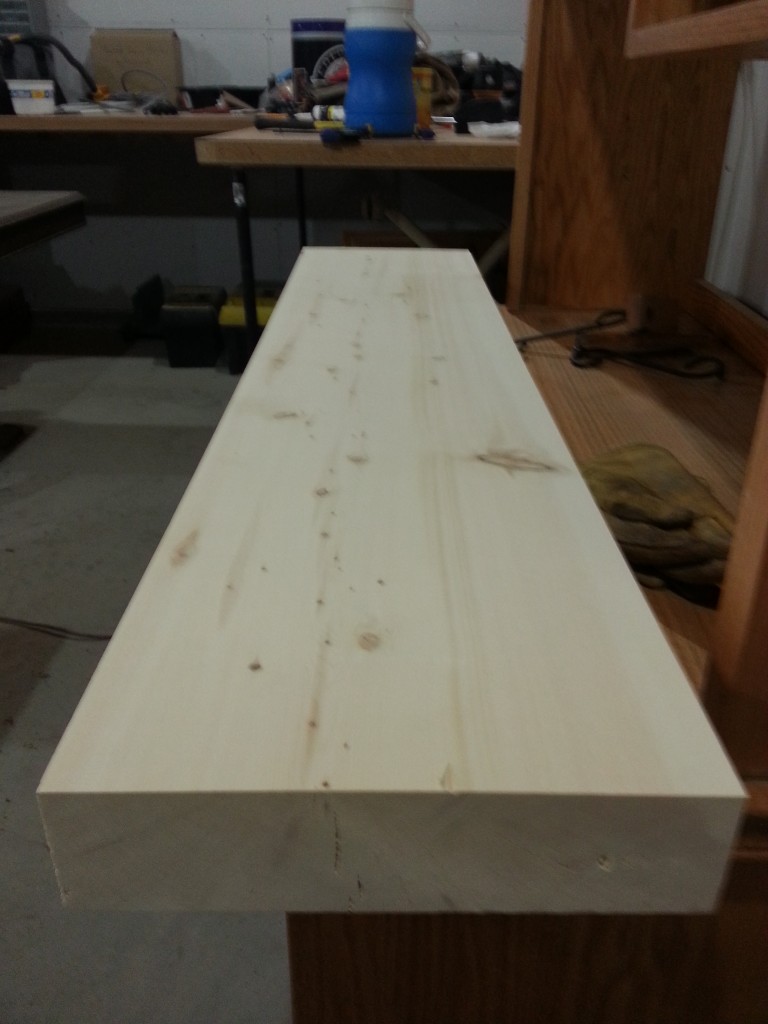
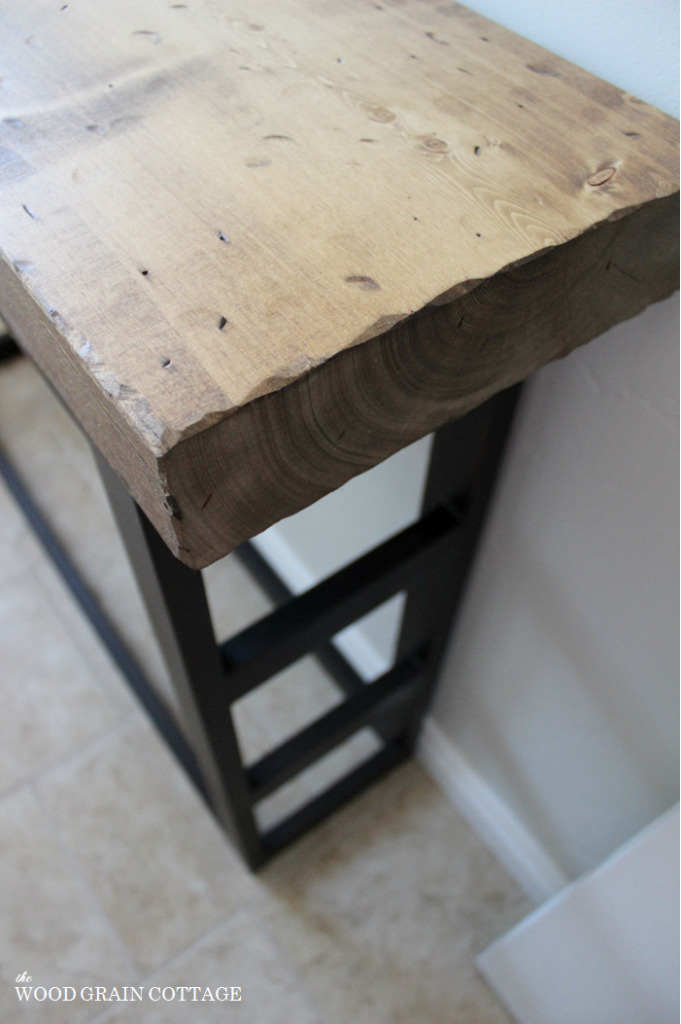
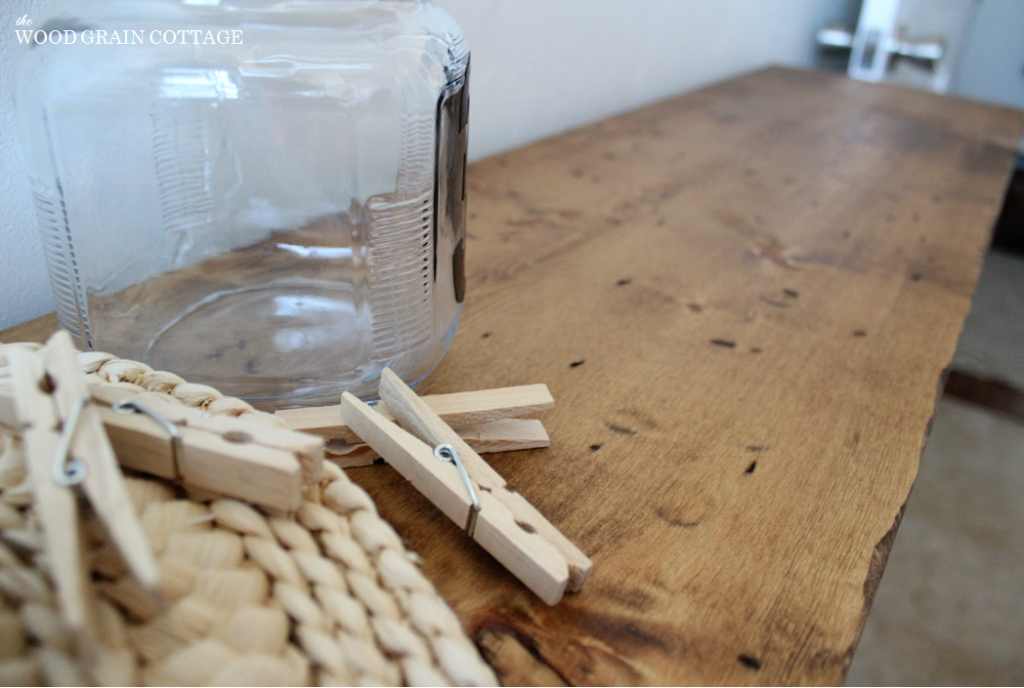
I was left with a perfectly smooth and square board. It was lovely. But I knew I wanted it to look aged, so I grabbed a razor blade and started cutting sections to make it look old.

Once it was roughed up a bit, I started on the top.
Using a hammer and nail sinker, I wacked the top of the board…

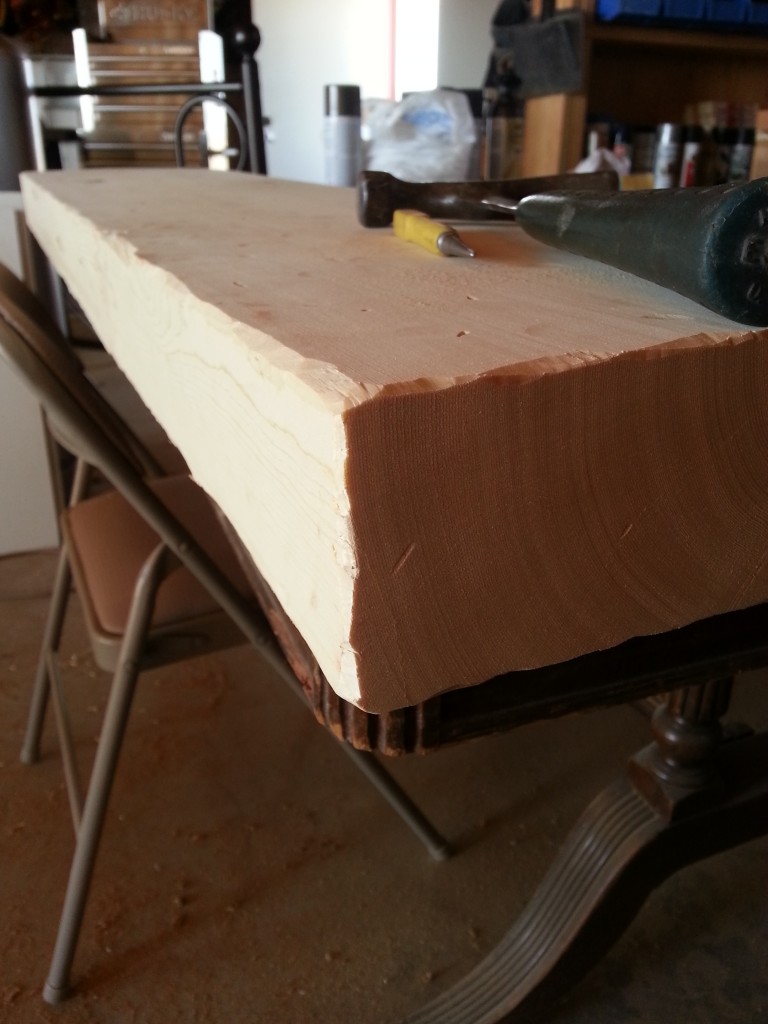
I didn’t have a specific plan for roughing it up. I just hammer the top, using the nail setter to make holes and used one side of the hook end of the hammer to make slash marks.
After that, I wiped the board down and grabbed my go- to stain:

I gave it a couple of heavy coats… and made sure to fill every hole and hammer spot with stain…
Once the stain was dry, I sprayed on several coats of this:

I let that dry over night.
The next day we attached the top and bottom with a few screws and moved it inside.
I am totally smitten. I walk by just to stare at it.
WE made this! A-mazing!
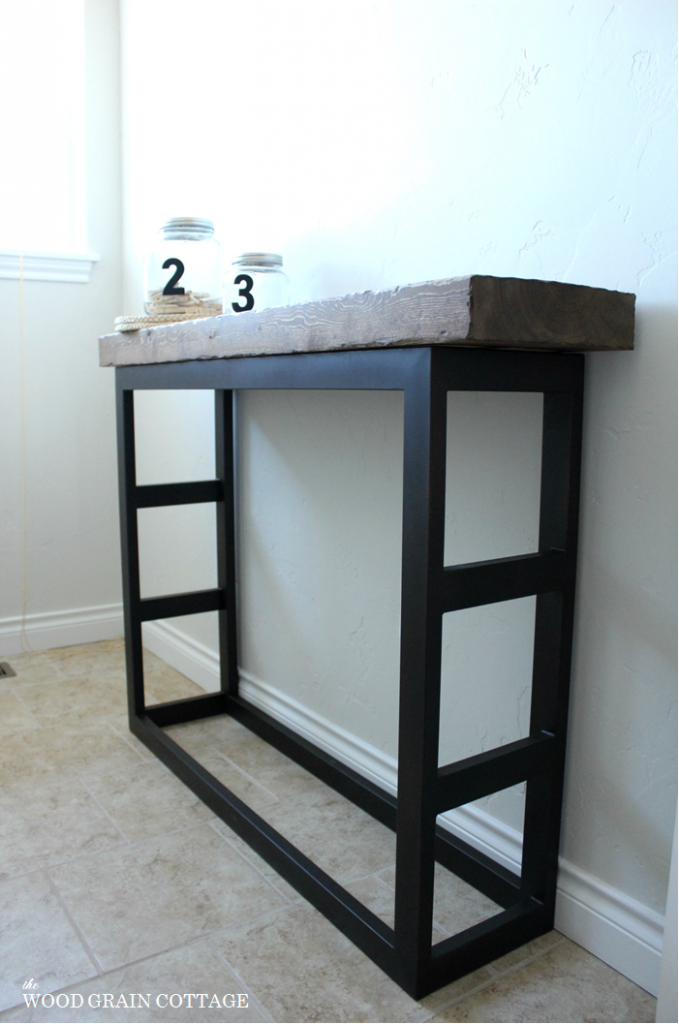
The combination of the thick wood top and metal sides had me at hello…
I looove the ladder sides!

The top board does look old!

I’m loving this table! It’s the perfect height and width. I can easily bend over to do laundry without worrying about bumping the table. Plus, it looks sooo good! AND completely custom!
Now let’s talk about the price difference… because it’s amazing!
The original Pottery Barn table was priced at $1,099.
Our table cost us about $45. Yes. $45. Here’s the breakdown:
Metal: Around $30
3 Cans of Spray Paint: $15
Wood: FREE
Stain: FREE, on hand
Clear Satin: FREE, on hand
Total: $45
HAPPINESS is probably a bit of an understatement. It’s more like: I love it sooo much. Can we move my bed next to it? I’ll do laundry every day to see it! You need that washed? NO problem! I’m your gal!
That might sum it up…
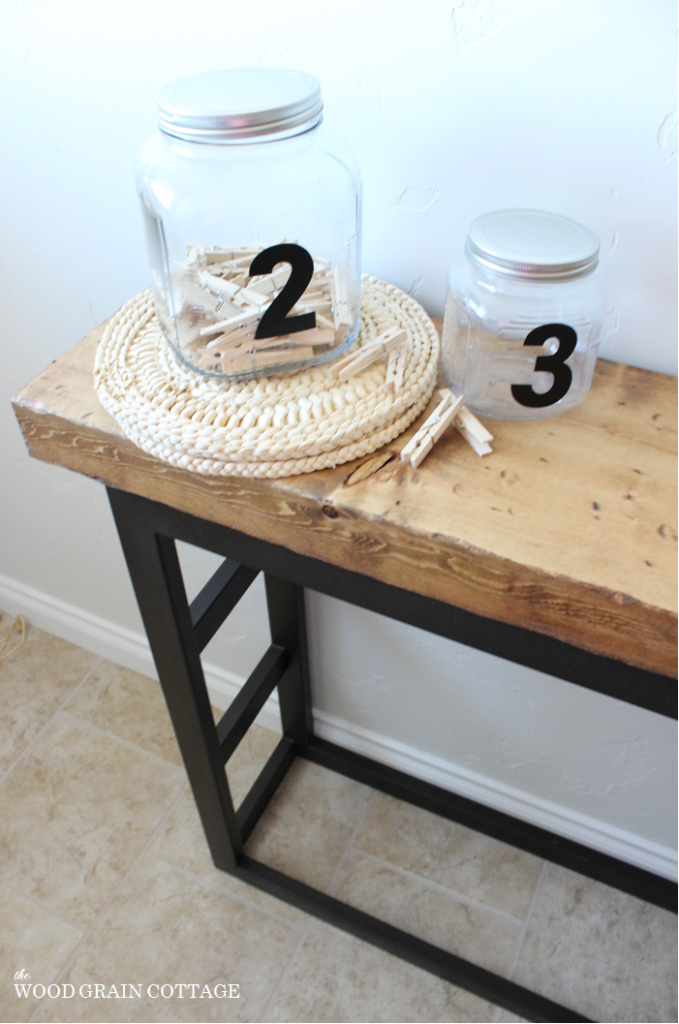
Now that the table is done, I’ve lost my laundry sorter and we need to make crates for underneath the washer & dryer. I’ve already got a sketch drawn and I’m ready to get buildin’…!

Linking up to:
Looks fantastic! I love how you used a razor to cut off the edge. I’ve always just pounded them with a hammer to soften the edge a bit, but I love the finished look that this created. I’ll have to try it next time!
Thanks for sharing.
THANK YOU Amanda! I’m so glad you like it! Using a razor blade is such a quick and effective way of distressing the edges. And I like quick and effective. 😉
-Shayna
Holy freakin’ cow, you are good. The table is seriously amazing! 🙂
APRIL! You make me smile! I’m so glad you like it! ME TOO! 🙂
Hugs!
-Shayna
You and your hubby make quite a team Shayna! I would love for you to share this with us this week at Pretty Things!!
xo, Tanya
http://twelveoeight.blogspot.com/2013/04/pretty-things-link-party-17-and-party.html
THANK YOU Tanya! I’m a pretty lucky lady to have him! 🙂
Heading over now to link up!
-Shayna
This table looks amazing Shayna! 🙂 As always, you make the prettiest things! I’m truly impressed by how it turned out! 🙂 & the price difference: WOW! what a difference! I can’t wait to see your next project!
Awe, Ingrid! You are always SO SWEET! Seriously. 🙂
I’m happy you like it- me too! 😉
-Shayna
Oh, swoon! I love this table. So sad I don’t have a welder in my life. Sigh. But this is great and I love your tutorial on the wood piece ~ lovely! I’m pinning this.
Do you mind sharing what software you use to title your pic’s? I’m looking for something new.
I’m visiting you today from Hepworth’s. I hope you get a chance to stop by my blog and comment, too!
~ Megin of VMG206
Tile Photo Coasters ~ Gift Idea
Megin! THANK YOU! I’m so glad you enjoyed it… I’m beyond lucky to have a welder husband! 😉 And, THANK YOU for the pin!
For the software, I use Microsoft Excel. I’m not sure if that helps you or not, but it works fabulously for me and the options are endless! 🙂
Heading over to check out your blog now!
-Shayna
OMG it’s freaking AMAZEBALLS!!! You should be sooo proud of yourselves! Job well done!
ERIN! Thank you! I’m so happy you like it too! Your comment makes me excited all over again! 🙂
-Shayna
Simply amazing!!!! Love this! Great job guys! Better than PB!
THANK YOU so much Jamin! I’m happy you stopped by to check it out!
And thank YOU for the inspiration! 🙂
-Shayna
This looks amazing, I am so in love with this. I love the industrial look and the stain you chose. It’s perfect.
TARYN! THANK YOU! I’m so happy you love it… me too! 🙂
Thanks for stopping by!
-Shayna
I love your table! Great job! I’m totally loving the industrial look right now!
THANK YOU so much Allison! I’m lovin’ the industrial look too! 🙂
-Shayna
What a perfect board!..Exactly how I envision my fireplace mantle, and have been trying to tell my hubby/builder! Just showed him your pictures and he finally gets it! And the razorblade technique is genius..now to make friends with a sawmill worker!
THANK YOU so much Shelley! I’m so happy that you were able to show your husband and have him understand what you were talking about…. been there, done that! 😉
Good luck with your board… the razor blade makes it very easy! 🙂
-Shayna
bravo! i love the scale of this piece and can imagine a hundred places it could go.
visiting via MMS and so glad i dropped by!
stop by anytime. http://hellolovelyinc.blogspot.com
michele
Hi Michele! I’m so glad you dropped by for a visit! THANK YOU for your kind comment. You’re right- it’s such a versatile piece!
On my way to check out your blog now! 🙂
-Shayna
This is stunning! I love it and boy do I want your friends and husband (husband only as a friend of course 🙂 You know all of the right people for sure!
Simply. Beautiful.
THANK YOU Julie! So glad you you love it! I know, I’m pretty lucky to have my handy hubby… and our friends! 😉
Hugs!
-Shayna
This is gorgeous! Now all I need is to get my husband to learn how to weld, hmm… 🙂
Awe- THANK YOU Jeannine! Having a welder hubby is wonderful! 🙂
-Shayna
This is fantastic, I love the look you got with using the knife to cut the edges.
Your newest follower.
Lisa @ Creative Raisins
THANK YOU Lisa! I’m so happy you like it! The razor blade makes the edges super easy to distress!
So glad to have you as a new follower! 🙂
-Shayna
Shayna,
I love the table! Do you have any idea how much the welding supplies and labor would have cost without your husband’s talent? Do you know if most welding shops will do this type of work?
Elissa
THANK YOU so very much, Elissa! After talking with my hubby, we think you could probably have it made for around $200. That should include material and labor. However, it would depend entirely on the shop you asked to make it. Typically most welding shops will do custom work, but look specifically for a custom job shop.
I hope that helps!
-Shayna
What is the height of the table?
Hi John! The table is 3 feet tall.
I hope that helps!
-Shayna
Ok so I’ve been obsessing over making this exact table myself. My plans tomorrow morning were to traverse the jungle and pick up a piece of old barn wood to begin my project. So, I was super geeked to run across a site that showed where someone else had also taken on the project. Picked up some tips… So thanks a million!!! Wish I knew a welder:( I’m going this week to a machine shop to have my base made.
THANK YOU so much, Polly! I’m so happy I was able to help! Your machine shop should definitely be able to make the base! 😀
Enjoy your table! 😀
-Shayna
I’m curious where your husband got the metal to build the frame? I love metal & wood together & this table is amazing. I don’t know how to weld but my 16 year old nephew does, lol. I have called Home Depot, Lowes, 84 Lumber & Ace & nowhere sells metal. There’s no other places around here that I would know to call to see that’s why I’m asking. I’d really appreciate it. It’s a beautiful table. & you know, I’ve distressed wood with hammers, nails, screws, spoons, chains, anything to really beat it up. I’ve even used utility blades but I’ve never thought to cut up the edges before the way you did. It looks amazing, so realistically aged looking. & 3 inches thick looks so much better than the average 2 in thick. Your table is beautiful.
THANK YOU so much, Jamie! I love this side table too! My husband is a welder by trade, so he got the metal from work, where he ordered it from a metal distribution company. Perhaps you could check out a local steel fabrication shop and see if you can purchase it from them. I would think they would be able to order for you.
I hope that helps! 😀
Would you consider making one for someone else? I would actually need it to be even longer.
Brent, If You can’t find someone to make your table…message me. I have extra reclaimed birch barn wood left over and the patina needed to age the steel. If not make for you…I could sell you my leftover supplies. I have enough to make another table. [email protected] I can send you the awesome pics of my table. THIS BLOG ROCKS!!
Ok, so my table is finished!!! I posted once before saying you totally inspired me to do myself and….IT TURNED OUT AMAZING!!! Thanks so much for posting bc without running across your post I would have never tackled myself. The steel cost me 50$ at a steel yard, 60$ for the neighbor to weld, 30$ for 100+ year old reclaimed birch barn wood from here in Lexington Ky. Wish I could post a pic for you to see:)))
Nice table but the tutorial is only good if one has resources similar to yours — welding shop, friend in a lumber store, etc.
Hello, I was wondering what the dimensions for this project are? Thankyou
The table is 11″ deep x 3′ tall x 4′ long.