
DIY Spoon & Pallet Hook Rack
This DIY Spoon & Pallet Hook Rack is the perfect up-cycle project! See how I bent spoons and used a leftover pallet to create this project.
Happy $30 Thursday to ya!
AND… SURPRISE… April and I added the fabulous Jen from Migonis Home to join in on the $30 Thursday fun too! Yay!

I’m sharing another easy and cheap project- and one that’s brought a ton of charm to our kitchen.
It’s a project that makes me happy!
DIY Spoon & Pallet Hook Rack

This was really very easy and provides so. much. character.
I started my spoon hunt weeks ago. I began scouring our local thrift stores for silver plated spoons. I begged. I pleaded. I begged some more. Luckily, they all knew me so it wasn’t too embarrassing… Or was it?
In the end, I was only able to find 1 (one) silver plated spoon. Ummm… pretty sure I would need more than 1 spoon to make a row of hooks. So, I went with my only other option: stainless steel spoons.
I knew stainless spoons would be more difficult to bend, flatten and stamp but it was a risk I was willing to take.
Working with a total “I’ll figure this out as I go” attitude, down to our workshop I went. I started by grabbing my spoons, a clamp and hammer.
Please note: Some of the links in this post are affiliate links, which allows us to make a small commission from your purchase, but your purchase price stays the same. Thank you for helping support our blog! We greatly appreciate it!
Supplies:
- Spoons, silver plated would be best, but stainless steel spoons work too
- Clamps
- Hammer
- Steel Round Rod
- Center Punch
- Screw Driver/ Drill
- Drill Bits
- Pallet Board
- White Paint
- Water
- Sharpie
- Screws, depends on drill size
First, I clamped the spoon to the workbench.

Then I grabbed my hammer and relieved a little stress.

Ummm… total side note… and completely optional… perhaps think about placing a scrap piece of wood underneath the spoon before hammering. After six spoons, you’ll have a lovely spoon shaped divit. That makes for a happy husband! (I’m dripping with sarcasm here…)
(Complete idiot moment…)
Once one side of the spoon was flattened, I moved the clamp down to the point where I wanted the start of my bend to begin, then I lifted up on the handle of the spoon to give it a slight bend.

Then I searched the garage for a round metal rod. At first I couldn’t find a single thing, but then I saw a lovely tamper sitting in the corner and it was perfect.
I clamped the spoon to the rod and started to bend it around with the hammer.

I kept turning the spoon around the rod…
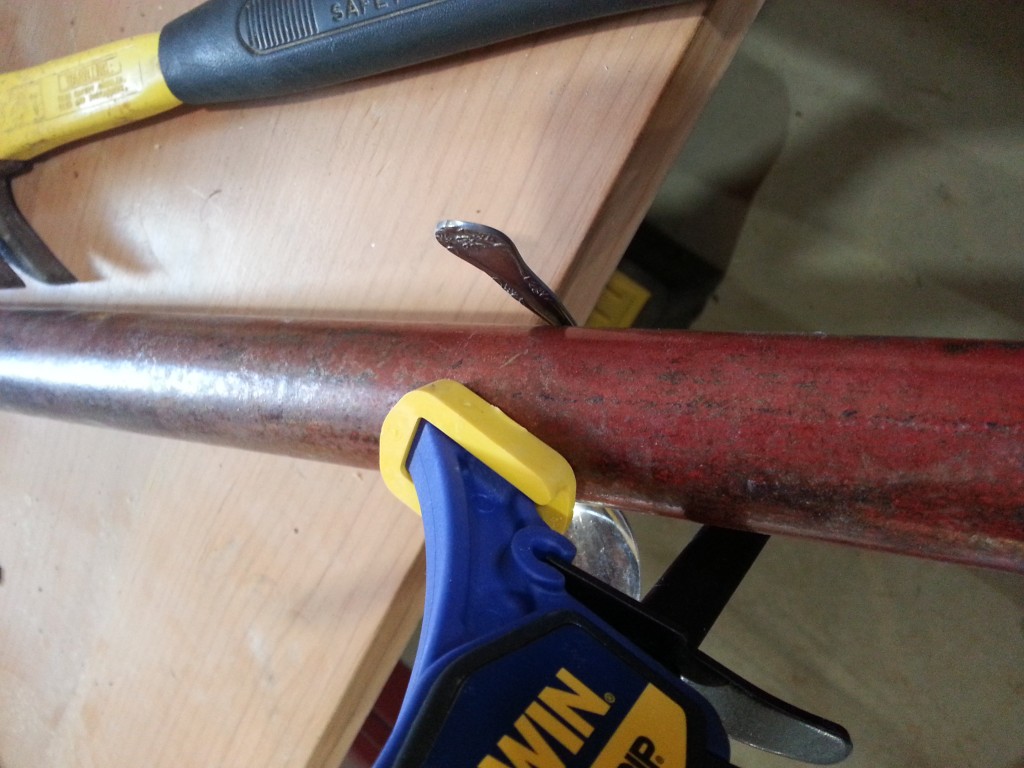
And kept turning it and hammering…

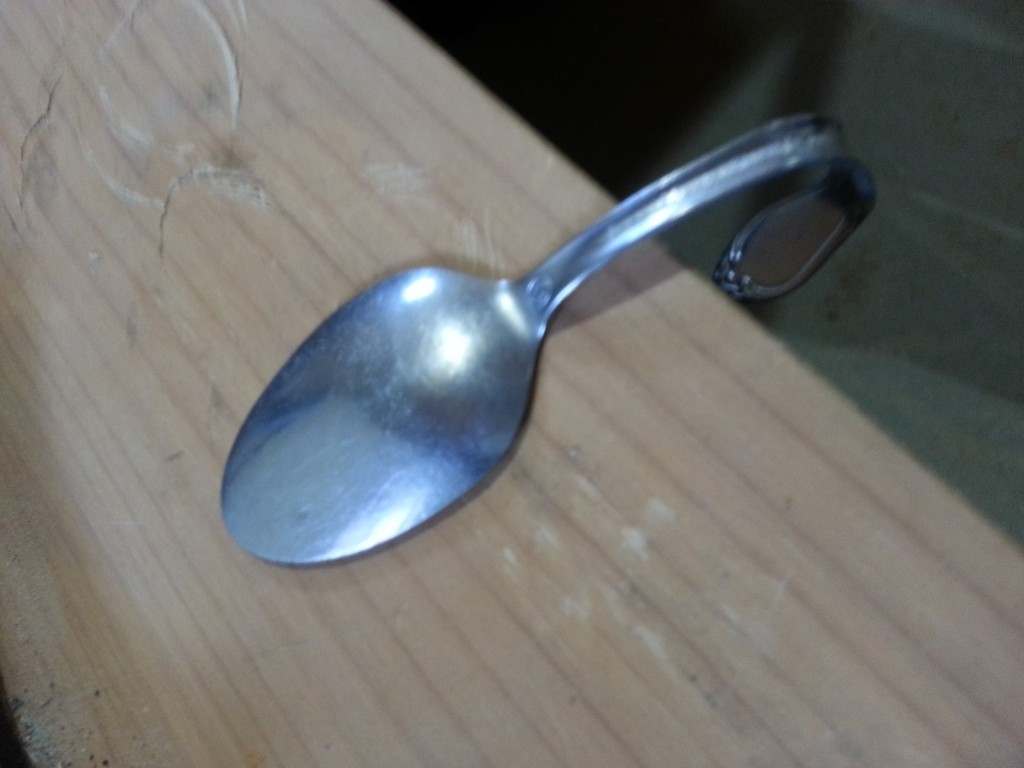
Once I had the correct bend, I used one spoon as a guide and curved each spoon to match the first one. Every spoon bent differently, even though they were all made of stainless steel.
To make sure the head of the spoon was flat, I placed the spoon on the bench and started pounding the opposite side of the spoon until it was as flat as possible.
With the spoon heads flattened, I marked the middle of the top and bottom of the spoon with a round sharpie dot.
I knew I would need to attach the spoons with small screws, so I grabbed our center punch and hammer and marked the spot with the center punch.
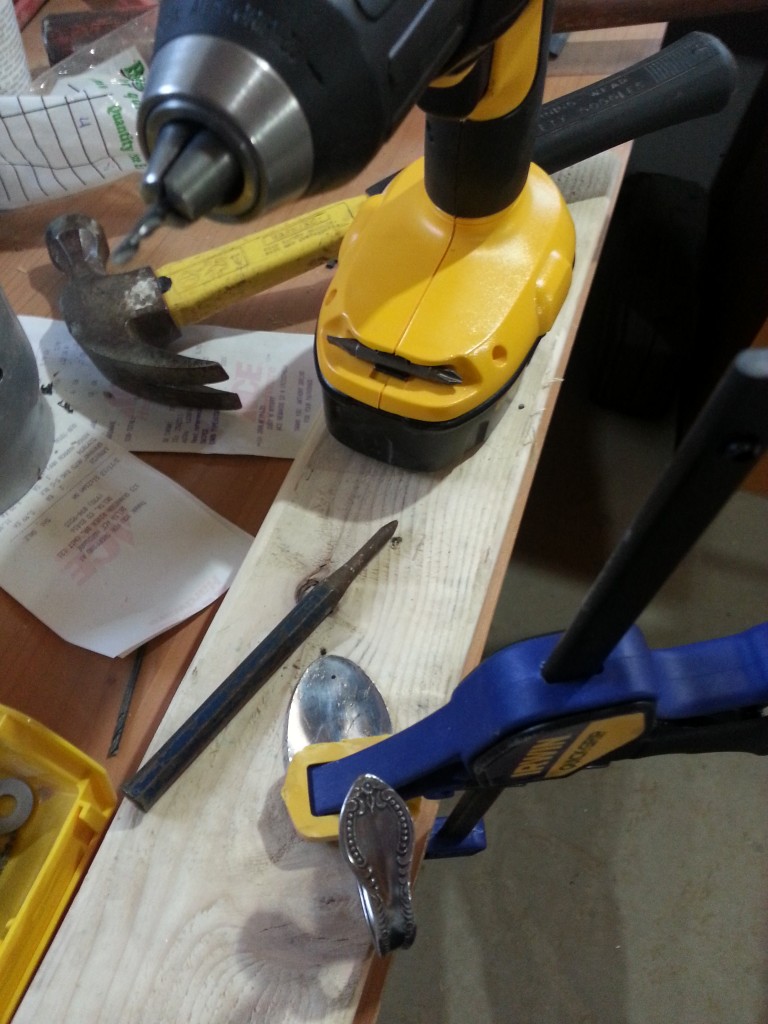
Then I used our drill and started drilling each hole. This took a little time and A LOT of patience. Each stainless spoon was a different thickness, I even had one spoon that wouldn’t drill.
I now owe my husband a set of drill bits, as I broke 3 (three) of them on one spoon…
At the last minute I had to rush down to thrift store and beg for another spoon. She’s back…
Once all the spoons were drilled, I grabbed my hammer and found the nearest pallet. I removed one of the boards and gave it a nice white wash finish with equal parts of white paint and water.

While it was drying, I tried my hand at stamping the spoons. After a few tries, I could see that it wasn’t going to happen. No way. The stainless was way too thick.
Said metal welding hubby said such thing wouldn’t work… I ignored him.
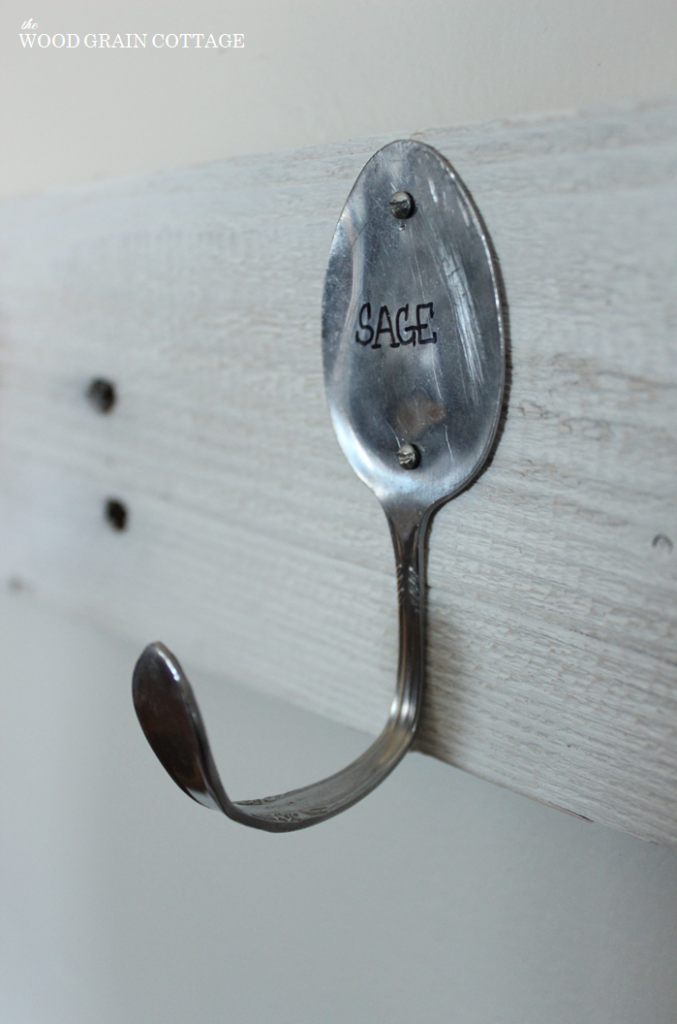
Using my backup plan instead, I wrote each word on the spoons with a fine point sharpie.

I had six spoons, so I picked six herbs: Dill, Thyme, Parsley, Sage, Basil, & Chive.
I grabbed some teeny tiny screws…

Made sure each spoon was evenly spaced on the pallet board, and began screwing them into place.

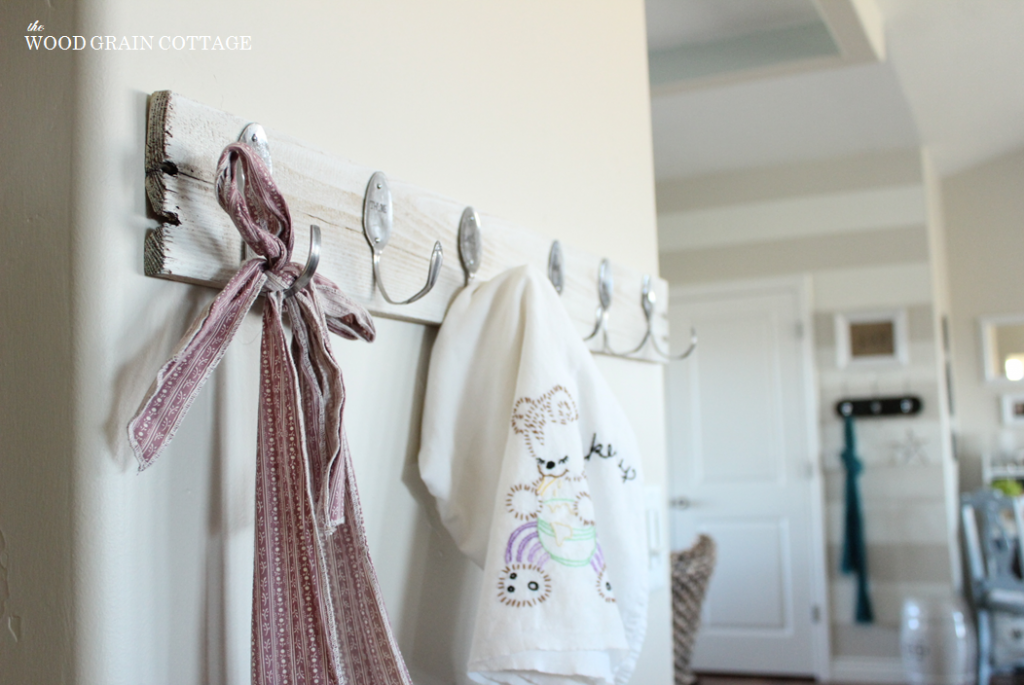
With all the screws in place, the hook rack was done.
Seriously, this is such a fun addition to our kitchen!
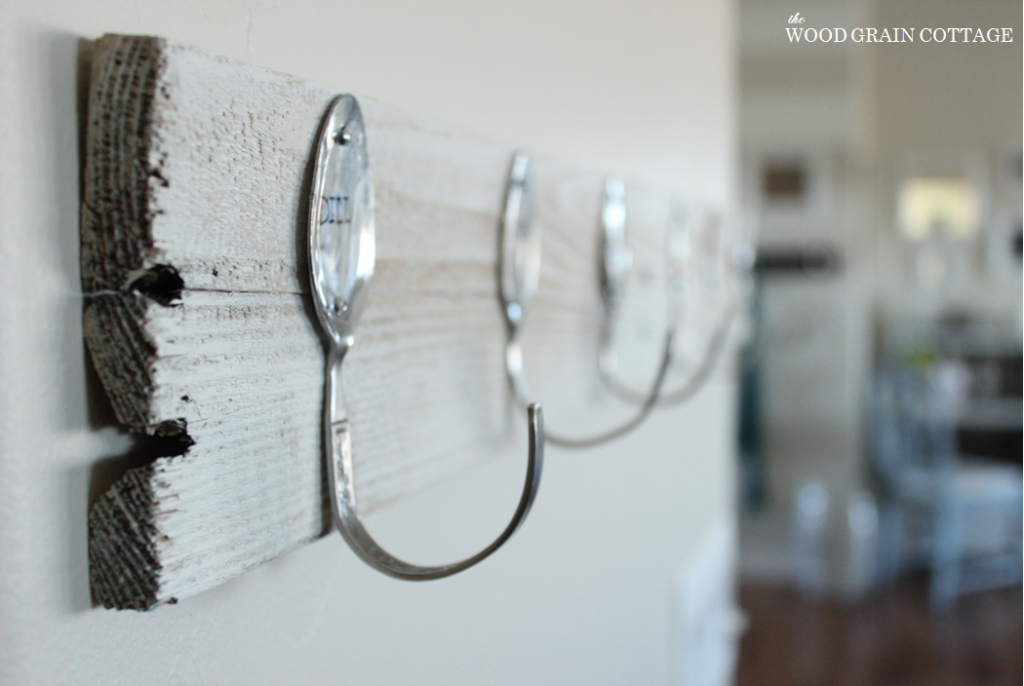
It has a really happy personality…

And I love the addition of the herb words…

You really can’t even tell the words aren’t stamped…
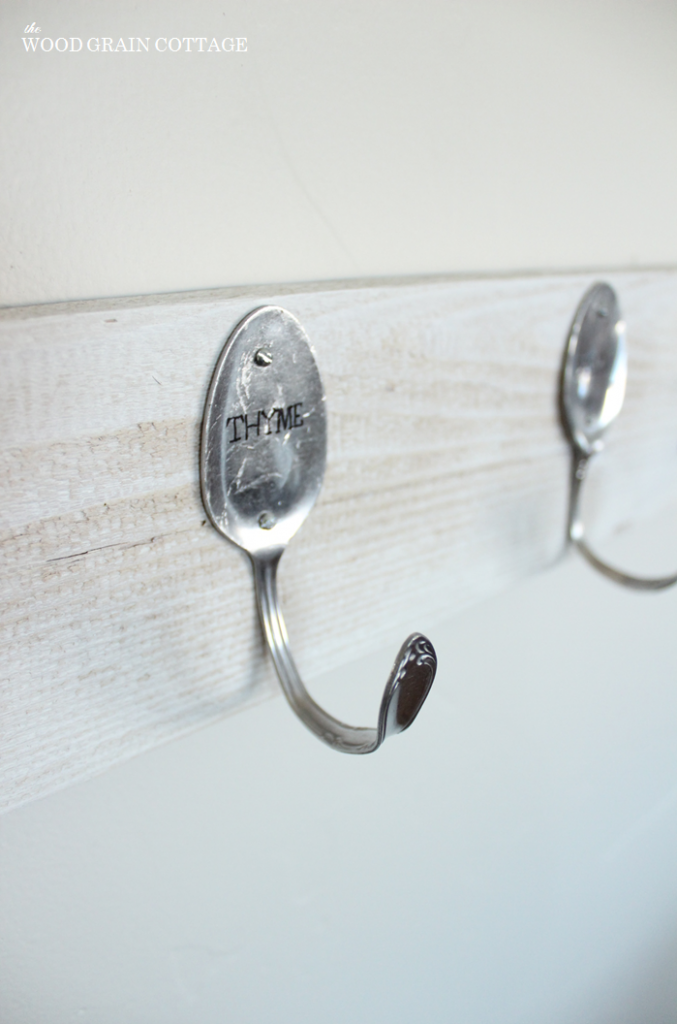
The roughness of the pallet board combined with the sleek and shine of the spoons leaves my heart mushy.
Plus, you can still see the grain of the wood through the white wash finish. That tops it off for me. I mean, you all know we love a little wood grain around here…
So. Pretty.!

I had to bring back my apron and tea towel… they make it feel like mine.
I’ve seen something similar for around $60-$70 dollars…
I spent $1.00 on all the spoons, $1.00 on the screws, the pallet board was free, the tools were free, I had the paint and supplies on hand. This project literally cost me $2.00.
(And an eventual drill bit assortment… Hubby if you’re reading this, I’m on my way to the store right now…) (Wink.)
$2.00!
WHAT?
You’d never know…
LOVE. THIS. PROJECT. Happiness all around!
And now, here are the other two leading ladies: April & Jen.


And here are their FABULOUS projects:
April made this DIY framed fabric wall art:

And Jen made a shelf from a floor joist:

They are soo creative! Be sure to head over and see how they made them!
Here’s to another $30 Thursday… I hope you enjoyed it! Be sure to check out our $30 Thursday pinterest board!
🙂

P.S. Just in case you missed the past two months, here are my previous $30 Thursday projects:
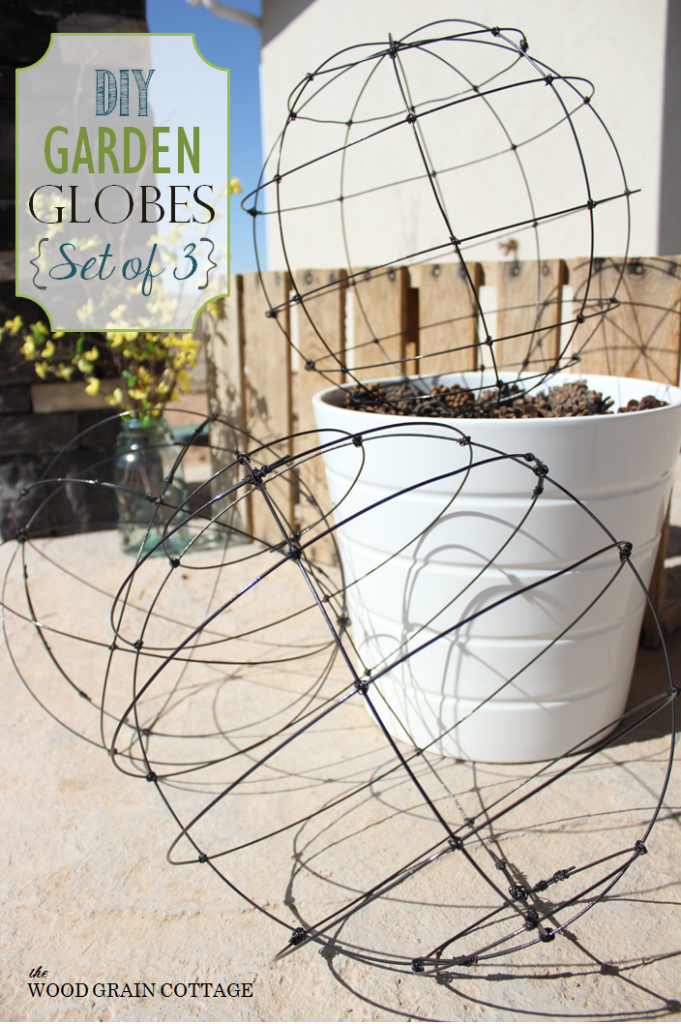
DIY Garden Globes:
I LOVE these! What an amazing project! The shortcut on the stamps is perfection!
Thank you so much for inspiring me today!
blessings,
karianne
THANK YOU KariAnne! I’m so glad you enjoyed it!
Thanks for stopping by! 🙂
Big Smiles!
-Shayna
love love love this!!!! you did such a great job! 🙂 i never would have known it was a sharpie trick from the first photo you shared… you fooled me!
THANK YOU Jen! I’m so glad you liked it… and I was pretty tricky, huh? 🙂
Thanks for joining us!
Big Smiles!
-Shayna
A lot of inspiration in today’s post! I love all the projects! The spoons; amazing idea and not expensive! Thank you for sharing ! hope you are having a great day!
Thank you Ingrid! I’m so glad you enjoyed the post. You’re right- there is a ton of inspiration! 🙂
Have a fabulous day!
Big Smiles!
-Shayna
Love it! It’s perfect….Great idea! 🙂
THANK YOU April! This is such a fun series! 🙂
-Shayna
WOW! This project is fabulous and I just LOVE the addition of the spice words! This makes me want to go find some spoons right now! I would love to have you share this at my party!!! I am a new facebook follower! So excited to see what else you have in store!
http://www.madetobeamomma.com/2013/04/homemade-by-you-45-brand-new-site.html
THANK YOU Katie! I’m so glad you like it! I hope you find some spoons… 🙂
Linking up now…
-Shayna
This is darling! Girl, I am loving your style. So cute. Off to PIN it!!
Thank YOU Shannon! I’m happy you like it! THANKS for the pin! 🙂
Big Smiles!
-Shayna
LOVE this! I really need to have this in my kitchen
THANK YOU Heather! I love it too! 🙂
-Shayna
Um yeah, this is my first time over here and I am loving your blog! This little hook rack is so cute and I so appreciate all of your tips…and now I won’t kill myself trying to stamp my spoons:) If you get a sec, I would love for you to share over at Get Schooled Saturday #71 at Too Much Time On My Hands. The party is open all weekend.
xxx
Kim
http://too-much-time.com/2013/04/get-schooled-saturday-71.html
THANK YOU Kim! I am so glad you found me- and that you enjoyed the post! 🙂
On my way to share now!
Have a great weekend!
-Shayna
Oh Lord now I’m on a spoon search.. I just
love your little spoon rack and I want one!
Thanks for all the info too! Was wondering
how to bend the spoons so well…
Happy Spring
Sandy
THANK YOU Sandy! I hope you find some spoons… they sure make it feel a little bit happier around here! 🙂
GOOD LUCK!
-Shayna
OoOoO, Shayna! That’s gorgeous! I love the rustic wood plank with the bling of the spoons. So creative! I’m including a link back in tomorrow’s DIY highlights! 🙂 Love it!
THANK YOU Roeshel!I’m so glad you like it and am beyond excited to be included in your highlight post! 🙂
BIG smiles to you!
-Shayna
beautiful creation. I love how antique but fresh it looks. Great job!
THANK YOU Virginia! So happy you like it! 🙂
-Shayna
I love this project! I just bought some spoons at the thrift store the other day to do something similar…I was going to add them to the bottom of a shelf, but I’m thinking I like this better!
XO,
Christy
THANK YOU Christy! I’m so glad you like it! The spoons are such a fun way to add a whole bunch of character- whatever you decide to do with them will be perfect! 🙂
Big Smiles!
-Shayna
What a great project, this would look fantastic in my kitchen, just need to find the right spoons.
THANK YOU Jill! I’m so glad you like it- and I hope you find some spoons! 🙂
-Shayna
Great project. Love that you found a way around the troubles you encountered. The hooks are adorable!
Liz
THANK YOU Liz! I definitely had to get creative a few times! 🙂
-Shayna
I’m popping over from Hometalk to give you a big thumbs up on this project. It’s so cute and I love your tip for making a faux stamp on the spoons. I made spoon herb markers last winter with stainless spoon and thought my teeth would fall out when I flattened them. I went through six spoons to get one good one when stamping them. I’ll use your faux method in the future!!
Awe- THANK YOU Paula! I’m so glad you enjoyed it, and thanks for visiting!
I completely understand how you felt while flattening the spoons… Ditto! I’m telling ya- that faux stamp works- and you can’t even tell! 🙂
-Shayna
Have been looking for a neat house warming gift for my niece, I believe the spoons on the pallet will do the trick. I am going to put the names of her family members on the spoons, so it can be used as a coat rack in their mud room!
Hi Jewel! You are so right- this would make a perfect house warming gift! Family member names on each spoon would be fabulous! I hope she loves it! 🙂
-Shayna
How wonderful this coat rack is ! You gave me an awesome idea on how to do mine , thank-you ! When I married my husband 2 yrs ago I knew I had a lot of work ahead of me, ALOT ! But his coat rack gives me shudders every time I walk by it, but it is usually pushed to the back of my mind, except for the last week or so. Every time I pass it I think, ” I need to do something with that SOON !. This is an old and cheap, looks cheap too, coat rack or I should say, a plank of wood with 4 dowels tack on it, and it’s missing 1 of those ! To be honest I haven’t really looked for one and didn’t think I would find one really different. That was till I read about yours. And it will fit in just right as we live in the country. Thank you !
Hi Lisa! I’m so happy you love this and that it has inspired you! How fabulous! That makes me happy! I’m sure you will love it! It’s such a versatile piece and will look wonderful in your home! 🙂
Hugs!
-Shayna
totally gorgeous! i’d love to replicate for my kitchen. i bet if you used drill bits for metal instead of wood they wouldn’t have broken:) haha! you are so talented
THANK YOU so much, Carissa! 😉
-Shayna
Hello,
How did you attach it to the wall? thanks!
Hi Jenny! I attached it with a few nails that I hammered directly through the pallet wood, which were from the original pallet.
I hope that helps! 🙂
-Shayna
absolutely in LOVE with this project… the whole look….the whitewash….the spoons…. EVERYTHING!!!! you did an amazing job with your photos. Clear, precise, great tute. THANK you. Im off to the thrift shop for my spoons now……. ba bye………
:]
I was told that lard will work as a cutting agent when drilling stainless steel objects–might make your drills last longer!
I’m making this!
Awesome idea. I had a set of silver plated from an estate we were settling. Now to find it will be my problem!!! As I could not sell it. Hope hubby didn’t throw it out.
Shayna,
I know you actually did this project a long time ago, but I spied it again today and want to tell you how cute this is – not to mention useful! I love it and want to try this. My family gives away “door prizes” at our family reunion in the summer and I’d love to have one of these to give. Thanks so much for inspiring me and showing the “step by step” process for making it!