
DIY Stackable Fruit Crates & A New Series: $30 Thursday
See how we made these DIY stackable fruit crates inspired by a set from Pottery Barn. We’re sharing our full, easy to follow tutorial.
I’ve been very excited for today- and for good reason! The lovely April from House By Hoff and I have teamed up to bring you a new monthly series- $30 Thursday.
On the first Thursday of every month, we’re going to be sharing a new project that costs $30 or less! Gotta love that, right?
Plus, we’ve created a joint pinterest board where we’ll each pin our $30 Thursday projects. That way it will be super easy for all of you to find a little inspiration to projects that are completely manageable on a budget! Be sure to head over to pinterest and follow the board!
Before I show you my project, let’s meet April!

Now, with that said, here’s my first project!
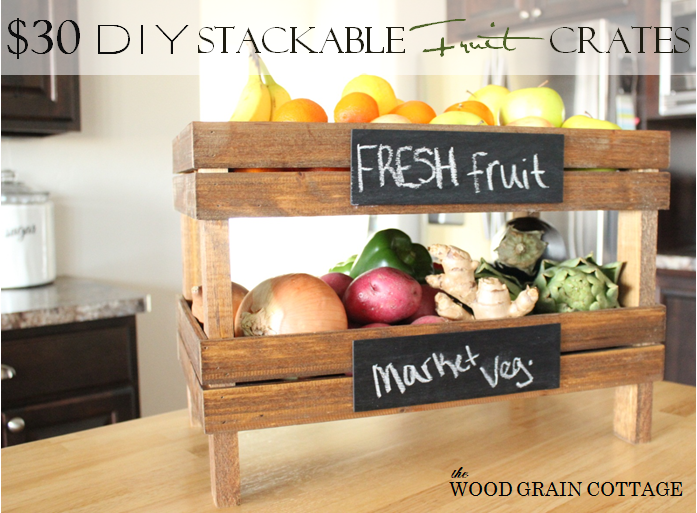
DIY Stackable Fruit Crates
My inspiration started with these crates from Pottery Barn:

Awesome, right? I loved how versatile they could be and how much storage they could add to my kitchen. The price on the other hand was WAY beyond our budget. $119 for two crates was a little extreme! (They’re no longer available for sale.)
So, I grabbed up my handsome hubby and headed to the garage to start building.
And here’s how we did it- complete with lots of pictures! Luckily we had most of the supplies on hand!
Please note: Some of the links in this post are affiliate links, which allows us to make a small commission from your purchase, but your purchase price stays the same. Thank you for helping support our blog! We greatly appreciate it!
Supplies:
- 1 Package Cedar Tongue and Groove, we cut them down to our desired size, below (Pine can be used instead.)
- 1/4″ 4′ x 8′ sheet of Underlayment, we used leftover pieces from another project
- 1- 1″ x 2″ Cedar Board, cut to size, below (Pine can be used instead)
- 1/8″ x 12″ x 12″ Birch Plywood
- Table Saw, this is similar to ours
- Miter Saw, this is similar to ours
- 18 Gauge Nail Gun
- 1 1/4″ 18 Gauge Brad Nails
- 3/4″ 18 Gauge Brad Nails
- Air Compressor
- Tri Square
- Tape Measure
- Sandpaper, medium grit
- Clamps
- Chalkboard Spray Paint
- Foam Brush
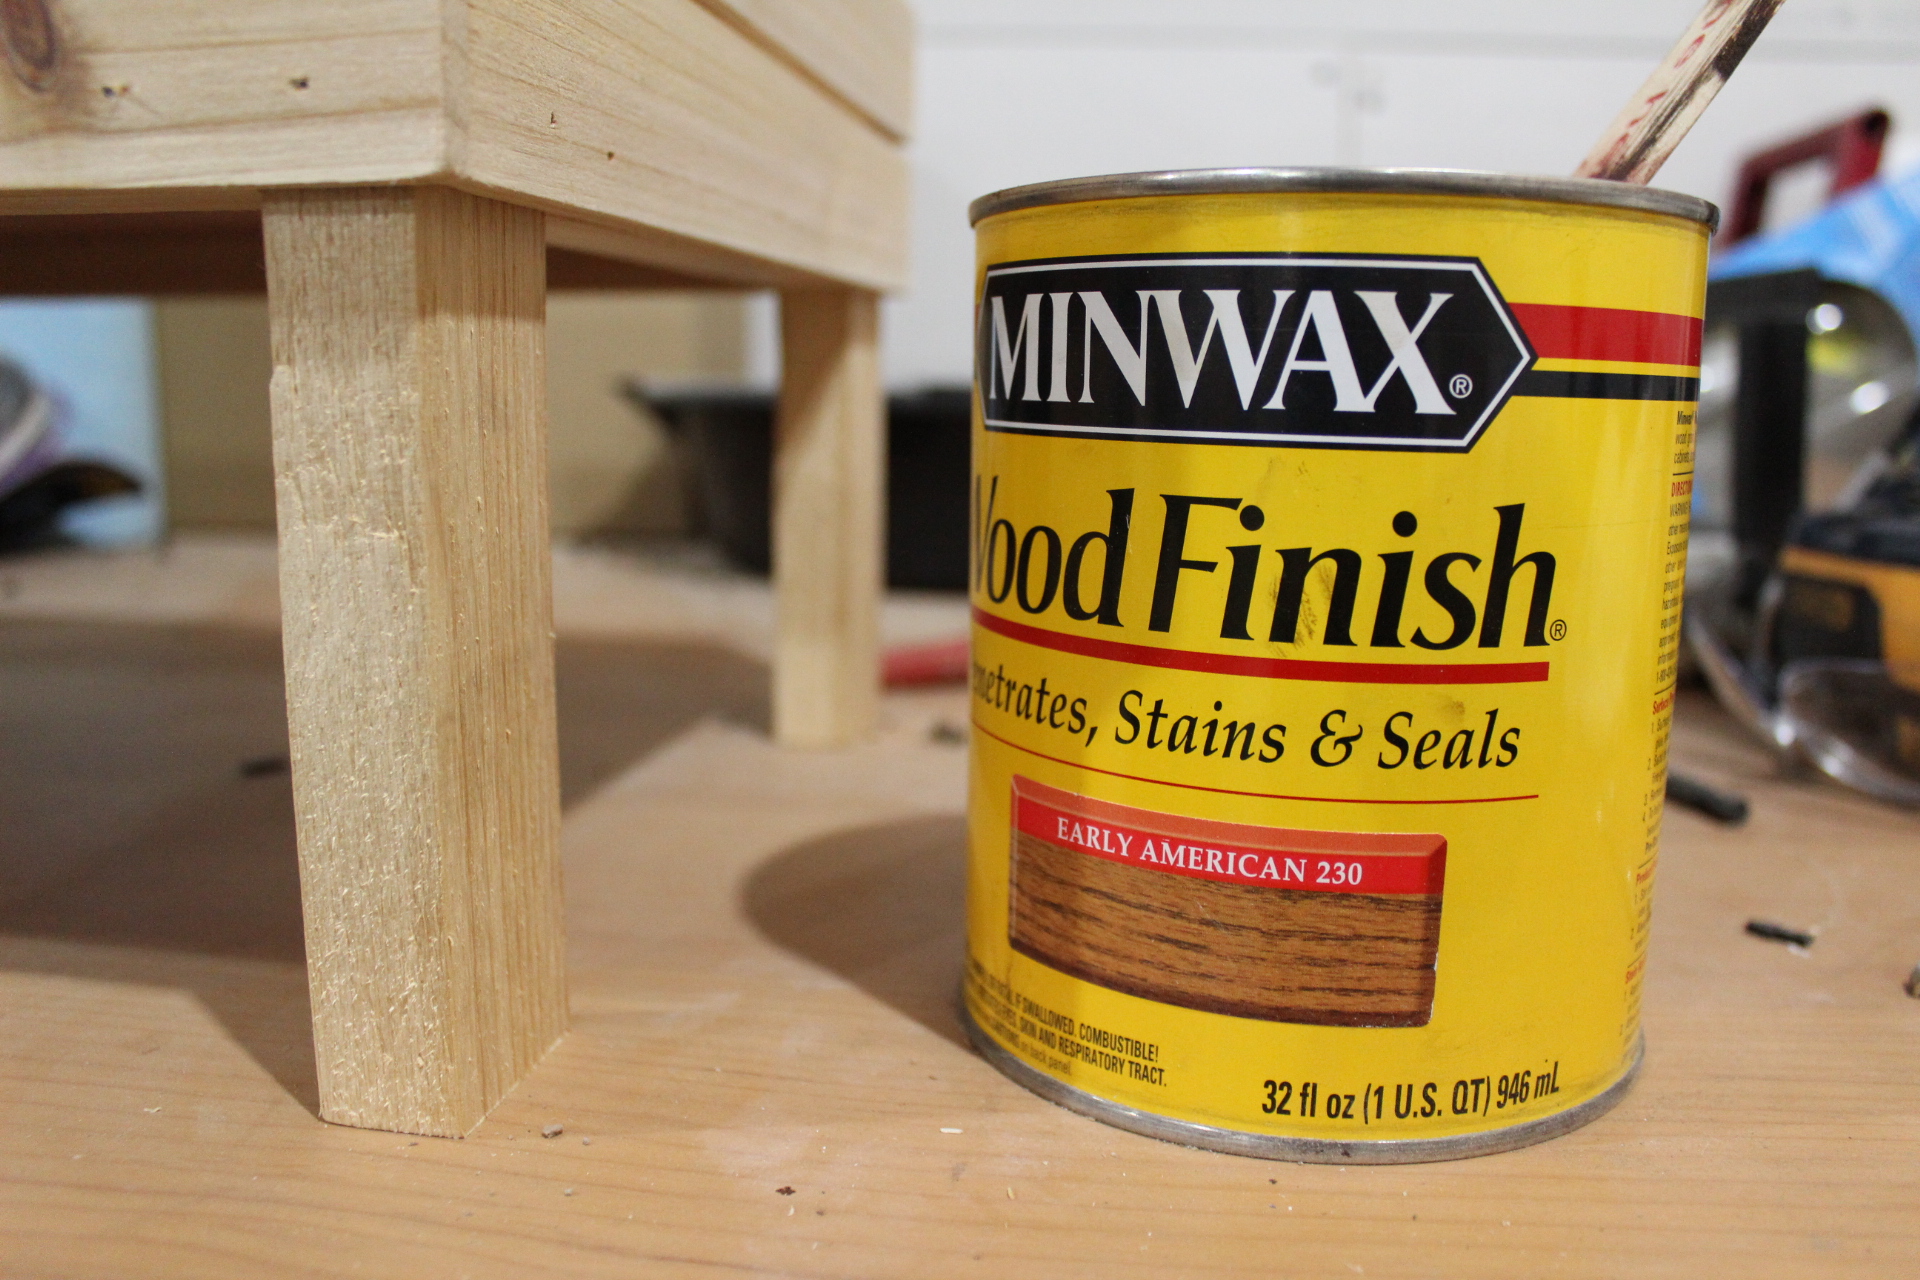
- Minwax Early American Stain
- Hot Glue Gun
- Glue Sticks
First thing, we had to do decide on the size. Pottery Barn’s crates were a whopping 18″ long x 11″ wide x 18″ tall. There was no way that I could make that fit on my counter top- they were too tall! We cut the size down to 18″ long x 11 ” wide x 14″ tall.
To make this project as cheap as possible, we used wood that we already had on hand. However, you could absolutely make this project for $30. Places like Home Depot and Lowes have an entire section dedicated to pre- cut strips just waiting to be used.
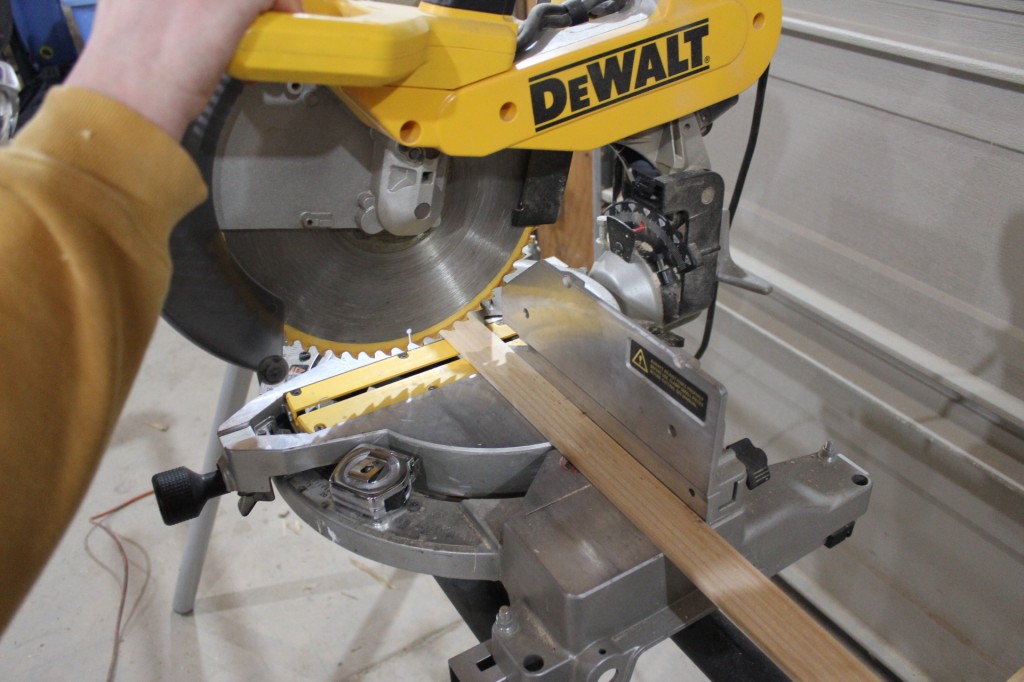
Because we had Cedar tongue and groove planks on hand from my DIY sign, that’s what we used. We had to cut off the tongue and groove part.

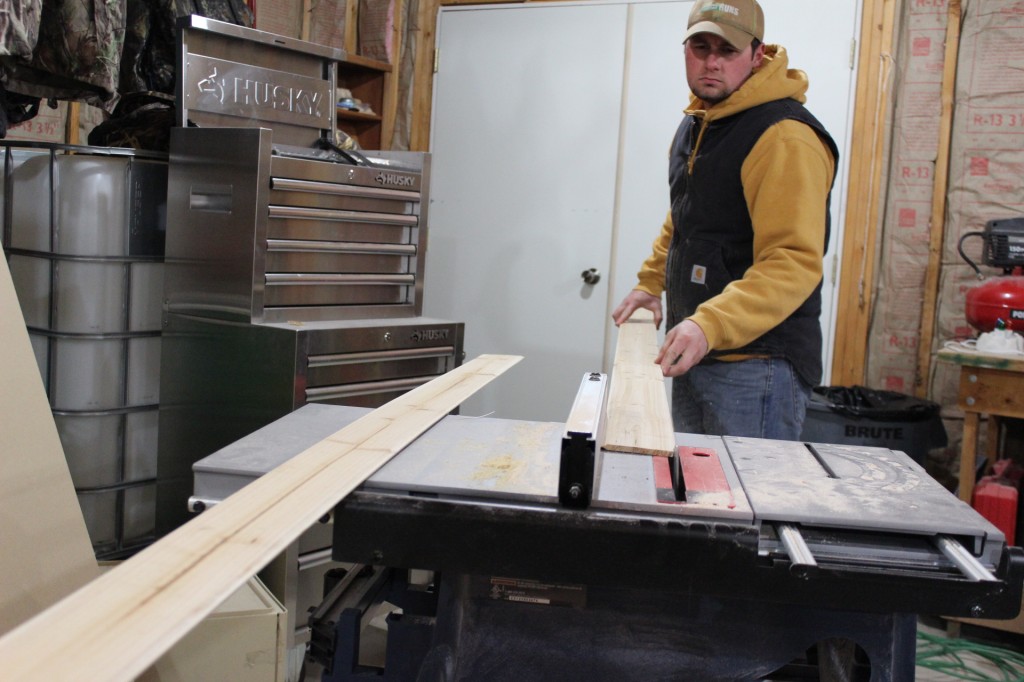
Then we cut that in half to make it into two strips.

Once we had all the pieces cut, we started cutting the wood blocks for the frame. For that we used 1″ x 2″ cedar boards, which we also had on hand from the sign.


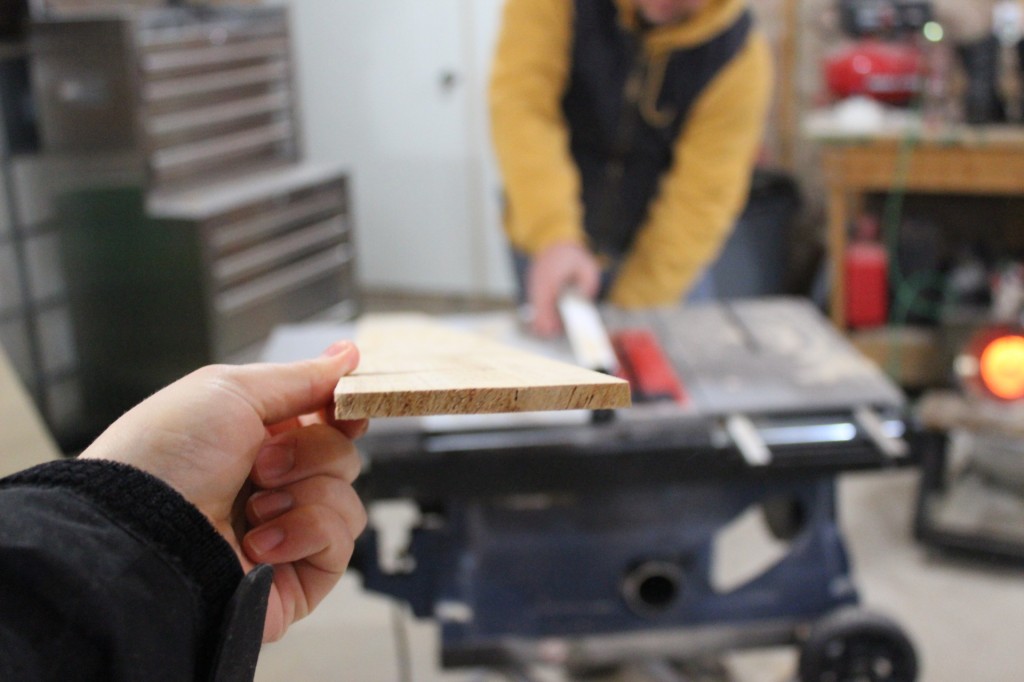
Once he had the “legs” cut down, he started cutting the planks into 18″ and 11″ pieces. We cut enough for 2 crates, so 16 pieces total. 2 on each side.

I started sanding down the splintered edge.

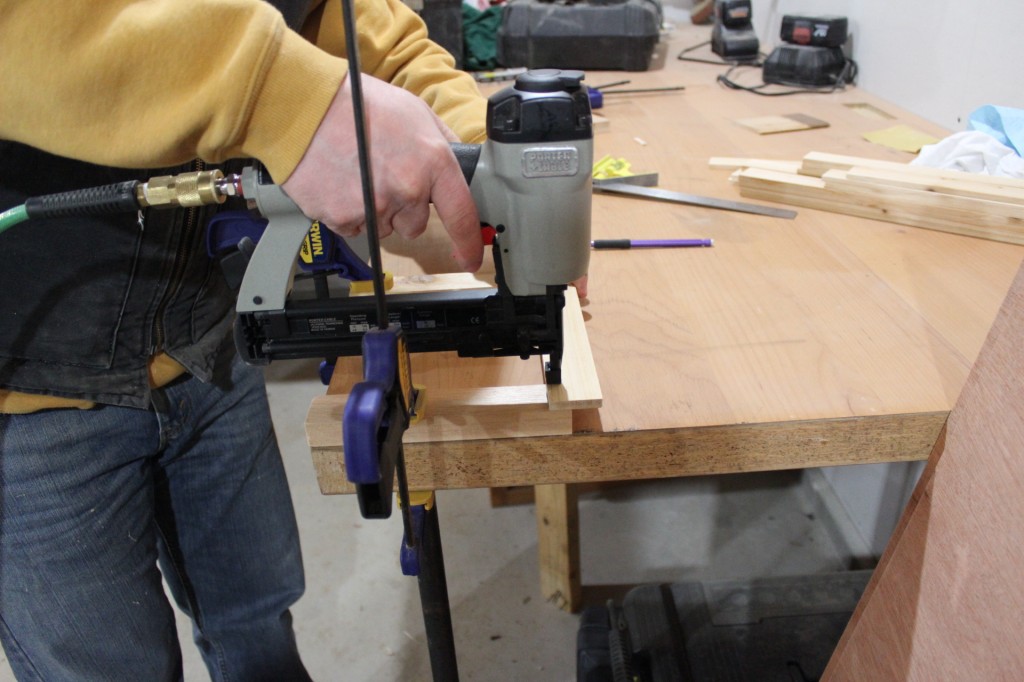
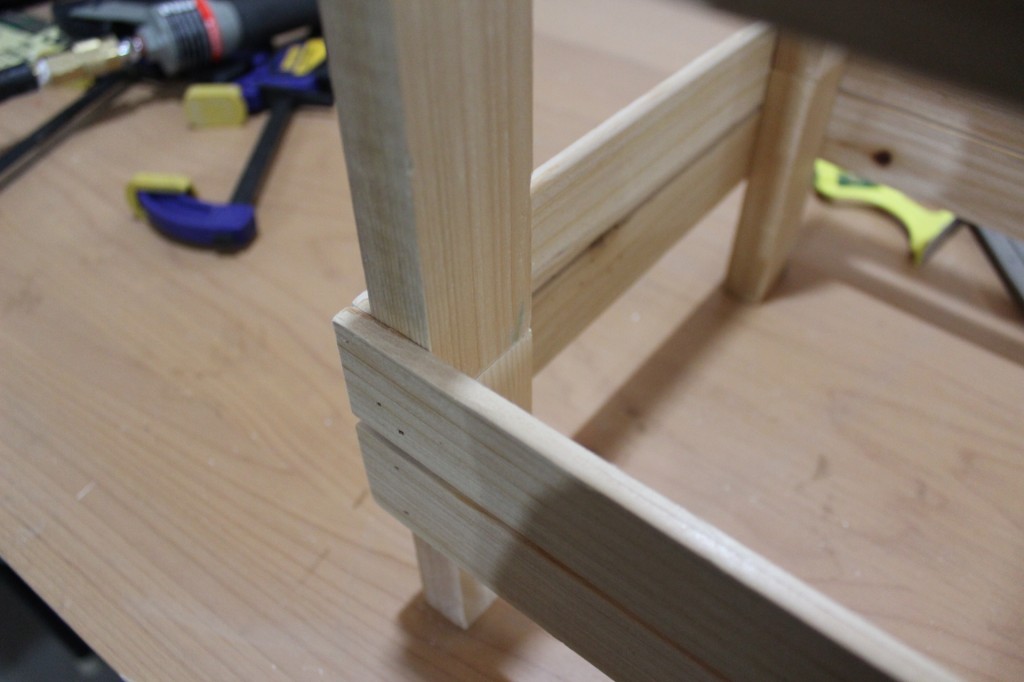
Then Anthony started to figure our how he was going to put the crates together:

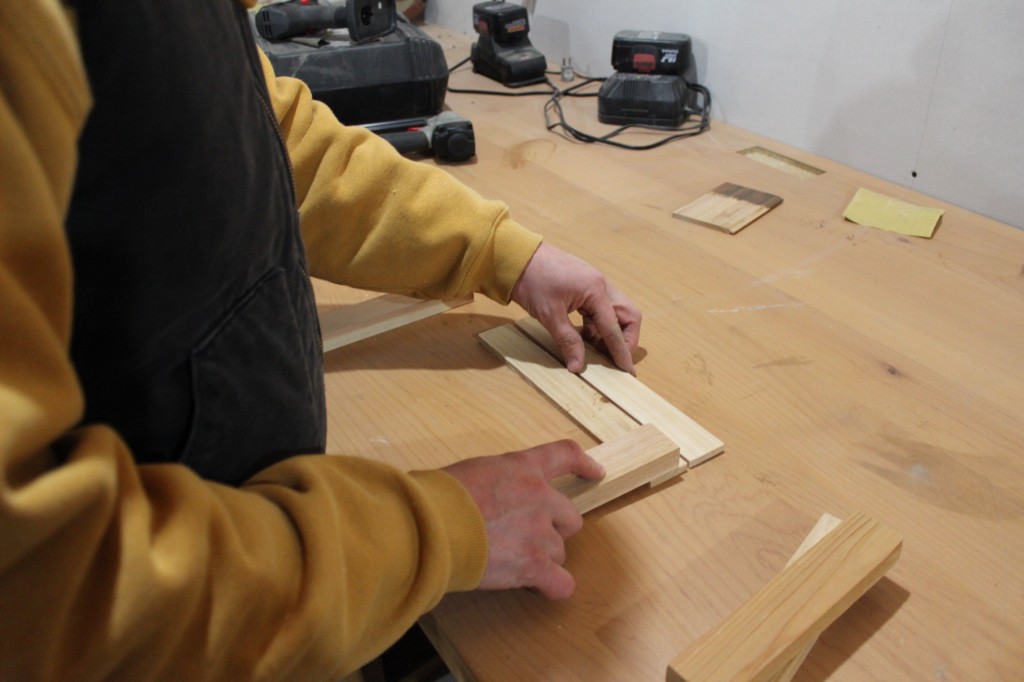
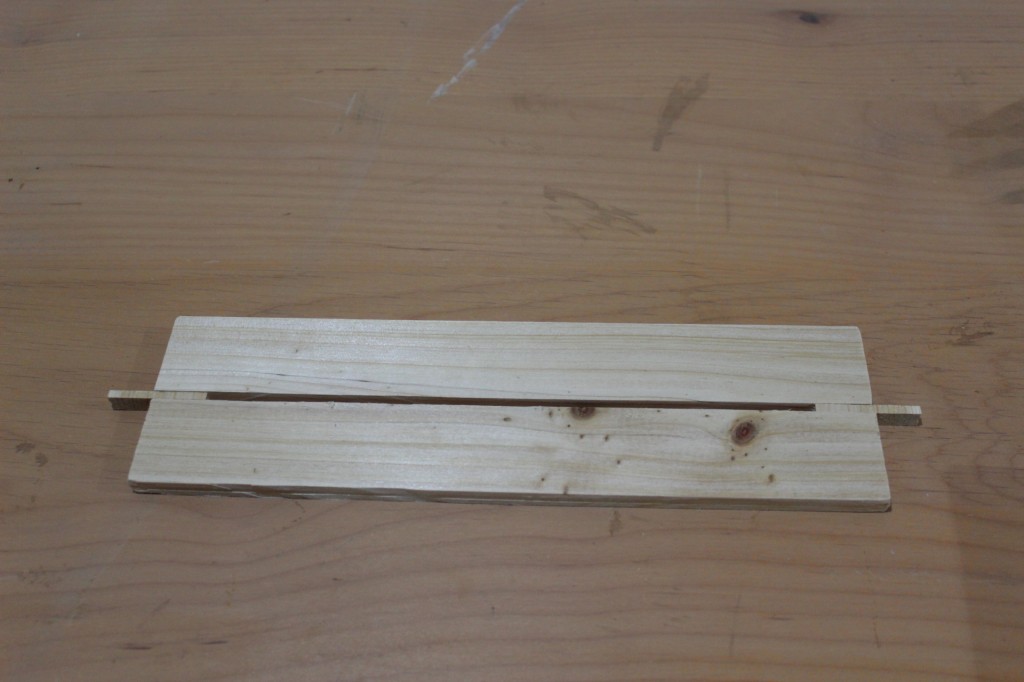
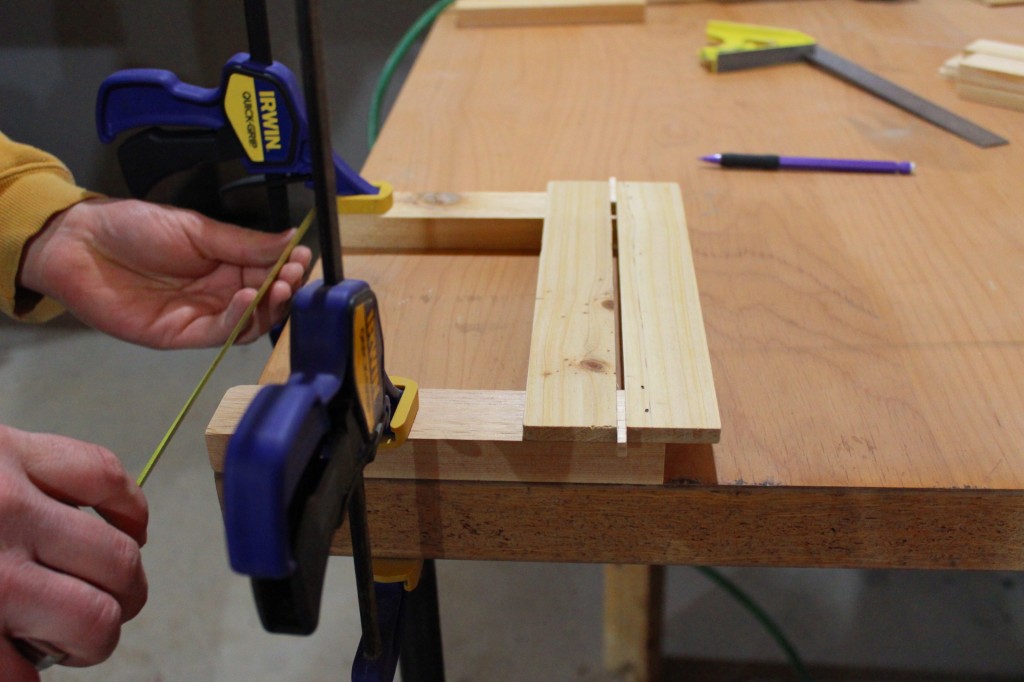
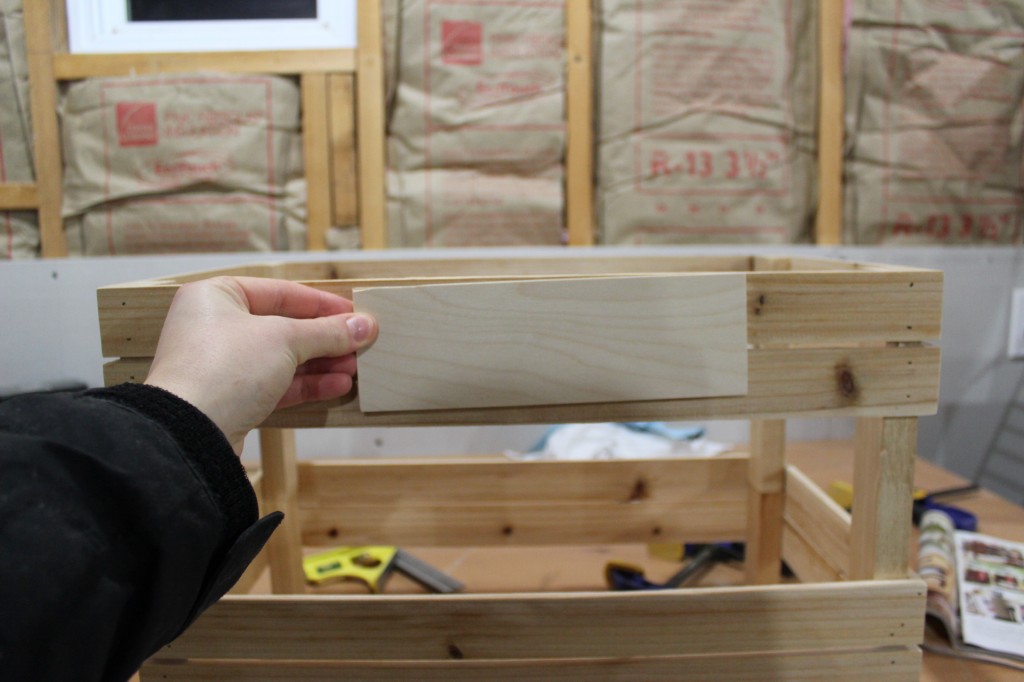
To get an exact spacing, we used a piece of the wood, which we cut down, to use as a guide.
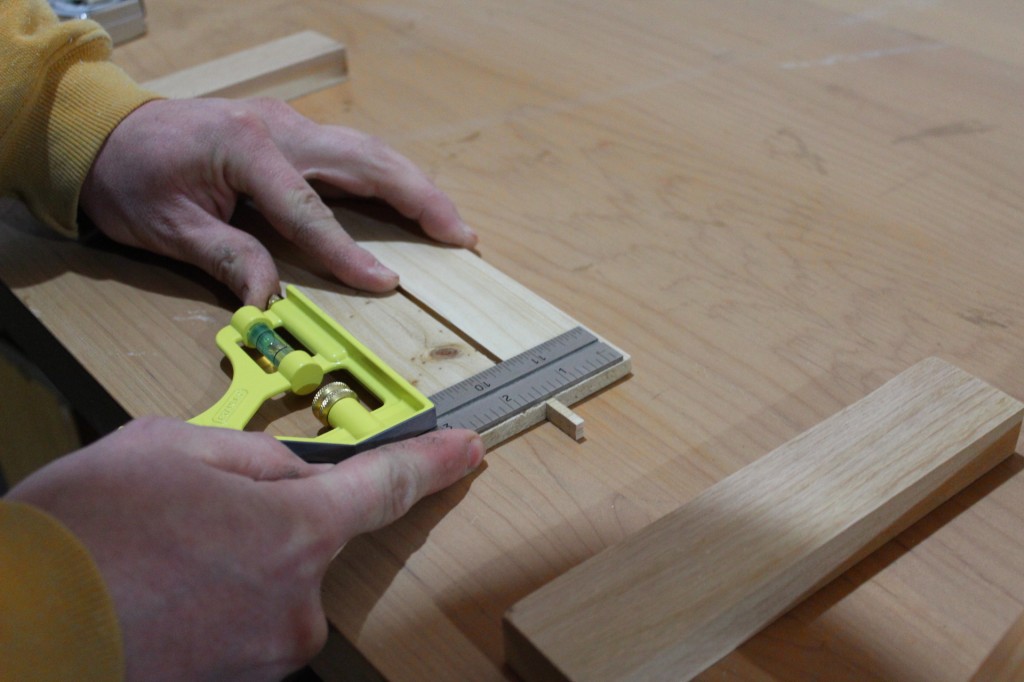
He used a square to make sure everything was even.
And then starting nailing the strips to the legs.
With the first strip in place, we used clamps to keep them on the table, put the spacers in place and nailed the second strip to the leg.
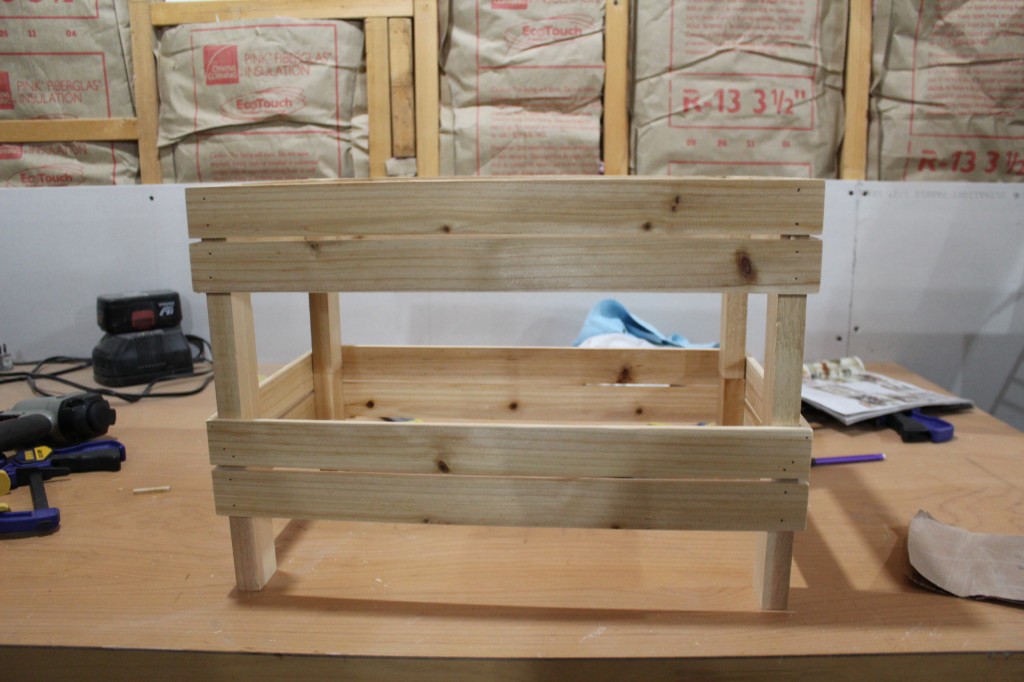
We did the same thing to the other side of the crate. Once that was done, we started adding the 18″ strips to the long side.


And repeated that on the other side. Which gave us this:
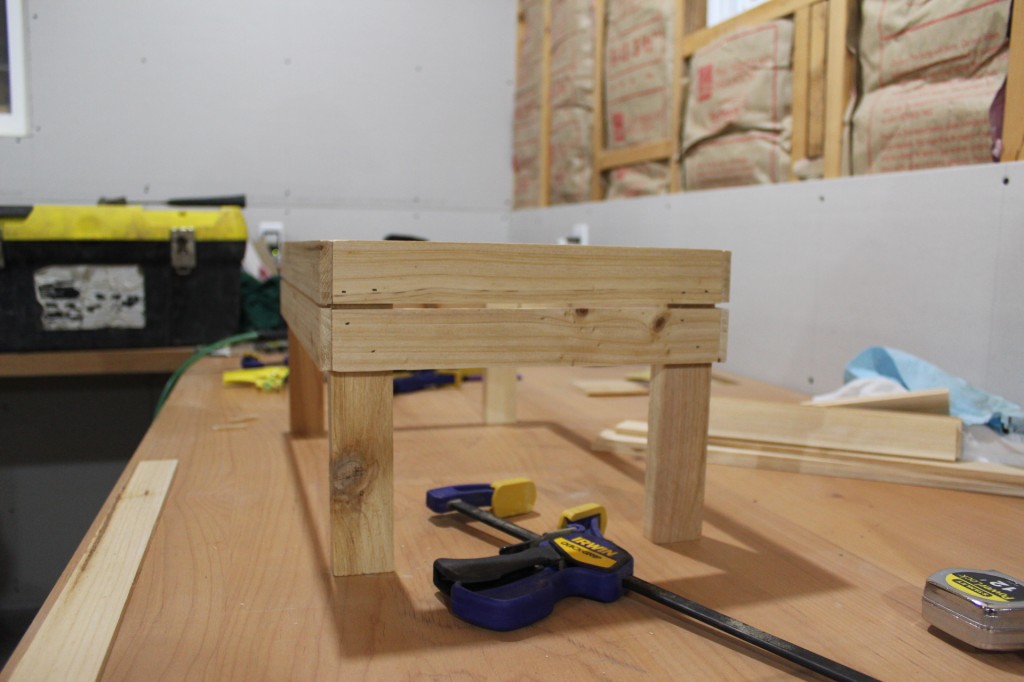

Once we had the first crate done, I decided it was too tall. With the table saw, we cut the legs off to 3 inches showing on the bottom of the crate.
Before we figured out how to add the bottom, we started making the second crate, which would sit inside the first one. We left a gap on the top of the first strip and the top of the 1″ x 2″ block. See the above picture if that doesn’t make sense.

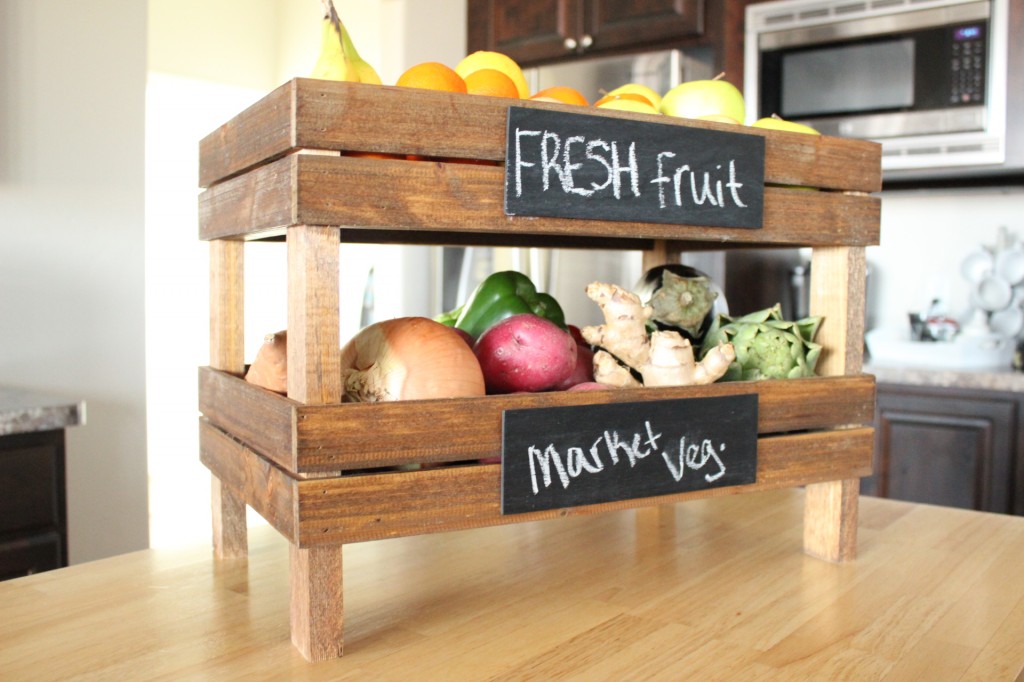
This is how they stack.
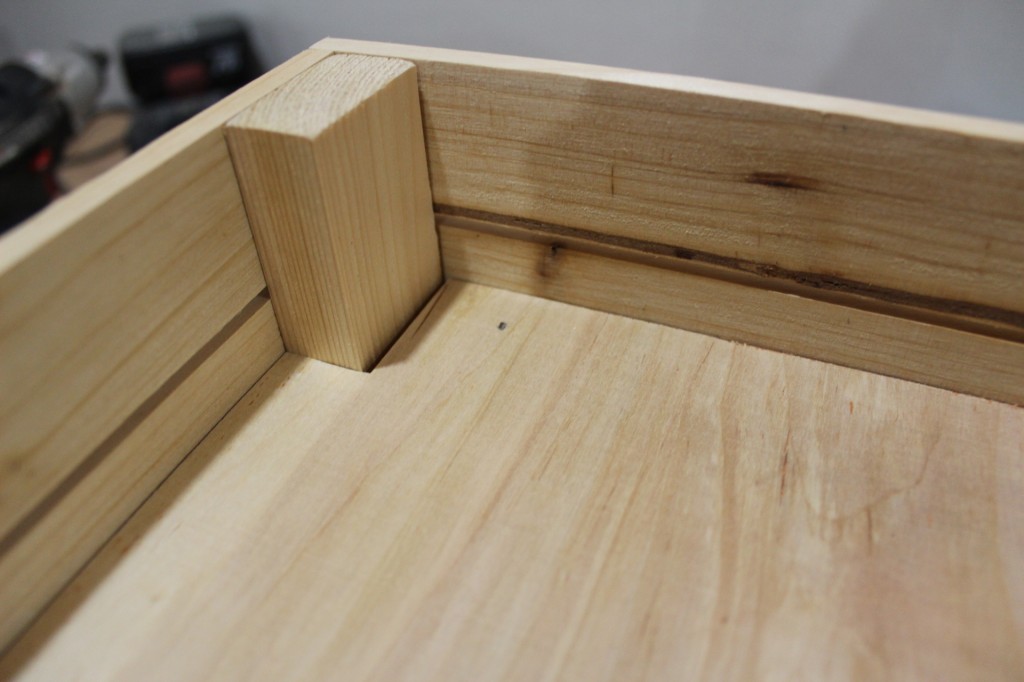
Next, we started installing the base of the crate. To do that, we used the same 1″ x 2″ blocking that we used for the legs. We measured the inside of the legs on each side of the crate and wedged the block between each leg.

We wedged the blocking so that it was flush with the bottom strip and nailed them into place.

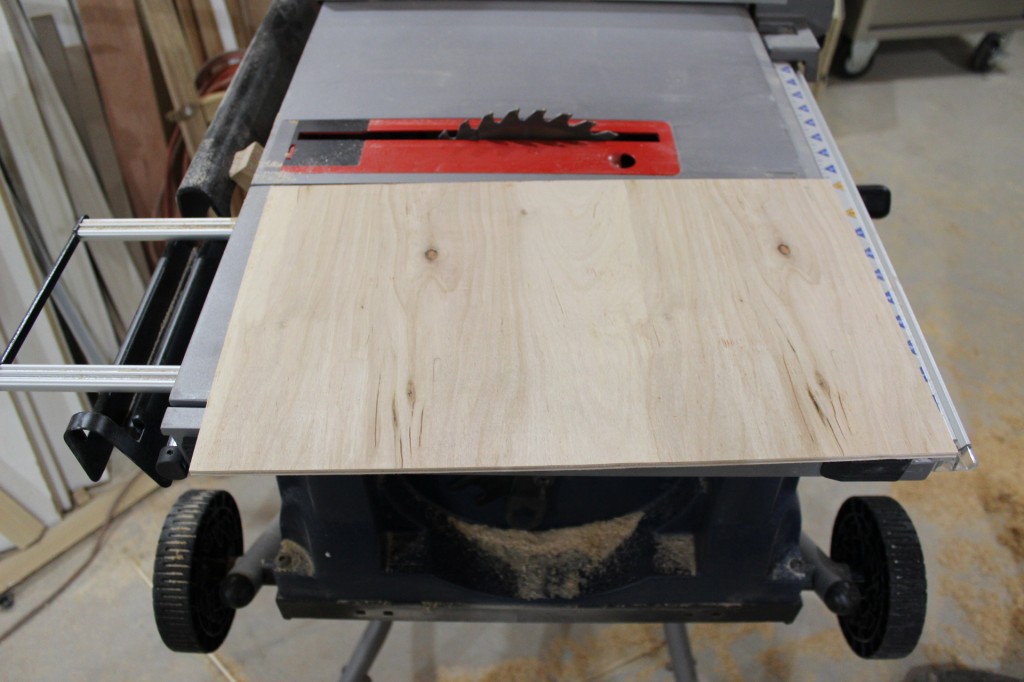
For the bottom of the crate, we used the same wood that we used for our plank wall.
We measured the crate, then used the table saw to cut around the blocks in the corners.


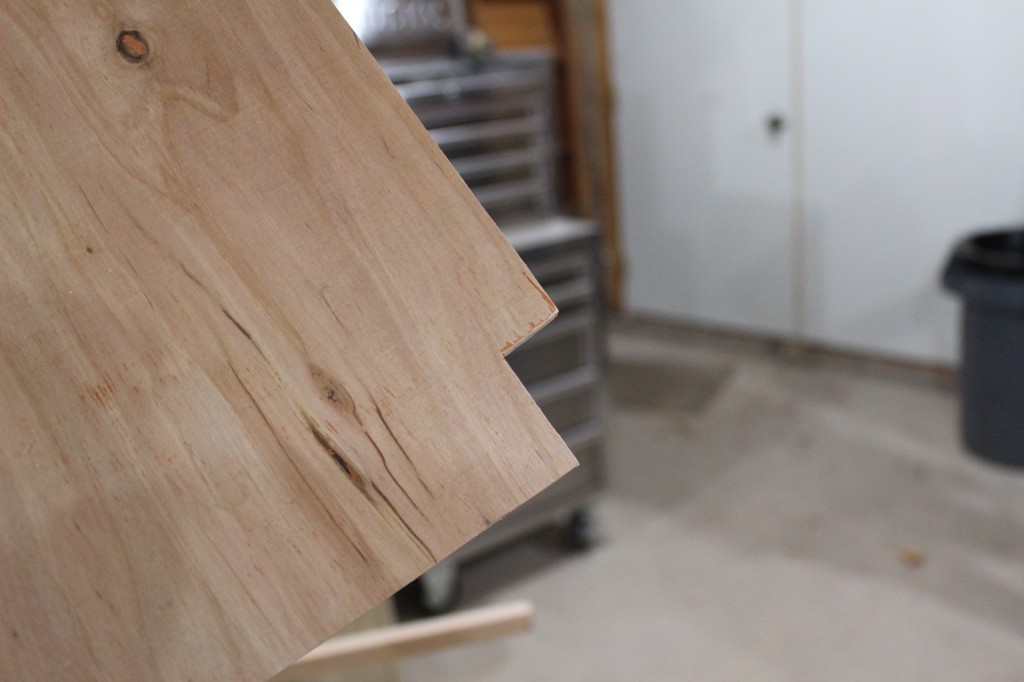
After the corners were cut, we pushed the bottom into place.

And nailed the corners.
That baby is solid!
Before I started to stain the crates, I had the hubby cut down some craft wood into strips for the chalkboard labels.

Then I gave them three coats of Chalkboard spray paint.

While I waited for the spray paint to dry, I started staining the crates.
I used Early American by Minwax. Love that color!
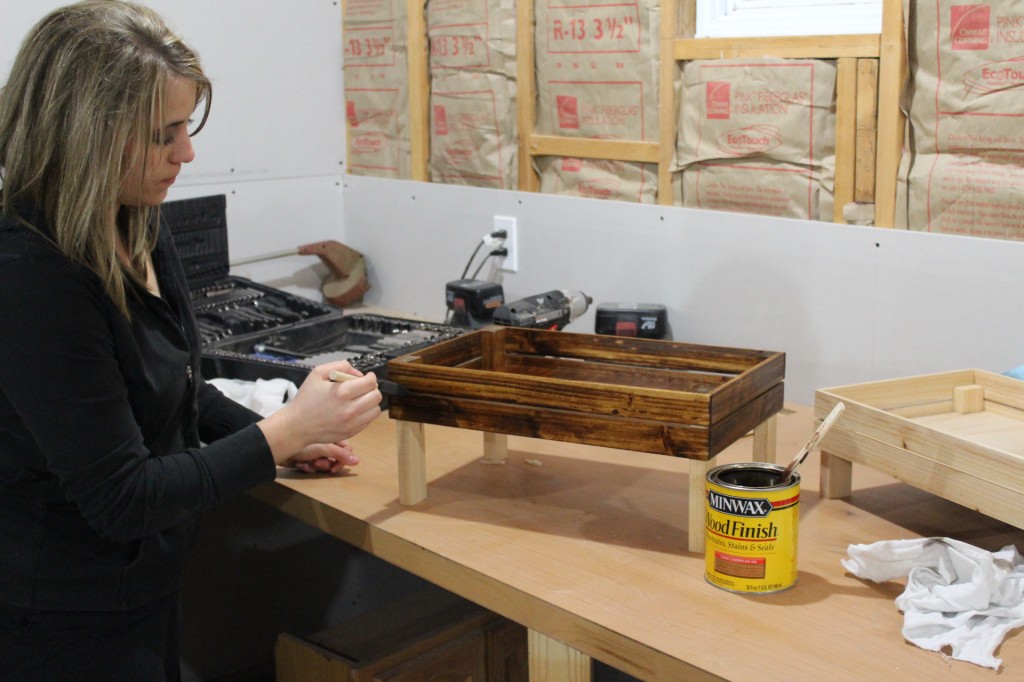
Luckily, I only had to do one coat. I let it sit the entire time that I stained the crate. Once I was done, I used a t- shirt towel to soak up the extra stain.

Then, I started on the second crate.

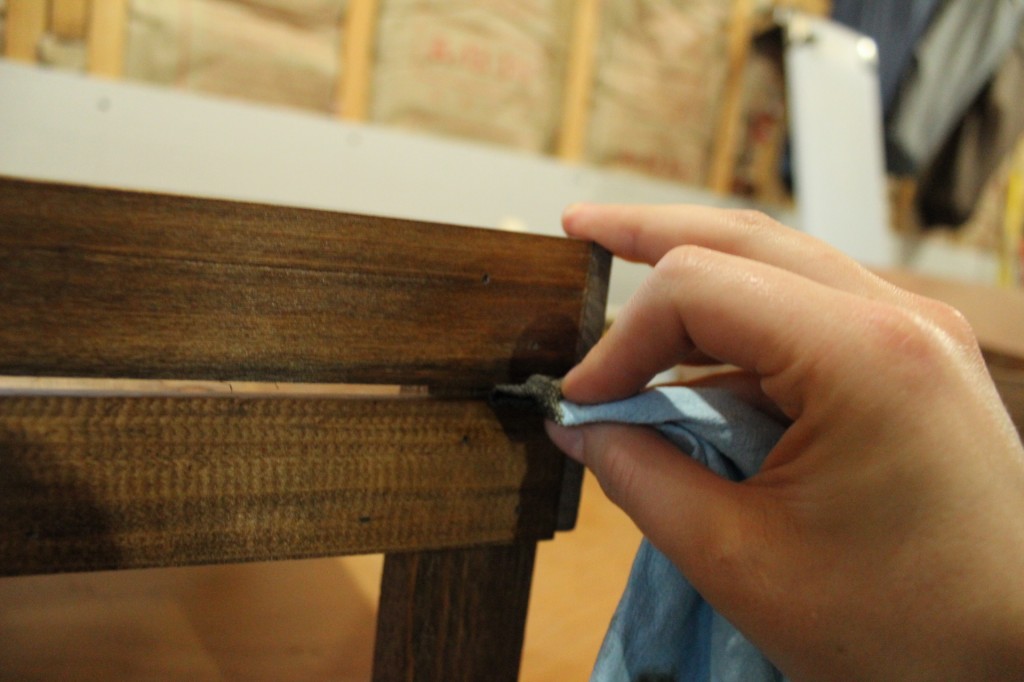
I am beyond thrilled with how the wood absorbed the stain.

And, I was totally shocked to see that the bottom stained the same as the sides and legs. We used a different material, and all wood stains differently. Honestly, I was prepared to line the crates if the bottom didn’t take the stain very well. I totally dodged that bullet.

To get in between the strips, I used a shop towel and wiped in the gaps.
I let them dry overnight.
The next day, I brought them into the house and attached the chalkboard with hot glue. Easy!
Here’s the finished product!
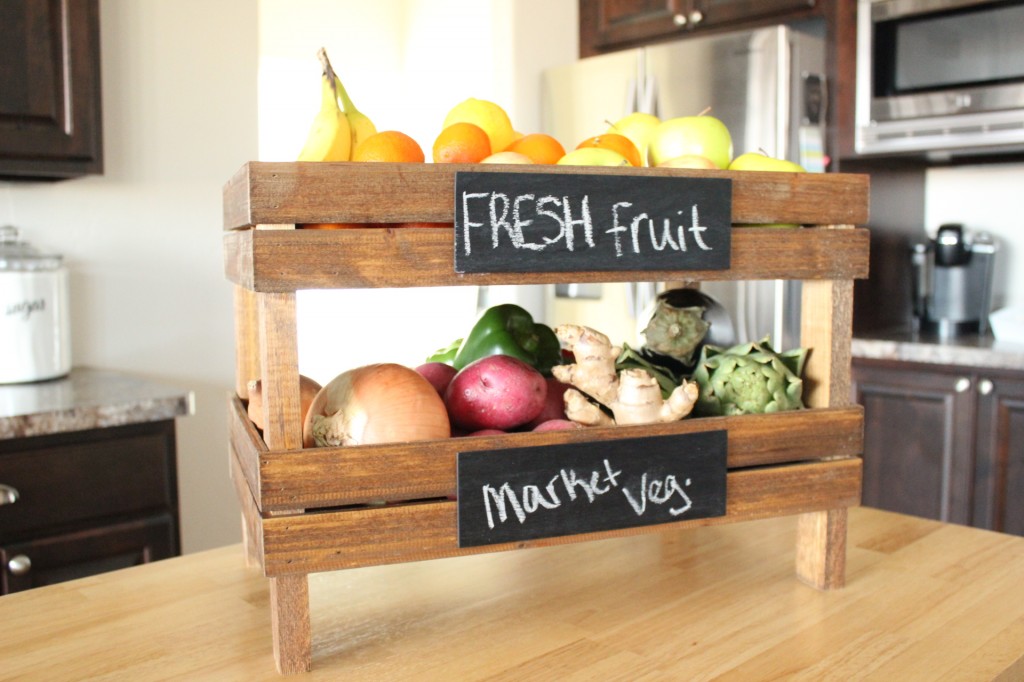
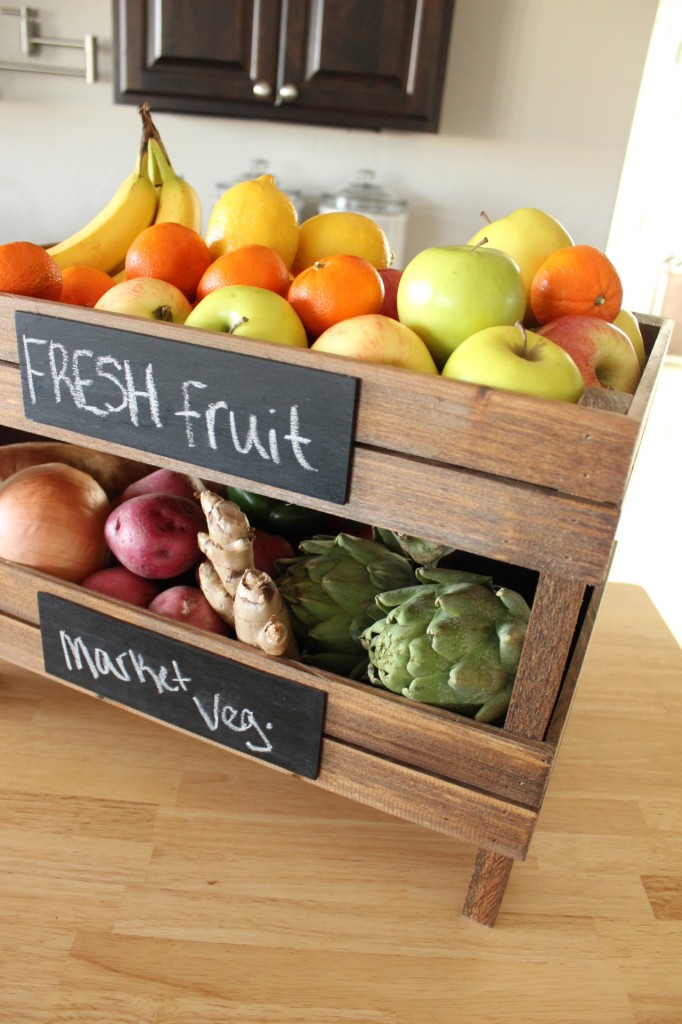

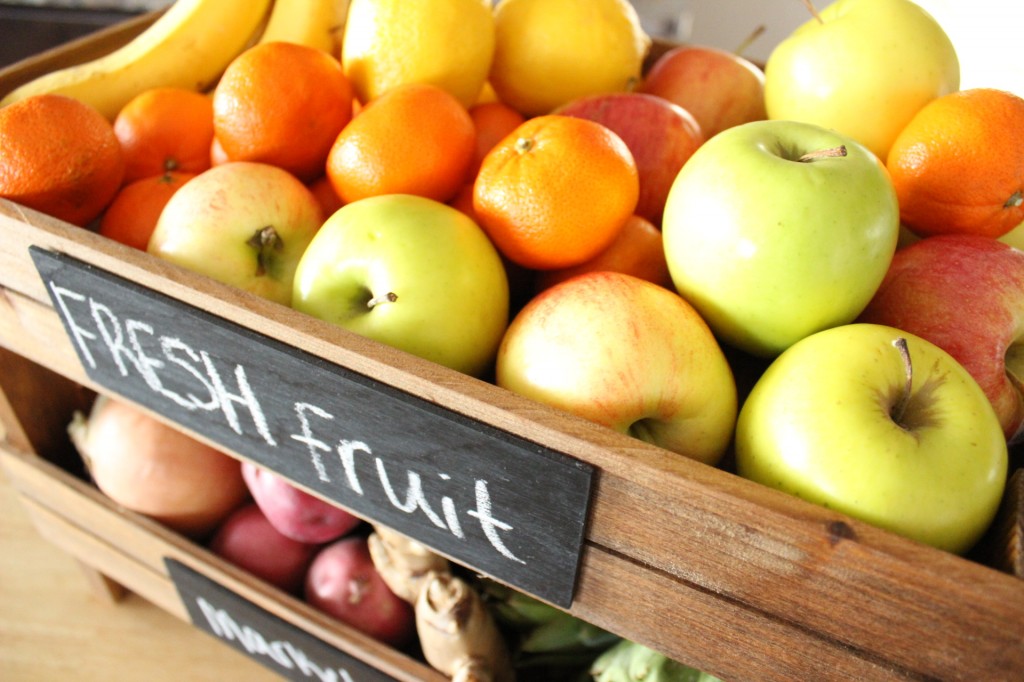
They hold so much fruit and vegetables!
I can’t even begin to describe how much I love these! They turned out awesome and look so ridiculously close to the Pottery Barn version that it’s a little unbelievable!
That, my friends, is a very successful knock off!
The price couldn’t have been better. $119 compared to the $30 we spent is quite the difference- and one that I’ll be proud to display on my kitchen counter! 🙂
Be sure to head over to April’s blog and check out her awesome set of DIY chalkboard table and chairs!
Here’s a sneak peak!

Darling, right?
And that’s a wrap! I hope you enjoy our very first $30 Thursday! Thanks for joining us! 🙂

Linking up to:
So cute! Love the knock off!! (: Way to go!
Thank you Lolly! 🙂
-Shayna
Too stinkin cute! I hope you don’t mind me pinning this for my readers. 🙂
Also I’d love it if you would share this or any of your other great projects over at F-it Fridays sometime!
http://www.parloandlogi.com/category/f-it-friday/
Thank you Chrissy! Please pin away! I’m off to check out your blog- and share! 🙂
-Shayna
I absolutely LOVE this! I am going to have to get my hubby to make me one. Thank you so much for the inspiration.
Thank you Melissa! I’m so glad you enjoyed the tutorial! They’re pretty easy! Enjoy! 🙂
-Shayna
p.s. following you on Pinterest!
Awesome! I’m glad to have you! 🙂
-Shayna
Love love love this! What an amazing knock off! Now I want one… 🙂
Pinning it!
Awe, Thank you Jen! I hope you build one! Thanks for the pin! 🙂
-Shayna
So creative and smart! I need to learn how to use a saw…. 🙂
Thank you April! A saw might change your life. It did mine. 🙂
-Shayna
This is my first time visiting your blog. I guarantee it won’t be the last. I absolutley love this project. The crates are awesome.
Thank you Johanna! I’m so glad you like the crates- and I’m happy to have you as a new reader! 🙂
-Shayna
Can you make one for me – and I’ll buy it? 🙂 serious
Hi Michele! I’ll have to talk to the hubby and see what we can do. I’ll let you know- and THANK YOU for your interest! 🙂
-Shayna
Oh my goodness! This is absolutely adorable! What a fantastic, easy to follow tutorial too! I so wish I had more room in my kitchen for this because I am seriously obsessed! I’m your newest follower, can’t wait to see what you have next.
Thank you Christina! I’m glad you enjoyed the tutorial— and I’m so happy to have you as a new follower! 🙂
Big smiles!
-Shayna
Your fruit crate is awesome! I loved your the table and chair set by April too. I’m pinning this idea.:)
Megan
Thank you Megan! I’m so glad you liked our projects. Thanks for the pin too! 🙂
-Shayna
Great knock off, Shayna! Love it! And looking forward to your $30 Thursdays series!
Thank you Roeshel! Big smiles! 🙂
-Shayna
LOVE THIS!!!!!! The crates look great, and they are so beautifully made!!!!!! Just beautiful!
Awe, thank you Maria! I’m so glad you like them! 🙂
-Shayna
Love them!
I am pinning… Have a great weekend!
Thank you Desiree- and thanks for the pin! 🙂 Happy weekend to you as well!
-Shayna
Seriously so cute. I love the addition of the chalkboard in the front.
Thank you Jenn! I’m glad you like them- and you’re right, the chalkboard totally tops them off! 🙂
-Shayna
The crates are awesome! Great job!
I found you via Tatertots and Jello…
Anjana @ http://happyandharried.wordpress.com
Thank you Anjana! I’m glad you found me! 🙂
-Shayna
OMG I LOVE this idea. I have the perfect spot for it on my counter too! I’m pinning this right NOW! I’d love for you to come link this up at my Tuesday Time Out!
Melanie Reasons To Skip The Housework
Thank you Melanie- and thanks for the pin! 🙂 I’m off to check out your blog and link up!
-Shayna
Whoa. This is great. I sense many uses for this! Love the chalkboard labels too!
Thank you Rebecca! You are so right- they’re very versatile and will probably find many different uses! 🙂
-Shayna
Seriously fabulous, Shayna! I’ll definitely be tuning in to your series, love April’s blog too!! Pinned 🙂
Thank you Chelsea! I’m so glad you like them- and that you’ll be joining us for $30 Thursday! I agree, April’s blog is fantastic!
Thanks for the pin! 😉
-Shayna
Im in love with anything made from wood pallets. Love these crates – such a beautiful idea.
Thank you Mable! I’m glad you like them! 🙂
-Shayna
Hi! I absolutely LOVE these crates! I like to wash all my fruit and veggies as soon as i buy them. Do you know if it’s okay to eat them after they’ve been on the stained wood or should they be washed before consuming?
Hi Kathy! Thank you for your comment! You ask a very good question, which I’ll try to answer. 🙂 The stain was completely absorbed into the wood. Once it was dry, I did a good wipe down of the crates- so hopefully nothing is seeping into the fruit. I can’t imagine that it would. I always wash my fruit before I eat it, especially if it sits on the counter, since dust and the such is landing on it. If it were me, I would probably wash right be fore eating. Although, if you were really worried about it, you could line the bottom of the crate with a drawer liner. That should stop anything from getting on the fruit.
Hope that helps! 🙂
-Shayna
Stopping over from Fox Hollow Cottage to pin these crates. I’ll probably keep snooping around while I’m here too.
Bliss
THANK YOU for stopping by Bliss! And thank you for the pin! 😉
-Shayna
Thank you for sharing! I just saw the Pottery Barn version and googled and found you. Thank you for sharing all the great pics.
THANK YOU Gretchen! I’m so glad you found me- and that you enjoy my version of the PB fruit crates! 🙂
-Shayna
I am IN LOVE with these, I saw them on Hometalk and now I am pinning! Great job!! I can’t wait to make some!
Hugs!
Mindi
THANK YOU Mindi! I’m so happy you LOVE them! Me too! They have been such a great addition to our kitchen! 🙂
-Shayna
hope ya eat it fast enough, shouldnt put apples and bananas together or onion and potatoes together. like the idea though.
Hi Kelly! Thanks for your comment! I’ve never heard of this before… why can’t you store each of these items together? You’ve left me really curious! 😉
-Shayna
Hi my gosh there so awesome, I would be building a couple for myself but I lost my husband and had to sell our home so I no longer have my garage or any of our tools and we had plenty as we custom built 2 of our homes from the ground up made our own blue prints even, oh how you site brings back such good fun times for me Thank you so much I am not only a widow I am disabled so I cant even begin to make any I will have to see if I can find someone to build a couple for me but at a good price as Living on a limited monthly income isn’t easy. Its funny I found your site as I been looking for stackable crates for a while now and don’t really like the plastic ones I want to have like 3-4 to stack in front of my apt window for my buddy Violet she is my 9 year old cat and just loves sleeping and hanging inside crates. It would be great for her to lie on the top one’s with a soft blanket to look out the windows at all her animal friends as I have never let her outside don’t want anything to happen to her she is all I have. You don’t sell them do you?? Well Thank you so much again You brought a smile to my face. I wish you and your family all the best Kathy
Hi Kathy! THANKS so much for your comment. I’m so very sorry for your loss, but I’m glad these brought a smile to your face. I’m happy to have you here!
We aren’t currently selling them, but you’ll be the first to know if we do!
Hugs!
-Shayna
Thanks for joining in for Simply The Best Shayna! You know I love this project… and all your others too 🙂 Hope you are enjoying your Summer so far – Shannon
Such a fun party Shannon! So happy to link up! Thank you for your sweet comment! Happy Summer! 🙂
-Shayna
I love this! I voted for this project in the Simply The Best competition
Awe- THANK YOU Carol! Thanks for the vote too! 🙂
Have a great weekend!
-Shayna
That is frickin BRILLIANT. I love it. Being a broke DIYer this is right up my alley. Thanks so much for the very awesome step by steps.
Love this idea, but I would caution against using the Minwax stain because it’s not food safe. Perhaps a non-toxic water-based sealer that is food-safe should be applied over the top since you’ve already stained it but anyone making this in the future should be aware of putting fresh fruits and vegetable directly on Minwax stain.
Hi Laura! Yes, you are correct this isn’t food safe and if you’re making one for yourself, please be sure to seal it with a food safe product. 🙂
Getting ready to make one. I’m using raw linseed oil first and then a layer of beeswax. Very food safe. It’s what they use on butcher blocks.
Ok. You need a handyman for this. I have none. This is no good. Can’t you just use store-bought wooden crates? Thanks
Sorry you feel that way! This was one of the first DIY projects we did, so it can definitely be done. You could try using store bought wooden crates and add legs to them to create the “stackable” effect.