
Breakfast Nook Plank Wall Tutorial
Here we are! The planked wall in the breakfast nook is finished and we LOVE it! It’s the perfect punch of texture and a great focal point for the room.
Here’s the tutorial on how we did our plank wall!

Since we’ve never done a planked wall before, I started this project by browsing around the internet for guidance. After getting a general idea on what we needed to do, we measured our wall and headed to Home Depot to gather supplies.
Please note: Some of the links in this post are affiliate links, which allows us to make a small commission from your purchase, but your purchase price stays the same. Thank you for helping support our blog! We greatly appreciate it!
Supplies:
- 1/4″ 4′ x 8′ sheet of Underlayment, cut into 6″ strips
- Quarter Round
- Table Saw, this is similar to ours
- Miter Saw, this is similar to ours
- 18 Gauge Nail Gun
- 1 1/4″ 18 Gauge Brad Nails
- Air Compressor
- Jigsaw
- Pennies, for spacing
- Tri Square
- Level
- Tape Measure
- Sandpaper
- Caulking Gun
- Caulking
- Wall Putty
- Foam Roller
- Paint Brush
- Paint, I used White Dove by Benjamin Moore in satin
We decided to use a couple of 4 x 8 sheets of particle board underlayment intended for use under flooring. We also grabbed enough quarter round for the planks that would butt up to the other walls.
Once we got home, we cut the sheets into 6 inch strips with our table saw. After we had the planks cut, I took a piece of sandpaper to each cut edge and sanded off any splinters that popped up during cutting.
With all the planks ready, we started by leveling the ceiling to see where we would need to start our first board. Keep in mind that most ceilings are not level and that you absolutely want your first board to be level! If not, your entire wall will be crooked. And that will make you very mad!
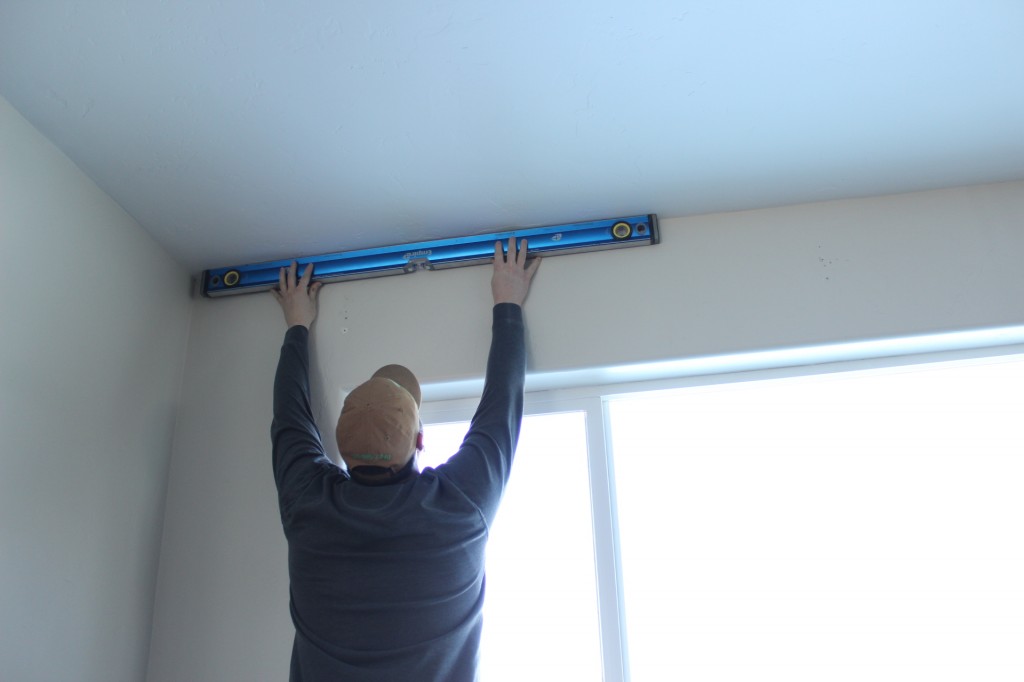
Once we knew how uneven the ceiling was, we grabbed our first plank and made sure it was level. Then we used our nail gun to secure it in place.

With the first plank up, we grabbed our second one, cut it to size, then used our level to make sure everything was even.

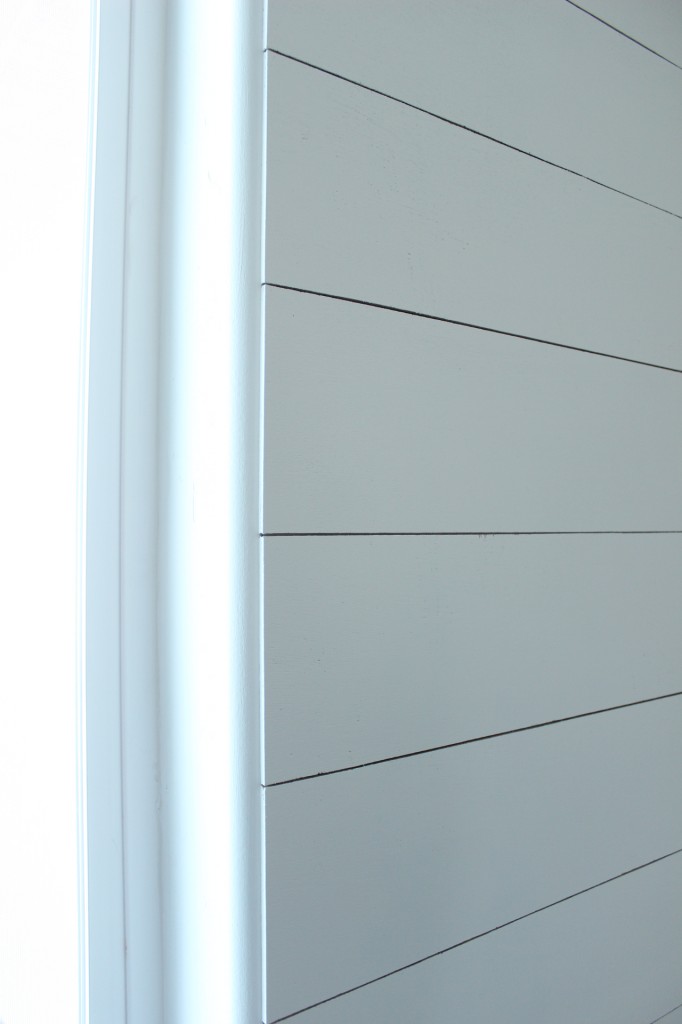
Since our wall was longer than the sheets of plywood, we decided to place the planks together tightly to make the seams less visible. I didn’t want to have the random scattered look, but more of a seamless look.
With the first row of planks nailed up, you could definitely see how uneven our ceiling was in a few spots. Luckily, it’s nothing that a little bit of caulking wouldn’t fix.

For the spacing in between the planks, we used a couple of pennies to keep the planks evenly spaced throughout the wall. It worked like a charm!


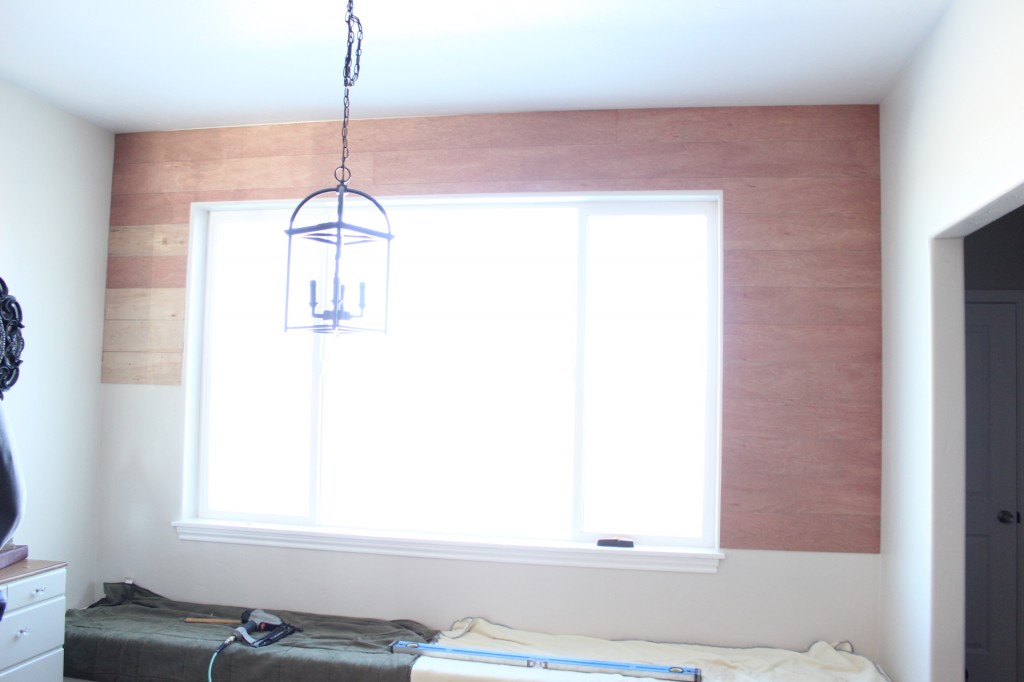
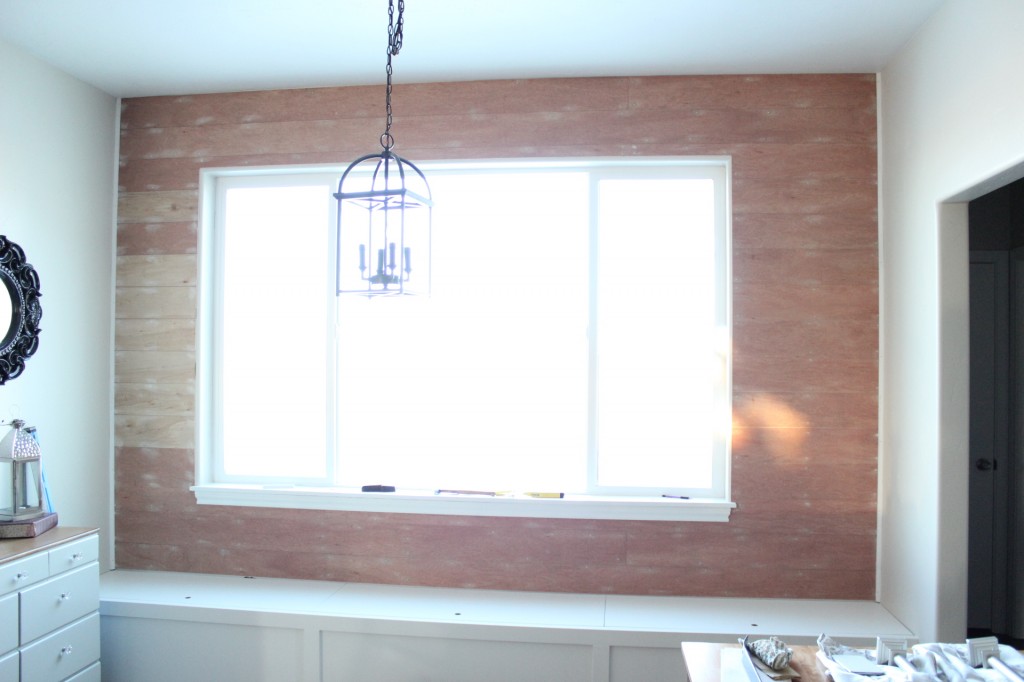
We kept nailing up the planks until we reached the top of the window… then we chose to notch around it rather than plank the inside.

Once we cut around the window, we started on the sides, which went quick!
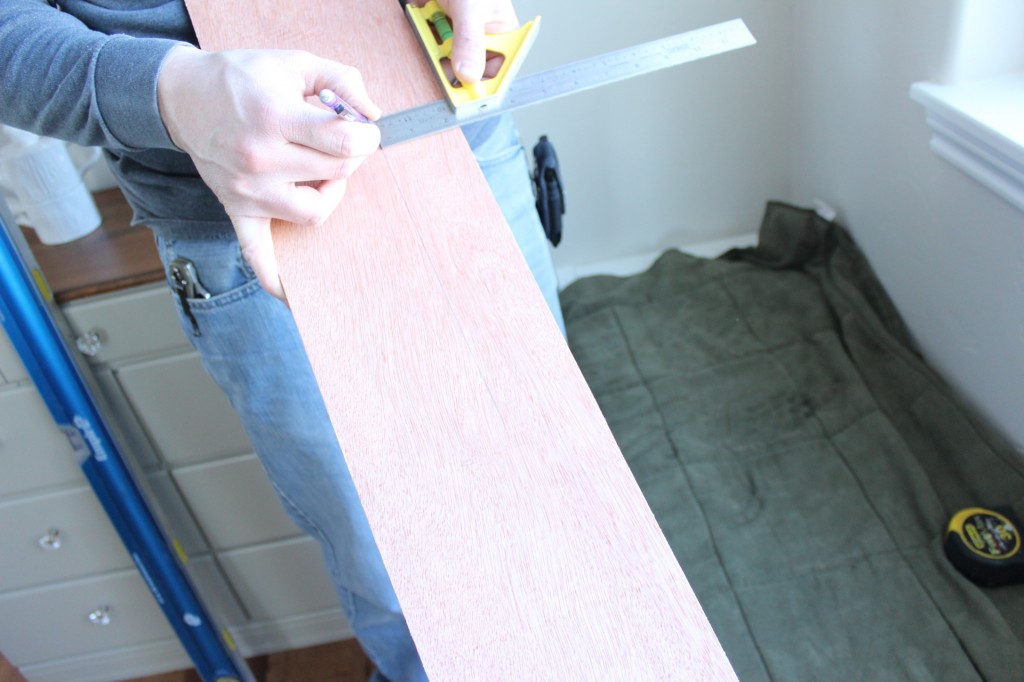
Then, while the hubby was cutting the planks to fit around the window sill, the spackling fairy (points fingers at self) came and started to fill all the nail holes.

To cut around the window sill, Anthony measured and made a template on the plank.


We did the same thing to the other side and nailed up both of the planks. Then, we nailed on the window trim that we took off.
With that done, it was easy to nail up the rest of the planks.
The spackling fairy returned to finish filling the nails holes, then sanded them smooth and wiped down all the boards with a damp cloth to remove the dust.
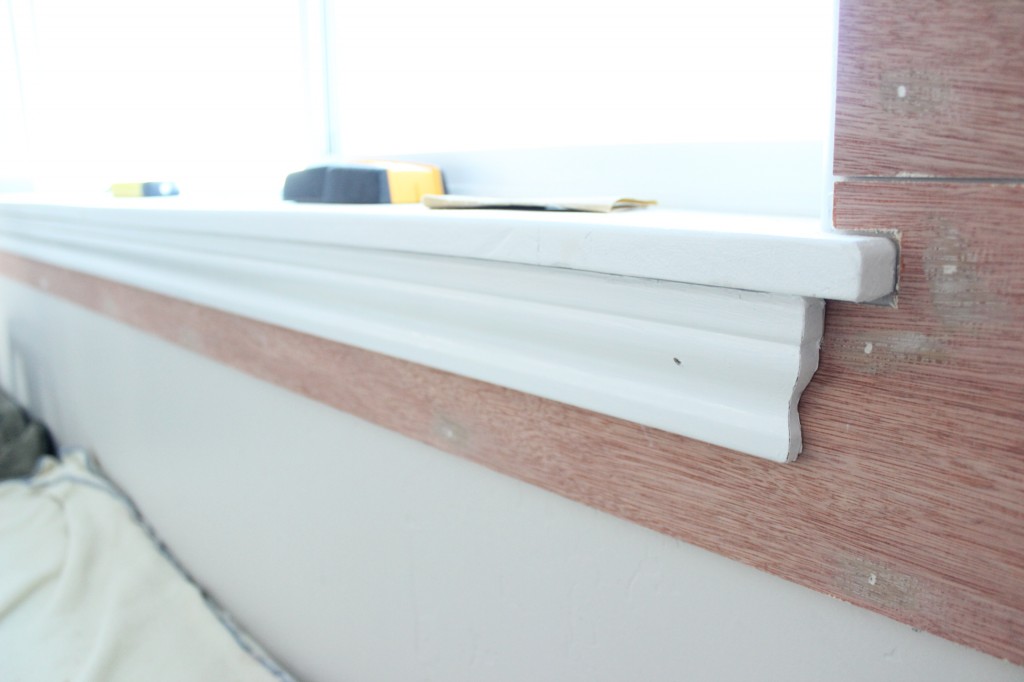
From there we installed the quarter round on each side of the wall.

With everything finished and ready to paint, we quickly caulked the top of the wall to hide the uneven ceiling, and the sides of the quarter round. We didn’t caulk the inside of the quarter round where it met up with the planks because we didn’t want to get any caulking in the lines, which would have thrown off the planked look.
I decided to paint the entire wall the same color as the breakfast nook bench, White Dove by Benjamin Moore. I also painted the inside of the window frame where we didn’t install the planks.
I must admit, I was a bit skeptical about not planking the inside of the window frame. I knew that it wouldn’t be really noticeable because of the curtains, and I didn’t think that it was worth the extra effort.
Honestly, I’m glad that we didn’t waste our time. After I painted the inside of the frame to match the planks, you can’t even tell. It all fits together perfectly.

I’m seriously smitten with this wall. If I could pack it around with me, I totally would.
We also made sure to stop the planks and quarter round above the bench lids so that they could be easily opened. Once the cushion is in place, you won’t be able to see the gap.

The caulking on the ceiling totally hid how uneven our ceiling was. Perfect!

Also, a few things to note:
– I used a smooth roller to paint the wall. I found that the paint didn’t want to seep into the cracks as long as I didn’t overload the roller. I did get paint in a few spots, but I used a putty knife to clean it out when it was still wet.
– The sheeting that we used was thin and it worked perfectly. I originally thought that we might need to use something a little bit thicker, but that’s certainly not the case.

– I am beyond happy that I went over the entire wall with a damp cloth. When I did that I made sure to wipe down the cracks and remove any dust that might have settled there.
-I didn’t worry about painting the wall before we installed the planks. However, the original color of the wall was a light tan. If I were to install the planks over a darker color, I would certainly paint the wall a light color first.
-I didn’t paint the cracks of the planks. Honestly, I think that this gives the wall the “planked” look. If the inside of the cracks were painted it would look a little bit different.
Really, this project didn’t even take us that long. If we wouldn’t have had to make the cuts around the window this project would have flew!
And the cost absolutely couldn’t be better. We spent a total of $60 on sheeting and quarter round, but a lot of the sheeting will be used on another project too! We did have the paint, spackling, caulking, nails, etc. on hand.
This breakfast nook has made some serious progress. Looking back at where we started, I can’t believe how much a few DIY projects can completely change the entire look and feel of a space.
Before:
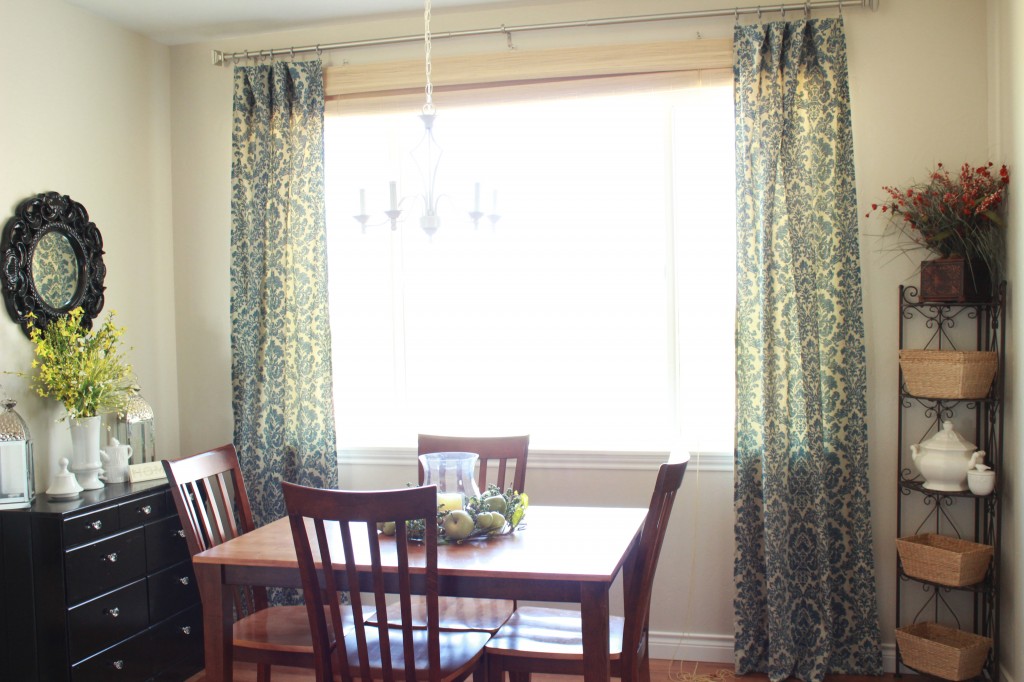
And now:
Now, it’s all about accessorizing and few other small DIY projects.
One thing’s for sure, you’ll be seeing planked walls pop up in a few other areas of our home. 🙂

To see more posts on our breakfast nook transformation, see below.
Breakfast Nook Refinished Dresser
Linking up to:
It looks beautiful, great work 🙂 and yes , DIY projects can make a big difference in a room 🙂 beautiful space
Thank you! We’re loving it!
-Shayna
Beautiful! I love the simplicity of the white.
Thank you Andrea!
-Shayna
WOW! You nook is gorgeous! The planked wall, the white,the built-in bench… it’s all amazing! I bet you love being in this space. Thanks so much for sharing! Have a wonderful day!
Awe! Thank you for such a sweet comment Brooke! You’re right- I love being in this space! 🙂 I hope you have a great day too!
-Shayna
oh i love it so much. i have a wall exactly like that in my dining nook and i’ve been wondering what do do with it! i love the transformation
Thanks Carissa! It’s really transformed the space- we love it!
-Shayna
It looks fabulous! So much added visual interest. 🙂
Kelly
Thank you, Kelly! I agree, it added a lovely texture to the room! 🙂
-Shayna
We just did this exact same thing to the ceiling in our dining room!
http://rindymae.blogspot.com/2013/01/gettin-my-plank-on.html
We still need some trim up, but so far I’m LOVING it. Yours looks awesome.
Found your post via the 36th Ave. link party. Now I’m gonna poke around your blog some more. 🙂
Thank you, Mindy! I’m glad you found me! It’s unbelievable how much texture it adds to a space! Great job on yours too! It turned out great! 🙂
-Shayna
we just did two plank floors using plywood..absolutely love it..never thought of doing walls….lol I have a bathroom that this would be perfect in! THANK YOU
THANK YOU so much, Donna! Planking on the floor is brilliant! I bet it’s lovely! 🙂
-Shayna
Love it! Very pretty! And I really like the new light fixture with the wall as well! 🙂
Thanks for linking up to this week’s Catch a Glimpse Party. I’ll be featuring this tomorrow.
Awe, thank you Allison! How exciting to be a feature on your awesome blog! Looking forward to it! Big smiles! 🙂
-Shayna
Wow. This is beautiful. Before you know it a magazine will be in your home snapping away for an upcoming issue. Maybe Country Living. 🙂
Thank you, Autumn! What a lovely comment! 🙂
-Shayna
That is one gorgeous wall, Shayna. What a beautiful job! Great tutorial too! Thank you so much for sharing!!!
Thank you so much Roeshel! I love the way that it turned out! 🙂 Big smiles!
-Shayna
I saw this project on Pinterest and had to come check it out! I am so glad I did I’ve been roaming around your blog and absolutely LOVE what you are doing! I’m happy to say I am your newest follower!
Wow, what a lovely comment! Thank you Jacque! I’m so happy to have you as a new follower— and thanks for the Facebook shout out! 🙂
-Shayna
I’ve been wanting to do this in my home for so long! Thanks for the tutorial!!!
You’re welcome! I’m glad you enjoyed the tutorial! 🙂
-Shayna
Found you via Pinterest… absolutely love this project and love your style! I’m getting ready to do the same in our bedroom. Subscribed for more 🙂
Hi Jenna Sue! I’m so glad you found me- and that your a new subscriber! I’m a big fan of your blog- so this is pretty exciting! 🙂
Great luck to you on your plank wall! I can’t wait to see it!
-Shayna
It’s seriously perfect!! I love it!
Awe- THANK YOU so much Shawna! I really love it too! 🙂
-Shayna
Beautiful! I love love love it! May I ask where the pendant light is from?
THANK YOU so very much, Caitlin! I got the light from Home Depot. You can read all about it here: https://www.thewoodgraincottage.com/2013/01/07/breakfast-nook-lighting/
Hope that helps! 🙂
-Shayna
I absolutely love how you did this project. Now there’s something I really like about your style…it’s a little rustic, a lot pretty, but very neat the whole time. I like the way you did your plank wall neatly. Does that make sense? This is my plan in one of our bedrooms. You sure did a great job!
AWE! STACEY! THANK YOU so much! I absolutely know what you mean about doing it neatly. I’m a bit OCD, so the tidier and cleaner we can make our projects, the better!
You will love you plank wall! 😀
-Shayna
Oh gosh….. I love this blog/tutorial….. I so want to do the same, but no money at all right now…… but this is great.. I will share it if I can…. great, really great.
THANK YOU so very much, Sheryll! I’m so happy you’re enjoying the blog! Welcome to The WGC! 😀
-Shayna
What a great tutorial. I would love to try this in my home now. Thank you!
THANK YOU so very much, Laurel! I’m so happy you enjoyed the tutorial! 😀
-Shayna
Hi – this looks so neat and gives such impact! When you attached the boards, did you make sure to nail them into the studs? I am thinking of doing this but am worried that if I don’t attach to the studs they might warp. Thanks!
THANK YOU so much, Cate! I love the planks! Yes, we did make sure to nail several of them into the studs, but we also nailed some straight into the drywall and they’ve all stayed in place really well, no warping! 😀
I hope that helps!
-Shayna
This looks so good, it really adds something extra to the room. I also liked the wood look prior to painting. Thanks for sharing this idea!
Lovely! Did you prime the wall before painting? How many coats did you do?
Thanks so much for sharing!
THANK YOU so much! For the walls, I didn’t prime anything. I just started painting and it took me about 3 coats. I hope that helps! 😀
I pinned this for later. We also have a breakfast nook and it has had me baffled for five years now. Should I put up curtains….cushions… not sure what the space needed. This is a great idea and one I am now considering for the space that makes me so unsure. Also, I never knew ceilings weren’t perfectly level. Good to know!
I think the wall looks great! What finish of paint did you use? Flat? eggshell? satin? etc? I am unsure as to what finish to paint mine and wanted your input. Thanks!
Hi Erica! 🙂 For the paint, I used White Dove by Benjamin Moore in Eggshell. I hope that helps! 🙂